How to Take Care of Spider Plant?


Spider plants, scientifically known as Chlorophytum comosum, are popular houseplants known for their graceful arching leaves and air-purifying qualities. These resilient plants are not only aesthetically pleasing but also relatively easy to care for, making them perfect for both beginner and experienced plant enthusiasts. Whether you are a seasoned plant lover looking to expand your collection or a novice wanting to introduce greenery into your living space, this comprehensive guide will provide you with all the necessary information on how to take care of spider plants. From understanding their needs and creating the ideal environment to watering, lighting, fertilizing, and handling common pests and diseases, this article will equip you with the knowledge and tips to ensure the health and vitality of your spider plants.

1.1 What is a Spider Plant?

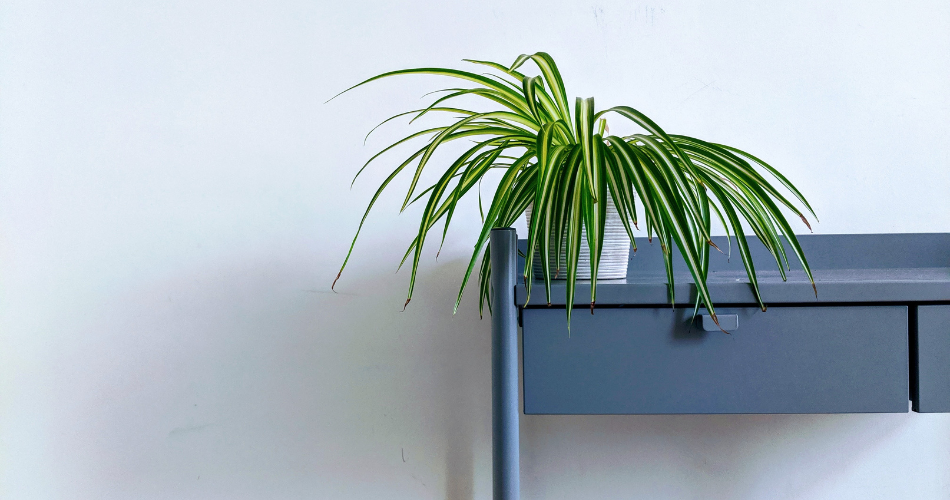
Picture this: you walk into someone’s house and your eyes are immediately drawn to a stunning green beauty cascading from a hanging pot. That, my friends, is the spider plant. Also known as Chlorophytum comosum (but let’s stick with spider plant, shall we?), this plant is a popular choice for both beginner and experienced plant enthusiasts.

1.2 Benefits of Having a Spider Plant

Aside from being a gorgeous addition to your home decor, spider plants offer a range of benefits. First off, they are excellent air purifiers, so they’ll keep your indoor air fresh and clean. Plus, they’re non-toxic to pets, so your furry friends can roam around without you having to worry. Spider plants also have this charming ability to produce baby spider plants, or “spiderettes,” which you can propagate and share with your plant-loving friends. It’s like the plant version of a joyful family reunion!

2. Understanding the Spider Plant’s Needs

2.1 Watering Requirements

Ah, the eternal question: “How often should I water my spider plant?” Well, my friend, the key is to let the top inch of the soil dry out between waterings. Stick your finger in the soil (wash your hands first, please) and if it feels dry, it’s time to give your plant a drink. But remember, moderation is key – overwatering can be just as damaging as underwatering.

2.2 Light Requirements

Just like humans, spider plants have their own preference for lighting. They thrive in bright but indirect light, so find them a cozy spot near a window where they can bask in the gentle rays of the sun without getting burned. Too much direct sunlight can scorch their leaves, and we don’t want our spider plant to feel like it’s on a tropical beach vacation gone wrong, do we?

2.3 Temperature and Humidity Preferences

Spider plants are quite adaptable when it comes to temperature, but they prefer a moderate range between 55°F and 80°F (13°C and 27°C). So, make sure you’re not subjecting them to extreme temperatures, like a sauna or a walk-in freezer. As for humidity, they can handle different levels, but if you live in a dry climate, consider misting their leaves occasionally to give them that refreshing spa treatment.

2.4 Soil and Potting Mix

The soil you choose for your spider plant should be well-draining and rich in organic matter. Think of it as creating a comfortable, cozy home for your plant. A mixture of potting soil, perlite, and peat moss will do the trick. Avoid heavy, water-retaining soils that can suffocate the roots. Let’s keep those roots breathing, shall we?

3. Choosing the Right Environment for Your Spider Plant

3.1 Indoor vs. Outdoor Placement

Indoor or outdoor? That is the question. Spider plants can thrive both indoors and outdoors, depending on your climate. If you live in a region with harsh winters, it’s best to keep them indoors where they can be shielded from frosty conditions. Outdoor placement is ideal for those lucky folks enjoying a mild climate year-round. Although, be ready to welcome your spider plant back inside if old man winter pays a visit.

3.2 Finding the Ideal Location

When it comes to finding the perfect spot for your spider plant, think about its lighting needs. Remember, bright but indirect light is the way to go. A well-lit living room, bedroom, or even a bathroom with a window can be the ideal place for your green friend. Just make sure they’re not getting too cozy with a heating vent or being tucked away in a dark corner. Let’s keep them feeling like the star of the show.

3.3 Considerations for Different Seasons

Ah, the ever-changing seasons! Spider plants, being the adaptable creatures they are, will have some different needs depending on the time of year. In summer, they may need more water due to increased evaporation, while in winter, they might require less frequent watering as growth slows down. Keep an eye on your spider plant and adjust its care routine accordingly. We all need a little extra TLC sometimes, especially during winter.

4. Watering and Moisture Requirements

4.1 Determining the Right Watering Schedule

Remember the golden rule: let the soil dry out between waterings. Depending on your indoor conditions, this can mean watering once a week or every two weeks. It’s always better to underwater than overwater, as spider plants are quite forgiving. So, be patient, keep an eye on the soil moisture, and trust your green thumb instincts.

4.2 Using the Correct Watering Technique

When it’s time for a little hydration session, pour water into the soil until it starts to drain from the pot’s drainage holes. Let it have a nice drink, then discard the excess water. You don’t want your spider plant sitting in a puddle of water; that’s not a spa treatment they signed up for.

4.3 Avoiding Overwatering and Underwatering

Overwatering can lead to root rot and a sad, droopy spider plant. Imagine walking into a room full of wilted plant leaves. It’s like a plant funeral, and we don’t want that. On the other hand, underwatering can cause dry, crispy leaves that will make your spider plant feel like a desert wanderer. Find that sweet spot of moisture, my friends.

4.4 Managing Moisture Levels in the Surrounding Environment

Remember, spider plants appreciate a bit of humidity, so if your indoor environment is on the dry side, consider misting their leaves occasionally or placing a tray of water nearby to increase the moisture in the air. They might even thank you with some extra spiderettes.

And there you have it, my fellow plant lovers – a comprehensive guide to taking care of your spider plant. Embrace the joy of raising these green beauties, and remember, a happy spider plant means a happy plant parent. Happy planting!

5. Providing Adequate Light for Spider Plants

5.1 Understanding the Light Preferences of Spider Plants

Spider plants may seem all cool and laid-back, but they do have their preferences when it comes to lighting. These green beauties thrive in bright, indirect sunlight, just like a diva who loves her spotlight but doesn’t want to get burned.

5.2 Choosing the Right Amount of Indirect Sunlight

Okay, so we know spider plants love indirect sunlight. But how much is too much, and how little is too little? Think of it like finding the perfect balance between a cozy shaded nook and a sunny spot by the window. You want to place your spider plant somewhere it can bask in the glow of bright, indirect light without being exposed to harsh, direct sunlight.

5.3 Supplementing with Artificial Light

Let’s face it, not all of us have the luxury of well-lit living spaces or sun-drenched windowsills. But fear not! If your spider plant isn’t getting enough light naturally, you can give it a helping hand with some artificial light. Just like a home gym for your plant, you can set up a simple grow light to provide the necessary rays for its growth and happiness.

6. Fertilizing Spider Plants for Optimal Growth

6.1 Understanding the Nutritional Needs of Spider Plants

Spider plants may look low-maintenance, but they have their nutritional needs just like the rest of us. These green buddies appreciate a balanced diet, consisting of the holy trinity of plant nutrients: nitrogen, phosphorus, and potassium. It’s like giving your plant a salad with all the right vitamins and minerals to keep it happy and thriving.

6.2 Choosing the Right Fertilizer Type

Now that you know the nutrients your spider plant needs, it’s time to find the right fertilizer to deliver those goods. Think of it as finding the perfect fuel to power your plant’s growth. You can choose between water-soluble fertilizers or slow-release pellets, depending on your preference and the needs of your spider plant.

6.3 Establishing a Fertilizing Schedule

Consistency is the key to a healthy diet, and it’s the same for your spider plant’s fertilizing routine. Set up a schedule to provide a regular dose of nutrients, but be careful not to go overboard and overwhelm your green pal. Remember, a balanced diet is good, but too much can be counterproductive. Moderation is key, just like when indulging in your favorite snacks.

7. Dealing with Common Pests and Diseases

7.1 Identifying and Treating Common Spider Plant Pests

Pests? Ain’t nobody got time for that! Unfortunately, spider plants can attract a few unwanted visitors in the form of pests. From mealybugs to spider mites, these critters can wreak havoc on your plant’s well-being. But fear not, brave plant parent! With a keen eye and a dash of determination, you can identify and treat these pests like a superhero saving the day.

7.2 Recognizing and Managing Common Spider Plant Diseases

Just like humans can catch a cold or get a pesky rash, spider plants can also fall victim to diseases. Whether it’s fungal infections or root rot, these diseases can knock your plant off its feet. But fret not, dear reader! By learning to recognize the symptoms and taking swift action, you can nurse your plant back to health and make it bouncier than ever.

7.3 Preventative Measures to Avoid Pest and Disease Problems

An ounce of prevention is worth a pound of cure, they say. And boy, they couldn’t be more right! By implementing a few preventative measures, you can save yourself the hassle of dealing with pests and diseases in the first place. From regular inspections to proper watering techniques, you can create a shield of protection around your spider plant, keeping it happy and healthy.

8. Propagation and Pruning Tips for Spider Plants

8.1 Propagating Spider Plants

Spider plants are all about expanding their family tree. If you want to be a proud plant grandparent, learning how to propagate spider plants is like stepping into the world of plant wizardry. With a few snips here and there, you can give life to new spider plant babies, ready to spread their green goodness in their own pots.

Fast forward to the future, and you can have a whole spider plant clan taking over your home (in the best way possible, of course).

Note: Don’t forget to wear a wizard hat and cast some spells while propagating. It’s optional but highly recommended for an optimal magical experience!
In conclusion, taking care of spider plants can be an enjoyable and rewarding experience. By providing them with the right conditions and meeting their specific needs, you can watch these beautiful plants thrive and enhance the ambiance of your home or office. Remember to water them appropriately, provide adequate light, fertilize them regularly, and keep an eye out for pests and diseases. With proper care and attention, your spider plants will continue to flourish, bringing joy and natural beauty to your surroundings for years to come. So go ahead, embrace the world of spider plants and enjoy the many benefits they have to offer.

FAQ

1. How often should I water my spider plant?


Spider plants prefer evenly moist soil, but they don’t like to sit in waterlogged conditions. As a general rule, water your spider plant when the top inch of soil feels dry to the touch. This typically translates to watering once every 1-2 weeks, depending on environmental factors such as temperature and humidity.

2. Can spider plants tolerate low light conditions?


Spider plants are known for their ability to tolerate a wide range of light conditions, including low light. While they prefer bright, indirect sunlight, they can still survive and thrive in areas with less light. However, in low light conditions, their growth may slow down, and they may produce fewer offshoots or spiderettes.

3. How can I propagate my spider plant?


Propagation of spider plants is relatively easy and can be done through the spiderettes that sprout from the mother plant. Simply wait until the spiderettes have developed roots, then gently separate them from the mother plant and plant them in a pot with well-draining soil. Alternatively, you can also propagate spider plants by dividing the root clump during repotting.

4. What should I do if my spider plant is infested with pests?


If you notice pests such as spider mites, aphids, or mealybugs on your spider plant, it is important to take action promptly. Start by isolating the affected plant to prevent the infestation from spreading. You can then try using natural remedies like spraying a mixture of water and mild soap or using neem oil. For severe infestations, consider using an appropriate insecticide, following the instructions carefully.

How to Make Bonsai of Banyan Tree at Home

Bonsai, the ancient Japanese art of cultivating miniature trees, has captivated enthusiasts around the world for centuries. The meticulous care and attention to detail required in creating and maintaining bonsai trees make it a rewarding and meditative practice. In this article, we will explore the fascinating world of bonsai, focusing specifically on the process of making a unique bonsai from a banyan tree in the comfort of your own home. From understanding the characteristics of banyan trees to selecting the right specimen, preparing the necessary tools and materials, and mastering the techniques of pruning and shaping, we will guide you through the step-by-step process of creating a stunning banyan tree bonsai. So, let’s embark on this journey, unraveling the secrets of bonsai and discovering the art of transforming a banyan tree into a living masterpiece.

Understanding the Art and Importance of Bonsai Trees

So you’ve probably seen those cute little trees that look like they’ve been miniaturized, right? Well, those are bonsai trees! Bonsai is an ancient Japanese art form that involves growing and shaping trees in small containers, making them look like miniature versions of their full-sized counterparts. It’s like having a tiny tree that fits perfectly on your windowsill.

The Significance of Bonsai in Culture and Tradition

Bonsai trees have a rich cultural and traditional importance. In Japanese culture, bonsai is seen as a symbol of harmony, balance, and patience. It’s a way of connecting with nature on a smaller scale and appreciating the beauty of the natural world. Plus, they make for great conversation starters! Imagine inviting your friends over and impressing them with your bonsai skills. It’s like having a living work of art in your home.

2. Banyan Tree: Characteristics and Suitability for Bonsai Cultivation

Overview of Banyan Trees

Now, let’s talk about the star of our bonsai show – the banyan tree! Banyan trees are known for their wide, sprawling canopies and aerial roots that give them a unique appearance. They are native to tropical regions and are commonly found in countries like India and Southeast Asia. These trees have a majestic presence and can add a touch of grandeur to your bonsai collection.

Advantages and Disadvantages of Using Banyan Trees for Bonsai

Using banyan trees for bonsai has both its pros and cons. On the positive side, banyan trees have strong and flexible branches, which makes them great for shaping and styling. They also have a thick trunk, which adds to the overall aesthetic appeal of a bonsai tree. However, banyan trees do require more maintenance compared to other bonsai varieties. They need regular pruning to maintain their shape and prevent the aerial roots from getting out of control. So, if you’re up for the challenge, a banyan bonsai can be a rewarding and stunning addition to your collection.

3. Selecting the Right Banyan Tree for Bonsai: Factors to Consider

Criteria for Choosing Banyan Trees

When selecting a banyan tree for bonsai, there are a few key factors to consider. First, choose a tree that has a thick and sturdy trunk, as this will give your bonsai a sense of maturity and strength. Look for a tree with well-developed branches that can be easily shaped and wired. It’s also important to consider the overall health of the tree, as you want to start with a healthy foundation for your bonsai journey.

Types and Varieties of Banyan Trees Suitable for Bonsai

There are several different types and varieties of banyan trees that are suitable for bonsai cultivation. Some popular choices include the Indian banyan (Ficus benghalensis), the strangler fig (Ficus aurea), and the sacred fig (Ficus religiosa). Each variety has its unique characteristics and growth habits, so make sure to do your research and choose the one that aligns with your vision for your bonsai masterpiece.

4. Steps to Prepare and Set Up Your Bonsai: Tools, Soil, and Container Selection

Essential Tools for Bonsai Making

Now let’s get our hands dirty and dive into the practical aspects of bonsai making! You’ll need a few essential tools to get started. These include sharp pruning shears for trimming branches and roots, bonsai wire for shaping and training, concave cutters for removing larger branches, and a root rake for gently loosening the soil around the roots. Having the right tools will make your bonsai journey a whole lot easier and more enjoyable.

Choosing the Right Soil Composition

The soil composition for your banyan bonsai is crucial for its overall health and growth. Bonsai soil should have good drainage while retaining enough moisture for the tree. Consider using a mixture of organic materials like compost or peat moss, inorganic components like perlite or pumice, and a bit of coarse sand to create a well-draining yet moisture-retaining soil blend. Remember, happy roots equal a happy bonsai!

Selecting an Appropriate Container for Your Banyan Tree Bonsai

Last but not least, let’s talk about the container for your banyan bonsai. The container you choose should complement the overall aesthetic of your bonsai and provide enough space for root growth. Look for containers made from durable materials like ceramic or plastic, with drainage holes to prevent waterlogging. And don’t forget to consider the size of your banyan tree when selecting the container. You want your bonsai to have room to grow, but not too much space that it looks lost in its surroundings.

So there you have it, a beginner’s guide to making a bonsai out of a banyan tree at home. Remember to have fun with the process and let your creativity flow. With a little patience and care, you’ll have your very own mini masterpiece in no time! Happy bonsai-ing!5. Pruning and Shaping Techniques: Creating the Desired Bonsai Form

Understanding Pruning Principles for Bonsai Trees

Pruning is a key technique in shaping your Banyan Tree Bonsai and achieving the desired form. When it comes to bonsai, less is more. Pruning involves removing excess foliage and branches to maintain the tree’s miniature size and create a balanced shape. Start by identifying any branches that are growing too tall or crossing each other, and carefully trim them to maintain a harmonious appearance. Remember, pruning should be done gradually over time to avoid stressing the tree.

Shaping Strategies: Wiring, Clipping, and Branch Manipulation

To further shape your Banyan Tree Bonsai, you can employ various techniques like wiring, clipping, and branch manipulation. Wiring involves wrapping a thin wire around the branches to guide their growth in a specific direction. Be sure to use aluminum wire, as it is flexible yet sturdy enough to hold the branches in place. Additionally, clipping can be used to refine the shape of your bonsai by snipping off small portions of foliage or branches. Lastly, branch manipulation entails gently bending or wiring branches to create interesting twists and turns. Mastering these shaping strategies will allow you to bring out the unique character of your Banyan Tree Bonsai.

6. Bonsai Care: Watering, Fertilizing, and Providing the Ideal Growing Conditions

Proper Watering Techniques for Banyan Tree Bonsai

Watering your Banyan Tree Bonsai properly is crucial for its health and growth. As a general rule, water your bonsai thoroughly but infrequently. Allow the soil to slightly dry out between waterings to prevent overwatering, which can lead to root rot. When watering, make sure to soak the entire root ball and allow the excess water to drain out completely. Remember, consistent moisture is essential, so monitor the moisture level of the soil regularly.

Fertilizer Application and Nutritional Requirements

Just like any other plant, bonsai trees require proper nutrition to thrive. Fertilizing your Banyan Tree Bonsai is essential for providing it with the necessary nutrients. Use a balanced, slow-release fertilizer formulated specifically for bonsai trees. During the growing season, fertilize your bonsai every two to four weeks to support healthy growth. However, always follow the instructions on the fertilizer packaging to avoid over-fertilization.

Creating an Optimal Growing Environment: Light, Temperature, and Humidity

Finding the ideal growing conditions for your Banyan Tree Bonsai is crucial for its overall health. These trees thrive in bright, indirect sunlight, so place your bonsai near a window where it can receive ample light. However, be cautious of direct sunlight, as it can scorch the delicate foliage. Temperature-wise, Banyan Tree Bonsai can tolerate a wide range, but they prefer warmer temperatures between 60-80°F (15-27°C). Lastly, maintaining a moderate level of humidity is essential. Consider using a humidity tray or placing your bonsai near a humidifier to keep the air moist.

7. Common Issues and Troubleshooting: Dealing with Pests, Diseases, and Other Challenges

Identifying and Treating Common Bonsai Pests

Despite your best efforts, pests can sometimes find their way to your Banyan Tree Bonsai. Common bonsai pests include aphids, scales, and spider mites. Keep a close eye on your bonsai and check for any signs of infestation, such as yellowing leaves or sticky residue. If you spot any pests, promptly treat your bonsai with an appropriate insecticide or natural pest control methods like neem oil. Regularly inspect your bonsai to prevent any major pest problems.

Preventing and Managing Diseases in Banyan Tree Bonsai

Diseases can also affect your Banyan Tree Bonsai, but with proper care, you can minimize the risk. Overwatering, poor air circulation, and excessive humidity can lead to fungal diseases like root rot or powdery mildew. To prevent diseases, ensure proper watering practices and adequate airflow around your bonsai. If you notice any signs of disease, such as discolored or wilting leaves, take immediate action by adjusting watering practices or using appropriate fungicides.

Troubleshooting Techniques for Common Bonsai Challenges

Sometimes, despite your best efforts, your Banyan Tree Bonsai may encounter challenges. Common issues include leaf drop, yellowing foliage, or stunted growth. To troubleshoot these problems, evaluate the watering, lighting, and fertilizing routines. Adjusting these factors can often resolve common bonsai issues. Additionally, seek advice from experienced bonsai enthusiasts or join a bonsai club to gain insights and solutions to specific challenges.

8. Patience and Mastery: Nurturing Your Banyan Tree Bonsai over Time

Nurturing a Banyan Tree Bonsai is a long-term commitment that requires patience and mastery. Bonsai trees are living works of art that continue to evolve over time. As you care for your bonsai and learn more about its needs, you’ll gain a deeper appreciation for the art of bonsai. Enjoy the journey of nurturing your Banyan Tree Bonsai and watch as it grows and develops into a unique and stunning miniature tree. Remember, bonsai is an art form, so embrace the imperfections and let your personality shine through in the way you care for and style your bonsai. Happy bonsai growing!

In conclusion, creating a bonsai from a banyan tree at home is a fulfilling and rewarding endeavor. By following the steps outlined in this article, you can embark on a journey of artistry and patience, nurturing your banyan tree bonsai into a living work of art. Remember to provide the proper care, attention, and maintenance required to ensure the long-term health and beauty of your bonsai. With dedication and practice, you can master the techniques of bonsai cultivation and experience the joy of watching your banyan tree bonsai thrive and evolve over time. So, get started on this enchanting horticultural adventure and enjoy the timeless beauty and serenity that bonsai brings.

FAQ

1. Can I make a bonsai from any type of banyan tree?

While it is possible to make a bonsai from various types of banyan trees, certain species are more suitable than others. Look for banyan trees with smaller leaves and flexible branches, as they are easier to shape and maintain as bonsai. Research and consult with experts or local nurseries to find the best banyan tree species for bonsai cultivation.

2. How long does it take for a banyan tree bonsai to mature?

Patience is key when it comes to bonsai cultivation. The time it takes for a banyan tree bonsai to mature can vary widely depending on factors such as the age of the tree when you start, the techniques employed, and the overall care provided. It can take several years or even decades for a banyan tree bonsai to reach its full potential, but the journey of nurturing and shaping the tree is part of the beauty and enjoyment of bonsai.

3. Is bonsai difficult to maintain?

Maintaining a bonsai, including a banyan tree bonsai, requires regular care and attention. It involves tasks such as watering, pruning, fertilizing, and monitoring for pests and diseases. However, with proper knowledge, techniques, and a consistent routine, bonsai maintenance can become a rewarding and therapeutic practice. It is important to learn about the specific care requirements of your banyan tree bonsai, including its unique needs for light, temperature, and humidity.

4. Can I display my banyan tree bonsai indoors?

While banyan tree bonsai can be temporarily displayed indoors for short periods, it is generally recommended to keep them outdoors. Bonsai trees thrive in natural light and outdoor conditions, which are essential for their growth and health. If you do choose to display your banyan tree bonsai indoors, make sure to provide it with adequate light and proper environmental conditions to prevent it from weakening or experiencing issues related to lack of sunlight and air circulation.

Fuji Cherry Mastery: A Comprehensive Fuji Cherry Bonsai Care Guide

Fuji Cherry Bonsai, with its delicate blossoms and graceful branches, has captivated bonsai enthusiasts around the world. This miniature version of the beloved cherry tree offers an exquisite display of color and form, making it a favorite choice for bonsai enthusiasts of all levels. In this comprehensive guide, we will delve into the art of caring for Fuji Cherry Bonsai, exploring everything from the selection process to the essential techniques for maintaining its health and beauty. Whether you are a seasoned bonsai enthusiast or a beginner looking to embark on the rewarding journey of bonsai cultivation, this article will provide you with valuable insights and practical tips to ensure the success of your Fuji Cherry Bonsai.

1.1 Understanding the History and Significance of Fuji Cherry Bonsai

Fuji Cherry Bonsai, also known as Prunus incisa, is a tree that has captured the hearts of bonsai enthusiasts around the world. With its delicate pink blossoms and compact size, it brings a touch of elegance and grace to any garden or indoor space. Originating from Japan, this bonsai tree has a rich history and holds deep cultural significance. It symbolizes the transient nature of life and is often associated with beauty, renewal, and the arrival of spring.

1.2 Exploring the Characteristics and Aesthetics of Fuji Cherry Bonsai

The Fuji Cherry Bonsai is renowned for its petite size and stunning display of flowers. Its leaves are small and oval-shaped, with a vibrant green color that adds to its visual appeal. During springtime, the tree bursts into a profusion of pink or white blossoms, creating a breathtaking spectacle. The delicate branches and trunk of the Fuji Cherry Bonsai lend themselves well to various bonsai styles, allowing for artistic expression and creativity. Whether it’s the cascading style, formal upright, or windswept, this bonsai tree can be shaped to embody a range of aesthetic preferences.

2. Selecting the Right Fuji Cherry Bonsai: Essential Considerations

2.1 Choosing the Ideal Species and Varieties of Fuji Cherry Bonsai

When selecting a Fuji Cherry Bonsai, it’s important to consider the species and varieties available. Some popular choices include Prunus incisa ‘Kojo-no-mai’ and Prunus incisa ‘Yae-Kon-dou’. Each variety has its own unique characteristics, such as flower color and growth habit. Researching and understanding the traits of different species and varieties will help you choose the one that best suits your taste and desired aesthetics.

2.2 Evaluating the Health and Vigor of Fuji Cherry Bonsai

To ensure the long-term success of your Fuji Cherry Bonsai, it’s crucial to select a tree that is healthy and vigorous. Look for well-developed roots, vibrant foliage, and an overall robust appearance. Avoid bonsai trees with signs of disease or pests, as this can lead to future problems and difficulties in care.

2.3 Assessing the Age and Development of Fuji Cherry Bonsai

The age and development of a Fuji Cherry Bonsai can greatly impact its potential for growth and future styling. Younger bonsai trees offer more flexibility for shaping and training, while older specimens may already possess impressive trunk thickness and branching. Consider your skill level and personal preferences when choosing between a young or mature bonsai.

3. Understanding the Environmental Needs of Fuji Cherry Bonsai

3.1 Providing the Optimal Light Conditions for Fuji Cherry Bonsai

Like all bonsai trees, Fuji Cherry Bonsai thrives in bright, indirect light. Place your bonsai near a window that receives ample sunlight, but be cautious of excessive heat or direct sunlight, which can scorch the delicate leaves. If natural light is limited, you can supplement it with fluorescent grow lights.

3.2 Maintaining the Ideal Temperature and Humidity Levels

Fuji Cherry Bonsai prefers cool to moderate temperatures, ideally between 50°F to 70°F (10°C to 21°C). Protect the tree from extreme heat or cold, as it can cause stress and damage. Additionally, maintaining proper humidity levels is important for the bonsai’s health. A humidity tray or regular misting can help create a suitable environment, especially during drier seasons or indoor heating.

3.3 Creating a Suitable Air Circulation for Fuji Cherry Bonsai

Adequate air circulation is essential for the overall health of your Fuji Cherry Bonsai. Proper ventilation helps prevent fungal diseases and promotes the exchange of gases. Avoid placing the bonsai in stagnant or heavily congested areas. Regularly exposing it to fresh air, such as during outdoor periods in suitable weather, can greatly benefit its overall well-being.

4. Mastering the Art of Pruning and Shaping Fuji Cherry Bonsai

4.1 Learning the Basics of Pruning and Trimming Fuji Cherry Bonsai

Pruning is a fundamental aspect of maintaining the shape and health of your Fuji Cherry Bonsai. Regularly remove any dead, damaged, or overcrowded branches to promote proper airflow and encourage new growth. Additionally, trimming back the new growth after flowering can help maintain the desired shape and size of your bonsai tree.

4.2 Understanding the Different Pruning Techniques and Styles

There are various pruning techniques and styles that can be applied to your Fuji Cherry Bonsai, depending on your desired aesthetic. These include but are not limited to, clip and grow, thinning, and directional pruning. Research and experimentation will help you determine the best techniques to achieve your desired bonsai style.

4.3 Training and Wiring Fuji Cherry Bonsai to Achieve Desired Shapes

To shape and style your Fuji Cherry Bonsai, training and wiring techniques can be utilized. Training involves gently guiding the branches and trunk into the desired positions over time. Wiring, on the other hand, allows for more immediate shaping by using bonsai wire to hold the branches in place. Care should be taken to avoid applying excessive pressure or leaving wires on for too long, as this can damage the tree. Regular monitoring and adjustments are necessary when using wiring techniques.

By following these essential guidelines, you can cultivate and care for a beautiful Fuji Cherry Bonsai that will bring you joy and admiration for years to come. Remember, bonsai care is an art form, so embrace the journey with patience, creativity, and a touch of humor!

5. Nurturing the Health of Fuji Cherry Bonsai: Watering, Soil, and Fertilization

5.1 Establishing a Proper Watering Routine for Fuji Cherry Bonsai

Watering your Fuji Cherry Bonsai is like finding the perfect balance in a yoga pose – too little water and it’ll wither away, too much water and it’ll drown. So how do you strike that perfect balance? First, you need to understand that Fuji Cherry Bonsai prefer moist soil but not soggy. Stick your finger about an inch into the soil, and if it feels dry, it’s time to water. Don’t worry, it’s not as tricky as mastering a handstand, just keep the soil consistently moist, not bone dry or drenched, and your little cherry tree will flourish.

5.2 Selecting the Appropriate Soil Mix for Fuji Cherry Bonsai

Choosing the right soil for your Fuji Cherry Bonsai is like picking the perfect pair of shoes – it needs to fit just right. These bonsai trees love well-draining soil, so go for a mix that includes organic materials like bark, peat moss, and perlite. Avoid heavy soils that retain too much water, as they can lead to root rot and a very unhappy bonsai. And remember, it’s all about finding that perfect fit for your tree’s roots, so don’t be afraid to experiment with different soil mixes.

5.3 Understanding Fertilization Techniques for Healthy Growth

Fertilizing your Fuji Cherry Bonsai is like giving it a delicious, nutritious snack – it helps it grow strong and healthy. Use a balanced, slow-release fertilizer during the growing seasons of spring and summer. Just like we don’t gorge ourselves on a whole pizza in one sitting (or do we?), avoid over-fertilizing, as it can burn the roots of your bonsai. Follow the instructions on the fertilizer package, and your cherry tree will have all the nourishment it needs to thrive.

6. Protecting Fuji Cherry Bonsai from Pests and Diseases

6.1 Identifying Common Pests that Affect Fuji Cherry Bonsai

Uh-oh, it’s time to play detective and identify the pesky little intruders that might bug your Fuji Cherry Bonsai. Keep an eye out for aphids, spider mites, and scale insects, who seem to think your bonsai is an all-you-can-eat buffet. These critters can suck the life out of your tree, but don’t worry, we’ve got your back.

6.2 Preventive Measures to Keep Pests and Diseases at Bay

Putting up a “No Vacancy” sign for pests and diseases is easier than you might think. Keep your bonsai healthy and strong by providing proper care, including watering, fertilizing, and pruning. A healthy bonsai is like Fort Knox, impenetrable to pests and diseases. Also, make it a habit to inspect your tree regularly, catch any unwelcome guests early on, and take appropriate action.

6.3 Natural and Chemical Treatments

When all else fails and your Fuji Cherry Bonsai is under attack, it’s time to bring in the big guns. Natural treatments like neem oil and insecticidal soap can help get rid of those pesky pests and keep your bonsai in tip-top shape. If the situation escalates, you can consider using chemical treatments, but be sure to follow the instructions carefully and handle them with caution. Remember, the goal is to protect your bonsai, not unleash chaos in your garden.In conclusion, cultivating Fuji Cherry Bonsai can be a truly rewarding and fulfilling experience. With proper care and attention, this delicate tree can bring beauty, tranquility, and a sense of accomplishment to any bonsai collection. By following the guidelines outlined in this comprehensive care guide, you will have the knowledge and tools to nurture your Fuji Cherry Bonsai and watch it flourish over time. Remember, bonsai cultivation is an art that requires patience and dedication, but the results are truly worth it. So go ahead, embrace the art of caring for Fuji Cherry Bonsai and enjoy the timeless beauty it brings to your life.

FAQ

1. Can I grow Fuji Cherry Bonsai indoors?

Fuji Cherry Bonsai prefers to be grown outdoors, as it requires ample sunlight and fresh air to thrive. However, during the winter months or in regions with extreme weather conditions, it is possible to grow Fuji Cherry Bonsai indoors temporarily. Just ensure that it receives sufficient natural light and is protected from drafts.

2. How often should I water my Fuji Cherry Bonsai?

The watering frequency for Fuji Cherry Bonsai depends on various factors such as climate, pot size, and soil type. As a general rule, it is crucial to check the moisture level of the soil regularly. Water the bonsai when the top layer of soil feels slightly dry, but avoid overwatering, as it can lead to root rot. A well-draining soil mix and careful observation will help you determine the ideal watering schedule for your Fuji Cherry Bonsai.

3. Can I shape my Fuji Cherry Bonsai into different styles?

Absolutely! Fuji Cherry Bonsai can be shaped into various styles, including formal upright, cascade, semi-cascade, and slanting, among others. However, shaping should be done gradually and with careful consideration of the tree’s health and growth patterns. Pruning, wiring, and training techniques can be employed to achieve the desired shape and form of your Fuji Cherry Bonsai.

4. How do I protect my Fuji Cherry Bonsai from pests and diseases?

To protect your Fuji Cherry Bonsai from common pests like aphids, spider mites, and scale insects, it is important to regularly inspect the tree for any signs of infestation. If pests are detected, appropriate measures such as using insecticidal soaps or natural remedies like neem oil can be applied. As for diseases, maintaining proper hygiene, providing adequate airflow, and using well-draining soil can help prevent most fungal infections. If necessary, fungicides can be used, but it is always best to consult with experts or experienced bonsai growers for specific advice on pest and disease management.

How to Grow Cherry Blossom (Sakura) Bonsai from Seed?

Welcome to our comprehensive guide on how to grow cherry blossom bonsai from seed. Cherry blossom bonsai, also known as sakura bonsai, is a captivating art form that allows you to cultivate the iconic beauty of cherry blossom trees in miniature form. These delicate and elegant trees hold immense cultural and symbolic significance, particularly in Japanese culture, representing the transient nature of life and the beauty of the changing seasons. In this article, we will delve into the step-by-step process of growing cherry blossom bonsai from seeds, from selecting the right seeds to nurturing and shaping the bonsai into a stunning masterpiece. Get ready to embark on a rewarding journey of cultivating your very own cherry blossom bonsai tree, bringing the enchanting beauty of blooming cherry blossoms into your home or garden.

1.1 What is Cherry Blossom Bonsai?

Cherry Blossom Bonsai is the beautiful art of cultivating cherry blossom trees in miniature form. By carefully nurturing these tiny trees, you can recreate the beauty and serenity of cherry blossom season right in your own home or garden.

1.2 The Cultural and Symbolic Significance of Cherry Blossom Bonsai

Cherry blossoms hold a special place in many cultures, particularly in Japan, where they are known as “sakura.” These delicate flowers symbolize the transient nature of life and the beauty of impermanence. By growing a cherry blossom bonsai, you’re not just cultivating a tree, but also embracing a meaningful tradition that has captivated people for centuries.

2. Selecting the Right Cherry Blossom Bonsai Seeds

2.1 Understanding Different Cherry Blossom Varieties

Not all cherry blossom trees are created equal. Different varieties offer unique characteristics, such as flower color, size, and growth patterns. Take the time to research and select a cherry blossom variety that resonates with you and suits your growing conditions.

2.2 Choosing High-Quality Cherry Blossom Bonsai Seeds

When it comes to growing from seed, quality matters. Look for reputable seed suppliers that specialize in bonsai or cherry blossom trees. Ensure that the seeds are fresh, viable, and properly stored to maximize your chances of success. Don’t be tricked into buying “mystery” seeds, or you might end up with a surprise garden gnome instead of a cherry blossom tree.

3. Preparing the Soil and Seedling Containers

3.1 Selecting the Appropriate Soil Mix for Cherry Blossom Bonsai

Cherry blossom bonsai thrive in well-draining soil that retains moisture without becoming waterlogged. A mix of organic bonsai soil, perlite, and coarse sand creates an ideal growing medium. Avoid using regular garden soil, as it can suffocate the delicate roots and lead to problems down the road.

3.2 Preparing the Seedling Containers for Planting

Choose shallow containers with sufficient drainage holes to accommodate the bonsai’s roots. Fill the containers with the prepared soil mix, leaving enough space for the seedlings to grow. Remember, we’re aiming for miniatures, not giants, so resist the urge to plant them in the equivalent of a mansion-sized pot.

4. Germinating Cherry Blossom Bonsai Seeds

4.1 Soaking the Cherry Blossom Bonsai Seeds

Prepare a cup of warm water and gently place your cherry blossom seeds in it. Let them soak for about 24 hours, giving them a luxurious spa treatment and encouraging them to shed their hard exterior. Don’t forget to play some relaxing spa music to set the mood!

4.2 Creating the Ideal Germination Environment

To give your seeds the perfect start, you need to create a warm and moist environment. You can achieve this by placing the soaked seeds in a plastic bag or seed tray covered with a clear lid or plastic wrap. Keep them in a cozy spot, like the top of your refrigerator or a sunny windowsill.

4.3 Planting the Cherry Blossom Bonsai Seeds

Once your seeds have sprouted tiny roots, it’s time to plant them in their prepared containers. Gently make a small hole in the soil for each seed and place them carefully, root-side down. Cover them lightly with soil, like tucking them in with a cozy blanket, and water gently. Now, all that’s left to do is wait patiently as your cherry blossom bonsai begins its journey from seed to stunning miniature tree.

Remember, growing a cherry blossom bonsai from seed requires patience, care, and a touch of whimsy. Enjoy the process, embrace any challenges that come your way, and celebrate the eventual blooming of these enchanting trees in your own miniature world.

5. Nurturing and Caring for Cherry Blossom Bonsai Seedlings

Growing cherry blossom bonsai from seed can be a rewarding and fulfilling experience. Once your seedlings have sprouted, it’s important to provide them with the care they need to thrive. Here are some essential tips for nurturing and caring for your cherry blossom bonsai seedlings.

5.1 Providing Proper Watering and Drainage

Watering is a crucial aspect of bonsai care, and cherry blossom bonsai are no exception. It’s important to strike a balance between keeping the soil moist and avoiding overwatering. Remember, cherry blossom bonsai prefer slightly moist soil, not waterlogged swamps!

To ensure proper drainage, place your bonsai pot on a tray filled with pebbles and water. This will prevent the roots from sitting in excess water, which can lead to root rot. A well-draining soil mix, composed of a combination of organic matter and inorganic materials like perlite or sand, can also help maintain the ideal moisture level.

5.2 Ensuring Adequate Sunlight and Temperature

Cherry blossom bonsai thrive in bright, indirect sunlight, so make sure to place them near a window or in an area that receives sufficient light throughout the day. However, be cautious of intense afternoon sunlight as it can scorch the delicate leaves.

In terms of temperature, cherry blossom bonsai prefer a cool to mild climate. Keep them away from drafts or extreme temperature fluctuations. If you live in a region with harsh winters, consider protecting your bonsai with a frost cloth or moving it to a sheltered location during the coldest months.

5.3 Fertilizing and Nutrient Requirements for Cherry Blossom Bonsai Seedlings

Feeding your cherry blossom bonsai seedlings with the right nutrients is essential for their healthy growth. During the growing season, which typically spans from spring to autumn, use a balanced liquid fertilizer diluted according to the manufacturer’s instructions. Apply it every two to three weeks to provide your bonsai with the necessary nutrients.

Remember, a little goes a long way when it comes to fertilizing bonsai. Overfertilization can lead to excessive foliage growth and weaken the overall health of your cherry blossom bonsai. So, be cautious and resist the temptation to turn your bonsai into a “monster tree” with an overdose of nutrients.

6. Pruning and Shaping Cherry Blossom Bonsai Trees

Pruning and shaping are essential aspects of bonsai cultivation, and they play a significant role in creating the desired aesthetic for your cherry blossom bonsai. Here are some tips to get you started on the path to bonsai artistry.

6.1 Understanding Pruning Techniques for Cherry Blossom Bonsai

Pruning helps maintain the shape and size of your bonsai while encouraging new growth. When it comes to cherry blossom bonsai, it’s best to prune during the dormant season, which is usually winter. Remove any dead or crossing branches, as well as any growth that compromises the overall design of your bonsai. Remember, less is more when it comes to pruning – only remove what is necessary to maintain the tree’s form.

6.2 Shaping and Training the Bonsai’s Structure

Shaping your cherry blossom bonsai is a creative process that requires patience and a vision for the final result. Use wire to gently guide the branches into the desired position. However, be cautious not to wrap the wire too tightly to avoid damaging the delicate branches. As the tree grows, regularly check the wire and adjust or remove it as necessary to prevent it from digging into the bark.

Remember, bonsai is a living art form, and your cherry blossom bonsai will continue to evolve over time. Embrace the process and enjoy the journey of shaping your miniature masterpiece.

7. Promoting Healthy Growth and Blooming of Cherry Blossom Bonsai

Ensuring the vigorous growth and beautiful blooming of your cherry blossom bonsai requires creating the right conditions and encouraging its natural tendencies. Here are some tips to help you promote healthy growth and abundant blossoming.

7.1 Providing the Right Conditions for Growth

Cherry blossom bonsai thrive in a well-ventilated environment with consistent temperatures and humidity. Avoid exposing them to extremes, such as hot, dry air or overly damp conditions. Maintaining a stable environment will help your bonsai focus on its growth and reduce the risk of stress-related issues.

Additionally, periodically check the roots of your bonsai to ensure they are not becoming pot-bound. If they are, consider repotting your bonsai in fresh soil to provide it with the necessary space to grow and thrive.

7.2 Encouraging Flowering and Blossoming

Cherry blossom bonsai are admired for their stunning flowers, so you’ll want to encourage their blooming potential. Providing a period of dormancy during winter can help stimulate flower production in the following spring. Ensure your bonsai receives the necessary chill hours by placing it in a cool location away from heating sources.

To promote flowering, some bonsai enthusiasts also use techniques like defoliation and pinching, which involve selectively removing leaves or bud tips. However, these techniques require knowledge and experience, so it’s best to consult a bonsai expert if you’re considering them.

8. Troubleshooting Common Issues in Growing Cherry Blossom Bonsai from Seed

Even the most experienced bonsai growers encounter challenges along the way. Here are some common issues you may face while growing cherry blossom bonsai from seed and how to tackle them.

8.1 Identifying and Addressing Pest Problems

Pests can be pesky little critters that disrupt the tranquility of your cherry blossom bonsai. The most common pests include aphids, spider mites, and mealybugs. Keep a keen eye out for any signs of infestation such as distorted leaves, webbing, or sticky residue.

If you spot any unwelcome visitors, there are various remedies available. For minor infestations, you can try wiping the affected leaves with a damp cloth or spraying a gentle solution of water and mild soap. However, for more severe cases, consider using organic insecticides or seeking advice from a local nursery or bonsai expert to identify the best course of action.

Remember, perseverance and a little TLC will help you overcome these hurdles and continue on your bonsai journey with grace and style. Happy growing!

By following the steps outlined in this article, you can embark on a fulfilling journey of growing your very own cherry blossom bonsai from seed. With patience, care, and attention to detail, you will witness the transformation of tiny seeds into magnificent bonsai trees that showcase the ethereal beauty of cherry blossoms. Remember to maintain proper care and continue learning about bonsai cultivation to ensure the long-term health and vitality of your cherry blossom bonsai. May your bonsai bring you joy, tranquility, and a deep appreciation for the beauty of nature.

FAQs

1. Can I grow cherry blossom bonsai from seeds, or is it better to start with a pre-grown tree?

While it is possible to grow cherry blossom bonsai from seeds, it requires patience and dedication. Starting with pre-grown trees or nursery plants can be a quicker and more reliable option for beginners. However, growing from seeds allows you to experience the entire lifecycle of the bonsai, from germination to maturity.

2. How long does it take for cherry blossom bonsai seeds to germinate?

The germination time for cherry blossom bonsai seeds can vary, but it typically takes around 2 to 3 weeks for the seeds to sprout. However, it’s important to note that cherry blossom bonsai trees can take several years to develop into mature, flowering specimens. Cultivating bonsai requires patience and a long-term commitment.

3. What are some common challenges or problems in growing cherry blossom bonsai from seed?

Some common challenges in growing cherry blossom bonsai from seed include low germination rates, fungal infections, improper watering, and pest infestations. It is crucial to maintain a sterile and controlled environment, provide appropriate care, and promptly address any issues that arise. Regular monitoring and research will help you overcome these challenges and ensure the health of your bonsai.

4. Can cherry blossom bonsai be grown indoors?

Cherry blossom bonsai can be grown indoors, but they require specific conditions to thrive. These include providing sufficient natural or artificial light, maintaining adequate humidity levels, and ensuring proper ventilation. While indoor cultivation is possible, placing the bonsai outdoors during the spring to experience natural sunlight and temperature fluctuations can encourage healthier growth and better blooming.

What is a Good Alternative for Bonsai Soil?

Bonsai trees are miniature works of art, carefully cultivated to mimic the shape and appearance of full-sized trees. One crucial factor in the successful cultivation of bonsai trees is the choice of soil. Bonsai soil differs from regular potting soil, as it requires a unique blend of properties to ensure proper drainage, aeration, and nutrient retention. While traditional bonsai soil and potting soil are commonly used, they have their limitations. Therefore, finding a good alternative for bonsai soil becomes essential. In this article, we will explore different types of alternative bonsai soils, both organic and inorganic, along with factors to consider in choosing the right soil for your bonsai tree. Additionally, we will provide tips on creating a customized bonsai soil mix and maintaining the health of your bonsai tree using alternative soil options.

1.1 What is Bonsai Soil?

Bonsai soil is the lifeblood of your little tree friend. It’s the special blend of ingredients that helps your bonsai thrive and stay healthy. Think of it like the perfect outfit for your tree – it needs to fit just right.

1.2 Why is Bonsai Soil Important?

Good bonsai soil is like a superhero cape for your tree. It provides the right balance of drainage and water retention, allowing your bonsai to breathe and soak up moisture just as it would in nature. Without proper soil, your bonsai might get too soggy or too dry, and that’s never a good look.

2. Common Types of Bonsai Soil and Their Limitations

2.1 Traditional Bonsai Soil

Ah, the tried-and-true classic. Traditional bonsai soil is usually a mix of clay, sand, and organic matter. It does the job, but it can be a bit finicky. It tends to compact over time, making it harder for water to flow through and nutrients to reach the roots. Plus, it can be a pain to sift through all those tiny particles.

2.2 Potting Soil as Bonsai Soil

In a pinch, you might be tempted to use regular old potting soil for your bonsai. But beware! Potting soil can be a bit too moisture-retentive for bonsai’s liking. It can suffocate the roots and lead to root rot, and nobody wants that. So save the potting soil for your houseplants and give your bonsai the special treatment it deserves.

2.3 The Limitations of Common Types of Bonsai Soil

Unfortunately, even the most popular bonsai soils have their downsides. Traditional bonsai soil can become compacted, while potting soil can be too moisture-retentive. These limitations can hinder your bonsai’s growth and overall health. But fear not! There are alternative options out there.

3. Factors to Consider in Choosing an Alternative for Bonsai Soil

3.1 Understanding Your Bonsai Tree’s Needs

Just like humans, bonsai trees have unique preferences. Some like it dry, while others prefer a little more moisture. Before you choose an alternative bonsai soil, make sure you know what your tree needs. Research its species and find out if it prefers well-drained or moisture-retentive soil.

3.2 Drainage and Water Retention

Drainage and water retention are the dynamic duo when it comes to bonsai soil. You want a soil that allows excess water to escape, but also holds onto enough moisture to keep your bonsai happy. Finding that sweet spot is crucial for your tree’s health and growth.

3.3 Nutrient Retention

Bonsai trees need their nutrients like we need our morning coffee. When choosing an alternative bonsai soil, consider its ability to retain nutrients. You want soil that can hold onto those goodies and slowly release them to your tree’s roots. After all, you wouldn’t want your bonsai to miss out on its essential vitamins.

4. Organic Alternatives for Bonsai Soil

4.1 Coco Coir

Imagine your bonsai wrapped in a cozy blanket made of coconut fibers. That’s exactly what coco coir does. It provides excellent drainage, retains moisture, and is a renewable resource. Plus, it’s the perfect choice for environmentally-conscious bonsai enthusiasts. It’s like giving your tree a little tropical vacation.

4.2 Peat Moss

Peat moss is like a breath of fresh air for your bonsai’s roots. It adds lightweight texture, improves aeration, and retains moisture without suffocating the roots. Just be aware that peat moss comes from peat bogs, which are environmentally sensitive areas, so be mindful of where your peat moss comes from.

4.3 Composted Bark

If your bonsai is craving a natural, earthy vibe, composted bark is here to save the day. This organic alternative provides good drainage, helps prevent compaction, and adds a touch of rustic charm to your tree’s home. It’s like decorating your bonsai’s pot with a miniature log cabin.

Remember, when it comes to bonsai soil, finding the right alternative is all about understanding your tree’s needs and balancing factors like drainage, water retention, and nutrient retention. So go forth, bonsai enthusiasts, and give your little tree friend the soil it deserves – your bonsai will thank you with stunning growth and beauty.

5. Inorganic Alternatives for Bonsai Soil

When it comes to bonsai trees, the soil they grow in plays a crucial role in their overall health and development. While traditional bonsai soil is a mix of organic and inorganic materials, some enthusiasts prefer using only inorganic alternatives for various reasons. Let’s take a look at a few popular options:

5.1 Akadama

Ah, Akadama, the rock star of bonsai soil alternatives. This clay-like substance hails from Japan and has been a favorite among bonsai enthusiasts for years. It has excellent water retention properties while still maintaining good drainage. Plus, using Akadama gives your bonsai that authentic Japanese touch, making it feel like it’s on its own Zen retreat.

5.2 Pumice

If you’re looking for something lightweight and porous, pumice could be your bonsai’s new best friend. This volcanic rock is well-known for its ability to retain just the right amount of moisture without causing waterlogged roots. It also offers fantastic aeration, making sure your bonsai’s roots can breathe easy. Just imagine your bonsai saying, “Ah, pumice, just what I needed for a breath of fresh air!”

5.3 Lava Rock

When it comes to making a statement, lava rock is the MVP. It not only provides excellent drainage but also adds a touch of rugged beauty to your bonsai soil mix. Its porous nature allows for proper aeration, preventing root rot and other unwanted issues. Plus, lava rock gives your bonsai that rebellious, wild-at-heart vibe, as if it’s saying, “I don’t conform to just any soil.”

6. Creating a Customized Bonsai Soil Mix

Now that we’ve explored some inorganic alternatives for bonsai soil, you might be wondering how to put them to good use. Fear not, as creating a customized bonsai soil mix is easier than you might think.

6.1 Understanding the Blend Ratios

Creating the perfect bonsai soil mix is all about balance. Different tree species have different preferences, so it’s essential to understand their needs before getting your hands dirty. Some trees might thrive in a mix that’s heavy on Akadama, while others might prefer a more pumice-dominated blend. Experimentation is the name of the game here, so don’t be afraid to test various ratios until you find the perfect concoction.

6.2 Step-by-Step Guide to Mixing Bonsai Soil

Mixing bonsai soil is like preparing a gourmet meal for your little arboreal companion. Start by gathering all your chosen ingredients, whether it’s Akadama, pumice, lava rock, or a combination of these inorganic goodies. Then, grab a large container and pour in the desired amounts of each ingredient according to your blend ratios. Use your hands or a trowel to thoroughly mix everything together until you achieve a uniform consistency. And voila, you’ve just become a master chef of bonsai soil!

7. Tips for Maintaining Healthy Bonsai Trees with Alternative Soil

Now that you’ve successfully created a bonsai soil mix with inorganic alternatives, it’s crucial to know how to maintain your bonsai’s well-being.

7.1 Proper Watering Techniques

Just like Goldilocks, your bonsai wants its water just right. Overwatering can suffocate the roots, while underwatering can leave them parched. Finding the right balance is essential. Ensure that your bonsai receives enough water but also has adequate drainage to prevent waterlogged roots. Remember, happy roots make for a happy bonsai!

7.2 Fertilization and Nutrient Management

Even bonsai trees need their vitamins! Fertilization is key to keeping them healthy and thriving. Using a slow-release fertilizer or one specifically formulated for bonsai will provide the necessary nutrients without overwhelming the plant. It’s also essential to monitor your bonsai’s growth and adjust the fertilization accordingly. After all, nobody wants a bonsai on a sugar rush.

7.3 Monitoring and Adjusting Soil pH

Soil pH may not be the most exciting topic, but it’s crucial for your bonsai’s overall health. Different tree species prefer specific pH levels, so it’s essential to monitor and adjust accordingly. Testing kits are readily available to measure the pH of your soil mix. If needed, you can make adjustments using additives like lime or sulfur. Your bonsai will thank you for maintaining a harmonious pH balance.

8. Exploring the Best Alternative for Bonsai Soil

In the world of bonsai, the choice between traditional organic soil and inorganic alternatives is a personal one. While organic soil offers its unique benefits, inorganic alternatives like Akadama, pumice, and lava rock can provide excellent results for bonsai enthusiasts. Experiment, find your bonsai’s favorite mix, and remember to have fun. After all, bonsai trees are like miniature versions of nature’s marvels, and they deserve the best soil to showcase their greatness. Happy growing!

Exploring the Best Alternative for Bonsai Soil

Choosing the right soil for your bonsai tree is crucial for its overall health and development. While traditional bonsai soil and potting soil have been widely used, they may not always meet the specific needs of your bonsai tree. By considering factors such as drainage, water retention, and nutrient retention, you can explore alternative options that offer better results. Whether you opt for organic alternatives like coco coir and composted bark, or inorganic alternatives like akadama and pumice, experimenting with different soil mixes can help you find the best solution for your bonsai’s unique requirements. Remember to monitor and adjust the soil pH, practice proper watering techniques, and provide adequate fertilization to maintain the health and beauty of your bonsai tree for years to come.

FAQ

1. Can I use regular potting soil for my bonsai tree?

Regular potting soil is not ideal for bonsai trees because it tends to retain too much moisture, leading to root rot and other issues. Bonsai trees require a well-draining soil mix that allows for proper aeration and nutrient absorption. Therefore, it is recommended to use a specialized bonsai soil or consider alternative options discussed in this article.

2. What are the benefits of using organic alternatives for bonsai soil?

Organic alternatives, such as coco coir, peat moss, and composted bark, offer several benefits for bonsai trees. These materials improve water drainage, promote root growth, and provide slow-release nutrients. Organic alternatives also help in retaining moisture while preventing excessive waterlogging. Additionally, they are environmentally friendly and sustainable options for bonsai soil.

3. Can I create my own customized bonsai soil mix?

Yes, creating a customized bonsai soil mix is possible and often recommended. By blending different types of organic and inorganic materials, you can tailor the soil mix to meet the specific needs of your bonsai tree. Understanding the blend ratios, considering the tree’s requirements, and experimenting with different combinations will help you create an optimal soil mix for your bonsai.

4. How often should I water my bonsai tree with alternative soil?

The watering frequency for bonsai trees with alternative soil depends on various factors such as tree species, climate, soil composition, and pot size. It is essential to strike a balance between keeping the soil moist and avoiding overwatering. To determine the watering needs of your bonsai, closely monitor the soil’s moisture level and only water when the top layer feels slightly dry. Adjust the frequency as necessary based on the specific requirements of your tree.

How Are Bonsai Pots Made: The Fascinating Journey of Bonsai Pot Creation

Bonsai, the art of cultivating miniaturized trees, has captivated enthusiasts for centuries. While the focus is often on the artistry of shaping and maintaining bonsai trees, the importance of bonsai pots should not be overlooked. Bonsai pots play a crucial role in providing a suitable environment for the tree’s growth, as well as enhancing the overall aesthetic appeal.

Understanding the process of how bonsai pots are made is essential for appreciating the craftsmanship and thought that goes into their creation. This article delves into the fascinating world of bonsai pot making, exploring traditional and modern materials, the step-by-step process, design considerations, and techniques for creating unique patterns and textures. Whether you are a bonsai enthusiast or simply curious about the art form, this article will provide valuable insights into the intricate world of bonsai pot craftsmanship.

1.1 The Significance of Bonsai Pots in Bonsai Cultivation

Bonsai is not just about cultivating miniaturized trees; it’s an art form that requires attention to detail, precision, and creativity. And when it comes to bonsai, the pot plays a crucial role in showcasing the beauty and essence of the miniature tree.

Think of the bonsai pot as the frame for a masterpiece painting. It complements the tree’s size, shape, and style, creating a harmonious and visually appealing composition. Bonsai pots are specially designed to provide the necessary conditions for tree growth while enhancing its aesthetic appeal.

1.2 Exploring the History and Cultural Importance of Bonsai Pots

Bonsai has a rich history that dates back centuries, and the art of bonsai pot making is an integral part of that tradition. Originating in ancient China and later adopted and refined by the Japanese, bonsai cultivation has always been accompanied by the creation of unique pots.

Bonsai pots reflect the culture and aesthetics of the time, as well as the personal style of the artist. These pots were not only functional but also considered valuable art pieces. They were often passed down through generations, becoming cherished family heirlooms.

Today, the art of bonsai pot making continues to be deeply rooted in tradition, while also embracing modern innovations. The evolution of bonsai pots reflects the ever-changing world of bonsai cultivation.

2. Traditional Materials Used for Bonsai Pots

2.1 Clay and Its Varieties for Bonsai Pot Making

When it comes to traditional bonsai pots, clay is the go-to material. Clay offers a natural and porous surface that allows the roots to breathe and absorb moisture. There are various types of clay used, such as akadama, mica, and volcanic clays, each with its unique properties and characteristics.

Clay pots provide stability and durability, ensuring the tree remains firmly planted while allowing excess water to drain properly. The earthy tones and textures of clay pots also add to the overall charm and authenticity of the bonsai display.

2.2 Wood and Its Role in Traditional Bonsai Pot Construction

Wood has also been used traditionally for bonsai pot construction. Wooden pots provide a more rustic and organic feel to the bonsai display. However, they require special treatment and coatings to ensure their longevity and prevent decay.

Wooden pots are often crafted from high-quality hardwoods, such as cedar or cypress, known for their resistance to rot and insect damage. They bring a touch of nature into the bonsai composition, harmonizing with the tree’s natural beauty.

2.3 Stone and Its Unique Features in Bonsai Pot Creation

Stone pots, although less common, hold a special place in the world of bonsai. Carved from natural stones, these pots offer a unique and elegant touch to the bonsai display. Stone pots are prized for their durability and ability to retain moisture, providing a stable environment for the tree’s roots.

Stone pots come in various shapes and sizes, from simple and rounded to intricate and sculptural designs. They bring a sense of tranquility and stability to the overall composition, evoking the essence of nature’s rugged beauty.

3. Modern Approaches and Materials in Bonsai Pot Making

3.1 Introduction to Synthetic Materials Used in Bonsai Pot Production

While traditional materials still dominate the bonsai pot-making scene, modern approaches have introduced synthetic materials into the mix. Synthetic materials, like plastic and resin, offer advantages such as lightweight construction, durability, and affordability.

Plastic bonsai pots are a popular choice among beginners and enthusiasts looking for cost-effective options. They are easy to clean and maintain, making them practical for those new to bonsai cultivation.

Resin bonsai pots, on the other hand, offer more aesthetic appeal, mimicking the look and texture of traditional materials like clay and stone. They often come in a wider array of shapes, colors, and designs, allowing for more creative expression in bonsai display.

3.2 Exploring Innovative Techniques and Materials for Bonsai Pot Design

Innovation knows no bounds, even in the world of bonsai pot making. Artists and craftsmen continuously push the boundaries, experimenting with new techniques and materials to create truly unique and eye-catching bonsai pots.

Materials like fiberglass, concrete, and even recycled materials are being used to craft bonsai pots with unconventional shapes, textures, and colors. These innovative pots add a contemporary flair to the traditional art of bonsai, showcasing the adaptability and creativity of bonsai enthusiasts.

4. Step-by-Step Process of Making Bonsai Pots

4.1 Choosing the Right Tools and Equipment for Bonsai Pot Making

To begin making your own bonsai pots, you’ll need a few essential tools and equipment. These may include clay or synthetic materials, a potter’s wheel or mold, carving tools, kiln or oven (for clay pots), and safety gear like gloves and goggles.

4.2 Preparation of Materials and Clay Work for Bonsai Pots

Depending on the material chosen, you’ll need to prepare the clay or synthetic material accordingly. Clay needs to be wedged and kneaded to remove air bubbles and ensure consistency, while synthetic materials may require cutting or shaping.

Once prepared, the material is ready for shaping and forming into a pot. This can be done by hand or using a potter’s wheel or mold, depending on your expertise and preferred method.

4.3 Shaping and Forming Bonsai Pots through Different Methods

Shaping and forming the bonsai pot involves carefully manipulating the material to achieve the desired shape and size. Whether it’s clay or synthetic material, attention to detail and precision are crucial to create a pot that complements the bonsai tree’s style.

Different techniques, such as pinching, coiling, or slab construction, can be employed to achieve specific pot designs. The choice of technique depends on the artist’s vision and the characteristics of the material being used.

4.4 Drying, Trimming, and Refining Bonsai Pots for Final Touches

After shaping, the bonsai pot needs to be dried and trimmed to remove any excess material or imperfections. Clay pots may require additional firing in a kiln to harden the material and increase durability.

Once dried, the pot can be refined further through sanding, polishing, or adding decorative elements like etchings or glazes. The final touches bring the pot to life, enhancing its visual appeal and making it ready for the bonsai tree’s display.

Remember, making bonsai pots is both a skill and an art form. With practice and creativity, you can create unique and beautiful pots that elevate the art of bonsai cultivation to new heights. So, get your hands dirty and let your imagination run wild in the wonderful world of bonsai pot5. Factors to Consider in Designing Bonsai Pots

When it comes to designing bonsai pots, there are a few crucial factors to keep in mind. These factors can help ensure that your pot not only looks great but also serves its purpose in supporting the health and growth of your bonsai tree.

5.1 Understanding the Aesthetics and Principles of Bonsai Pot Design

Designing a bonsai pot is all about understanding the aesthetics and principles of bonsai. The pot should complement the tree, enhancing its natural beauty and creating a harmonious overall appearance. Just like a well-dressed person, a well-designed bonsai pot can make all the difference.

Consider factors such as the size, shape, and color of the pot. It should be proportionate to the size of your bonsai tree and mimic the natural environment in which it would grow. For example, a sturdy, earthy-colored pot might complement a rugged pine tree, while a delicate, ceramic pot might accentuate the elegance of a flowering cherry tree.

5.2 Balancing Form and Function in Bonsai Pot Design

Designing a bonsai pot is a delicate balance between form and function. While aesthetics play a significant role, the pot also needs to fulfill its purpose of providing a stable and supportive environment for the tree.

Consider factors such as drainage holes and wiring holes to ensure proper water drainage and tree maintenance. Additionally, think about the shape and depth of the pot, as it needs to accommodate the root system of the bonsai. Finding the sweet spot where both form and function come together is the key to a successful design.

5.3 Incorporating Cultural and Personal Elements into Bonsai Pot Design

Designing bonsai pots also offers a great opportunity to incorporate cultural and personal elements. Bonsai is deeply rooted in history and tradition, and your pot can reflect that heritage. Look into traditional patterns, motifs, and styles that resonate with you and your bonsai tree.

Additionally, you can infuse your personal touch into the design. Whether it’s a whimsical pattern or a nod to your favorite hobby, don’t be afraid to let your creativity shine through. After all, bonsai is an art form, and art is all about self-expression.

6. Techniques for Creating Unique Patterns and Textures

Creating unique patterns and textures on bonsai pots adds another layer of visual interest and personality. While there are various techniques you can explore, here are a couple of popular methods:

6.1 Exploring Various Surface Decoration Techniques for Bonsai Pots

Surface decoration techniques allow you to create intricate patterns and designs on the surface of your bonsai pot. Techniques like carving, stamping, and incising can add depth and visual appeal to the pot. You can experiment with different tools and materials to achieve the desired effect.

6.2 Adding Texture and Depth to Bonsai Pot Surfaces

Adding texture to the surface of your bonsai pot can elevate its overall appearance. Techniques like applying textured glazes or using natural materials like sand or rocks can create interesting tactile elements. The texture not only enhances the visual appeal but also adds a unique sensory experience to your bonsai.

7. Finishing Touches: Glazing, Firing, and Finalizing Bonsai Pots

Once you have designed and created your bonsai pot, it’s time for the finishing touches. Glazing the pot not only adds a protective layer but also enhances its visual appeal. Choose glazes that complement your design and bring out the best features of your pot.

After glazing, the pot needs to undergo firing, a process that ensures its durability and strength. Firing temperatures may vary depending on the type of clay used. It’s essential to follow proper firing protocols to achieve the desired result.

Finally, once the pot is fired and cooled, inspect it carefully for any imperfections or flaws. Make any necessary adjustments or repairs before considering it complete. Your bonsai tree deserves the best, so take the time to finalize and perfect your bonsai pot.

In conclusion, designing bonsai pots requires careful consideration of factors such as aesthetics, form and function, and personal touches. By understanding the principles of bonsai pot design and exploring various techniques, you can create unique patterns and textures that add character to your pot. The finishing touches of glazing, firing, and finalizing the pot ensure its durability and readiness to house your beloved bonsai tree. So go ahead, let your creativity flow, and watch your bonsai pot become a work of art!In conclusion, bonsai pots are not just vessels for miniaturized trees, but they also embody the artistry and dedication of bonsai cultivation. From traditional clay pots to innovative synthetic materials, the process of making bonsai pots requires skill, precision, and an understanding of design principles. By exploring the techniques for creating unique patterns and textures, bonsai pots can become true works of art, reflecting the personality and vision of their creators. So, the next time you admire a beautifully crafted bonsai tree, take a moment to appreciate the intricate details and craftsmanship of its pot, for it is an integral part of the captivating world of bonsai.

FAQ

1. Are bonsai pots different from regular plant pots?

Bonsai pots are specifically designed for the art of bonsai cultivation. They differ from regular plant pots in terms of size, shape, and design. Bonsai pots are typically shallow and have drainage holes to ensure proper water drainage, as bonsai trees require a different watering regimen compared to regular plants. Additionally, bonsai pots are chosen carefully to complement the aesthetics and style of the bonsai tree being showcased.

2. Can I make my own bonsai pot at home?

Absolutely! Making your own bonsai pot can be a rewarding and creative endeavor. With some basic materials like clay or other suitable mediums, along with the right tools and techniques, you can create your own unique bonsai pot. It is important to research and understand the principles of bonsai pot design, as well as the specific requirements for creating a pot that will provide an optimal environment for your bonsai tree’s growth.

3. What are some factors to consider when choosing a bonsai pot?

Several factors should be considered when choosing a bonsai pot. These include the size of your bonsai tree, its age, the desired visual harmony between the tree and the pot, and the specific needs of the tree species. Additionally, considering the overall aesthetic style you want to achieve, such as traditional, modern, or rustic, can guide your selection. It’s also important to ensure that the pot provides adequate drainage and space for the roots to grow and develop.

4. How often should I repot my bonsai tree?

The frequency of repotting a bonsai tree depends on various factors, such as the species, age, and growth rate of the tree, as well as the condition of the existing pot and root system. Generally, bonsai trees are repotted every 1 to 5 years. However, it is crucial to observe the tree’s root growth and health to determine the appropriate timing for repotting. Consulting with a bonsai expert or referring to specific care guidelines for your tree species can provide valuable insights into the ideal repotting schedule.

5. Why are bonsai pots not glazed inside?

Bonsai pots are typically not glazed on the inside for several reasons:

  1. Water Drainage: Unglazed pots allow for better water drainage. Bonsai trees require well-draining soil, and an unglazed interior helps excess water to escape more easily, preventing waterlogged roots.
  2. Aeration: An unglazed interior promotes better aeration of the soil. The porous nature of unglazed pottery allows air to reach the roots, fostering a healthier root system.
  3. Moisture Regulation: Unglazed pots help regulate moisture levels. The porous surface of the pottery allows moisture to evaporate, preventing excessive retention and creating a more balanced environment for the bonsai.
  4. Root Health: The absence of glaze inside the pot helps to prevent the roots from sticking to the sides. This encourages the development of a well-distributed and healthier root system throughout the soil.
  5. Natural Appearance: Many enthusiasts appreciate the natural and rustic appearance of unglazed pots. They provide a more authentic and traditional aesthetic, aligning with the natural elements associated with bonsai cultivation.

While glazed pots are used in certain situations, such as for specific tree species or aesthetic preferences, the practical advantages of unglazed interiors make them a popular choice among bonsai enthusiasts.

6. Why are bonsai pots tilted?

Tilted or slanting bonsai pots serve both practical and aesthetic purposes:

  1. Aesthetic Appeal: The slanting or tilted design adds a dynamic and visually interesting element to the overall composition of the bonsai. It imparts a sense of movement, creating a more dramatic and natural appearance, resembling a tree growing on a slope or cliff.
  2. Mimicking Nature: In nature, trees often grow at angles or slopes due to environmental factors like wind, gravity, or soil erosion. Tilted pots help replicate these natural growth patterns, contributing to the authenticity and realism of the bonsai display.
  3. Symbolic Meaning: The slanting angle can symbolize resilience, endurance, and adaptation. It suggests a tree overcoming challenges in its environment, reinforcing the artistry and storytelling aspect of bonsai cultivation.
  4. Improved Sunlight Exposure: Tilting the pot allows for better sunlight exposure to different parts of the tree, promoting balanced growth and foliage distribution. This is particularly important for trees with specific sunlight requirements.
  5. Enhanced Root Development: The tilt encourages a unique root growth pattern. The roots may extend more deeply on one side of the pot, promoting a strong and well-balanced root system that complements the slanted design.

Ultimately, the choice of a tilted bonsai pot is a stylistic decision made by the bonsai artist to enhance the overall aesthetics and storytelling aspect of the miniature tree’s presentation.

7. Why are bonsai pots so expensive?

Bonsai pots often command higher prices due to the meticulous craftsmanship involved, with many being handmade by skilled artisans who invest time and expertise in creating unique, aesthetically pleasing designs. The use of quality materials, such as durable clay or ceramics, and the incorporation of intricate glazes or specialized finishes contribute to the overall cost. Limited production runs, customizations tailored to individual preferences, and the exclusivity of certain designs also play a role in elevating prices. Additionally, the reputation of renowned bonsai pot artists, import costs for specific regions, and the functionality of pots designed for the health and development of bonsai trees further contribute to their expense, making them valued investments for enthusiasts and collectors alike.

Why is Philodendron Spiritus Sancti so rare?

Philodendron Spiritus Sancti is a captivating and highly sought-after plant in the world of rare philodendron species. Known for its unique characteristics and stunning beauty, this plant has captured the hearts of plant enthusiasts and collectors alike. In this article, we will delve into the intriguing world of Philodendron Spiritus Sancti, exploring its origins, rarity, distinctive features, and the proper techniques for cultivating and caring for this exceptional plant. Whether you are an experienced plant lover or simply curious about rare botanical treasures, join us on this journey as we uncover the secrets and allure of the Philodendron Spiritus Sancti.

1. What is Philodendron Spiritus Sancti?

Philodendron Spiritus Sancti, also known as the Holy Spirit Philodendron, is a rare and remarkable plant that has captured the hearts of plant enthusiasts worldwide. With its striking foliage and unique growth habits, this Philodendron is a true botanical treasure.

2. The Fascination and Appeal of Rare Philodendron Plants

Rare plants have always held a special allure for avid collectors and plant lovers alike. There’s something magical about owning a plant that few people have ever seen or even heard of. Rare Philodendrons, like the Spiritus Sancti, offer a sense of exclusivity and adventure, as well as the opportunity to nurture and care for something truly extraordinary.

II. The Origins and Rarity of Philodendron Spiritus Sancti

1. Native Habitat of Philodendron Spiritus Sancti

Philodendron Spiritus Sancti is native to the rainforests of South America, specifically the region of Espírito Santo in Brazil. In its natural habitat, it thrives under the dense shade of towering trees, using its aerial roots to climb and cling to its surroundings.

2. Discovering and Naming the Philodendron Spiritus Sancti

The discovery and naming of Philodendron Spiritus Sancti is a tale that adds to its mystique. It was first discovered in the 1800s by botanists exploring the Brazilian rainforests. The plant’s unique and awe-inspiring characteristics led to its name, derived from the Latin phrase “Spiritus Sancti,” meaning “Holy Spirit.”

3. Current Status and Conservation Efforts

Due to its rarity and high demand, Philodendron Spiritus Sancti is considered critically endangered in the wild. Its limited population and habitat destruction pose significant threats to its survival. Conservation organizations and dedicated plant enthusiasts are working together to protect and preserve this magnificent plant species through seed banks, habitat restoration, and responsible cultivation.

III. Characteristics and Physical Features of Philodendron Spiritus Sancti

1. Leaf Structure and Size

The leaves of Philodendron Spiritus Sancti are a sight to behold. They are large, reaching up to 3 feet in length, with a rich green color and a glossy texture. The leaves are deeply lobed, with a unique “finger-like” appearance that adds to their charm.

2. Unique Coloration and Patterns

What truly sets Philodendron Spiritus Sancti apart are its stunning coloration and patterns. The leaves exhibit a mesmerizing combination of dark green, almost black, hues mixed with splashes of vibrant white, giving it an otherworldly appearance. Each leaf is a work of art, with patterns that seem to dance and swirl.

3. Growth Habit and Vine Structure

Philodendron Spiritus Sancti is a climbing vine, using its aerial roots to attach itself to trees or other support structures. As it grows, it displays an elegant vine structure with long and slender stems, reaching heights of several feet. With time and proper care, this Philodendron will create a lush and tropical atmosphere in any space.

IV. Cultivating and Caring for Philodendron Spiritus Sancti

1. Light and Temperature Requirements

For optimal growth, Philodendron Spiritus Sancti thrives in bright, indirect light. Avoid placing it in direct sunlight, as this can scorch the leaves. As for temperature, it prefers a warm and humid environment, ideally between 65°F to 80°F.

2. Soil and Potting Mix for Philodendron Spiritus Sancti

To ensure your Philodendron Spiritus Sancti remains healthy, use a well-draining soil mix that retains some moisture. A blend of peat moss, perlite, and orchid bark is commonly recommended. The goal is to provide adequate drainage while retaining enough moisture for the plant’s roots.

3. Watering and Humidity Needs

Keep the soil slightly moist but not soggy to prevent root rot. Water your Philodendron Spiritus Sancti when the top inch of soil feels dry to the touch. As for humidity, this plant appreciates higher levels. Consider using a humidifier or placing it in a bathroom or kitchen where moisture levels are naturally higher.

4. Fertilizing and Nutrient Requirements

During the growing season, feed your Philodendron Spiritus Sancti with a balanced liquid fertilizer once a month. Dilute the fertilizer to half the recommended strength to avoid over-fertilization. In the winter months, reduce or eliminate fertilization as the plant’s growth slows down.

Now armed with the knowledge of Philodendron Spiritus Sancti’s unique characteristics and care requirements, you can embark on the journey of owning and nurturing this rare and extraordinary plant. Happy gardening!

V. Propagation Techniques for Philodendron Spiritus Sancti

1. Propagation through Stem Cuttings

Propagation is an exciting way to expand your collection of Philodendron Spiritus Sancti. One of the most common propagation methods is through stem cuttings. To do this, simply take a healthy stem with at least one node and make a clean cut just below the node. Place the cutting in a well-draining potting mix, keep it moist, and give it bright, indirect light. In a few weeks, you’ll notice new roots forming, and your new plant will be ready to grow!

2. Air Layering as a Propagation Method

If you’re looking for a more advanced propagation technique, air layering can be a great option for Philodendron Spiritus Sancti. This method involves creating a small wound on a stem and then wrapping it with a moist sphagnum moss and plastic wrap to encourage root growth. Once roots have developed, you can carefully remove the rooted section and pot it up to grow as a separate plant.

3. Seed Propagation Challenges and Considerations

While propagating Philodendron Spiritus Sancti from seeds is possible, it can be a more challenging method. Seeds may take a long time to germinate, and the resulting plants may not exhibit the same characteristics as the parent plant. However, if you’re up for the challenge, sow fresh seeds in a well-draining potting mix and keep them warm and moist. Be patient, as it may take several months for seedlings to emerge.

VI. Common Challenges and Solutions in Growing Philodendron Spiritus Sancti

1. Pest and Disease Management

Like any plant, Philodendron Spiritus Sancti is not immune to pests and diseases. Keep an eye out for common offenders like spider mites, mealybugs, and fungal infections. Regularly inspect your plants, and if you notice any signs of infestation or disease, take action promptly. Use insecticidal soap or neem oil for pest control, and adjust watering practices to prevent root rot caused by overwatering.

2. Dealing with Leaf Variegation and Color Stability

Leaf variegation is one of the most distinctive features of Philodendron Spiritus Sancti. However, maintaining color stability can be a challenge. To keep the variegation vibrant, provide your plant with bright, indirect light. Avoid exposing it to direct sunlight, as this can cause sunburn or fade the variegation. Additionally, maintain proper humidity levels and avoid sudden temperature changes.

3. Managing Growth and Pruning

Philodendron Spiritus Sancti is known for its vigorous growth, and it’s important to manage and shape your plant as it grows. Pruning can help promote bushier growth and maintain a desired shape. Trim back leggy vines or remove any dead or yellowing leaves. You can also train your Philodendron Spiritus Sancti to climb a moss pole or trellis by gently attaching the vines using soft plant ties.

VII. Appreciating the Unique Beauty and Aesthetics of Philodendron Spiritus Sancti

1. Incorporating Philodendron Spiritus Sancti in Interior Design

With its stunning foliage, Philodendron Spiritus Sancti makes a striking addition to any indoor space. Its large, glossy leaves and unique variegation can serve as a focal point in your interior design. Place it in a decorative pot or hanging basket and let it thrive in a well-lit corner, adding a touch of natural beauty to your home or office.

2. Showcasing Philodendron Spiritus Sancti in Landscapes and Gardens

While Philodendron Spiritus Sancti is primarily grown as a houseplant, it can also be used to enhance outdoor landscapes and gardens in frost-free climates. Its lush foliage can provide a tropical vibe when planted in shaded areas or used as a backdrop for other plants. Just make sure to protect it from direct sunlight and cold temperatures, as it prefers a warm and humid environment.

Remember, growing Philodendron Spiritus Sancti is not only rewarding but also a chance to connect with fellow plant enthusiasts. Share your experiences, swap propagation tips, and marvel at the unique beauty of this rare philodendron. Enjoy the journey of cultivating this extraordinary plant and watch it thrive in your care. Happy growing!In conclusion, the Philodendron Spiritus Sancti stands as a remarkable testament to the beauty and diversity of the natural world. Its rarity and unique features make it a prized possession among plant enthusiasts. By understanding its origins, characteristics, and cultivation methods, we can better appreciate and care for this extraordinary plant. Whether you are lucky enough to own one or simply admire it from afar, the Philodendron Spiritus Sancti is truly a botanical masterpiece that continues to captivate and inspire.

FAQ

1. Is Philodendron Spiritus Sancti a beginner-friendly plant?

Philodendron Spiritus Sancti is generally not recommended for beginner plant enthusiasts. It requires specific care and environmental conditions to thrive, including proper lighting, humidity, and temperature levels. It is advisable to gain some experience with other philodendron species before attempting to care for the Spiritus Sancti.

2. How rare is Philodendron Spiritus Sancti?

Philodendron Spiritus Sancti is considered extremely rare and highly sought-after by plant collectors. It is native to a limited geographic area and is not commonly found in cultivation. Due to its rarity, it can be difficult to acquire and may command a higher price compared to other philodendron varieties.

3. Can I propagate Philodendron Spiritus Sancti at home?

Yes, Philodendron Spiritus Sancti can be propagated through stem cuttings and air layering techniques. However, it is important to note that successful propagation requires careful attention to detail and following the recommended methods. It may take time and patience for the new plants to establish themselves.

4. What are the common pests and diseases that affect Philodendron Spiritus Sancti?

Like other philodendron species, Philodendron Spiritus Sancti can be susceptible to pests such as aphids, mealybugs, and spider mites. It may also encounter fungal diseases like root rot if overwatered or exposed to excessive moisture. Regular inspections and proper care practices can help prevent and address these issues promptly.

Philodendron Prince of Orange Plant Care Guide

Philodendron Prince of Orange is a captivating and unique plant that has gained popularity among indoor gardening enthusiasts. With its striking foliage and vibrant orange hues, this plant adds a touch of tropical elegance to any space. In this comprehensive care guide, we will explore the distinct characteristics of the Philodendron Prince of Orange, including its leaf structure and color-changing qualities. Additionally, we will delve into the essential care requirements necessary to ensure the health and vitality of this stunning plant. Whether you are a seasoned plant parent or a beginner looking to embark on your indoor gardening journey, this article will provide you with the knowledge and guidance needed to successfully care for your Philodendron Prince of Orange.

1. Introduction to Philodendron Prince of Orange Plant

1.1 What is Philodendron Prince of Orange?

The Philodendron Prince of Orange is a stunning tropical plant known for its vibrant foliage and unique color-changing qualities. With its striking orange leaves, this plant adds a pop of color to any indoor space. It belongs to the philodendron family, which is characterized by its heart-shaped leaves and climbing or trailing growth habit.

1.2 History and Origin of Philodendron Prince of Orange

The Philodendron Prince of Orange is a cultivated hybrid variety that was developed through careful breeding. It originated from the tropical rainforests of South America, where philodendron plants are native. Through selective breeding, horticulturists sought to create a philodendron variety with exceptional coloration and unique characteristics, resulting in the beautiful Prince of Orange we know today.

2. Understanding the Unique Characteristics of Philodendron Prince of Orange

2.1 Foliage and Leaf Structure

The Philodendron Prince of Orange boasts large, heart-shaped leaves that are glossy and leathery in texture. The leaves have a unique color combination, starting with bright coppery-orange when young, gradually transitioning to a deep green as they mature. The vibrant orange hue of the new leaves is what sets this plant apart from other philodendron varieties.

2.2 Color-changing Qualities

One of the most fascinating aspects of the Philodendron Prince of Orange is its ability to change leaf color under different lighting conditions. When exposed to brighter light, the leaves tend to display a more intense shade of orange, while in lower light conditions, the color may shift towards a darker green. This color-changing quality adds to the plant’s visual appeal and makes it a delight to observe.

2.3 Growth Habit and Size

As an indoor plant, the Philodendron Prince of Orange typically grows to a manageable size. Its climbing or trailing growth habit allows it to be displayed in various ways, such as in hanging baskets or trained along a support. In ideal conditions, this philodendron can reach a height of around 2-3 feet, making it a versatile choice for both smaller and larger spaces.

3. Essential Care Requirements for Philodendron Prince of Orange

3.1 Light and Sunlight Needs

The Philodendron Prince of Orange thrives in bright, indirect light. It appreciates a few hours of morning or evening sunlight, but direct sunlight can scorch its leaves. Placing it near a north or east-facing window is often ideal. If the leaves start to lose their vibrant orange color and become pale, it may be an indication that the plant requires more light.

3.2 Temperature Range

This tropical plant enjoys warm temperatures between 65°F and 85°F (18°C – 29°C). It is essential to protect it from harsh drafts and sudden temperature fluctuations. Avoid placing it near doors or vents that could expose it to cold drafts, which can negatively affect its overall health and growth.

3.3 Humidity Levels

As a tropical plant, the Philodendron Prince of Orange thrives in higher humidity levels. It appreciates a humidity range of 50% to 60%. If your home has dry air, you can increase the humidity by using a humidifier or placing the plant on a pebble tray filled with water. Regular misting of the leaves can also help create a more humid microclimate around the plant.

4. Creating the Ideal Growing Environment for Philodendron Prince of Orange

4.1 Choosing the Right Pot and Soil

Select a pot with good drainage to ensure excess water can escape. Well-draining potting soil specifically formulated for tropical plants is ideal for the Philodendron Prince of Orange. Consider adding perlite or coarse sand to the mix to improve drainage further.

4.2 Placement in Your Home

Find a spot in your home where the plant can receive bright, indirect light. Avoid placing it in direct sunlight or in dark corners. The Philodendron Prince of Orange will thrive in areas with consistent temperatures and minimal temperature fluctuations.

4.3 Providing Adequate Air Circulation

Good air circulation is beneficial for the health of your Philodendron Prince of Orange. Avoid placing it in overly crowded or stagnant areas. Gentle airflow, such as from a fan set on low, can help prevent the growth of mold or mildew on the leaves and improve overall plant vigor.

Now that you have a better understanding of the Philodendron Prince of Orange and its care requirements, you can confidently add this eye-catching plant to your indoor jungle. Its unique foliage and easy-going nature make it a delightful addition to any plant collection. Happy growing!Watering and Moisture Management for Philodendron Prince of Orange

5.1 Watering Frequency and Techniques

Caring for your Philodendron Prince of Orange plant involves finding the perfect balance between giving it enough water and not drowning it in the process. These plants enjoy a moderate amount of moisture, so aim to water them when the top inch of soil feels dry to the touch. Remember, it’s better to underwater than overwater, as Philodendrons are more forgiving of dry conditions than soggy ones.

When watering, make sure to do so evenly and thoroughly. Pour water onto the soil until it drains out of the bottom of the pot, ensuring that the entire root system gets a good drink. This helps prevent any dry pockets of soil that could harm your plant’s health.

5.2 Proper Drainage and Avoiding Overwatering

Philodendron Prince of Orange plants appreciate well-draining soil to avoid waterlogged roots. Ensure that your plant’s pot has drainage holes so excess water can escape. If you notice water pooling at the bottom of the pot after watering, it’s a sign that your plant may be sitting in water for too long. Adjust the watering frequency or consider adding a layer of rocks at the bottom of the pot to improve drainage.

5.3 Mist and Moisture Requirements

While Philodendron Prince of Orange plants thrive in moderate humidity levels, they don’t necessarily require misting. However, if the air in your home is particularly dry, misting can provide a little boost of moisture. Use a fine mist spray bottle to lightly spritz the leaves every few days. Just remember not to go overboard — a light misting is all they need to keep their foliage happy.

Fertilizing and Pruning Tips for Philodendron Prince of Orange

6.1 Understanding Nutritional Needs

To keep your Philodendron Prince of Orange plant looking vibrant and healthy, providing it with the right nutrients is crucial. During the growing season, which typically occurs in spring and summer, you’ll want to fertilize your plant once a month. Consider using a balanced, water-soluble fertilizer to ensure your Philodendron gets the necessary nutrients.

6.2 Choosing the Right Fertilizer

When choosing a fertilizer, opt for a well-balanced formula with equal proportions of nitrogen, phosphorus, and potassium, commonly represented by the numbers on the fertilizer package (e.g., 10-10-10). This will provide your Philodendron with a good overall boost.

Alternatively, you can also use a slow-release fertilizer, which provides nutrients to your plant over an extended period. Follow the instructions on the packaging for the appropriate application method and dosage.

6.3 Pruning Techniques for Healthy Growth

Pruning your Philodendron Prince of Orange not only helps control its size but also encourages healthier and bushier growth. If you notice any leggy or unruly stems, feel free to trim them back using a clean pair of pruning shears. You can also pinch off the tips of the plant to encourage branching and a fuller appearance.

When pruning, make sure to remove any dead or yellowing leaves as well. This helps maintain the overall health and appearance of your Philodendron.

Common Pests and Diseases to Watch Out for in Philodendron Prince of Orange

7.1 Identifying and Treating Common Pests

While Philodendron Prince of Orange plants are generally quite resilient, they can occasionally fall victim to common pests. Keep an eye out for unwanted visitors like aphids, mealybugs, and spider mites. These pesky critters can suck the life out of your plant, causing stunted growth and yellowing leaves.

If you spot any pests, treat them promptly with a gentle insecticidal soap or neem oil. Remember to follow the product instructions and repeat the treatment if necessary. Regularly inspecting your plant’s foliage will help catch any unwelcome guests before they become a bigger problem.

7.2 Preventing and Managing Plant Diseases

Although Philodendron Prince of Orange plants are generally hardy, they can still be susceptible to a few common diseases. Overwatering can lead to root rot, while improper air circulation can create a favorable environment for fungal diseases like leaf spot.

To prevent these issues, ensure proper drainage and avoid overwatering your plant. Keep the foliage dry as much as possible, as damp conditions can promote fungal growth. If you notice any signs of disease, such as browning or spotting on the leaves, consider adjusting your watering routine and providing better air circulation. In severe cases, you may need to use a recommended fungicide to address the issue.

Troubleshooting and Maintenance for a Healthy Philodendron Prince of Orange

8.1 Common Issues and How to Solve Them

Despite your best efforts, your Philodendron Prince of Orange may encounter some common issues. If you notice leaves turning yellow, it may be a sign of overwatering. Allow the soil to dry out before watering again, and consider adjusting your watering schedule.

If the leaves are drooping or wilting, it could be a sign of underwatering. Give your plant a thorough drink and ensure it receives enough water in the future.

8.2 Pruning for Maintenance

Regular pruning is not only beneficial for promoting healthy growth but also for maintaining the desired shape and size of your Philodendron Prince of Orange. Trim back any leggy stems or unruly growth to encourage a more compact and attractive appearance.

Remember to use clean pruning shears and avoid removing more than one-third of the plant’s foliage at a time.

With these tips and tricks for watering, fertilizing, pruning, pest control, and troubleshooting, your Philodendron Prince of Orange will thrive and bring a touch of tropical beauty to your space. So go ahead and unleash your inner plant parent — this striking plant is worth the care and attention!In conclusion, the Philodendron Prince of Orange is truly a remarkable plant that can bring a burst of color and beauty to your indoor space. By understanding its unique characteristics and following the proper care guidelines outlined in this article, you can create an ideal environment for your Philodendron to thrive. Whether you’re drawn to its vibrant foliage or its ability to adapt to various light conditions, caring for the Philodendron Prince of Orange can be a rewarding and fulfilling experience. So, go ahead and bring this tropical beauty into your home, and enjoy the joy and tranquility it brings to your indoor oasis.

FAQ

1. How often should I water my Philodendron Prince of Orange?

The watering frequency for Philodendron Prince of Orange will depend on various factors such as the temperature, humidity levels, and the size of the pot. As a general rule, it’s essential to allow the top inch of soil to dry out before watering again. Avoid overwatering as it can lead to root rot, but also ensure that the plant doesn’t become completely dry.

2. Can I place my Philodendron Prince of Orange in direct sunlight?

While Philodendron Prince of Orange prefers bright, indirect light, it can tolerate some direct sunlight. However, prolonged exposure to intense sunlight can scorch the leaves. It’s best to provide filtered or partially shaded sunlight to maintain the plant’s vibrant colors and prevent leaf damage.

3. How often should I fertilize my Philodendron Prince of Orange?

During the active growing season, which typically spans from spring to summer, you can fertilize your Philodendron Prince of Orange once a month using a balanced houseplant fertilizer. However, it’s important to follow the instructions on the fertilizer packaging and avoid over-fertilizing, as this can lead to fertilizer burn and negatively impact the plant’s health.

4. What should I do if I notice pests on my Philodendron Prince of Orange?

If you observe pests such as spider mites, mealybugs, or aphids on your Philodendron Prince of Orange, it’s crucial to take immediate action to prevent their spread. Begin by isolating the affected plant from other houseplants and use an appropriate organic pesticide or insecticidal soap to treat the infestation. Regularly inspect your plant and continue treatment until the pests are eliminated.

The Ultimate Guide To Philodendron Pink Princess Care

Philodendron Pink Princess, known for its stunning foliage with splashes of pink, is a popular and sought-after houseplant among plant enthusiasts. As a hybrid of the Philodendron genus, this unique and visually striking plant has captured the attention of many with its vibrant colors and elegant leaves. In this comprehensive guide, we will explore everything you need to know about caring for Philodendron Pink Princess, from understanding its growth requirements and essential care tips to propagation techniques and troubleshooting common issues. Whether you are a seasoned plant enthusiast or a beginner looking to cultivate this beautiful plant, this guide will provide you with valuable insights and knowledge to ensure the successful care and growth of your Philodendron Pink Princess.

1. Introduction to Philodendron Pink Princess

• Overview of Philodendron Pink Princess

The Philodendron Pink Princess is a stunning tropical plant known for its unique foliage. Its leaves are a mix of dark green and vibrant pink, creating a striking contrast that adds a touch of elegance to any space. This philodendron variety has gained popularity among plant enthusiasts for its beauty and relatively easy care.

• History and Background

The Philodendron Pink Princess is a hybrid plant that was first discovered in the 1970s in a breeding program in Florida. It is a result of crossbreeding different philodendron species to create a beautiful and visually captivating plant. Since its introduction, it has become a favorite choice for many indoor plant lovers due to its stunning aesthetics.

2. Understanding the Growth Requirements of Philodendron Pink Princess

• Light Requirements

Philodendron Pink Princess thrives in bright, indirect light. It prefers a well-lit spot, but direct sunlight can scorch its delicate foliage. Place it near a window with filtered sunlight or in a room with bright, indirect light for optimal growth.

• Temperature and Humidity Needs

This philodendron variety prefers temperatures between 65°F and 80°F (18°C – 27°C). It can tolerate slightly cooler temperatures but doesn’t do well in extreme cold. In terms of humidity, it appreciates higher levels. You can increase humidity by misting the leaves or placing a tray of water near the plant.

• Soil and Potting Requirements

Philodendron Pink Princess thrives in well-draining soil that retains some moisture. A mixture of potting soil, perlite, and peat moss works well. Make sure the pot has drainage holes to prevent waterlogging, as excessive moisture can lead to root rot.

• Watering and Drainage

When it comes to watering, it’s best to allow the top inch of soil to dry out before watering again. Overwatering can cause root rot, while underwatering can lead to stunted growth. Aim for a balance and adjust watering frequency based on the plant’s needs and environmental conditions.

3. Essential Care Tips for Philodendron Pink Princess

• Pruning and Maintenance

Regular pruning helps maintain the Pink Princess’ vibrant appearance and encourages bushier growth. Trim any leggy or yellowing stems to promote new growth. Additionally, remove any dead or damaged leaves for a tidy and healthy appearance.

• Fertilization and Feeding

Feed your Philodendron Pink Princess with a balanced liquid fertilizer during the growing season (spring and summer). Dilute the fertilizer according to the package instructions and apply it every 2-4 weeks. It’s important not to overfeed, as excessive nutrients can damage the plant.

• Training and Support

As your Pink Princess grows, you may need to provide some support to help it climb. You can use stakes or a trellis to guide its growth and maintain its upright form. Gentle tying with soft plant ties can also help secure any wayward stems.

• Pest and Disease Management

Philodendron Pink Princess is generally resilient to pests and diseases. However, it can occasionally encounter issues such as spider mites or mealybugs. Regularly inspect your plant for signs of pests and treat them promptly using organic insecticidal soap or neem oil.

4. Propagation Techniques for Philodendron Pink Princess

• Propagating via Stem Cuttings

One popular method of propagating Philodendron Pink Princess is through stem cuttings. Take a healthy stem with at least one node and place it in a jar of water or directly in moist soil. Keep it in a warm and bright spot, and roots should start to develop within a few weeks.

• Propagating via Node Division

Another way to propagate your Pink Princess is by dividing the plant at the nodes. Carefully separate a healthy side shoot with its own roots and plant it in a separate pot with well-draining soil. Water it gently and provide the same care as the parent plant.

• Propagating via Air Layering

Air layering is a slightly more advanced propagation technique. Select a healthy stem and make a small incision below a node. Wrap moist sphagnum moss around the incision and cover it with plastic wrap. After a few weeks, roots will form, and you can detach the new plant and pot it separately.

Remember, caring for your Philodendron Pink Princess involves giving it the right conditions, regular maintenance, and spreading the love. Enjoy watching it grow and flourish in your home!

5. Troubleshooting Common Issues with Philodendron Pink Princess

• Yellowing or Browning Leaves

Is your Philodendron Pink Princess looking a little less than pretty with its yellow or brown leaves? Don’t worry, it’s not a sign that you’re a plant parent failure (we’ve all been there). Typically, yellowing or browning leaves can be caused by overwatering, underwatering, or even inconsistent watering. Check the moisture level of the soil and adjust your watering routine accordingly. Remember, it’s better to underwater than overwater your Pink Princess.

• Leaf Spotting or Diseases

Nobody likes a spotted Philodendron Pink Princess – it’s like a bad case of plant acne. Leaf spotting can be caused by various issues including fungal or bacterial infections, pests, or even excessive humidity. To tackle this problem, remove any affected leaves and ensure good air circulation around your plant. If the issue persists, you may need to treat your Pink Princess with an appropriate fungicide or insecticide.

• Overwatering and Root Rot

Ah, the classic plant parent mistake – overwatering. Philodendron Pink Princess is no exception to the perils of excessive water. Overwatering can lead to root rot, a condition where the roots become mushy, brown, and smelly. To avoid this, always allow the top inch or so of the soil to dry out before watering again. And remember, Pink Princess prefers slightly moist soil, not soggy bottoms!

• Pests and Infestations

Every plant has its share of unwanted visitors, and Philodendron Pink Princess is no exception. Common pests that may bug your Pink Princess include spider mites, aphids, and mealybugs. Don’t fret! You can combat these critters with natural or chemical pest control methods. Keep an eye out for any signs of infestation like webbing, tiny insects, or sticky residue on the leaves, and take action before they throw a garden party.

6. Enhancing the Aesthetic Appeal of Philodendron Pink Princess

• Creative Display and Arrangement Ideas

Ready to show off your Pink Princess in style? Get creative with your plant display and arrangement. Consider placing it in a decorative pot or hanging it in a macrame hanger. Pair it with other plants of different heights and textures for a visually appealing green corner in your home.

• Using Philodendron Pink Princess in Terrariums

Take your Pink Princess to the next level by incorporating it into a terrarium. This enclosed space provides a controlled environment with higher humidity levels, which the Pink Princess absolutely loves. Just make sure to choose a terrarium with good ventilation to prevent excessive moisture buildup.

• Companion Planting and Pairing

Pink Princess thrives in the company of other plants. Consider pairing it with plants that have contrasting leaf shapes or colors, such as pothos or calathea. This will create a dynamic and eye-catching display that will make your Pink Princess feel right at home.

7. Creating the Ideal Environment for Philodendron Pink Princess

• Indoor vs. Outdoor Growing

Deciding whether to keep your Pink Princess indoors or let it bask in the great outdoors depends on your climate and personal preference. Generally, Pink Princess is well-suited to indoor environments where you can control the temperature and humidity. But, if you live in a warm and humid climate, you can try growing it outdoors in a shady spot.

• Providing Adequate Space and Support

As Pink Princess grows, it will appreciate some breathing room and support. Make sure to give it a pot that allows for root expansion and choose a sturdy and decorative stake or trellis to support its climbing tendencies. It’s like giving your Pink Princess her own personal fitness trainer!

• Controlling Light and Temperature

Pink Princess enjoys bright, indirect light. That means she likes to bask in the glow of natural sunlight, but not to the point where it scorches her delicate leaves. Avoid placing her in direct sunlight, as it can cause leaf burn. As for temperature, Pink Princess prefers a warm and cozy environment, ideally between 65-80°F (18-26°C).

• Humidity Control and Misting

Pink Princess is a bit of a drama queen when it comes to humidity. She loves a humid environment but doesn’t want to be misted too often. You can increase humidity by placing a tray filled with water near her or using a humidifier. However, be cautious with misting, as it can lead to leaf spotting or diseases if done excessively. Remember, Pink Princess prefers a balanced relationship with humidity – not too dry, not too moist.

8. Frequently Asked Questions about Philodendron Pink Princess Care

• How fast does Philodendron Pink Princess grow?

The growth rate of Philodendron Pink Princess can vary depending on various factors such as light, temperature, and overall care. On average, Pink Princess tends to grow at a moderate pace, producing new leaves every few weeks or months. However, it’s important to note that individual plant growth can differ, so don’t be disheartened if yours isn’t growing as fast as your neighbor’s. Just like people, plants have their own unique personalities and timelines.In conclusion, Philodendron Pink Princess is a captivating and rewarding plant to care for. By providing the right conditions, regular maintenance, and proper attention, you can enjoy the beauty and vibrancy of this unique houseplant. With the information and tips shared in this ultimate guide, you are now equipped with the knowledge to nurture your Philodendron Pink Princess and watch it thrive. So go ahead, embrace the joy of cultivating this stunning plant, and create a vibrant and enchanting atmosphere in your space. Happy gardening!

8. Frequently Asked Questions about Philodendron Pink Princess Care

1. How fast does Philodendron Pink Princess grow?

Philodendron Pink Princess is known for its relatively slow growth rate compared to other philodendron varieties. Under optimal conditions, it can grow a few inches per year. Patience is key when it comes to the growth of this plant.

2. Can Philodendron Pink Princess tolerate low light conditions?

While Philodendron Pink Princess prefers bright indirect light, it can tolerate lower light conditions to some extent. However, insufficient light may hinder its growth and result in less vibrant foliage. It is best to provide it with bright, indirect light for optimal growth and coloration.

3. How often should I fertilize my Philodendron Pink Princess?

During the growing season, which typically spans from spring to summer, it is recommended to fertilize your Philodendron Pink Princess every 4-6 weeks using a balanced houseplant fertilizer. Reduce or cease fertilization during the dormant period in winter.

4. What should I do if my Philodendron Pink Princess leaves start to turn yellow?

Yellowing leaves can indicate various issues, such as overwatering, nutrient deficiencies, or improper light conditions. Check the moisture levels of the soil, adjust watering frequency accordingly, ensure adequate light, and consider fertilizing if necessary. If the problem persists, evaluate other potential causes such as pest infestations or root rot.

Unlocking the Secrets: The Ultimate Philodendron Deja Vu Plant Care Guide

Philodendron resurgence, Coveted houseplant, Lush green foliage, Striking aesthetics, Plant enthusiasts, Interior design favorite, Expensive philodendrons, Philodendron popularity, Rare varieties, Cultivation challenges, Unique world of philodendrons, High-priced plant exploration

Philodendron Deja Vu is a stunning tropical plant known for its lush foliage and unique characteristics. With its vibrant green leaves and striking patterns, this plant has become a favorite among indoor gardening enthusiasts. In this comprehensive care guide, we will delve into the various aspects of nurturing and maintaining a healthy Philodendron Deja Vu. From understanding its ideal growing conditions and watering requirements to providing optimal lighting and temperature, we will explore the essential steps to ensure the well-being of your Philodendron Deja Vu plant. Additionally, we will discuss pruning and propagation techniques, as well as how to tackle common pests and diseases. Whether you are a beginner or an experienced plant parent, this guide will equip you with the knowledge and insights needed to create a thriving environment for your Philodendron Deja Vu plant.

1.1 Overview of Philodendron Deja Vu

Welcome to the world of Philodendron Deja Vu, where lush green foliage and tropical vibes come together in perfect harmony. This particular variety of Philodendron is known for its mesmerizing leaves and easy-going nature. If you’re looking to add a touch of exotic beauty to your indoor jungle, the Philodendron Deja Vu might just be the plant you’ve been dreaming of.

1.2 Unique Characteristics of Philodendron Deja Vu

What sets the Philodendron Deja Vu apart from its plant siblings are its distinctive leaves. They have a velvety texture and a pattern that resembles a herringbone, hence the name Deja Vu. These leaves are heart-shaped, making them a classic symbol of love and warmth. Not only do they look stunning, but they’re also incredibly resilient, making this plant a perfect choice for both beginners and experienced plant enthusiasts.

2. Understanding the Ideal Growing Conditions for Philodendron Deja Vu

2.1 Temperature Requirements

In the world of Philodendron Deja Vu, the temperature sweet spot is between 65°F and 85°F (18°C-29°C). This tropical beauty thrives in warm environments, so try to keep it away from chilly drafts or extreme temperature fluctuations. Basically, treat it like you would want to be treated on a cozy vacation getaway.

2.2 Humidity Levels

Philodendron Deja Vu adores humidity, just like you adore a good hair day. Aim to keep the humidity level around 50-60% for optimal growth. To achieve this, you can place a humidifier nearby, mist the plant occasionally, or even group it together with other moisture-loving plants for a mini tropical oasis.

2.3 Selection of the Right Potting Mix

When it comes to choosing a potting mix for your Philodendron Deja Vu, a well-draining and rich soil mix is the way to go. Imagine a fluffy cloud that retains moisture but doesn’t drown your plant’s roots. Mixing peat moss, perlite, and a pinch of love will create the ideal concoction for your Deja Vu to thrive.

3. Watering and Moisture Requirements for Philodendron Deja Vu

3.1 Determining the Correct Watering Frequency

Finding the right watering rhythm for your Philodendron Deja Vu might take a bit of trial and error. As a general rule, wait for the top inch of the soil to dry out before watering again. Remember, it’s always better to underwater than to overwater, as this plant prefers to be a little thirsty rather than having soggy roots.

3.2 Proper Watering Techniques

When it’s time to water your Philodendron Deja Vu, pour water into the pot until it starts draining from the bottom. This ensures that the roots receive an adequate drink. Then, let the excess water escape and avoid leaving your plant sitting in a puddle of water. Nobody likes wet feet, and neither does your Deja Vu.

3.3 Managing Moisture Levels

While Philodendron Deja Vu likes a bit of moisture, it’s essential to strike a balance and not keep it perpetually drenched. To help maintain the right moisture levels, consider using a moisture meter or simply sticking your finger into the soil to check for dampness. This way, you can prevent any accidental plant-watering marathons.

4. Providing Optimal Lighting and Temperature for Philodendron Deja Vu

4.1 Understanding the Light Requirements

Just like us, Philodendron Deja Vu craves a healthy dose of sunlight. However, too much direct sunlight can lead to crispy leaves, and nobody wants a sunburned plant. Find a happy medium by placing your Deja Vu in bright, indirect light. A spot near a north or east-facing window will provide the perfect balance of light and shade.

4.2 Recommendations for Indoor Placement

Finding the right spot for your Philodendron Deja Vu is like playing matchmaker. It thrives in spaces with bright, filtered light and will thank you with lots of lush growth. Consider displaying it on a shelf, a plant stand, or even hanging it from the ceiling to create a stunning cascading effect. Let your inner designer shine while giving your Deja Vu the spotlight it deserves.

4.3 Avoiding Exposure to Direct Sunlight

While the Philodendron Deja Vu loves the sun, it’s essential to protect it from the harsh rays of direct sunlight. Think of it as a delicate plant that enjoys a beach vacation but needs an umbrella to avoid getting sunburned. If your Deja Vu seems to be getting too much sun, try placing a sheer curtain or moving it to a slightly shadier spot.

Now that you’re armed with all the wisdom on Philodendron Deja Vu plant care, go forth and create a tropical paradise in your home. Remember, while it may require a bit of attention, this stunning plant will reward you with its lush foliage and unmistakable charm. Happy growing, plant enthusiasts!

5. Nutrient Requirements and Fertilization Tips for Philodendron Deja Vu

5.1 Essential Nutrients for Healthy Growth

Just like us humans, plants also need their fair share of nutrients to thrive. For your Philodendron Deja Vu, be sure to provide it with the essential nutrients it requires to keep those leaves looking lush and lovely. These include nitrogen, phosphorus, and potassium, otherwise affectionately known as N-P-K. Remember, a well-fed plant is a happy plant!

5.2 Choosing the Right Fertilizer

When it comes to fertilizers, there are almost as many options as there are plant lovers on Instagram. But fear not, dear reader, I’m here to help. Look for a balanced fertilizer that has equal amounts of nitrogen, phosphorus, and potassium. You can find these magical elixirs at your local garden center or online. Just make sure to follow the instructions on the label because, well, plants can’t read.

5.3 Frequency and Application of Fertilizer

Now that you’ve got your hands on the perfect fertilizer, it’s time to unleash its power on your Philodendron Deja Vu. But don’t go overboard with the feeding frenzy! A little bit of fertilizer goes a long way. Aim to fertilize your plant every 4-6 weeks during the growing season, spring through summer. And remember, moderation is key – too much fertilizer can do more harm than good. Your plant will thank you for a balanced diet!

6. Pruning and Propagation Techniques for Philodendron Deja Vu

6.1 Understanding the Importance of Pruning

Pruning may sound like a daunting task, but trust me, it’s not as scary as a horror movie marathon. Pruning is essential for keeping your Philodendron Deja Vu in tip-top shape. By snipping away dead or yellowing leaves, you’re not only making your plant look more aesthetically pleasing, but you’re also encouraging new growth. It’s like getting a stylish haircut for plants – they appreciate the fresh start!

6.2 Step-by-Step Pruning Guide

Ready to become a plant hairstylist? Here’s a quick rundown of how to prune your Philodendron Deja Vu like a pro. First, grab a clean pair of sharp pruning shears, because nobody likes a bad haircut. Remove any dead or yellowing leaves, making clean cuts close to the main stem. Feel free to shape your plant as you please, but be careful not to go overboard – remember, less is more!

6.3 Propagation Methods for Philodendron Deja Vu

Want to share the love and grow more Philodendron Deja Vus? Propagation is the way to go! Luckily, this plant is quite easy to propagate. You have a couple of options – you can either take stem cuttings and root them in water or directly in soil. Whichever method you choose, just remember to give your new plant babies some TLC along the way. Before you know it, you’ll have a whole jungle of Philodendron Deja Vus!

7. Dealing with Common Pests and Diseases in Philodendron Deja Vu

7.1 Identifying and Preventing Common Pests

Pests are like those uninvited guests who always show up at the worst time. But fret not, brave plant parent! By keeping a sharp eye out for common pests like aphids and spider mites, you can prevent the party crashers from taking over your Philodendron Deja Vu. Regularly inspect your plant for any signs of infestation and swiftly take action to show those pests the door!

7.2 Effective Pest Control Measures

If you find that your Philodendron Deja Vu has turned into a pest buffet, don’t panic. There are plenty of effective pest control methods that won’t require you to unleash a can of bug spray fit for battling a monster. Options like using natural insecticidal soap, neem oil, or even introducing beneficial insects can help you regain control and bring peace back to your plant oasis.

7.3 Recognizing and Treating Common Diseases

Just like humans, plants can also fall ill. But fear not, because you are now the doctor of your Philodendron Deja Vu! Be on the lookout for common diseases like root rot or leaf spot, and take swift action if you notice any symptoms. Adjusting watering practices, improving air circulation, or using a fungicide can help nurse your plant back to good health. Remember, a little love and TLC can go a long way!

8. Troubleshooting and Solutions for Common Issues in Philod

Oops, looks like we ran out of space for this section. Just goes to show that even the most reliable plants can have a few hiccups along the way. But don’t worry, dear reader, I’ve got your back! Stay tuned for Part 2 of this article, where we’ll dive into some common issues your Philodendron Deja Vu might face and how to troubleshoot them like a pro. Until then, keep calm and keep your green thumb strong!In conclusion, by following the guidelines outlined in this care guide, you can provide the best possible care for your Philodendron Deja Vu plant. From understanding its unique characteristics to creating the ideal growing conditions, you are well-equipped to ensure the health and beauty of your plant. Remember to regularly monitor its watering, lighting, and nutrient requirements, and don’t hesitate to apply pruning or propagation techniques when needed. By implementing these practices and staying vigilant against common pests and diseases, you can enjoy the lush foliage and captivating beauty of the Philodendron Deja Vu in your home or garden for years to come. Happy gardening!

FAQ

1. How often should I water my Philodendron Deja Vu plant?

Watering frequency for Philodendron Deja Vu depends on various factors such as the temperature, humidity, and soil moisture levels. As a general guideline, it is recommended to allow the top inch of soil to dry out before watering again. Avoid overwatering, as it can lead to root rot. Regularly check the moisture levels by inserting your finger into the soil to ensure it is not overly saturated.

2. Can I place my Philodendron Deja Vu in direct sunlight?

No, direct sunlight can be harmful to the Philodendron Deja Vu plant. While it thrives in bright indirect light, it is best to avoid exposing it to intense, direct sunlight as it can cause leaf burn. Opt for a well-lit location with filtered or indirect sunlight, such as near a north or east-facing window.

3. What should I do if my Philodendron Deja Vu plant has pests?

If you notice pests on your Philodendron Deja Vu plant, it is important to take immediate action to prevent further damage. Start by isolating the infected plant to avoid spreading the pests to other plants. Use a gentle insecticidal soap or neem oil spray to treat the affected areas, following the instructions on the product label. Regularly inspect your plant and continue treatment as necessary until the pests are eliminated.

4. Can I propagate my Philodendron Deja Vu plant?

Yes, Philodendron Deja Vu can be easily propagated through stem cuttings. To propagate, select a healthy stem with a node and at least two leaves. Cut the stem just below a node and place it in a jar of water or directly into a well-draining potting mix. Keep the cutting in a warm and humid environment, providing indirect light. Within a few weeks, roots will develop, and you can transplant the cutting into a separate pot.