How do you Take Care of a Water Jasmine plant?

Water Jasmine (Wrightia religiosa) is a beautiful and versatile plant that is popular among gardening enthusiasts. With its delicate white flowers and glossy green leaves, this evergreen shrub adds a touch of elegance to any indoor or outdoor space. However, to ensure the health and longevity of your water jasmine plant, it is important to understand its specific care requirements. From choosing the right environment to mastering watering techniques and managing pests, this article will provide you with a comprehensive guide on how to properly take care of a water jasmine plant. Whether you are a beginner or an experienced gardener, this article will equip you with the knowledge and tips needed to cultivate a thriving water jasmine plant.

1.1 What is a Water Jasmine Plant?

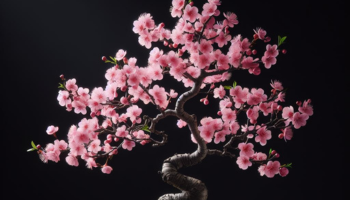
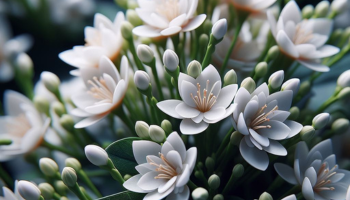
Picture this: a delicate, green vine with small, elliptical leaves and tiny, charming white flowers. That, my friend, is the water jasmine plant. Also known as Wrightia religiosa, this plant is a popular choice among plant enthusiasts for its beauty and ease of care.

1.2 Benefits of Growing Water Jasmine

Apart from being a treat for the eyes, water jasmine plants offer numerous benefits. They are excellent air purifiers, helping to improve the air quality in your home or office. Plus, their fragrance is simply divine, filling the air with a sweet and pleasant scent.

1.3 Popular Varieties of Water Jasmine

Water jasmine plants come in a variety of forms, each with its own unique characteristics. Some popular varieties include “Variegata,” which features leaves with striking cream and green patterns, and “Alba,” known for its pure white blossoms. Whether you prefer a splash of color or a classic look, there’s a water jasmine variety to suit your taste.

2. Choosing the Right Environment for Water Jasmine

2.1 Indoor vs. Outdoor Growing

Deciding whether to grow your water jasmine plant indoors or outdoors depends on your location and climate. If you live in a warmer region, you can enjoy the luxury of growing your water jasmine outdoors, allowing it to bask in the natural sunlight. However, if you reside in a cooler area, it’s best to keep your water jasmine indoors, where you can control the temperature more easily.

2.2 Light Requirements for Water Jasmine

Like many plants, water jasmine thrives in bright, indirect light. It’s essential to place your plant in a spot where it can receive plenty of sunshine without being exposed to harsh, direct sunlight. A sunny windowsill or a well-lit corner of a room are great options to keep your water jasmine happy and healthy.

2.3 Temperature and Humidity Considerations

Water jasmine plants prefer temperatures between 65°F to 85°F (18°C to 29°C). Avoid exposing your plant to drastic temperature changes, as it can lead to stress and damage. Additionally, maintaining a humid environment is crucial for the well-being of your water jasmine. If the air in your home is dry, consider using a humidifier or placing a tray filled with water near the plant to increase moisture levels.

3. Watering and Moisture Requirements

3.1 Understanding Watering Needs

Watering your water jasmine plant can sometimes be a bit tricky. These plants prefer to be slightly moist but not waterlogged. Overwatering can lead to root rot, while underwatering can cause the plant to wither. Striking the right balance is key – just like watering a demanding houseplant, but with a bit more finesse.

3.2 Frequency and Amount of Watering

As a general rule, water your water jasmine when the top inch of the soil feels slightly dry to the touch. Give it a good drink, allowing excess water to drain away, and avoid letting the plant sit in standing water. Remember, it’s always better to underwater than overwater, so resist the temptation to drown your beautiful water jasmine.

3.3 Tips for Properly Moisturizing the Soil

To help maintain moisture levels and prevent the soil from drying out too quickly, consider adding a layer of organic mulch around the base of your water jasmine plant. This will help retain moisture and protect the roots. Additionally, misting the leaves occasionally or placing a tray of water nearby can provide a little extra humidity, which water jasmine plants adore.

4. Sunlight and Temperature Needs

4.1 Ideal Sunlight Conditions for Water Jasmine

While water jasmine plants enjoy bright light, they prefer to be shielded from direct sunlight. Strive for a location that offers filtered or indirect light. This can be achieved by placing them near a sheer curtain or in a spot that receives bright, indirect light throughout the day. Avoid harsh afternoon sun, as it can scorch the leaves.

4.2 Importance of Temperature Control

Water jasmine plants are happiest in temperatures between 65°F to 85°F (18°C to 29°C). Keep them away from cold drafts, such as open windows on chilly nights, as they can cause the plant to suffer. Additionally, avoid placing the plant near heaters or vents, as the dry, hot air can dehydrate the leaves and disrupt their growth.

4.3 Protecting Water Jasmine from Extreme Weather

Extreme weather conditions, such as frost or excessive heat, can put stress on your water jasmine plant. If you’re growing it outdoors, it’s crucial to monitor the weather forecast and take necessary precautions. Consider covering the plant during colder nights or providing shade during scorching summer days to shield it from the harshest elements.

Taking care of a water jasmine plant is an enjoyable and rewarding experience. With a little attention to its light, temperature, and watering needs, you’ll have a thriving and beautiful addition to your indoor or outdoor space. So get ready to nurture your green thumb and enjoy the beauty of this delightful plant.

5. Soil and Fertilizer Considerations

5.1 Choosing the Right Soil Mix

When it comes to taking care of your water jasmine plant, one of the first things to consider is the soil. Water jasmine thrives in well-draining soil that is rich in organic matter. You want to create an environment that allows water to freely flow through the soil while retaining enough moisture for the plant’s roots.

To achieve this, a good soil mix for water jasmine consists of equal parts peat moss, perlite, and regular potting soil. This combination provides the perfect balance of moisture retention and drainage, ensuring that your plant’s roots can grow and breathe.

5.2 Understanding Fertilizer Needs

Water jasmine plants, like many other houseplants, benefit from regular fertilization. However, it’s important to understand their specific fertilizer needs to avoid over or underfeeding.

Water jasmine plants prefer a balanced, all-purpose fertilizer with an NPK ratio of around 10-10-10. This means the fertilizer contains equal amounts of nitrogen (N), phosphorus (P), and potassium (K). Look for a slow-release fertilizer or one that is specifically formulated for indoor plants.

5.3 Best Fertilizer Practices for Water Jasmine

Now that you have the right fertilizer, it’s essential to know how and when to apply it to your water jasmine plant. During the active growing season, which is typically spring and summer, fertilize your plant every two to four weeks. Dilute the fertilizer according to the instructions on the packaging and apply it directly to the soil. Avoid getting the fertilizer on the leaves or stems, as it can cause burns.

During the dormant season, which is usually fall and winter, reduce the frequency of fertilization to once every two months. This allows your water jasmine to rest and prepare for new growth in the following season.

6.1 Why Pruning is Important for Water Jasmine

Pruning is an essential part of water jasmine plant care. It not only helps maintain the plant’s shape and appearance but also promotes healthy growth and prevents overcrowding.

Regular pruning allows you to remove dead or damaged branches, which helps prevent the spread of diseases and pests. It also encourages new growth and improves the overall aesthetic of your water jasmine plant.

6.2 How to Prune Water Jasmine Properly

When it comes to pruning water jasmine, less is more. Start by removing any dead, yellowing, or diseased leaves or branches. Use clean and sharp pruning shears to make clean cuts, as jagged cuts can invite infections.

To encourage branching and bushier growth, selectively prune the tips of the stems. This will stimulate lateral bud growth and result in a fuller and more compact plant. Remember to step back and observe the plant’s overall shape as you prune, ensuring a balanced and visually appealing appearance.

6.3 Training Water Jasmine for Desired Shape

If you have a specific shape or form in mind for your water jasmine, it’s possible to train the plant to grow in that manner. Start by gently bending and tying the stems to the desired support structure, such as a trellis or stake.

As the plant grows, continue adjusting and securing the stems to maintain the desired shape. Be patient, as it may take time for the plant to adapt and grow in the desired direction. Regular pruning and training will help you achieve the look you want for your water jasmine.

Common Pests and Diseases

7.1 Identifying Common Pests for Water Jasmine

Just like any other plant, water jasmine is susceptible to pests. The most common ones include aphids, mealybugs, and spider mites. Keep an eye out for signs such as sticky residue, yellowing leaves, or visible insects.

Aphids are tiny, pear-shaped insects that cluster on new growth, sucking sap from the plant. Mealybugs appear as small white cottony patches on stems and leaves, while spider mites cause webbing and stippled leaves.

7.2 Preventing and Treating Pest Infestations

To prevent pest infestations, regularly inspect your water jasmine plant for any signs of trouble. If you notice pests, you can try removing them manually with a cotton swab dipped in rubbing alcohol. For larger infestations, use an insecticidal soap or neem oil solution, following the instructions on the product.

To minimize the risk of pests, ensure good plant hygiene by removing any dead leaves or debris from the plant’s vicinity. Additionally, avoid overwatering, as it can create a favorable environment for pests to thrive.

7.3 Common Diseases and How to Manage Them

Water jasmine plants can be prone to a few common diseases, such as powdery mildew and root rot. Powdery mildew appears as a white powdery coating on leaves and stems, while root rot causes the plant’s roots to become mushy and discolored.

To prevent these diseases, avoid overwatering and make sure your plant has proper drainage. If you notice any signs of disease, promptly remove and dispose of affected plant parts. You can also use a fungicide labeled for indoor plants to manage powdery mildew.

8. Tips for Troubleshooting and Maintaining a Healthy Water Jasmine Plant

8.1 Signs of Stress and How to Address Them

Keeping an eye out for signs of stress in your water jasmine is crucial for maintaining its overall health. Some common signs of stress include wilting leaves, yellowing foliage, or stunted growth.

If you notice these symptoms, reassess the plant’s care routine. Check if it’s receiving adequate light, water, and nutrients. Adjust any deficiencies or excesses accordingly to help your water jasmine recover.

8.2 Common Issues and Solutions

One common issue with water jasmine is leaf drop, which can happen when the plant experiences sudden temperature changes, drafts, or overwatering. Ensure that your water jasmine is placed in a stable environment away from cold drafts or hot radiators.

Another issue is yellowing leaves, which can indicate overwatering or nutrient deficiencies. Adjust your watering schedule to allow the soil to dry out slightly between waterings, and consider fertilizing with a balanced fertilizer to address any nutrient deficiencies.

Remember, plants are living beings, and they sometimes need a little trial and error to find their sweet spot. Keep experimenting, listen to your water jasmine’s needs, and don’t be too hard on yourself if things don’t go perfectly. With time and care, your water jasmine will thrive and bring beauty to your home.In conclusion, taking care of a water jasmine plant requires attention to detail and understanding of its unique needs. By providing the right environment, properly watering and fertilizing, and implementing regular pruning and pest control measures, you can ensure the health and beauty of your water jasmine plant for years to come. Remember to stay vigilant and address any issues promptly to maintain its vitality. With patience and care, you can enjoy the stunning blooms and fragrance of this enchanting plant in your home or garden. Happy gardening!

FAQ

1. How often should I water my water jasmine plant?

Water jasmine plants prefer to be kept evenly moist, but not overly saturated. As a general rule, water your plant when the top inch of soil feels dry to the touch. Depending on the climate and indoor conditions, this may range from once or twice a week to every few days. Monitor the moisture level of the soil and adjust your watering schedule accordingly.

2. Can I grow water jasmine indoors?

Yes, water jasmine plants can be grown indoors as long as they receive adequate sunlight and are placed in a well-ventilated area. Choose a location near a sunny window or provide supplementary artificial light. Ensure the indoor temperature and humidity levels are suitable for the plant’s growth. Regularly monitor the plant for any signs of stress or pest infestations.

3. How do I prune my water jasmine plant?

Pruning is essential for maintaining the shape and health of your water jasmine plant. To prune, use clean and sharp pruning shears. Remove any dead, damaged, or diseased branches. You can also prune to shape the plant or control its size. It is recommended to prune in the early spring or after the flowering period. Avoid excessive pruning, as it may affect the plant’s ability to produce flowers.

4. What are common pests that affect water jasmine plants?

Water jasmine plants can be susceptible to pests such as aphids, spider mites, and whiteflies. Regularly inspect your plant for signs of infestation, including distorted leaves, sticky residue, or small insects. Treat any infestations promptly using organic insecticidal soaps or natural remedies like neem oil. Maintaining good plant hygiene and proper care practices can help prevent pest problems.

Fuji Cherry Mastery: A Comprehensive Fuji Cherry Bonsai Care Guide

Fuji Cherry Bonsai, with its delicate blossoms and graceful branches, has captivated bonsai enthusiasts around the world. This miniature version of the beloved cherry tree offers an exquisite display of color and form, making it a favorite choice for bonsai enthusiasts of all levels. In this comprehensive guide, we will delve into the art of caring for Fuji Cherry Bonsai, exploring everything from the selection process to the essential techniques for maintaining its health and beauty. Whether you are a seasoned bonsai enthusiast or a beginner looking to embark on the rewarding journey of bonsai cultivation, this article will provide you with valuable insights and practical tips to ensure the success of your Fuji Cherry Bonsai.

1.1 Understanding the History and Significance of Fuji Cherry Bonsai

Fuji Cherry Bonsai, also known as Prunus incisa, is a tree that has captured the hearts of bonsai enthusiasts around the world. With its delicate pink blossoms and compact size, it brings a touch of elegance and grace to any garden or indoor space. Originating from Japan, this bonsai tree has a rich history and holds deep cultural significance. It symbolizes the transient nature of life and is often associated with beauty, renewal, and the arrival of spring.

1.2 Exploring the Characteristics and Aesthetics of Fuji Cherry Bonsai

The Fuji Cherry Bonsai is renowned for its petite size and stunning display of flowers. Its leaves are small and oval-shaped, with a vibrant green color that adds to its visual appeal. During springtime, the tree bursts into a profusion of pink or white blossoms, creating a breathtaking spectacle. The delicate branches and trunk of the Fuji Cherry Bonsai lend themselves well to various bonsai styles, allowing for artistic expression and creativity. Whether it’s the cascading style, formal upright, or windswept, this bonsai tree can be shaped to embody a range of aesthetic preferences.

2. Selecting the Right Fuji Cherry Bonsai: Essential Considerations

2.1 Choosing the Ideal Species and Varieties of Fuji Cherry Bonsai

When selecting a Fuji Cherry Bonsai, it’s important to consider the species and varieties available. Some popular choices include Prunus incisa ‘Kojo-no-mai’ and Prunus incisa ‘Yae-Kon-dou’. Each variety has its own unique characteristics, such as flower color and growth habit. Researching and understanding the traits of different species and varieties will help you choose the one that best suits your taste and desired aesthetics.

2.2 Evaluating the Health and Vigor of Fuji Cherry Bonsai

To ensure the long-term success of your Fuji Cherry Bonsai, it’s crucial to select a tree that is healthy and vigorous. Look for well-developed roots, vibrant foliage, and an overall robust appearance. Avoid bonsai trees with signs of disease or pests, as this can lead to future problems and difficulties in care.

2.3 Assessing the Age and Development of Fuji Cherry Bonsai

The age and development of a Fuji Cherry Bonsai can greatly impact its potential for growth and future styling. Younger bonsai trees offer more flexibility for shaping and training, while older specimens may already possess impressive trunk thickness and branching. Consider your skill level and personal preferences when choosing between a young or mature bonsai.

3. Understanding the Environmental Needs of Fuji Cherry Bonsai

3.1 Providing the Optimal Light Conditions for Fuji Cherry Bonsai

Like all bonsai trees, Fuji Cherry Bonsai thrives in bright, indirect light. Place your bonsai near a window that receives ample sunlight, but be cautious of excessive heat or direct sunlight, which can scorch the delicate leaves. If natural light is limited, you can supplement it with fluorescent grow lights.

3.2 Maintaining the Ideal Temperature and Humidity Levels

Fuji Cherry Bonsai prefers cool to moderate temperatures, ideally between 50°F to 70°F (10°C to 21°C). Protect the tree from extreme heat or cold, as it can cause stress and damage. Additionally, maintaining proper humidity levels is important for the bonsai’s health. A humidity tray or regular misting can help create a suitable environment, especially during drier seasons or indoor heating.

3.3 Creating a Suitable Air Circulation for Fuji Cherry Bonsai

Adequate air circulation is essential for the overall health of your Fuji Cherry Bonsai. Proper ventilation helps prevent fungal diseases and promotes the exchange of gases. Avoid placing the bonsai in stagnant or heavily congested areas. Regularly exposing it to fresh air, such as during outdoor periods in suitable weather, can greatly benefit its overall well-being.

4. Mastering the Art of Pruning and Shaping Fuji Cherry Bonsai

4.1 Learning the Basics of Pruning and Trimming Fuji Cherry Bonsai

Pruning is a fundamental aspect of maintaining the shape and health of your Fuji Cherry Bonsai. Regularly remove any dead, damaged, or overcrowded branches to promote proper airflow and encourage new growth. Additionally, trimming back the new growth after flowering can help maintain the desired shape and size of your bonsai tree.

4.2 Understanding the Different Pruning Techniques and Styles

There are various pruning techniques and styles that can be applied to your Fuji Cherry Bonsai, depending on your desired aesthetic. These include but are not limited to, clip and grow, thinning, and directional pruning. Research and experimentation will help you determine the best techniques to achieve your desired bonsai style.

4.3 Training and Wiring Fuji Cherry Bonsai to Achieve Desired Shapes

To shape and style your Fuji Cherry Bonsai, training and wiring techniques can be utilized. Training involves gently guiding the branches and trunk into the desired positions over time. Wiring, on the other hand, allows for more immediate shaping by using bonsai wire to hold the branches in place. Care should be taken to avoid applying excessive pressure or leaving wires on for too long, as this can damage the tree. Regular monitoring and adjustments are necessary when using wiring techniques.

By following these essential guidelines, you can cultivate and care for a beautiful Fuji Cherry Bonsai that will bring you joy and admiration for years to come. Remember, bonsai care is an art form, so embrace the journey with patience, creativity, and a touch of humor!

5. Nurturing the Health of Fuji Cherry Bonsai: Watering, Soil, and Fertilization

5.1 Establishing a Proper Watering Routine for Fuji Cherry Bonsai

Watering your Fuji Cherry Bonsai is like finding the perfect balance in a yoga pose – too little water and it’ll wither away, too much water and it’ll drown. So how do you strike that perfect balance? First, you need to understand that Fuji Cherry Bonsai prefer moist soil but not soggy. Stick your finger about an inch into the soil, and if it feels dry, it’s time to water. Don’t worry, it’s not as tricky as mastering a handstand, just keep the soil consistently moist, not bone dry or drenched, and your little cherry tree will flourish.

5.2 Selecting the Appropriate Soil Mix for Fuji Cherry Bonsai

Choosing the right soil for your Fuji Cherry Bonsai is like picking the perfect pair of shoes – it needs to fit just right. These bonsai trees love well-draining soil, so go for a mix that includes organic materials like bark, peat moss, and perlite. Avoid heavy soils that retain too much water, as they can lead to root rot and a very unhappy bonsai. And remember, it’s all about finding that perfect fit for your tree’s roots, so don’t be afraid to experiment with different soil mixes.

5.3 Understanding Fertilization Techniques for Healthy Growth

Fertilizing your Fuji Cherry Bonsai is like giving it a delicious, nutritious snack – it helps it grow strong and healthy. Use a balanced, slow-release fertilizer during the growing seasons of spring and summer. Just like we don’t gorge ourselves on a whole pizza in one sitting (or do we?), avoid over-fertilizing, as it can burn the roots of your bonsai. Follow the instructions on the fertilizer package, and your cherry tree will have all the nourishment it needs to thrive.

6. Protecting Fuji Cherry Bonsai from Pests and Diseases

6.1 Identifying Common Pests that Affect Fuji Cherry Bonsai

Uh-oh, it’s time to play detective and identify the pesky little intruders that might bug your Fuji Cherry Bonsai. Keep an eye out for aphids, spider mites, and scale insects, who seem to think your bonsai is an all-you-can-eat buffet. These critters can suck the life out of your tree, but don’t worry, we’ve got your back.

6.2 Preventive Measures to Keep Pests and Diseases at Bay

Putting up a “No Vacancy” sign for pests and diseases is easier than you might think. Keep your bonsai healthy and strong by providing proper care, including watering, fertilizing, and pruning. A healthy bonsai is like Fort Knox, impenetrable to pests and diseases. Also, make it a habit to inspect your tree regularly, catch any unwelcome guests early on, and take appropriate action.

6.3 Natural and Chemical Treatments

When all else fails and your Fuji Cherry Bonsai is under attack, it’s time to bring in the big guns. Natural treatments like neem oil and insecticidal soap can help get rid of those pesky pests and keep your bonsai in tip-top shape. If the situation escalates, you can consider using chemical treatments, but be sure to follow the instructions carefully and handle them with caution. Remember, the goal is to protect your bonsai, not unleash chaos in your garden.In conclusion, cultivating Fuji Cherry Bonsai can be a truly rewarding and fulfilling experience. With proper care and attention, this delicate tree can bring beauty, tranquility, and a sense of accomplishment to any bonsai collection. By following the guidelines outlined in this comprehensive care guide, you will have the knowledge and tools to nurture your Fuji Cherry Bonsai and watch it flourish over time. Remember, bonsai cultivation is an art that requires patience and dedication, but the results are truly worth it. So go ahead, embrace the art of caring for Fuji Cherry Bonsai and enjoy the timeless beauty it brings to your life.

FAQ

1. Can I grow Fuji Cherry Bonsai indoors?

Fuji Cherry Bonsai prefers to be grown outdoors, as it requires ample sunlight and fresh air to thrive. However, during the winter months or in regions with extreme weather conditions, it is possible to grow Fuji Cherry Bonsai indoors temporarily. Just ensure that it receives sufficient natural light and is protected from drafts.

2. How often should I water my Fuji Cherry Bonsai?

The watering frequency for Fuji Cherry Bonsai depends on various factors such as climate, pot size, and soil type. As a general rule, it is crucial to check the moisture level of the soil regularly. Water the bonsai when the top layer of soil feels slightly dry, but avoid overwatering, as it can lead to root rot. A well-draining soil mix and careful observation will help you determine the ideal watering schedule for your Fuji Cherry Bonsai.

3. Can I shape my Fuji Cherry Bonsai into different styles?

Absolutely! Fuji Cherry Bonsai can be shaped into various styles, including formal upright, cascade, semi-cascade, and slanting, among others. However, shaping should be done gradually and with careful consideration of the tree’s health and growth patterns. Pruning, wiring, and training techniques can be employed to achieve the desired shape and form of your Fuji Cherry Bonsai.

4. How do I protect my Fuji Cherry Bonsai from pests and diseases?

To protect your Fuji Cherry Bonsai from common pests like aphids, spider mites, and scale insects, it is important to regularly inspect the tree for any signs of infestation. If pests are detected, appropriate measures such as using insecticidal soaps or natural remedies like neem oil can be applied. As for diseases, maintaining proper hygiene, providing adequate airflow, and using well-draining soil can help prevent most fungal infections. If necessary, fungicides can be used, but it is always best to consult with experts or experienced bonsai growers for specific advice on pest and disease management.

How to Grow and Care for Juniper Bonsai

Welcome to the world of Juniper Bonsai, a fascinating and rewarding art form that combines horticulture and aesthetics. Juniper Bonsai is derived from the Juniperus genus of trees and shrubs, known for their resilience and ability to thrive in various climates. These miniature trees, meticulously grown and shaped, encapsulate the beauty and tranquility of nature in a small, captivating package. In this article, we will explore the art of growing and caring for Juniper Bonsai, covering everything from selecting the right variety to pruning techniques and pest management. Whether you are a seasoned bonsai enthusiast or a beginner looking to embark on this journey, this guide will provide you with the essential knowledge to nurture and cultivate your own stunning Juniper Bonsai tree.

1. Introduction to Juniper Bonsai

1.1 What is Juniper Bonsai?

If you’ve ever wanted a tree that fits on a coffee table, then juniper bonsai is your new best friend. Juniper bonsai is a miniature version of the iconic juniper tree, carefully cultivated to fit in a small pot. It’s like having a tiny forest in your own home, except with less wildlife and more pruning.

1.2 History and Significance of Juniper Bonsai

Juniper bonsai has a rich history spanning centuries. Originating in China and later popularized in Japan, these tiny trees have been cherished for their aesthetic beauty and symbolic significance. In the world of bonsai, juniper bonsai is often revered for its resilience, longevity, and ability to withstand harsh conditions. It’s like the Chuck Norris of the bonsai world, except with more finesse and fewer roundhouse kicks.

2. Selecting the Right Juniper Bonsai Variety

2.1 Understanding Different Juniper Bonsai Varieties

Just like there are different flavors of ice cream, there are different varieties of juniper bonsai. From the versatile Juniperus procumbens to the elegant Juniperus rigida, each variety brings its own unique characteristics to the bonsai table. It’s like assembling a diverse squad of miniature trees, ready to impress your guests and make your neighbors jealous.

2.2 Factors to Consider when Choosing a Juniper Bonsai

Choosing the right juniper bonsai is like finding the perfect partner compatibility is key. Factors to consider include the growth pattern, foliage type, and overall shape of the tree. Make sure you find a juniper bonsai that matches your aesthetic preferences and fits well with the space you have available. It’s like finding the yin to your yang, but with less soul-searching and more horticulture.

3. Essential Tools and Materials for Juniper Bonsai Care

3.1 Basic Tools for Juniper Bonsai Care

To care for your juniper bonsai, you’ll need a few basic tools. These include concave cutters for precise pruning, wire cutters for shaping branches, and a pair of chopsticks for those important bonsai conversations. Okay, maybe not the last one, but it’s always good to have chopsticks nearby for a quick snack break.

3.2 Required Materials for Juniper Bonsai Care

Apart from tools, you’ll also need some materials to keep your juniper bonsai happy. This includes a well-draining soil mix, a bonsai pot to showcase your tree’s swag, and some wire for training those branches to strike a pose. Think of it as a mini spa day for your bonsai, complete with a trendy pot and a soil massage.

4. Proper Placement and Sunlight Requirements

4.1 Identifying Optimal Placement for Juniper Bonsai

Finding the perfect spot for your juniper bonsai is like playing a game of bonsai hide-and-seek. You’ll want to place it somewhere that provides a balance of light and shade, avoiding extreme temperature fluctuations and drafty spots. Think of your juniper bonsai as a diva that prefers the Goldilocks zone—not too hot, not too cold, just right.

4.2 Understanding Sunlight Needs for Juniper Bonsai

Sunlight is like fuel for your juniper bonsai—it needs just the right amount to thrive. Most juniper bonsai varieties love a good dose of direct sunlight, but be careful not to fry them like an overcooked pancake. Keep an eye on their sunbathing sessions and make sure they get enough shade breaks to prevent sunburn. It’s like finding the perfect balance between a solar panel and a beach umbrella.

Now that you’re armed with the basics of growing and caring for juniper bonsai, it’s time to embark on your miniature tree journey. Remember, bonsai care is a combination of art and science, but with a dash of whimsy thrown in. So grab your tools, embrace your inner bonsai artist, and let your juniper bonsai thrive!

5. Watering and Fertilizing Juniper Bonsai

5.1 Watering Techniques for Juniper Bonsai

Watering your Juniper bonsai is like finding the perfect balance in a relationship. Too much water, and it may drown; too little, and it may wither away. So, how do you know when and how much to water?

The key is to keep the soil moist but not soggy. Stick your finger into the soil about an inch deep, and if it feels dry, it’s time to water. Use a watering can or a gentle spray nozzle to ensure even watering throughout the pot.

Remember, Juniper bonsai prefers well-drained soil, so avoid overwatering or letting it sit in a tray of water. And don’t be surprised if your Juniper bonsai demands a little extra hydration during the hot summer months.

5.2 Fertilizing Guidelines for Juniper Bonsai

Juniper bonsai, like a diva, needs its fair share of nutrients to stay healthy and vibrant. Fertilizing is like giving it a mini spa treatment to keep it looking its best.

Use a balanced, organic fertilizer specifically formulated for bonsai trees. During the growing season from spring to autumn, feed your Juniper bonsai every two weeks. But hold back during winter when it’s taking a well-deserved rest, and fertilize only once every two months.

Remember, bonsai trees are like high-maintenance houseplants. So, be sure not to overdo the fertilizer, as it can lead to burnt roots. Follow the instructions on the packaging, and your Juniper bonsai will thank you with lush greenery.

6. Pruning and Shaping Techniques

6.1 Importance of Pruning for Juniper Bonsai

If your Juniper bonsai were a hairstyle, pruning would be the equivalent of going to the salon for a trim. It enhances the tree’s shape, encourages new growth, and keeps it looking sharp.

Regular pruning allows you to maintain the desired shape and size of your Juniper bonsai. Remove any dead, diseased, or damaged branches, and thin out dense areas to improve airflow and sunlight penetration. This will help keep your tree healthy and prevent pests and diseases from taking hold.

Pruning is best done during the active growth period in spring or early summer. Remember to use sharp, clean tools and sterilize them between cuts to avoid spreading any potential diseases.

6.2 Different Shaping Techniques for Juniper Bonsai

Shaping your Juniper bonsai is like sculpting a masterpiece. You have the power to transform it into various styles, depending on your artistic vision.

Some popular shaping techniques for Juniper bonsai include the formal upright style, informal upright style, cascade style, and windswept style. Each style requires careful wiring, bending, and trimming to achieve the desired look.

Remember, shaping a bonsai takes time and patience. Don’t rush the process, and let your creativity shine through. With a little practice, you’ll soon become a bonsai hairstylist extraordinaire.

7. Preventing and Managing Juniper Bonsai Pests and Diseases

7.1 Common Pests Affecting Juniper Bonsai

Pests are like unwanted guests crashing a party—annoying and potentially destructive. Protect your Juniper bonsai by keeping an eye out for these common pests that may try to join the party:

  • Spider mites: These tiny arachnids suck the sap from the leaves, causing yellowing and webbing.
  • Scale insects: These sneaky insects attach themselves to the branches and suck out the plant’s juices, leading to weakened growth.
  • Aphids: These tiny, sap-sucking insects can multiply quickly and cause leaf curling and general decline.

7.2 Effective Pest Prevention and Control Measures

To prevent these uninvited guests from wreaking havoc on your Juniper bonsai, regularly inspect the foliage and branches. If you spot any pests, act swiftly!

Start by gently washing the affected areas with a spray of water to dislodge the pests. For persistent infestations, you can use an organic insecticidal soap or horticultural oil spray. Just remember to follow the instructions carefully to avoid harming your bonsai.

Prevention is key, so maintain a clean and healthy growing environment for your Juniper bonsai. Remove any dead leaves or debris that may attract pests, and avoid overcrowding your bonsai with other plants.

7.3 Identifying and Treating Juniper Bonsai Diseases

Diseases can hit your Juniper bonsai like a bad case of the flu. Keep an eye out for these common diseases and take appropriate action to nurse your bonsai back to health:

  • Cedar apple rust: This fungal disease causes orange, gelatinous growths on the branches and affects both the Juniper bonsai and nearby apple trees.
  • Phomopsis tip blight: This fungal disease causes browning and dieback of the tips of branches, leading to an overall decline in the tree’s health.

If you suspect your Juniper bonsai has a disease, promptly remove and destroy the affected branches or foliage. Avoid overwatering and ensure good airflow around the tree. If the problem persists, consult a local horticulturist or bonsai expert for specific treatment options.

8. Repotting and Root Maintenance for Juniper Bonsai

8.1 When and How to Repot a Juniper Bonsai

Repotting your Juniper bonsai is like giving it a fresh start in a bigger home. It provides the tree with fresh soil, promotes healthy root growth, and prevents it from becoming root-bound.

The best time to repot your Juniper bonsai is in early spring, just before the growing season begins. Carefully remove the tree from its pot, trim any circling roots, and repot it into a slightly larger container. Use well-draining bonsai soil to ensure proper water retention and airflow.

Remember, repotting can be stressful for your bonsai, so be gentle and avoid disturbing the root ball too much. After repotting, place your bonsai in a shaded area for a few weeks to allow it to recover before gradually reintroducing it to full sunlight.

8.2 Proper Root Maintenance Techniques

Root maintenance is like providing your Juniper bonsai with a comfortable pair of shoes. It ensures healthy root development and overall vitality.

Regularly check the roots of your Juniper bonsai to make sure they’re not growing out of control. Trim any long or tangled roots, and gently comb out the root ball with a root rake to separate and aerate the roots.

Remember to repot your Juniper bonsai every two to three years to keep it happy and prevent it from becoming root-bound. And don’t forget to reward your bonsai with a little extra fertilizer after repotting to help it recover and grow strong.

In conclusion, growing and caring for Juniper Bonsai is an art form that requires patience, skill, and a deep appreciation for nature’s beauty. By following the guidelines outlined in this article, you can embark on a fulfilling journey of tending to these miniature trees, watching them thrive and evolve over time. Remember to enjoy the process and embrace the unique character of each Juniper Bonsai variety. With proper care and attention, your Juniper Bonsai can become a stunning centerpiece, bringing a sense of tranquility and natural harmony to your living space. Happy bonsai gardening!

FAQ

1. Can I grow Juniper Bonsai indoors?

While it is possible to grow Juniper Bonsai indoors, it is important to note that Junipers thrive in outdoor conditions. They require direct sunlight and proper airflow to thrive. If growing indoors, ensure that you place the bonsai near a bright window or provide supplemental grow lights to mimic natural sunlight.

2. How often should I water my Juniper Bonsai?

The watering frequency for Juniper Bonsai depends on several factors, including the climate, pot size, and soil type. As a general rule, it is best to water thoroughly when the topsoil appears dry, but before the tree becomes completely dry. Check the moisture level by inserting a finger into the soil to ensure it is moist but not waterlogged.

3. Do Juniper Bonsai require special soil or fertilizer?

Juniper Bonsai thrive in well-draining soil that allows water to flow freely. A mix of bonsai-specific soil, such as Akadama, pumice, and lava rock, is ideal. As for fertilizer, a balanced bonsai fertilizer is recommended, applied during the growing season. Follow the instructions on the fertilizer package and avoid over-fertilization, which can harm the tree.

4. How often should I prune and shape my Juniper Bonsai?

Pruning and shaping frequency depends on the growth rate and desired shape of your Juniper Bonsai. Regular pruning is necessary to maintain its shape and enhance ramification. It is best to prune during the active growing season, typically in spring or early summer. However, avoid excessive pruning, as it may weaken the tree. Consult pruning guides or seek guidance from experienced bonsai enthusiasts to develop and maintain the desired shape of your Juniper Bonsai.