How to Grow Cherry Blossom (Sakura) Bonsai from Seed?

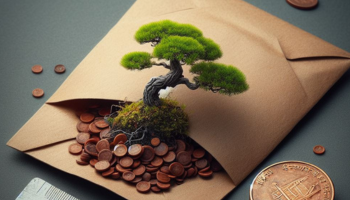
Welcome to our comprehensive guide on how to grow cherry blossom bonsai from seed. Cherry blossom bonsai, also known as sakura bonsai, is a captivating art form that allows you to cultivate the iconic beauty of cherry blossom trees in miniature form. These delicate and elegant trees hold immense cultural and symbolic significance, particularly in Japanese culture, representing the transient nature of life and the beauty of the changing seasons. In this article, we will delve into the step-by-step process of growing cherry blossom bonsai from seeds, from selecting the right seeds to nurturing and shaping the bonsai into a stunning masterpiece. Get ready to embark on a rewarding journey of cultivating your very own cherry blossom bonsai tree, bringing the enchanting beauty of blooming cherry blossoms into your home or garden.

1.1 What is Cherry Blossom Bonsai?

Cherry Blossom Bonsai is the beautiful art of cultivating cherry blossom trees in miniature form. By carefully nurturing these tiny trees, you can recreate the beauty and serenity of cherry blossom season right in your own home or garden.

1.2 The Cultural and Symbolic Significance of Cherry Blossom Bonsai

Cherry blossoms hold a special place in many cultures, particularly in Japan, where they are known as “sakura.” These delicate flowers symbolize the transient nature of life and the beauty of impermanence. By growing a cherry blossom bonsai, you’re not just cultivating a tree, but also embracing a meaningful tradition that has captivated people for centuries.

2. Selecting the Right Cherry Blossom Bonsai Seeds

2.1 Understanding Different Cherry Blossom Varieties

Not all cherry blossom trees are created equal. Different varieties offer unique characteristics, such as flower color, size, and growth patterns. Take the time to research and select a cherry blossom variety that resonates with you and suits your growing conditions.

2.2 Choosing High-Quality Cherry Blossom Bonsai Seeds

When it comes to growing from seed, quality matters. Look for reputable seed suppliers that specialize in bonsai or cherry blossom trees. Ensure that the seeds are fresh, viable, and properly stored to maximize your chances of success. Don’t be tricked into buying “mystery” seeds, or you might end up with a surprise garden gnome instead of a cherry blossom tree.

3. Preparing the Soil and Seedling Containers

3.1 Selecting the Appropriate Soil Mix for Cherry Blossom Bonsai

Cherry blossom bonsai thrive in well-draining soil that retains moisture without becoming waterlogged. A mix of organic bonsai soil, perlite, and coarse sand creates an ideal growing medium. Avoid using regular garden soil, as it can suffocate the delicate roots and lead to problems down the road.

3.2 Preparing the Seedling Containers for Planting

Choose shallow containers with sufficient drainage holes to accommodate the bonsai’s roots. Fill the containers with the prepared soil mix, leaving enough space for the seedlings to grow. Remember, we’re aiming for miniatures, not giants, so resist the urge to plant them in the equivalent of a mansion-sized pot.

4. Germinating Cherry Blossom Bonsai Seeds

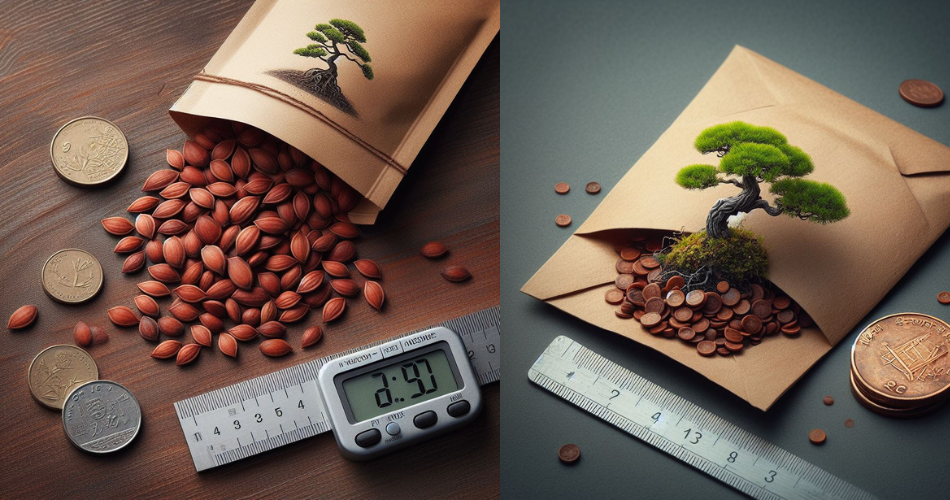
4.1 Soaking the Cherry Blossom Bonsai Seeds

Prepare a cup of warm water and gently place your cherry blossom seeds in it. Let them soak for about 24 hours, giving them a luxurious spa treatment and encouraging them to shed their hard exterior. Don’t forget to play some relaxing spa music to set the mood!

4.2 Creating the Ideal Germination Environment

To give your seeds the perfect start, you need to create a warm and moist environment. You can achieve this by placing the soaked seeds in a plastic bag or seed tray covered with a clear lid or plastic wrap. Keep them in a cozy spot, like the top of your refrigerator or a sunny windowsill.

4.3 Planting the Cherry Blossom Bonsai Seeds

Once your seeds have sprouted tiny roots, it’s time to plant them in their prepared containers. Gently make a small hole in the soil for each seed and place them carefully, root-side down. Cover them lightly with soil, like tucking them in with a cozy blanket, and water gently. Now, all that’s left to do is wait patiently as your cherry blossom bonsai begins its journey from seed to stunning miniature tree.

Remember, growing a cherry blossom bonsai from seed requires patience, care, and a touch of whimsy. Enjoy the process, embrace any challenges that come your way, and celebrate the eventual blooming of these enchanting trees in your own miniature world.

5. Nurturing and Caring for Cherry Blossom Bonsai Seedlings

Growing cherry blossom bonsai from seed can be a rewarding and fulfilling experience. Once your seedlings have sprouted, it’s important to provide them with the care they need to thrive. Here are some essential tips for nurturing and caring for your cherry blossom bonsai seedlings.

5.1 Providing Proper Watering and Drainage

Watering is a crucial aspect of bonsai care, and cherry blossom bonsai are no exception. It’s important to strike a balance between keeping the soil moist and avoiding overwatering. Remember, cherry blossom bonsai prefer slightly moist soil, not waterlogged swamps!

To ensure proper drainage, place your bonsai pot on a tray filled with pebbles and water. This will prevent the roots from sitting in excess water, which can lead to root rot. A well-draining soil mix, composed of a combination of organic matter and inorganic materials like perlite or sand, can also help maintain the ideal moisture level.

5.2 Ensuring Adequate Sunlight and Temperature

Cherry blossom bonsai thrive in bright, indirect sunlight, so make sure to place them near a window or in an area that receives sufficient light throughout the day. However, be cautious of intense afternoon sunlight as it can scorch the delicate leaves.

In terms of temperature, cherry blossom bonsai prefer a cool to mild climate. Keep them away from drafts or extreme temperature fluctuations. If you live in a region with harsh winters, consider protecting your bonsai with a frost cloth or moving it to a sheltered location during the coldest months.

5.3 Fertilizing and Nutrient Requirements for Cherry Blossom Bonsai Seedlings

Feeding your cherry blossom bonsai seedlings with the right nutrients is essential for their healthy growth. During the growing season, which typically spans from spring to autumn, use a balanced liquid fertilizer diluted according to the manufacturer’s instructions. Apply it every two to three weeks to provide your bonsai with the necessary nutrients.

Remember, a little goes a long way when it comes to fertilizing bonsai. Overfertilization can lead to excessive foliage growth and weaken the overall health of your cherry blossom bonsai. So, be cautious and resist the temptation to turn your bonsai into a “monster tree” with an overdose of nutrients.

6. Pruning and Shaping Cherry Blossom Bonsai Trees

Pruning and shaping are essential aspects of bonsai cultivation, and they play a significant role in creating the desired aesthetic for your cherry blossom bonsai. Here are some tips to get you started on the path to bonsai artistry.

6.1 Understanding Pruning Techniques for Cherry Blossom Bonsai

Pruning helps maintain the shape and size of your bonsai while encouraging new growth. When it comes to cherry blossom bonsai, it’s best to prune during the dormant season, which is usually winter. Remove any dead or crossing branches, as well as any growth that compromises the overall design of your bonsai. Remember, less is more when it comes to pruning – only remove what is necessary to maintain the tree’s form.

6.2 Shaping and Training the Bonsai’s Structure

Shaping your cherry blossom bonsai is a creative process that requires patience and a vision for the final result. Use wire to gently guide the branches into the desired position. However, be cautious not to wrap the wire too tightly to avoid damaging the delicate branches. As the tree grows, regularly check the wire and adjust or remove it as necessary to prevent it from digging into the bark.

Remember, bonsai is a living art form, and your cherry blossom bonsai will continue to evolve over time. Embrace the process and enjoy the journey of shaping your miniature masterpiece.

7. Promoting Healthy Growth and Blooming of Cherry Blossom Bonsai

Ensuring the vigorous growth and beautiful blooming of your cherry blossom bonsai requires creating the right conditions and encouraging its natural tendencies. Here are some tips to help you promote healthy growth and abundant blossoming.

7.1 Providing the Right Conditions for Growth

Cherry blossom bonsai thrive in a well-ventilated environment with consistent temperatures and humidity. Avoid exposing them to extremes, such as hot, dry air or overly damp conditions. Maintaining a stable environment will help your bonsai focus on its growth and reduce the risk of stress-related issues.

Additionally, periodically check the roots of your bonsai to ensure they are not becoming pot-bound. If they are, consider repotting your bonsai in fresh soil to provide it with the necessary space to grow and thrive.

7.2 Encouraging Flowering and Blossoming

Cherry blossom bonsai are admired for their stunning flowers, so you’ll want to encourage their blooming potential. Providing a period of dormancy during winter can help stimulate flower production in the following spring. Ensure your bonsai receives the necessary chill hours by placing it in a cool location away from heating sources.

To promote flowering, some bonsai enthusiasts also use techniques like defoliation and pinching, which involve selectively removing leaves or bud tips. However, these techniques require knowledge and experience, so it’s best to consult a bonsai expert if you’re considering them.

8. Troubleshooting Common Issues in Growing Cherry Blossom Bonsai from Seed

Even the most experienced bonsai growers encounter challenges along the way. Here are some common issues you may face while growing cherry blossom bonsai from seed and how to tackle them.

8.1 Identifying and Addressing Pest Problems

Pests can be pesky little critters that disrupt the tranquility of your cherry blossom bonsai. The most common pests include aphids, spider mites, and mealybugs. Keep a keen eye out for any signs of infestation such as distorted leaves, webbing, or sticky residue.

If you spot any unwelcome visitors, there are various remedies available. For minor infestations, you can try wiping the affected leaves with a damp cloth or spraying a gentle solution of water and mild soap. However, for more severe cases, consider using organic insecticides or seeking advice from a local nursery or bonsai expert to identify the best course of action.

Remember, perseverance and a little TLC will help you overcome these hurdles and continue on your bonsai journey with grace and style. Happy growing!

By following the steps outlined in this article, you can embark on a fulfilling journey of growing your very own cherry blossom bonsai from seed. With patience, care, and attention to detail, you will witness the transformation of tiny seeds into magnificent bonsai trees that showcase the ethereal beauty of cherry blossoms. Remember to maintain proper care and continue learning about bonsai cultivation to ensure the long-term health and vitality of your cherry blossom bonsai. May your bonsai bring you joy, tranquility, and a deep appreciation for the beauty of nature.

FAQs

1. Can I grow cherry blossom bonsai from seeds, or is it better to start with a pre-grown tree?

While it is possible to grow cherry blossom bonsai from seeds, it requires patience and dedication. Starting with pre-grown trees or nursery plants can be a quicker and more reliable option for beginners. However, growing from seeds allows you to experience the entire lifecycle of the bonsai, from germination to maturity.

2. How long does it take for cherry blossom bonsai seeds to germinate?

The germination time for cherry blossom bonsai seeds can vary, but it typically takes around 2 to 3 weeks for the seeds to sprout. However, it’s important to note that cherry blossom bonsai trees can take several years to develop into mature, flowering specimens. Cultivating bonsai requires patience and a long-term commitment.

3. What are some common challenges or problems in growing cherry blossom bonsai from seed?

Some common challenges in growing cherry blossom bonsai from seed include low germination rates, fungal infections, improper watering, and pest infestations. It is crucial to maintain a sterile and controlled environment, provide appropriate care, and promptly address any issues that arise. Regular monitoring and research will help you overcome these challenges and ensure the health of your bonsai.

4. Can cherry blossom bonsai be grown indoors?

Cherry blossom bonsai can be grown indoors, but they require specific conditions to thrive. These include providing sufficient natural or artificial light, maintaining adequate humidity levels, and ensuring proper ventilation. While indoor cultivation is possible, placing the bonsai outdoors during the spring to experience natural sunlight and temperature fluctuations can encourage healthier growth and better blooming.

How to Grow Your Own Avocado Bonsai Tree at Home

If you’re a plant enthusiast and looking for a unique addition to your indoor garden, growing your own avocado bonsai tree might be just what you need. Not only does it add life and beauty to your space, but it’s also a fun and rewarding experience.

Cultivating an avocado bonsai tree at home requires some patience and dedication but is relatively easy once you know the steps. In this article, I will guide you through the process of growing and caring for your own avocado bonsai tree.

Key Takeaways:

  • Growing an avocado bonsai tree is a fun and rewarding experience.
  • It requires patience and dedication but is relatively easy once you know the steps.
  • Cultivating an avocado bonsai tree at home allows you to enjoy the beauty of this miniature tree in your own space.
  • Choosing the right avocado variety is crucial for successful bonsai cultivation.
  • Proper care, including watering and pruning, is necessary for the healthy growth of the plant.

Choosing the Right Avocado Variety for Bonsai

Avocados are a popular fruit, but not all of them are well-suited for bonsai cultivation. It’s important to choose the right variety that can thrive in a miniature environment.

When selecting an avocado bonsai tree, consider the size of the tree’s leaves. Generally, smaller leaves lend themselves better to bonsai pruning and shaping. Some recommended varieties for avocado bonsai include:

  • Hass: A popular variety with small, dark green leaves and a compact growth habit. It also produces delicious fruit.
  • Fuerte: Another popular variety with medium-sized, oval leaves. It’s a hardy tree that can adapt well to different growing conditions.
  • Bacon: This variety has a unique growth habit that lends itself well to bonsai cultivation. Its leaves are slightly larger than other varieties but can still be pruned and shaped effectively.

It’s also important to consider the climate in which the avocado variety will be grown. Some varieties may not do well in colder temperatures or high humidity.

By selecting the right avocado variety, you’ll increase your chances of successfully growing a healthy and beautiful bonsai tree.

Planting and Caring for Your Avocado Bonsai Tree

Now that you have selected the right avocado variety, it’s time to plant and care for your bonsai tree. Follow these step-by-step instructions to ensure healthy growth:

Planting

Choose a pot that’s at least 8 inches in diameter and filled with well-draining soil. Plant your tree in the soil, making sure the root ball is level with the soil surface. Water the soil thoroughly.

Pruning

Trim back the top of your tree to just above a leaf bud. This will encourage bushier, fuller growth. Trim back any branches that grow too long or cross over other branches.

Watering

Water your avocado bonsai tree regularly, but avoid overwatering. Check the moisture level of the soil using a moisture meter and water when the top inch feels dry.

Maintenance Tips

Avocado bonsai trees thrive in bright, indirect sunlight. Place your tree near a sunny window and rotate it every few days to ensure even growth. Fertilize your tree with a balanced houseplant fertilizer every two to three months.

With these tips, you can maintain a healthy and thriving avocado bonsai tree. Keep monitoring your tree’s growth and adjust your care as necessary.

Troubleshooting Common Issues with Avocado Bonsai Trees

Despite your best efforts, your avocado bonsai tree may run into some common issues. Pests, diseases, and nutrient deficiencies can all affect the health and growth of your plant. It’s important to identify these problems early and take appropriate measures to address them.

Common Problems

Here are some of the most common issues you may encounter with your avocado bonsai:

  • Yellowing leaves: This can be a sign of nutrient deficiency or overwatering.
  • Brown spots: This could be due to fungal diseases or pests.
  • Pest infestation: Spider mites and thrips are common pests that can affect avocado bonsai trees.

Troubleshooting Tips

If you notice any of these issues, here are some troubleshooting tips to help you get your avocado bonsai tree back on the right track:

  1. Check soil moisture: Make sure you’re not overwatering your tree and that the soil isn’t too dry.
  2. Nutrient deficiency: Use a fertilizer specifically designed for avocado trees or try adding an organic compost to the soil.
  3. Pest control: Use an insecticidal soap or neem oil to control pests.
  4. Disease control: Remove affected leaves or branches and use a fungicide to control fungal diseases.

By following these tips, you’ll be able to troubleshoot and resolve common issues with your avocado bonsai tree.

Conclusion

In conclusion, growing an avocado bonsai tree can be a delightful and engaging activity for any plant enthusiast. By following the steps and techniques outlined in this article, you can successfully cultivate your own homegrown avocado bonsai tree. Remember to carefully choose the right avocado variety for bonsai, provide the necessary care and maintenance, and troubleshoot any potential issues that may arise.

With patience and dedication, you can watch your avocado bonsai tree grow and transform into a stunning miniature tree that adds life and vibrancy to any space in your home. So why wait? Start your avocado bonsai journey today and enjoy the beauty of this fascinating plant!

FAQ

How long does it take for an avocado bonsai tree to grow?

The growth rate of an avocado bonsai tree can vary depending on various factors such as the variety, growing conditions, and care provided. On average, it takes about 3-5 years for an avocado bonsai tree to grow and develop into a mature tree.

What are the best avocado varieties for bonsai?

Some recommended avocado varieties for bonsai cultivation include ‘Hass,’ ‘Bacon,’ ‘Fuerte,’ and ‘Reed.’ These varieties are known for their compact growth habit and adaptability to bonsai techniques.

How often should I water my avocado bonsai tree?

The watering frequency for an avocado bonsai tree depends on environmental conditions, such as temperature and humidity. Generally, it’s best to water the tree when the top inch of soil feels dry. Avoid overwatering, as it can lead to root rot. Regularly monitor the moisture levels and adjust the watering schedule accordingly.

What should I do if my avocado bonsai tree is infested with pests?

If you notice pests on your avocado bonsai tree, such as aphids or spider mites, it’s essential to take immediate action. Begin by manually removing the pests using a soft brush or cloth. If the infestation persists, you can use organic pest control methods or consult a professional for guidance.

What are some common issues that avocado bonsai trees may face?

Avocado bonsai trees may encounter several common issues, including leaf browning, wilting, and yellowing leaves. These problems can be caused by factors such as overwatering, inadequate sunlight, nutrient deficiencies, or pests. Proper care, regular monitoring, and timely intervention can help address and prevent these issues.

Mastering Philodendron Camposportoanum Care: A Comprehensive Guide

Philodendron Camposportoanum, also known as the Velvet-Leaf Philodendron, is a stunning tropical plant that has gained popularity among plant enthusiasts. With its unique velvety leaves and relatively easy care requirements, this species has become a favorite choice for both beginner and experienced plant owners. This ultimate care guide will provide valuable insights into the ideal growing conditions, watering and humidity requirements, light and temperature preferences, soil and fertilizer needs, pruning and propagation techniques, common pests and diseases, as well as essential tips for successful care and maintenance of Philodendron Camposportoanum. Whether you are a seasoned plant lover or just starting your journey, this comprehensive guide will equip you with the knowledge and skills necessary to cultivate a thriving and thriving Philodendron Camposportoanum in your home or garden.

1.1 What is Philodendron Camposportoanum?

If you’re tired of the same old, basic houseplants and are craving something a little more unique, let me introduce you to the Philodendron Camposportoanum. It’s like the hipster cousin of the Philodendron family, bringing a touch of coolness to your indoor jungle. Native to the rainforests of Brazil, this plant is sure to catch the eye with its stunning foliage and quirky charm.

1.2 Features and Characteristics

The Philodendron Camposportoanum is known for its heart-shaped leaves that come in a vibrant shade of green with prominent venation. But what really sets it apart from the crowd are the unique fringed edges on its leaves, giving it a touch of whimsy that screams “I’m not your average houseplant!”

This little attention seeker enjoys showing off its climbing abilities, so be prepared to provide it with some support or a trellis if you want it to reach its full potential. Don’t worry though, it won’t take up your entire living room – it’s a compact plant that stays relatively small, making it perfect for those with limited space.

2. Ideal Growing Conditions for Philodendron Camposportoanum

2.1 Light Requirements

When it comes to lighting, the Philodendron Camposportoanum prefers bright, indirect light. It’s like the plant version of Goldilocks – not too much, not too little, just the right amount. So, find a spot near a window where it can soak up some rays without getting scorched. If you notice its leaves starting to turn yellow, it’s a sign that it’s getting too much sun, so adjust accordingly.

2.2 Temperature Range

This tropical beauty thrives in temperatures between 65°F and 85°F (18°C to 29°C). It’s like a diva that likes to keep things comfortably warm. Avoid exposing it to drafts or sudden temperature changes, as it prefers a stable environment. So, keep it cozy and it will reward you with its stunning foliage.

2.3 Humidity Levels

Philodendron Camposportoanum is all about that moisture, so it will appreciate a humid environment. If you live in a dry climate, don’t fret! You can increase humidity by placing a water tray near the plant or misting its leaves regularly. It’s like giving it a little spa treatment and who doesn’t love a pampered plant?

2.4 Suitable Potting Options

When it comes to choosing the perfect home for your Philodendron Camposportoanum, opt for a well-draining potting mix. You don’t want it sitting in soggy soil, as that can lead to root rot – a definite buzzkill. A mix of peat moss, perlite, and orchid bark will keep it happy and ensure its roots can breathe. Plus, it’s like giving it a fancy, designer outfit to show off to all your friends.

3. Watering and Humidity Requirements

3.1 Proper Watering Techniques

Watering your Philodendron Camposportoanum is like finding the balance in life – not too much, not too little. Allow the top inch or so of soil to dry out before watering it again. Stick your finger in the soil to check its moisture level, or use a moisture meter if you want to feel like a high-tech plant parent. Remember, overwatering is a no-no, so give it a little sip, not a full-on water fountain.

3.2 Understanding Moisture Needs

This plant enjoys being kept slightly moist, but not waterlogged. Think of it as a plant that likes to keep its toes damp, but not swimming in a lake. Too much water can lead to root rot, which is like a death sentence for this beauty. So, avoid the soggy situation and find that perfect balance of moisture.

3.3 Managing Humidity Levels

As mentioned earlier, Philodendron Camposportoanum appreciates a humid environment. You can increase humidity by misting its leaves with water or placing it near a humidifier. It’s like giving it a tropical vacation without the hassle of airport security.

4. Proper Light and Temperature for Philodendron Camposportoanum

4.1 Finding the Right Amount of Light

When it comes to light, this plant wants to be just like Goldilocks – not too bright, not too dim, but just right. Find a spot near a window where it can bask in bright, indirect light. If the leaves start to look pale or leggy, it’s a sign that it’s not getting enough light. So, move it closer to the window and let it soak up those rays.

4.2 Avoiding Direct Sunlight

While Philodendron Camposportoanum enjoys bright light, direct sunlight can be a bit too harsh for its delicate leaves. It’s like a plant that’s sensitive to sunburn. So, protect it from those scorching rays by placing it in a spot where it receives filtered or indirect light. It’s like giving it a stylish parasol to shield it from the sun.

4.3 Maintaining Optimal Temperature Range

This plant likes to keep things warm, but not too hot. It’s like a diva that prefers a cozy, comfortable environment. Maintain temperatures between 65°F and 85°F (18°C to 29°C) to keep it happy. Avoid exposing it to drafts or extreme temperature fluctuations, as it can cause stress. So, find that sweet spot and keep the temperature just right for your Camposportoanum companion.

5. Soil and Fertilizer Needs

5.1 Choosing the Right Soil Mix

When it comes to keeping your Philodendron Camposportoanum happy, the right soil mix is key. Think of it like finding the perfect foundation for a beautiful building – you want something sturdy and well-draining. A well-balanced mix of peat moss, perlite, and a touch of sand should do the trick. This will ensure that excess water doesn’t hang around for too long, preventing root rot and other nasty problems.

5.2 Fertilizing Schedule

Now that you have your soil sorted, it’s time to talk about feeding your Philodendron Camposportoanum. These plants aren’t too demanding when it comes to fertilizer, but a little boost every now and then can go a long way. During the growing season (spring and summer), feed your plant once a month with a balanced fertilizer. In the cooler months, you can cut back to every two to three months. Remember, it’s always better to under-fertilize than overdo it. Nobody likes a hangry plant!

5.3 Nutrient Requirements

Just like humans need their vitamins, Philodendron Camposportoanum also has some specific nutrient needs. The three main macronutrients they crave are nitrogen, phosphorus, and potassium. These can be found in balanced fertilizers labeled with an NPK ratio (those numbers on the packaging). Aim for a ratio of 10-10-10 or something similar. Additionally, don’t forget about micronutrients like iron, magnesium, and zinc. They might be tiny, but they play an essential role in your plant’s overall health. Consider adding a micronutrient supplement to your feeding routine to keep your Philodendron thriving.

6. Pruning and Propagation Techniques

6.1 Importance of Pruning

Pruning may sound like a fancy term, but it’s just a fancy way of saying “trimming.” Just like you might give yourself a haircut to tidy up, your Philodendron could use a little grooming too. Regular pruning helps control the plant’s size, shape, and can even encourage more bushy growth. Plus, it gives you a chance to show off your fancy gardening shears. Talk about a win-win situation!

6.2 Step-by-Step Pruning Guide

Ready to get your hands dirty? Pruning your Philodendron Camposportoanum is a relatively simple process. Start by identifying any dead or dying leaves – those are the ones that need to go first. Use clean and sharp shears to make a clean cut just above the leaf node (the point where the leaf meets the stem). This will promote new growth. If you want to shape your plant, you can also trim back any leggy or unruly stems. Just remember: moderation is key. Don’t go all Edward Scissorhands on your poor Philodendron!

6.3 Propagation Methods

Once you’ve mastered the art of pruning, you might want to expand your Philodendron family. Luckily, propagating Philodendron Camposportoanum is as easy as can be. You have a few different options to choose from: stem cuttings, air layering, or division. Stem cuttings are perhaps the most popular and straightforward method. Simply cut a healthy stem with a few leaves attached, remove the lower leaves, and place it in a glass of water or moist soil. Before you know it, you’ll have a brand new Philodendron baby to brag about!

6.4 Caring for Newly Propagated Plants

Now that you’re a proud parent of some baby Philodendrons, it’s time to make sure they have the best start in life. These little ones are more delicate than a snowflake on a summer’s day, so handle them with care. Keep them in a warm and humid environment, away from direct sunlight. Water them regularly, but be cautious not to overwater – they’re tiny and can’t handle too much moisture just yet. With a little TLC, your Philodendron offspring will grow into strong, independent plants in no time.

7. Common Pests and Diseases

7.1 Identifying Common Pests

Let’s face it, pests are like the uninvited guests that show up at your party and eat all your snacks. Unfortunately, Philodendron Camposportoanum can also fall victim to some unwanted visitors. Keep an eye out for pests such as spider mites, mealybugs, and aphids. These sneaky critters can cause damage to your plant by sucking the sap or leaving behind unsightly webs. Not exactly the kind of decoration you were going for.

7.2 Preventing and Treating Pests

To prevent these pesky critters from wreaking havoc on your Philodendron, it’s essential to maintain good plant hygiene. Regularly inspect your plant for any signs of infestation. If you do spot some unwanted guests, there are a few ways to show them the exit door. You can try using natural remedies like neem oil or insecticidal soap. For severe cases, you may need to bring out the big guns and use a chemical pesticide, but be cautious and always follow the instructions carefully. Nobody wants to accidentally harm their precious plant.

7.3 Recognizing Common Diseases

Just like humans catch the occasional cold, Philodendron Camposportoanum can also fall ill from time to time. Keep an eye out for common diseases such as root rot, leaf spot, or powdery mildew. These can be caused by overwatering, poor air circulation, or excessive humidity. Not exactly the most glamorous ailments, but they can definitely put a damper on your plant’s overall health.

7.4 Disease Prevention and Treatment

Prevention is always better than a cure, so make sure to provide your Philodendron with the right conditions to avoid diseases. Ensure proper drainage, don’t overwater, and maintain good air circulation around your plant. If you do spot signs of disease, act quickly to prevent it from spreading further. Remove affected leaves or stems, adjust watering habits, and consider using a fungicide if necessary. Your Philodendron will thank you for taking care of its well-being!

8. Tips for Successful Care and Maintenance

8.1 Monitoring Growth and Development

Just like a proud parent tracking their child’s growth milestones, it’s important to keep an eye on your Philodendron Camposportoanum’s progress. Monitor its growth rate, leaf color, and overall appearance. If you notice any sudden changes, it could be a sign that something isn’t quite right. Maybe it needs more sunlight, less water, or perhaps just a little pep talk to boost its confidence. Don’t worry; we won’t judge if you start having conversations withIn conclusion, Philodendron Camposportoanum is a remarkable plant that brings beauty and tropical vibes to any space. By providing the right growing conditions, proper care, and attention, you can enjoy the lush foliage and velvety leaves of this stunning plant for years to come. Remember to monitor its needs, adjust watering and light levels accordingly, and address any issues promptly. With the knowledge and tips shared in this care guide, you are well-equipped to create an environment where your Philodendron Camposportoanum can thrive. So, go ahead and embark on the rewarding journey of caring for this unique plant, and enjoy the natural beauty it brings to your home or garden.

FAQ

1. Is Philodendron Camposportoanum suitable for beginners?

Philodendron Camposportoanum is considered a relatively easy plant to care for, making it suitable for beginners. With the right growing conditions and regular maintenance, even those new to plant care can successfully nurture and enjoy this beautiful tropical plant.

2. How often should I water my Philodendron Camposportoanum?

The watering frequency for Philodendron Camposportoanum may vary depending on various factors such as humidity levels, temperature, and potting medium. As a general guideline, it is recommended to water the plant when the top inch of soil feels slightly dry. Avoid overwatering, as it can lead to root rot, but also ensure that the plant doesn’t dry out completely between waterings.

3. Can Philodendron Camposportoanum tolerate low light conditions?

While Philodendron Camposportoanum prefers bright, indirect light, it can tolerate lower light conditions to some extent. However, it is important to note that inadequate light may result in reduced growth and less vibrant foliage. If placing the plant in a low light area, ensure it still receives some natural or artificial light to maintain its overall health and vitality.

4. How do I propagate Philodendron Camposportoanum?

Philodendron Camposportoanum can be propagated through stem cuttings. Choose a healthy stem with at least two or three leaves and make a clean cut just below a node. Place the cutting in a suitable potting medium, keep it moist, and provide indirect light. With time and proper care, the cutting will develop roots, and you will have successfully propagated a new Philodendron Camposportoanum plant.

How To Propagate Anthurium: A Step-by-Step Comprehensive Guide

Anthuriums, with their vibrant and captivating flowers, are popular houseplants that add a touch of tropical elegance to any space. If you are an avid plant enthusiast or simply looking to expand your indoor garden, learning how to propagate anthuriums can be a rewarding endeavor. Propagation allows you to create new plants from existing ones, giving you the opportunity to share the beauty of anthuriums with others or expand your collection. In this comprehensive guide, we will explore the various methods of anthurium propagation, including seeds and cuttings, providing you with step-by-step instructions, helpful tips, and insights into caring for newly propagated plants. Whether you are a beginner or have some experience in plant propagation, this article will equip you with the knowledge you need to successfully propagate anthuriums and enjoy the satisfaction of nurturing new life.

1. Introduction to Anthurium Propagation

Propagation, a fancy word for making more plant babies, is an exciting way to expand your plant collection without breaking the bank. And if you’re a fan of colorful, heart-shaped flowers, then propagating Anthurium plants should be high on your to-do list. But before we dive into the nitty-gritty of Anthurium propagation, let’s first understand what it actually means and why it’s worth your time.

1.1 What is Anthurium Propagation?

Anthurium propagation is the process of creating new Anthurium plants from existing ones. Think of it as a magical way to clone your favorite plant and watch it grow into a thriving beauty. With a little bit of knowledge and some TLC, you can propagate Anthuriums and enjoy their stunning blooms in various corners of your home or garden.

1.2 Benefits of Propagating Anthurium Plants

Aside from the sheer satisfaction of nurturing new life, propagating Anthurium plants offers several benefits. First and foremost, you get to expand your plant collection without spending a fortune on buying new plants. Plus, by propagating your existing Anthuriums, you can preserve unique varieties or share the love by gifting them to friends and family. So not only does it save you money, but it’s also a great way to spread some green joy!

2. Understanding Anthurium Plant Anatomy

Before we delve into the art of propagation, let’s take a quick tour of an Anthurium plant’s anatomy. Knowing the different parts of the plant will help you make informed decisions when it comes to choosing the right propagation method.

2.1 Anatomy of Anthurium Flowers

Anthurium flowers are like nature’s way of showing off. With their vibrant colors and heart-shaped spathes, they captivate everyone who lays eyes on them. The spathe, a modified leaf, encloses the spadix, which is responsible for producing tiny flowers. These flowers contain both male and female reproductive organs, making them perfect for propagating Anthuriums.

2.2 Anatomy of Anthurium Leaves

Anthurium leaves are a sight to behold, with their glossy texture and elongated shape. These leaves serve as the plant’s energy factories, converting sunlight into food through a process called photosynthesis. Understanding the anatomy of Anthurium leaves is crucial because certain propagation methods require specific leaf sections to be successful.

2.3 Understanding Anthurium Root Systems

Beneath the surface, Anthurium plants boast a network of roots that provide them with essential nutrients and anchor them in their pots or soil. The root system plays a vital role in the health and growth of the plant, so it’s important to take it into consideration when propagating Anthuriums. Now, let’s dive into the exciting world of propagation methods!

3. Methods of Anthurium Propagation

When it comes to propagating Anthuriums, you have a few tricks up your green thumb. Each method has its own quirks and success rate, so it’s worth exploring all of them and figuring out which one works best for you. Let’s take a look at the three main methods of Anthurium propagation.

3.1 Division Method

If you have a mature Anthurium plant with multiple stems or clumps, the division method is your go-to. It’s as simple as separating the clumps into individual plants, each with its own roots and leaves. This method ensures that each new plant has a head start in life and can thrive independently.

3.2 Seed Propagation Method

For the patient and adventurous plant lovers out there, seed propagation is an option worth exploring. It involves collecting and sowing Anthurium seeds, allowing you to witness the entire lifecycle of the plant from start to finish. While it may take longer than other methods, the satisfaction of growing a plant from a tiny seed is unparalleled.

3.3 Stem Cutting Method

If you’ve ever had a magic wand fantasy, then the stem cutting method might be right up your alley. By taking a section of the stem and providing it with the right conditions, you can encourage the growth of new roots and create a whole new Anthurium plant. It’s like casting a spell, except the only magic involved is the power of nature.

4. Propagating Anthurium from Seeds

Now that we’ve piqued your curiosity about seed propagation, let’s dig deeper into this fascinating method. Although it requires a little more patience, the process is incredibly rewarding. So put on your gardening gloves (or wizard robes, if you prefer), and let’s learn how to propagate Anthuriums from seeds.

4.1 Collecting and Preparing Anthurium Seeds

The journey of seed propagation starts with collecting mature Anthurium seeds. These seeds are typically found inside the berries that develop after the plant is pollinated. To ensure successful propagation, it’s crucial to collect ripe berries, remove the seeds, and prepare them for planting. Don’t worry, we’ll guide you through each step of the way!

4.2 Sowing Anthurium Seeds

Once you have your Anthurium seeds all prepped and ready, it’s time to sow them. Whether you choose to sow them directly in pots or opt for a seed tray, creating the perfect environment for seed germination is key. We’ll walk you through the process, providing tips to maximize your chances of success.

4.3 Germination Process and Care

With your seeds sown, it’s time to sit back, relax, and let nature work its magic. The germination process may take anywhere from a few weeks to a couple of months, so patience is an essential virtue here. We’ll cover the care and maintenance required during this stage to ensure healthy seedlings and increase their chances of growing into strong, blooming Anthurium plants.

Propagation opens up a whole new world of possibilities for Anthurium enthusiasts. Whether you choose to divide, sow seeds, or try your hand at stem cuttings, each method brings its own excitement and rewards. So go forth, aspiring plant propagators, and let your Anthurium collection flourish!

5. Propagating Anthurium from Cuttings

If you’ve fallen in love with the beauty of anthurium plants and want to expand your collection, propagating them from cuttings is a fantastic way to do it. It’s relatively simple and doesn’t require a green thumb of any kind. Here’s what you need to know to get started.

5.1 Selecting and Preparing Anthurium Cuttings

When selecting cuttings for propagation, look for healthy and mature stems with at least two or three leaves. Make sure to use a clean, sharp pair of scissors or pruning shears to make a clean cut just below a leaf node. Remove any flowers or buds from the cutting as they can divert energy from root development.

5.2 Choosing the Right Propagation Medium

To give your anthurium cuttings the best chance of success, you’ll need a suitable propagation medium. A mix of equal parts perlite and peat moss works well, providing good drainage and moisture retention. Fill a small pot or tray with this mixture, ensuring it is moist but not soaked.

5.3 Rooting Anthurium Cuttings

Dip the bottom end of your anthurium cutting in a rooting hormone to encourage root development. Then, create a small hole in the propagation medium and gently place the cutting inside. Press the medium around the cutting to ensure good contact. Keep the cuttings in a warm, bright location but out of direct sunlight. Mist them regularly to maintain humidity and prevent the medium from drying out.

6. Caring for Newly Propagated Anthurium Plants

Congratulations! You’ve successfully rooted your anthurium cuttings, and now it’s time to give them the care they need to thrive.

6.1 Transferring Anthurium Cuttings or Seedlings to Pots

Once the roots have developed, usually after a few weeks, carefully transfer your rooted anthurium cuttings or seedlings to individual pots. Use a well-draining potting mix that retains moisture without becoming waterlogged. Ensure the plant is at the same level it was in the propagation medium and water thoroughly after repotting.

6.2 Providing Optimal Light, Temperature, and Humidity

Anthuriums thrive in bright, indirect light, so place your newly propagated plants near a window with filtered sunlight. Maintain a temperature between 60-80°F (15-27°C) and humidity levels around 60-70%. You can increase humidity by placing a tray of water near the plants or using a humidifier.

6.3 Watering and Fertilizing Newly Propagated Anthurium Plants

Water your anthurium plants when the top inch of the soil feels dry to the touch. Avoid overwatering as it can lead to root rot. As for fertilizing, use a balanced liquid fertilizer diluted to half strength every two to four weeks during the growing season. However, remember that less is more – anthuriums can be sensitive to over-fertilization.

7. Troubleshooting Common Issues in Anthurium Propagation

Even the most experienced gardeners face challenges, but fear not! Here are some common issues you may encounter during anthurium propagation and how to tackle them.

7.1 Dealing with Root Rot and Overwatering

Overwatering is the enemy of healthy anthurium plants. Ensure the potting mix has good drainage, and only water when the soil is dry. If you suspect root rot, carefully remove the plant from the pot, trim away any rotted roots, and replant in fresh, well-draining soil.

7.2 Managing Pests and Diseases

Anthuriums can be susceptible to pests like aphids, mealybugs, and spider mites. Regularly inspect your plants for signs of infestation, such as tiny bugs, sticky residue, or distorted leaves. Treat infestations with organic insecticidal soap or neem oil, ensuring you cover both sides of the leaves.

7.3 Addressing Leaf Yellowing and Wilting

Yellowing leaves can be a sign of overwatering, underwatering, or nutrient deficiencies. Check the soil moisture, adjust your watering routine, and consider fertilizing with a balanced houseplant fertilizer. Wilting leaves may indicate dehydration or extreme temperature fluctuations. Adjust watering and ensure your plant is not exposed to drafts or direct heat sources.

8. Conclusion and Final Tips for Successful Anthurium Propagation

Propagation is a rewarding way to grow your anthurium collection and share the beauty with others. Remember to be patient and give your cuttings time to establish roots. Keep an eye on watering, light, temperature, and humidity to provide optimal conditions for growth. And most importantly, have fun with it! Happy propagating!

8. Conclusion and Final Tips for Successful Anthurium Propagation

Propagating anthurium plants is an exciting and rewarding process that allows you to expand your collection and share the beauty of these tropical plants with others. By understanding the anatomy of anthuriums and learning the various propagation methods such as seeds and cuttings, you can successfully create new plants and enjoy the satisfaction of watching them grow. Remember to provide the right care and attention to your newly propagated anthuriums, ensuring they have the optimal conditions of light, temperature, humidity, and watering. By troubleshooting common issues and addressing them promptly, you can set your propagated anthurium plants on a path to thrive. So go ahead, get your hands dirty, and embark on this botanical adventure – happy anthurium propagation!

FAQ

1. Can I propagate anthurium plants from seeds?

Yes, anthurium plants can be propagated from seeds. However, it’s important to note that the process of growing anthuriums from seeds can be more time-consuming and challenging compared to other propagation methods, such as stem cuttings. Proper seed collection, preparation, and germination techniques are crucial for successful seed propagation.

2. How long does it take for anthurium cuttings to root?

The time it takes for anthurium cuttings to root can vary depending on several factors, including the environmental conditions, the type of cutting, and the overall health of the plant. Generally, it can take anywhere from a few weeks to a couple of months for the cuttings to develop a robust root system. Providing the right level of humidity, temperature, and moisture during the rooting process can significantly aid in the successful establishment of roots.

3. What are some common problems I might encounter during anthurium propagation?

While anthurium propagation can be a rewarding experience, it’s not without potential challenges. Some common problems you may encounter include root rot due to overwatering, pests such as aphids or mites, and issues like leaf yellowing and wilting. However, with proper care, attention, and timely intervention, most problems can be managed effectively, ensuring the healthy growth of your propagated anthurium plants.

4. Can I propagate anthuriums if I only have one plant?

Yes, it is possible to propagate anthurium plants even if you only have one individual plant. While the division method may not be applicable in this case, you can still propagate anthuriums through other methods such as stem cuttings. By taking stem cuttings from the parent plant and following the appropriate procedures, you can successfully create new anthurium plants and expand your collection.