Bougainvillea Bonsai Bliss: A Complete Guide to Care and Cultivation

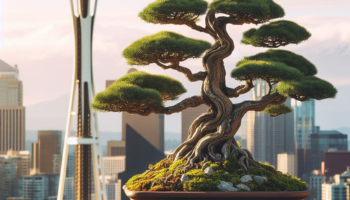
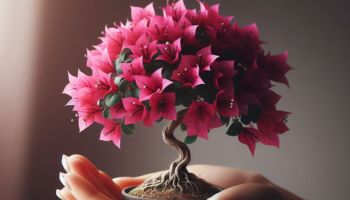
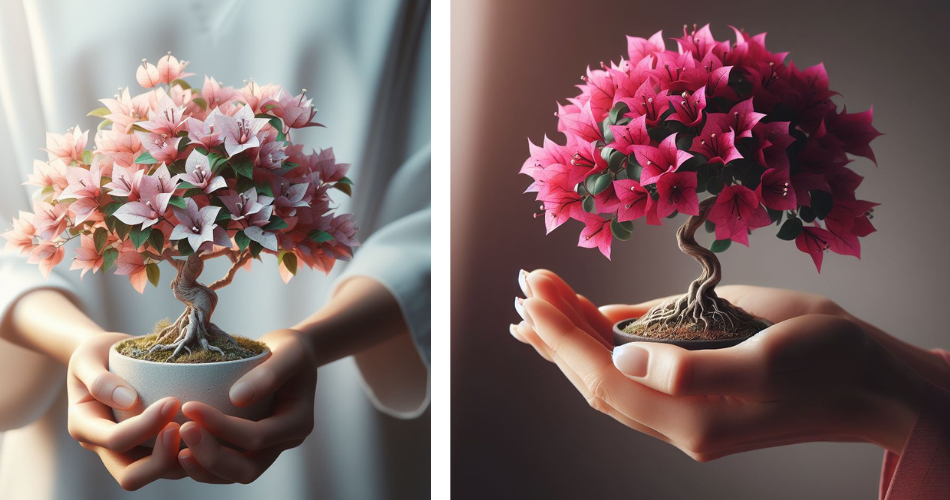
Bougainvillea bonsai is a delightful and captivating plant that has gained popularity among bonsai enthusiasts worldwide. This unique form of bonsai showcases the vibrant and colorful blooms of the Bougainvillea plant, adding a touch of tropical beauty to any collection. In this complete guide, we will explore the fascinating world of Bougainvillea bonsai, from selecting the right species to caring for its specific needs. Whether you are a seasoned bonsai enthusiast or a beginner looking to embark on this bonsai adventure, this article will provide you with valuable insights and techniques to cultivate and maintain Bougainvillea bonsai plants successfully. Let’s dive into the enchanting world of Bougainvillea bonsai and unlock the secrets of its care and cultivation.

1. Introduction to Bougainvillea Bonsai: A Captivating Plant for Enthusiasts

1.1 Understanding the Appeal of Bougainvillea Bonsai

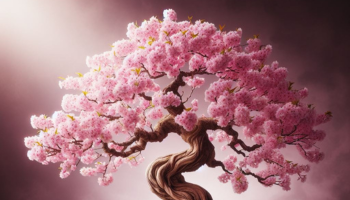
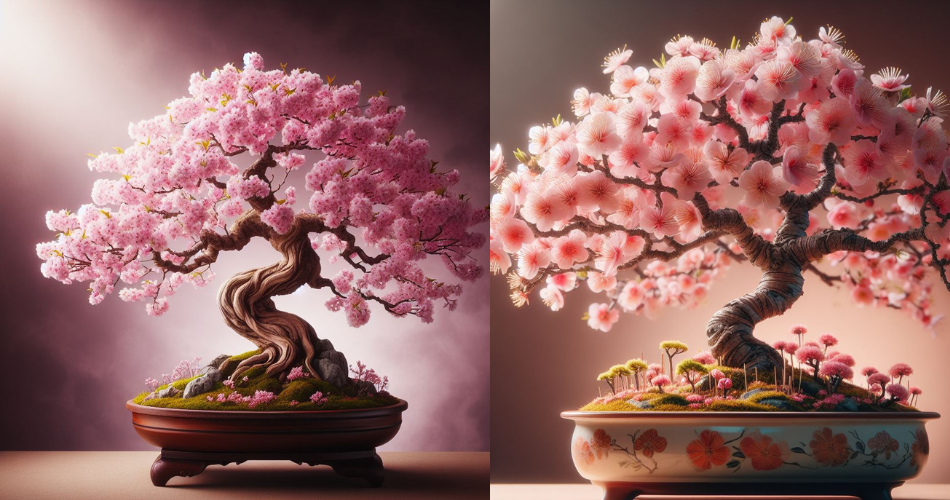
If you’re looking for a plant that will add a burst of color and beauty to your bonsai collection, look no further than the captivating bougainvillea bonsai. With its vibrant flowers and delicate foliage, this plant is a showstopper that never fails to impress. Its unique charm lies in its ability to create an enchanting miniature version of the larger bougainvillea tree, making it a favorite among bonsai enthusiasts.

1.2 Historical Background and Significance of Bougainvillea Bonsai

The history of bougainvillea bonsai dates back to ancient civilizations, where it was revered for its striking appearance and symbolic meaning. Originating from South America, this plant was later introduced to different parts of the world, gaining popularity for its resilience and adaptability. Over the years, bonsai artists have honed their skills in cultivating and shaping bougainvillea into breathtaking miniature trees that tell a story of beauty and perseverance.

1.3 Exploring the Unique Characteristics of Bougainvillea Bonsai

What sets bougainvillea bonsai apart from other bonsai trees is its stunning array of colorful bracts, which are actually modified leaves that surround the small white flowers. These bracts come in various shades of pink, red, orange, and purple, creating a visual spectacle that is hard to resist. Additionally, bougainvillea bonsai thrives in warm climates and can withstand dry conditions, making it a resilient and low-maintenance option for bonsai enthusiasts.

2. Selecting the Right Bougainvillea Species for Bonsai Cultivation

2.1 Overview of Bougainvillea Species Suitable for Bonsai

When it comes to choosing the perfect bougainvillea species for bonsai cultivation, there are several options to consider. Some popular choices include Bougainvillea glabra, Bougainvillea spectabilis, and Bougainvillea bonsai hybrids. Each species has its own unique characteristics and growth habits, allowing bonsai enthusiasts to select the one that best suits their preferences and climate conditions.

2.2 Factors to Consider when Choosing a Bougainvillea Species

Before diving into the world of bougainvillea bonsai, it’s important to consider a few factors when selecting a species. Factors such as sunlight requirements, cold hardiness, and growth patterns should be taken into account to ensure successful cultivation. Additionally, considering the color and size of the bracts can also play a role in choosing the right bougainvillea species that fits your vision for your bonsai collection.

2.3 Popular Bougainvillea Varieties for Bonsai and Their Features

There are several popular bougainvillea varieties that are well-suited for bonsai cultivation. For example, Bougainvillea ‘Barbara Karst’ is known for its vibrant red bracts and vigorous growth, making it a popular choice among bonsai enthusiasts. Bougainvillea ‘Pixie Queen’ is another variety that features delicate pink bracts, creating an elegant and feminine look. Explore the wide range of bougainvillea varieties available and choose the one that resonates with your style and preferences.

3. Essential Tools and Supplies for Bougainvillea Bonsai Care

3.1 Basic Tools Required for Bougainvillea Bonsai Care

To properly care for your bougainvillea bonsai, you’ll need a few essential tools in your arsenal. These include bonsai shears for pruning, concave cutters to remove branches, and wire cutters for shaping and training purposes. Additionally, having a root hook, a rake, and a pair of tweezers can also come in handy during repotting and maintenance tasks.

3.2 Additional Supplies for Optimal Bougainvillea Bonsai Cultivation

In addition to basic tools, there are a few supplies that can greatly improve the cultivation of your bougainvillea bonsai. A high-quality bonsai soil mix that provides good drainage and a balanced fertilizer specifically formulated for bonsai plants are essential. Furthermore, having a spray bottle for misting and a humidity tray can help create the ideal growing environment for your bougainvillea bonsai.

3.3 Understanding the Importance of Quality Tools and Supplies

Investing in good-quality tools and supplies is crucial for the long-term health and success of your bougainvillea bonsai. Well-crafted tools ensure precise cuts and minimize stress on the tree, while quality soil and fertilizer provide the necessary nutrients for growth and development. Remember, a happy and thriving bougainvillea bonsai starts with the right tools and supplies.

4. Key Steps for Proper Bougainvillea Bonsai Cultivation

4.1 Preparing the Ideal Growing Environment for Bougainvillea Bonsai

Creating the perfect growing environment for your bougainvillea bonsai is essential for its overall health and vitality. This includes placing it in a sunny spot where it can receive at least six hours of direct sunlight per day. Bougainvillea bonsai also thrive in well-draining soil, so make sure to choose a suitable bonsai mix and consider using a training pot or container with adequate drainage holes.

4.2 Potting and Repotting Bougainvillea Bonsai: Techniques and Considerations

Potting and repotting your bougainvillea bonsai is an important step in its cultivation. It’s generally recommended to repot every two to three years to refresh the soil and encourage healthy root growth. When repotting, carefully remove the old soil, trim any excessively long or tangled roots, and place the tree in a slightly larger pot with fresh bonsai soil mix. Remember to water thoroughly after repotting to ensure proper hydration.

4.3 Watering, Fertilizing, and Sunlight Requirements for Healthy Growth

Proper watering, fertilizing, and sunlight are crucial for the healthy growth of your bougainvillea bonsai. Watering should be done when the soil feels slightly dry, but avoid overwatering as it can lead to root rot. Using a balanced fertilizer during the growing season can provide the necessary nutrients for vibrant blooms and foliage. Additionally, ensure your bonsai receives adequate sunlight to promote healthy photosynthesis and overall vitality.

4.4 Nurturing Bougainvillea Bonsai: Pruning and Wiring Techniques

Regular pruning and wiring are essential for shaping and maintaining the desired form of your bougainvillea bonsai. Pruning should be done during the dormant season to avoid excessive bleeding of sap. Remove any dead or unhealthy branches, and shape the branches to create an aesthetically pleasing silhouette. Wiring can be used to gently guide branches into the desired position, but caution must be2>5. Understanding Bougainvillea Bonsai Pruning and Shaping Techniques

5.1 Pruning Basics: Why, When, and How to Prune Bougainvillea Bonsai

Pruning…it’s like giving your Bougainvillea Bonsai a fancy haircut, except instead of scissors, you’re using pruning shears. And instead of hair, you’re snipping away at branches. Okay, maybe it’s not exactly the same, but you get the idea.

So why do we prune? Well, first of all, your Bougainvillea Bonsai doesn’t want to look like Cousin It from the Addams Family. Pruning helps maintain a neat and tidy appearance. Plus, it encourages new growth and strengthens the overall structure of your bonsai.

Timing is crucial when it comes to pruning your Bougainvillea Bonsai. The best time to prune is during its dormant period, typically in late winter or early spring. This allows your bonsai to recover and grow vigorously when the warmer months roll around.

Now, how the heck do you prune a Bougainvillea Bonsai without ending up with a botched job? First, identify any dead, diseased, or crossing branches and remove them. Then, trim back excessive growth to maintain the desired shape. Remember, don’t go overboard—less is more when it comes to pruning.

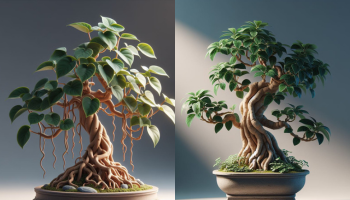
5.2 Shaping Bougainvillea Bonsai: Techniques for Creating Desired Forms

Creating the perfect shape for your Bougainvillea Bonsai is like sculpting a masterpiece, except instead of marble, you’re working with living plant material. It’s like being Michelangelo, but with more dirt under your fingernails.

When it comes to shaping your bonsai, there are a few techniques you can employ. One popular method is wiring, where you gently wrap the branches with wire to guide them into the desired position. Think of it as giving your bonsai a little nudge in the right direction, like a gentle suggestion rather than a forceful command.

Another technique is pruning for structure. This involves removing branches strategically to create an aesthetically pleasing shape. You can think of it as bonsai feng shui—finding the perfect balance between form and function.

Remember, shaping your Bougainvillea Bonsai is an art form, and like any artist, you’ll need some practice to master it. Don’t be discouraged if your bonsai doesn’t look like a work of art right away. Rome wasn’t built in a day, and bonsai masterpieces aren’t either.

5.3 Promoting Ramification and Branch Density in Bougainvillea Bonsai

Ramification and branch density—two fancy terms that basically mean your Bougainvillea Bonsai is filling out nicely, like a well-fitting pair of jeans. It’s all about creating a lush and full canopy that makes your bonsai a showstopper.

To promote ramification and branch density, you’ll need to encourage the growth of new branches. One way to do this is through careful pruning. By selectively pruning back certain branches, you stimulate the growth of new ones. It’s like giving your bonsai a little motivational pep talk: “Come on, buddy, you can do it, grow some more branches!”

Another technique is defoliation. This involves removing some or all of the leaves, which prompts your Bougainvillea Bonsai to produce new foliage. It’s like giving your bonsai a fresh start, a chance to sprout new growth and become even more beautiful.

But remember, don’t go overboard with the pruning and defoliation. Your bonsai needs some leaves to photosynthesize and fuel its growth. Plus, you don’t want your bonsai to look like a naked twig in the meantime.

So go ahead, give your Bougainvillea Bonsai the TLC it deserves. Prune, shape, and promote ramification like a pro, and watch your bonsai flourish into a stunning masterpiece. And hey, if all else fails, at least you’ll have a great excuse to spend more time in the garden.In conclusion, Bougainvillea bonsai is a captivating and rewarding plant to cultivate. By following the guidelines and techniques outlined in this complete guide, you can create and maintain a thriving Bougainvillea bonsai that showcases its vibrant colors and intricate forms. Remember to stay patient, as bonsai cultivation is an art that requires time and dedication. With proper care and attention, your Bougainvillea bonsai will continue to bring you joy and admiration for years to come. So, embark on this bonsai journey and enjoy the bliss of Bougainvillea bonsai cultivation.

FAQ

1. Are Bougainvillea bonsai suitable for indoor cultivation?

Bougainvillea bonsai are generally better suited for outdoor cultivation due to their sunlight and temperature requirements. However, certain Bougainvillea species can tolerate indoor conditions if provided with adequate light and suitable growing conditions.

2. How often should I water my Bougainvillea bonsai?

The frequency of watering your Bougainvillea bonsai will depend on various factors, including the climate, pot size, and soil composition. As a general rule, it is recommended to water thoroughly when the top layer of soil feels dry to the touch. Avoid overwatering, as Bougainvillea bonsai prefer slightly drier soil between watering sessions.

3. Can Bougainvillea bonsai be shaped into different bonsai styles?

Yes, Bougainvillea bonsai can be shaped into various bonsai styles, including formal upright, informal upright, cascade, and broom. However, it is important to keep in mind the natural growth habit and characteristics of the Bougainvillea plant when shaping it into different styles.

4. How can I promote blooming in my Bougainvillea bonsai?

To promote blooming in your Bougainvillea bonsai, ensure that it receives adequate sunlight. Bougainvillea plants require at least six hours of direct sunlight per day to encourage blooming. Additionally, providing a balanced fertilizer with higher phosphorus content during the flowering season can also help stimulate blooming.

Mastering Philodendron Camposportoanum Care: A Comprehensive Guide

Philodendron Camposportoanum, also known as the Velvet-Leaf Philodendron, is a stunning tropical plant that has gained popularity among plant enthusiasts. With its unique velvety leaves and relatively easy care requirements, this species has become a favorite choice for both beginner and experienced plant owners. This ultimate care guide will provide valuable insights into the ideal growing conditions, watering and humidity requirements, light and temperature preferences, soil and fertilizer needs, pruning and propagation techniques, common pests and diseases, as well as essential tips for successful care and maintenance of Philodendron Camposportoanum. Whether you are a seasoned plant lover or just starting your journey, this comprehensive guide will equip you with the knowledge and skills necessary to cultivate a thriving and thriving Philodendron Camposportoanum in your home or garden.

1.1 What is Philodendron Camposportoanum?

If you’re tired of the same old, basic houseplants and are craving something a little more unique, let me introduce you to the Philodendron Camposportoanum. It’s like the hipster cousin of the Philodendron family, bringing a touch of coolness to your indoor jungle. Native to the rainforests of Brazil, this plant is sure to catch the eye with its stunning foliage and quirky charm.

1.2 Features and Characteristics

The Philodendron Camposportoanum is known for its heart-shaped leaves that come in a vibrant shade of green with prominent venation. But what really sets it apart from the crowd are the unique fringed edges on its leaves, giving it a touch of whimsy that screams “I’m not your average houseplant!”

This little attention seeker enjoys showing off its climbing abilities, so be prepared to provide it with some support or a trellis if you want it to reach its full potential. Don’t worry though, it won’t take up your entire living room – it’s a compact plant that stays relatively small, making it perfect for those with limited space.

2. Ideal Growing Conditions for Philodendron Camposportoanum

2.1 Light Requirements

When it comes to lighting, the Philodendron Camposportoanum prefers bright, indirect light. It’s like the plant version of Goldilocks – not too much, not too little, just the right amount. So, find a spot near a window where it can soak up some rays without getting scorched. If you notice its leaves starting to turn yellow, it’s a sign that it’s getting too much sun, so adjust accordingly.

2.2 Temperature Range

This tropical beauty thrives in temperatures between 65°F and 85°F (18°C to 29°C). It’s like a diva that likes to keep things comfortably warm. Avoid exposing it to drafts or sudden temperature changes, as it prefers a stable environment. So, keep it cozy and it will reward you with its stunning foliage.

2.3 Humidity Levels

Philodendron Camposportoanum is all about that moisture, so it will appreciate a humid environment. If you live in a dry climate, don’t fret! You can increase humidity by placing a water tray near the plant or misting its leaves regularly. It’s like giving it a little spa treatment and who doesn’t love a pampered plant?

2.4 Suitable Potting Options

When it comes to choosing the perfect home for your Philodendron Camposportoanum, opt for a well-draining potting mix. You don’t want it sitting in soggy soil, as that can lead to root rot – a definite buzzkill. A mix of peat moss, perlite, and orchid bark will keep it happy and ensure its roots can breathe. Plus, it’s like giving it a fancy, designer outfit to show off to all your friends.

3. Watering and Humidity Requirements

3.1 Proper Watering Techniques

Watering your Philodendron Camposportoanum is like finding the balance in life – not too much, not too little. Allow the top inch or so of soil to dry out before watering it again. Stick your finger in the soil to check its moisture level, or use a moisture meter if you want to feel like a high-tech plant parent. Remember, overwatering is a no-no, so give it a little sip, not a full-on water fountain.

3.2 Understanding Moisture Needs

This plant enjoys being kept slightly moist, but not waterlogged. Think of it as a plant that likes to keep its toes damp, but not swimming in a lake. Too much water can lead to root rot, which is like a death sentence for this beauty. So, avoid the soggy situation and find that perfect balance of moisture.

3.3 Managing Humidity Levels

As mentioned earlier, Philodendron Camposportoanum appreciates a humid environment. You can increase humidity by misting its leaves with water or placing it near a humidifier. It’s like giving it a tropical vacation without the hassle of airport security.

4. Proper Light and Temperature for Philodendron Camposportoanum

4.1 Finding the Right Amount of Light

When it comes to light, this plant wants to be just like Goldilocks – not too bright, not too dim, but just right. Find a spot near a window where it can bask in bright, indirect light. If the leaves start to look pale or leggy, it’s a sign that it’s not getting enough light. So, move it closer to the window and let it soak up those rays.

4.2 Avoiding Direct Sunlight

While Philodendron Camposportoanum enjoys bright light, direct sunlight can be a bit too harsh for its delicate leaves. It’s like a plant that’s sensitive to sunburn. So, protect it from those scorching rays by placing it in a spot where it receives filtered or indirect light. It’s like giving it a stylish parasol to shield it from the sun.

4.3 Maintaining Optimal Temperature Range

This plant likes to keep things warm, but not too hot. It’s like a diva that prefers a cozy, comfortable environment. Maintain temperatures between 65°F and 85°F (18°C to 29°C) to keep it happy. Avoid exposing it to drafts or extreme temperature fluctuations, as it can cause stress. So, find that sweet spot and keep the temperature just right for your Camposportoanum companion.

5. Soil and Fertilizer Needs

5.1 Choosing the Right Soil Mix

When it comes to keeping your Philodendron Camposportoanum happy, the right soil mix is key. Think of it like finding the perfect foundation for a beautiful building – you want something sturdy and well-draining. A well-balanced mix of peat moss, perlite, and a touch of sand should do the trick. This will ensure that excess water doesn’t hang around for too long, preventing root rot and other nasty problems.

5.2 Fertilizing Schedule

Now that you have your soil sorted, it’s time to talk about feeding your Philodendron Camposportoanum. These plants aren’t too demanding when it comes to fertilizer, but a little boost every now and then can go a long way. During the growing season (spring and summer), feed your plant once a month with a balanced fertilizer. In the cooler months, you can cut back to every two to three months. Remember, it’s always better to under-fertilize than overdo it. Nobody likes a hangry plant!

5.3 Nutrient Requirements

Just like humans need their vitamins, Philodendron Camposportoanum also has some specific nutrient needs. The three main macronutrients they crave are nitrogen, phosphorus, and potassium. These can be found in balanced fertilizers labeled with an NPK ratio (those numbers on the packaging). Aim for a ratio of 10-10-10 or something similar. Additionally, don’t forget about micronutrients like iron, magnesium, and zinc. They might be tiny, but they play an essential role in your plant’s overall health. Consider adding a micronutrient supplement to your feeding routine to keep your Philodendron thriving.

6. Pruning and Propagation Techniques

6.1 Importance of Pruning

Pruning may sound like a fancy term, but it’s just a fancy way of saying “trimming.” Just like you might give yourself a haircut to tidy up, your Philodendron could use a little grooming too. Regular pruning helps control the plant’s size, shape, and can even encourage more bushy growth. Plus, it gives you a chance to show off your fancy gardening shears. Talk about a win-win situation!

6.2 Step-by-Step Pruning Guide

Ready to get your hands dirty? Pruning your Philodendron Camposportoanum is a relatively simple process. Start by identifying any dead or dying leaves – those are the ones that need to go first. Use clean and sharp shears to make a clean cut just above the leaf node (the point where the leaf meets the stem). This will promote new growth. If you want to shape your plant, you can also trim back any leggy or unruly stems. Just remember: moderation is key. Don’t go all Edward Scissorhands on your poor Philodendron!

6.3 Propagation Methods

Once you’ve mastered the art of pruning, you might want to expand your Philodendron family. Luckily, propagating Philodendron Camposportoanum is as easy as can be. You have a few different options to choose from: stem cuttings, air layering, or division. Stem cuttings are perhaps the most popular and straightforward method. Simply cut a healthy stem with a few leaves attached, remove the lower leaves, and place it in a glass of water or moist soil. Before you know it, you’ll have a brand new Philodendron baby to brag about!

6.4 Caring for Newly Propagated Plants

Now that you’re a proud parent of some baby Philodendrons, it’s time to make sure they have the best start in life. These little ones are more delicate than a snowflake on a summer’s day, so handle them with care. Keep them in a warm and humid environment, away from direct sunlight. Water them regularly, but be cautious not to overwater – they’re tiny and can’t handle too much moisture just yet. With a little TLC, your Philodendron offspring will grow into strong, independent plants in no time.

7. Common Pests and Diseases

7.1 Identifying Common Pests

Let’s face it, pests are like the uninvited guests that show up at your party and eat all your snacks. Unfortunately, Philodendron Camposportoanum can also fall victim to some unwanted visitors. Keep an eye out for pests such as spider mites, mealybugs, and aphids. These sneaky critters can cause damage to your plant by sucking the sap or leaving behind unsightly webs. Not exactly the kind of decoration you were going for.

7.2 Preventing and Treating Pests

To prevent these pesky critters from wreaking havoc on your Philodendron, it’s essential to maintain good plant hygiene. Regularly inspect your plant for any signs of infestation. If you do spot some unwanted guests, there are a few ways to show them the exit door. You can try using natural remedies like neem oil or insecticidal soap. For severe cases, you may need to bring out the big guns and use a chemical pesticide, but be cautious and always follow the instructions carefully. Nobody wants to accidentally harm their precious plant.

7.3 Recognizing Common Diseases

Just like humans catch the occasional cold, Philodendron Camposportoanum can also fall ill from time to time. Keep an eye out for common diseases such as root rot, leaf spot, or powdery mildew. These can be caused by overwatering, poor air circulation, or excessive humidity. Not exactly the most glamorous ailments, but they can definitely put a damper on your plant’s overall health.

7.4 Disease Prevention and Treatment

Prevention is always better than a cure, so make sure to provide your Philodendron with the right conditions to avoid diseases. Ensure proper drainage, don’t overwater, and maintain good air circulation around your plant. If you do spot signs of disease, act quickly to prevent it from spreading further. Remove affected leaves or stems, adjust watering habits, and consider using a fungicide if necessary. Your Philodendron will thank you for taking care of its well-being!

8. Tips for Successful Care and Maintenance

8.1 Monitoring Growth and Development

Just like a proud parent tracking their child’s growth milestones, it’s important to keep an eye on your Philodendron Camposportoanum’s progress. Monitor its growth rate, leaf color, and overall appearance. If you notice any sudden changes, it could be a sign that something isn’t quite right. Maybe it needs more sunlight, less water, or perhaps just a little pep talk to boost its confidence. Don’t worry; we won’t judge if you start having conversations withIn conclusion, Philodendron Camposportoanum is a remarkable plant that brings beauty and tropical vibes to any space. By providing the right growing conditions, proper care, and attention, you can enjoy the lush foliage and velvety leaves of this stunning plant for years to come. Remember to monitor its needs, adjust watering and light levels accordingly, and address any issues promptly. With the knowledge and tips shared in this care guide, you are well-equipped to create an environment where your Philodendron Camposportoanum can thrive. So, go ahead and embark on the rewarding journey of caring for this unique plant, and enjoy the natural beauty it brings to your home or garden.

FAQ

1. Is Philodendron Camposportoanum suitable for beginners?

Philodendron Camposportoanum is considered a relatively easy plant to care for, making it suitable for beginners. With the right growing conditions and regular maintenance, even those new to plant care can successfully nurture and enjoy this beautiful tropical plant.

2. How often should I water my Philodendron Camposportoanum?

The watering frequency for Philodendron Camposportoanum may vary depending on various factors such as humidity levels, temperature, and potting medium. As a general guideline, it is recommended to water the plant when the top inch of soil feels slightly dry. Avoid overwatering, as it can lead to root rot, but also ensure that the plant doesn’t dry out completely between waterings.

3. Can Philodendron Camposportoanum tolerate low light conditions?

While Philodendron Camposportoanum prefers bright, indirect light, it can tolerate lower light conditions to some extent. However, it is important to note that inadequate light may result in reduced growth and less vibrant foliage. If placing the plant in a low light area, ensure it still receives some natural or artificial light to maintain its overall health and vitality.

4. How do I propagate Philodendron Camposportoanum?

Philodendron Camposportoanum can be propagated through stem cuttings. Choose a healthy stem with at least two or three leaves and make a clean cut just below a node. Place the cutting in a suitable potting medium, keep it moist, and provide indirect light. With time and proper care, the cutting will develop roots, and you will have successfully propagated a new Philodendron Camposportoanum plant.

Best Guide to Understanding and Growing Bonsai Tree With Tips

Bonsai trees have captivated people around the world with their miniature beauty and profound symbolism. Originating from ancient Chinese and Japanese cultures, these meticulously cultivated trees have become a cherished art form and a serene addition to any space. In this comprehensive article, we will delve into the fascinating world of bonsai trees, exploring their origins, the various types and styles available, the techniques behind bonsai art, step-by-step instructions on creating your own bonsai tree, and essential tips for their care. Whether you are a beginner eager to learn about this ancient practice or a seasoned bonsai enthusiast looking for new insights, join us on this journey of discovery as we uncover the exquisite allure and timeless elegance of bonsai trees.

1.1 What are Bonsai Trees?

So, you’re walking through a garden center, minding your own business, when suddenly you come across these adorable miniature trees. “What sorcery is this?” you wonder. Well, my friend, those mini marvels are bonsai trees.

Bonsai, which literally means “planted in a container” in Japanese, is an ancient horticultural art form that involves growing and shaping trees and shrubs in miniature form. These pint-sized plants are not genetically modified or stunted in growth but are meticulously cultivated to mimic the appearance of full-grown trees in nature.

1.2 The Fascinating History of Bonsai

Now that you know what bonsai trees are, it’s time for a little history lesson. Bonsai has a rich and fascinating past that stretches back thousands of years.

The art of bonsai originated in China during the Han dynasty (206 BC – 220 AD) and was later adopted and refined by the Japanese. Initially, bonsai was considered a luxury reserved for the elite, but over time, it became more accessible to the general public.

Bonsai has gone through many cultural shifts and stylistic changes throughout its history, but its core principles remain the same: cultivating a living work of art that captures the essence of nature in miniature form.

2. The Origins and History of Bonsai

2.1 Ancient Roots: Bonsai Origins in China

Let’s take a trip back in time to ancient China, where the story of bonsai begins. The concept of growing trees in containers can be traced back to the Chinese practice of penjing, which means “tray scenery.” Penjing involved creating miniature landscapes that included rocks, water features, and yes, you guessed it, trees.

Chinese scholars and artists were captivated by the idea of replicating majestic mountains and ancient forests in a small-scale, portable format. They often used trees like pines, junipers, and cypresses, carefully pruning and training them to achieve the desired form.

2.2 Japanese Influence: Bonsai’s Expansion and Development

During the Tang dynasty (618 – 907 AD), the art of penjing made its way to Japan, where it underwent its own evolution. The Japanese, known for their meticulous attention to detail, took the concept of penjing and transformed it into what we now know as bonsai.

Japanese bonsai enthusiasts brought new techniques and aesthetics to the art form, emphasizing a more naturalistic style and a deeper connection between the tree and its container. Bonsai became an integral part of Japanese culture, with dedicated practitioners devoting their lives to perfecting this living art.

3. Different Types and Varieties of Bonsai Trees

3.1 Traditional Bonsai Styles

Just like there are different fashion styles, bonsai has its own array of “tree fashion” if you will. These various styles follow certain guidelines and techniques to showcase different aspects of a tree’s character. Some of the traditional bonsai styles include formal upright, informal upright, slanting, cascade, and windswept. Each style has its own unique charm, representing different natural growth patterns and environmental conditions.

3.2 Popular Bonsai Varieties

When it comes to bonsai, the variety is the spice of life. There is an extensive range of tree species that can be cultivated as bonsai, each with its own distinct characteristics. From the classic Japanese maple with its delicate foliage to the rugged and resilient juniper, there’s a bonsai tree to suit every taste and skill level. Other popular bonsai varieties include pine, azalea, elm, and ficus, just to name a few. The possibilities are endless!

4. The Art of Bonsai: Techniques and Styles

4.1 Understanding Bonsai Techniques

So, you’re ready to dive into the world of bonsai and create your mini masterpiece. But where do you start? Well, my friend, it all begins with understanding the basic techniques of bonsai cultivation. From pruning and wiring to repotting and root pruning, these techniques are the building blocks of shaping and maintaining a healthy bonsai tree. It may sound daunting, but with a little practice and patience, you’ll soon be pruning like a pro.

4.2 Exploring Bonsai Styles and Aesthetics

Just like a painting or a sculpture, bonsai is a form of artistic expression. The beauty of bonsai lies not only in its techniques but also in its aesthetics. There are different schools of thought when it comes to bonsai design, each emphasizing different aspects of visual balance and harmony. From the minimalist elegance of the Bunjin style to the dynamic and dramatic windswept style, exploring bonsai aesthetics is like embarking on a creative adventure. So, channel your inner artist and let your bonsai tree reflect your unique personality and style.

Now that you’ve learned the origins, types, and techniques of bonsai, it’s time to get your hands dirty and embark on this rewarding journey into the world of miniature trees. Remember, bonsai is not just about tending to plants but also about cultivating patience, mindfulness, and a deep appreciation for the beauty of nature in its tiniest form. Happy bonsai-ing!

5. How to Create Your Own Bonsai Tree

Creating your own bonsai tree is like giving birth to a little green masterpiece. Okay, maybe not quite as dramatic, but it’s definitely a rewarding and artistic process. Here’s a step-by-step guide on how to turn a regular tree into a miniature work of art.

5.1 Selecting the Right Tree Species

Choosing the right tree species for your bonsai is crucial. You want a tree that can thrive in a pot and be easily shaped. Some popular choices include juniper, pine, maple, and ficus. So, step away from the oak tree in your backyard and opt for something more bonsai-friendly.

5.2 Step-by-Step Bonsai Creation Process

Now comes the fun part! Here’s a simplified breakdown of the bonsai creation process:

1. Start with a young, healthy tree sapling or nursery-grown plant.
2. Carefully prune the roots to fit the size of your desired bonsai pot.
3. Repot the tree using a well-draining bonsai soil mixture.
4. Trim the branches to achieve the desired shape and overall aesthetic.
5. Wire the branches gently to encourage them to grow in the desired direction.
6. Regularly water, fertilize, and care for your bonsai to keep it happy and healthy.
7. Be patient and enjoy the rewarding journey as your tree gradually transforms into a stunning bonsai masterpiece.

6. A Comprehensive Guide to Bonsai Tree Care

Congratulations! You’ve successfully created your bonsai tree. Now, it’s time to learn how to keep it flourishing and thriving. Bonsai tree care is more than just giving it a little water now and then. It requires attention to detail and a nurturing touch.

6.1 Essential Care Practices for Bonsai Trees

To give your bonsai the best chance at a long and healthy life, remember these essential care practices:

– Place your bonsai in a spot that receives suitable sunlight for its specific species.
– Water your bonsai regularly, ensuring the soil is moist but not waterlogged.
– Don’t forget to fertilize your bonsai to provide it with essential nutrients.
– Trim and prune your bonsai regularly to maintain its shape and promote healthy growth.

6.2 Watering, Fertilizing, and Pruning Techniques

Proper techniques are key when it comes to watering, fertilizing, and pruning your bonsai. Here are a few tips to keep in mind:

– Water your bonsai thoroughly, allowing the water to soak through the soil and drain out the bottom.
– Use a balanced, slow-release fertilizer specifically formulated for bonsai trees.
– When pruning, always use clean, sharp tools to prevent damage and infection.
– Remember to prune back to a new bud or branch to encourage healthy growth.

7. Common Mistakes to Avoid in Bonsai Tree Care

Now that you know the basics of bonsai tree care, let’s talk about what not to do. We all make mistakes, but when it comes to caring for your miniature tree, there are a few common slip-ups to avoid.

7.1 Overwatering and Underwatering

Finding the right balance of water for your bonsai can be a bit like Goldilocks searching for the perfect porridge. Too much water can drown the roots, while too little water can cause dehydration. Pay attention to your bonsai’s specific water needs and adjust accordingly.

7.2 Pruning Errors and Improper Shaping

Think of pruning as giving your bonsai a stylish haircut rather than hacking away at it like Edward Scissorhands. Improper pruning can stunt growth, weaken the tree, or even lead to irreversible damage. Take your time and make deliberate cuts to achieve the desired shape.

7.3 Common Bonsai Tree Species to Grow

Juniper (Juniperus spp.): The Juniper, an emblem of hardiness, features needle-like leaves and rugged bark. Resilient and adaptable, it thrives in various climates and is a symbol of enduring strength in the bonsai world.

Ficus (Ficus spp.): With its diverse range of species, Ficus is a versatile bonsai choice. Glossy leaves and a propensity for aerial roots characterize these trees, making them suitable for both indoor and outdoor cultivation.

Pine (Pinus spp.): Pines evoke the grandeur of nature in miniature form. Known for their evergreen needles and distinctive cones, they embody strength and longevity, adding an element of timelessness to bonsai landscapes.

Maple (Acer spp.): The Japanese Maple, with its delicate, palmate leaves, brings a touch of elegance to bonsai collections. Its vibrant foliage transforms with the seasons, offering a dynamic display of color throughout the year.

Elm (Ulmus spp.): Elms contribute an air of refinement to bonsai gardens with their fine branches and serrated leaves. These deciduous trees adapt well to pruning, allowing for the creation of intricate designs.

Bonsai Fig (Ficus carica): The Bonsai Fig, a cultural icon, carries a rich history. Known for its broad leaves and twisting trunk, it embodies the artful fusion of nature and human creativity.

Japanese Maple (Acer palmatum): Revered for its captivating foliage, the Japanese Maple graces bonsai collections with its intricate branches and stunning autumnal transformation. Its presence exudes a sense of tranquil beauty.

Crabapple (Malus spp.): A harbinger of delicate blossoms, the Crabapple bonsai delights with its petite flowers and miniature fruit. Symbolic of nature’s ephemeral beauty, it captures fleeting moments in a bonsai setting.

Azalea (Rhododendron spp.): Azaleas burst into a riot of color, adorning bonsai landscapes with their vibrant blooms. These flowering shrubs add a touch of elegance and seasonal spectacle to collections.

Beech (Fagus spp.): Beeches, with their smooth bark and dense foliage, radiate a sense of enduring tranquility. These deciduous trees create a calming presence in bonsai compositions.

Wisteria (Wisteria spp.): Cascading clusters of lavender or white flowers define Wisteria bonsai. Known for their graceful appearance, they bring a sense of flowing elegance to the miniature world of bonsai.

Boxwood (Buxus spp.): Boxwood, prized for its small leaves and dense growth habit, lends itself well to bonsai artistry. Its compact nature makes it a versatile choice for shaping intricate designs.

Pomegranate (Punica granatum): Symbolizing fertility and abundance, the Pomegranate bonsai bears tiny, ornamental fruit. Its small, glossy leaves contribute to a captivating and symbolic display.

Olive (Olea europaea): The Olive bonsai, with its gnarled trunk and silver-green foliage, captures the essence of the Mediterranean landscape. A symbol of peace and endurance, it adds a touch of timeless beauty.

Cotoneaster (Cotoneaster spp.): Cotoneasters, with their delicate leaves and tiny berries, create bonsai scenes of intricate beauty. These deciduous or evergreen shrubs offer diversity in both form and color.

Schefflera (Schefflera arboricola): The Schefflera bonsai, known for its vibrant green leaves and tropical appearance, brings an exotic touch to collections. Its compound leaves and adaptability make it a popular choice.

Trident Maple (Acer buergerianum): Characterized by distinctive three-lobed leaves, the Trident Maple embodies balance and harmony. Its elegant structure and adaptability make it a sought-after species in bonsai cultivation.

Serissa (Serissa foetida): Serissas, with their small leaves and delicate white flowers, create an air of refinement in bonsai compositions. Known for their tolerance of pruning, they allow for intricate designs.

Jade (Crassula ovata): Resilient and symbolic of prosperity, the Jade bonsai, with its fleshy leaves and sturdy trunk, is a favorite among succulent enthusiasts venturing into the world of bonsai.

Rosemary (Rosmarinus officinalis): Infusing bonsai collections with aromatic charm, Rosemary bonsai delights the senses. Its fragrant leaves and compact growth habit make it a unique and flavorful addition to the miniature garden.

How to make bonsai soil?

Okay, so if you’re thinking of getting into bonsai and want to make your own soil mix, here are some unique details that could really make a difference. Firstly, bonsai trees require well-draining soil to prevent root rot and provide adequate oxygenation. A great mix typically consists of three components: akadama, pumice, and lava rock. Akadama is a clay-like substance that retains moisture while allowing excess water to drain away. Pumice, on the other hand, helps retain moisture without becoming too compacted. Lastly, lava rock adds stability and promotes healthy root growth by allowing air circulation within the soil mix. For a basic ratio, you can consider mixing 1 part akadama with 1 part pumice and 0.5 parts lava rock; however, this can be adjusted based on the specific needs of your tree species or personal preference. It’s always best to thoroughly research the requirements of your specific bonsai tree before creating your custom soil mix! Happy planting!

TopicDetails
Ingredients– Akadama soil, Pumice, Lava rock, Organic potting mix
Proportions– Akadama: 1 part, Pumice: 1 part, Lava rock: 1 part, Potting mix: 1 part
Mixing Steps1. Measure each component.
2. Combine in a large container.
3. Mix thoroughly until well-combined.
4. Adjust ratios if needed for specific bonsai species.
Testing Soil– Check drainage by watering the soil and observing runoff.
– Ensure soil retains moisture without becoming waterlogged.
– Adjust proportions based on plant needs and environmental factors.
Storage Tips– Store in a dry, cool place to prevent moisture absorption.
– Keep in an airtight container to maintain freshness.
– Check for any mold or pests before use.
Application– Gently pack the soil around the bonsai’s roots during repotting.
– Top-dress the soil annually to refresh nutrients and improve aeration.
Considerations– Tailor the mix to suit the specific needs of your bonsai species.
– Monitor plant health and adjust soil composition as necessary.

How to start growing a bonsai tree from seed?

Growing a bonsai tree from a seed is a fun and rewarding project. Start by choosing good-quality seeds that match the type of bonsai you want. Follow the instructions for preparing the seeds, like stratification or scarification. Plant the seeds in bonsai soil, keep them moist, and make sure they stay warm. It takes time for the seeds to sprout, so be patient. Once they grow into seedlings, take good care of them by protecting them from too much sun, watering them just right, and introducing fertilizer gradually. As your bonsai tree grows, trim and shape it to create your unique miniature masterpiece. Growing a bonsai from a seed takes time and care, but the end result is a beautiful and one-of-a-kind living artwork.

When to start clipping bonsai tree after growing one from a seed?


After growing a bonsai tree from a seed, it’s essential to allow it to establish a strong root system and develop a sturdy trunk before starting the clipping and shaping process. Generally, you should wait until the bonsai tree has reached a height of about 6 inches (15 centimeters) or has developed several sets of leaves. This may take anywhere from 6 months to a few years, depending on the tree species.

Once your bonsai has reached the desired height and has sufficient foliage, you can begin pruning and shaping. Start by removing any unwanted branches, focusing on maintaining a balanced and aesthetically pleasing structure. Regularly check the tree’s health, and only prune during the growing season, usually in spring or early summer.

Remember to use proper bonsai pruning techniques, including clean cuts with sharp tools, and avoid removing more than a third of the tree’s foliage at once. Patience and gradual shaping will help your bonsai tree develop into a beautiful and well-balanced miniature masterpiece.

How to Repot Bonsai?

Repotting your bonsai is a crucial step in its care routine, ensuring health and vitality. Discover the art of how to repot bonsai with precision. From choosing the right time to executing the process, our guide covers essential steps, materials, and tips for a successful bonsai transplant. Keep your miniature masterpiece thriving with proper repotting techniques.

8. Conclusion: Embracing the Beauty and Serenity of Bonsai Trees

Bonsai trees are more than just tiny plants in cute pots. They represent art, dedication, and a connection to nature. By following the steps to create your own bonsai and caring for it with love, you’ll be able to embrace the beauty and serenity that these miniature trees bring into your life. So, let your green thumb shine and embark on this rewarding bonsai journey today!

In conclusion, bonsai trees offer not just a stunning visual appeal but also a profound connection to nature and the artistry of cultivation. By understanding their origins, exploring different types and styles, mastering the techniques, and providing proper care, you can embark on a rewarding journey with these miniature marvels. Whether you choose to create your own bonsai tree or simply appreciate the art form, embracing the beauty and serenity of bonsai trees is a truly enriching experience. So, let the tranquility and harmony of bonsai trees inspire you as you embark on your own personal bonsai adventure.

FAQ

1. Are bonsai trees difficult to care for?

Bonsai trees do require specific care and attention, but with the right knowledge and commitment, they can be successfully maintained. Understanding their unique watering, pruning, and fertilizing needs is essential for their health and longevity.

2. Can any tree be turned into a bonsai?

While not all tree species are suitable for bonsai cultivation, a wide variety of trees can be transformed into bonsai. Some popular choices include junipers, maples, pines, and ficus trees. It’s important to research the specific requirements of each species before embarking on the bonsai journey.

3. How long does it take to create a bonsai tree?

Creating a bonsai tree is a patient and gradual process. It can take several years, or even decades, to transform a young tree into a mature and well-styled bonsai. The timeline depends on factors such as the desired style, tree species, and the skills of the bonsai artist.

4. Can bonsai trees be kept indoors?

While some bonsai trees can be kept indoors, it’s important to remember that most bonsai trees are outdoor plants that require sunlight, fresh air, and seasonal changes. Some tropical species can thrive indoors, but they still benefit from being placed outdoors periodically to maintain their overall health and vigor.

5. How often should I water my bonsai tree?

The watering frequency may fluctuate based on the bonsai tree species and its surroundings. Typically, you should water your bonsai when the upper layer of soil exhibits a slight dryness. Overwatering should be avoided, as it may result in root rot. Keep in mind that it’s preferable to underwater rather than overwater.

The Philodendron Paradise: A Complete Catalog of 76 Varieties for Indoor Greenery

Indoor greenery has become increasingly popular as people seek to bring nature’s beauty into their homes. Among the wide array of indoor plants, the Philodendron family stands out for its stunning variety and ability to thrive in indoor environments. In this blog post, we present “The Philodendron Paradise: A Complete Catalog of 76 Varieties for Indoor Greenery,” a comprehensive guide that showcases the unique characteristics of each Philodendron species. However, this catalog is more than just a list—it is an exploration of the captivating world of Philodendrons, presented in a manner that is both accessible and engaging. To ensure an enjoyable and informative reading experience, we will delve into the importance of using unique and simple language, choosing the right tone and style, simplifying complex plant terminology, and employing descriptive language and imagery. Join us as we embark on a journey to discover the beauty and simplicity of indoor greenery through the lens of Philodendron Paradise.

1. Introduction to The Philodendron Paradise: A Complete Catalog of 76 Varieties for Indoor Greenery

Welcome to The Philodendron Paradise, where we have compiled a complete catalog of 76 varieties for all your indoor greenery needs! If you’re looking to enhance your living spaces with the beauty of nature, you’ve come to the right place. Our catalog is filled with a wide range of Philodendron species, each offering its unique charm and benefits. So, let’s dive into the lush world of indoor greenery and discover the perfect Philodendron for you!

1.1 The significance of indoor greenery in enhancing living spaces

Who wouldn’t want to bring a slice of nature indoors? Indoor greenery has an incredible ability to transform any living space into a vibrant and rejuvenating oasis. Not only do plants add a touch of natural beauty, but they also have numerous benefits for our well-being. From purifying the air to reducing stress and boosting productivity, indoor greenery has a positive impact on our lives in more ways than one. So, get ready to create your own personal paradise with the help of our Philodendron catalog!

2. Understanding the Importance of Unique and Simple Language in Blog Posts

When it comes to writing a blog post that stands out from the crowd, using unique language is key. It’s like giving your post a splash of personality and flair that sets it apart from the rest. By infusing your writing with your own voice and style, you create a connection with your readers that keeps them coming back for more. So, don’t be afraid to let your creativity flow and sprinkle your words with a touch of uniqueness.

2.1 Why using unique language sets your blog post apart

In a sea of similar blog posts, using unique language is like a breath of fresh air. It captivates your readers’ attention and makes them curious to discover what you have to say. By avoiding clichés and putting your own spin on things, you provide a refreshing perspective that stands out from the crowd. So, embrace your inner wordsmith and let your unique language shine through your blog posts!

2.2 The benefits of using simple language for better reader comprehension

While unique language adds a delightful flavor to your writing, simplicity is equally important. Simple language ensures that your message is easily understood by readers of all backgrounds. By distilling complex ideas into concise and relatable sentences, you make your content accessible to a wider audience. So, keep it simple, my friend. Your readers will thank you for it!

3. Choosing the Right Tone and Style for Writing About Indoor Greenery

When it comes to writing about the beauty of indoor greenery, finding the right tone and style is essential. It’s all about striking a balance between informative and engaging, while staying true to the enchanting nature of plants. So, let’s explore how you can create a writing style that beautifully reflects the allure of indoor greenery.

3.1 Determining the appropriate tone for engaging readers

When engaging readers in the world of indoor greenery, a friendly and conversational tone works wonders. Imagine chatting with a plant enthusiast friend over a cup of tea. You want to create that same warm and inviting atmosphere in your writing. By being approachable and relatable, you’ll draw readers in and keep them hooked on your words.

3.2 Finding a writing style that reflects the beauty of indoor greenery

Just as each plant in your indoor garden has its unique beauty, your writing style should reflect that too. Let your words flourish like the leaves of a Philodendron, painting vivid images in the minds of your readers. Whether you choose a whimsical poetic style or a straightforward descriptive approach, make sure it captures the essence of the indoor greenery you’re showcasing.

4. Highlighting the Uniqueness of Each Philodendron Variety in the Catalog

In our catalog, we celebrate the diversity and distinct characteristics of each Philodendron variety. Get ready to embark on a journey through a world of lush foliage and stunning features. From the heart-shaped leaves of the Philodendron cordatum to the vibrant colors of the Philodendron prince of orange, there’s a Philodendron for every taste and style.

4.1 The diversity and characteristics of Philodendron species

Philodendron species come in all shapes and sizes, making them a joy to discover. From climbing vines to compact shrubs, each species has its own unique growth pattern and leaf structure. Some Philodendrons have glossy leaves, while others boast intricate patterns or striking colors. Exploring the diversity of Philodendron species is like embarking on a botanical adventure full of surprises and delights.

4.2 Exploring the distinct features of popular Philodendron varieties

Among the vast array of Philodendron varieties, some have captured the hearts of indoor plant enthusiasts worldwide. From the velvety leaves of the Philodendron Birkin to the dramatic foliage of the Philodendron Pink Princess, these popular varieties are adored for their striking aesthetics and unique traits. We’ll dive into the details and uncover the fascinating features that make these Philodendrons truly special. Get ready to fall in love with these green gems!

5. Simplifying Complex Plant Terminology for Easy Understanding

5.1 Breaking down botanical jargon for beginner plant enthusiasts

Botanical jargon can sometimes feel like a foreign language, especially for those new to the plant world. In this section, we’ll decode those complicated terms so even the most novice plant enthusiasts can understand them. From dissecting words like “photosynthesis” to explaining the purpose of terms like “node” and “aerial roots,” we’ll make sure you have a firm grasp on the basics.

5.2 Providing simplified explanations of scientific terms related to Philodendrons

Scientific terms can be intimidating, but fear not! We’re here to break them down in simple terms. Whether it’s explaining the role of “chlorophyll” in Philodendron’s green leaves or unraveling the mysteries behind “epiphytic” or “hemiepiphytic” growth habits, we’ll make sure you’re equipped with the knowledge to impress your friends at your next plant chat.

6. Engaging Readers with Clear and Concise Descriptions of Philodendron Species

6.1 Crafting captivating descriptions that capture the essence of each variety

Philodendron species are as diverse as they come, and we want to ensure you can understand their unique qualities. In this section, we’ll take you on a journey through concise yet captivating descriptions of each variety. From the heart-shaped leaves of the Philodendron cordatum to the vibrant foliage of the Philodendron gloriosum, you’ll feel like you’re exploring a botanical wonderland.

6.2 Using vivid language to depict the unique qualities of Philodendron species

Let’s paint a picture with words! We’ll use vivid and expressive language to bring the unique qualities of Philodendron species to life. Get ready to delve into a world of “lush, velvety leaves” and “graceful vines that dance through the air.” Our goal is to let your imagination run wild with the enchanting beauty of these indoor green marvels.

7. Creating an Enjoyable Reading Experience through Descriptive Language and Imagery

7.1 Enhancing the reader’s visual experience through descriptive language

A picture may be worth a thousand words, but we’ll strive to make those words count. Through descriptive language, we’ll paint vivid pictures in your mind’s eye, allowing you to envision the stunning details of each Philodendron variety. Prepare to be transported to a lush paradise, where you can almost feel the velvety leaves beneath your fingertips.

7.2 Incorporating vivid imagery to bring Philodendron varieties to life

Why only imagine when we can make these Philodendron varieties spring to life? Through the power of vivid imagery, we’ll take you on a visual journey that will leave you feeling like you’re standing amidst a thriving Philodendron jungle. From the deep emerald hues of the Philodendron birkin to the intricate patterns of the Philodendron pink princess, you’ll get to experience the beauty firsthand.

8. Tips for Writing a Blog Post that Captures the Beauty and Simplicity of Indoor Greenery

8.1 Strategies for conveying the allure of indoor greenery through words

Writing about indoor greenery is an art form, and we want to equip you with the best strategies to capture its allure. Whether it’s using sensory language to describe the scent of blooming flowers or employing expressive metaphors to convey the tranquility plants bring, we’ll help you infuse your writing with the magic of indoor greenery.

8.2 Maximizing the impact of simple language in creating a delightful reading experience

Who says simple language can’t be impactful? We’ll show you how to harness the power of concise, relatable language to create a delightful reading experience. No need for convoluted phrases or stuffy prose – we’ll provide tips and tricks to make your writing shine with ease, ensuring your readers are charmed from the first word to the last.In conclusion, “The Philodendron Paradise: A Complete Catalog of 76 Varieties for Indoor Greenery” invites you to explore the world of Philodendrons and discover the wonders of indoor greenery. By using unique and simple language, capturing the essence of each variety, and incorporating vivid descriptions and imagery, we aim to provide a delightful reading experience. Whether you are a seasoned plant enthusiast or just starting your indoor gardening journey, this catalog offers a wealth of information and inspiration. So, embrace the beauty of Philodendrons and let them transform your living spaces into verdant paradises. Happy planting!

FAQ

1. Are Philodendrons suitable for beginners in indoor gardening?

Philodendrons are often recommended for beginners due to their resilience and adaptability. They are relatively easy to care for, making them a great choice for those new to indoor gardening. With proper lighting, watering, and basic plant care practices, Philodendrons can thrive and bring beauty to your indoor spaces.

2. How do I determine the right Philodendron variety for my home?

Choosing the right Philodendron variety depends on various factors such as the amount of available natural light, the space you have, and your personal preferences. Some Philodendrons thrive in low light conditions, while others prefer bright, indirect light. Consider the size and growth habits of different varieties to ensure they fit well within your space. Additionally, take into account the care requirements and level of maintenance you are comfortable with.

3. Can Philodendrons be grown in water or should they be potted with soil?

Philodendrons can be grown in both water and soil, depending on the variety and personal preference. Many Philodendron species can be propagated in water and will develop roots before being transferred to soil. However, some gardeners prefer to keep their Philodendrons in water permanently, using specialized containers and nutrient solutions. Ultimately, the choice between water and soil cultivation depends on your gardening style and the specific needs of the Philodendron variety you have.

4. How often should I water my Philodendron?

The frequency of watering your Philodendron depends on several factors, including the environment, potting medium, and season. As a general rule, it’s best to allow the top inch or two of the soil to dry out before watering again. Over-watering can lead to root rot, while under-watering can cause stress and dehydration. It’s important to strike a balance and monitor the moisture levels of your Philodendron’s soil to ensure optimal growth and health.

Jade Bonsai Plant: A Comprehensive Guide to Cultivating and Caring for Crassula ovata

Welcome to our comprehensive guide on cultivating and caring for Crassula ovata, commonly known as the Jade Bonsai Plant. In this article, we will delve into the captivating world of Jade Bonsai, exploring its origins, characteristics, and various varieties. Whether you are a seasoned bonsai enthusiast or a beginner looking to embark on a new horticultural journey, this guide will provide you with valuable insights and practical tips to cultivate and care for your own beautiful Jade Bonsai Plant. From selecting a healthy plant to mastering essential techniques like watering, pruning, and fertilizing, get ready to unlock the secrets of nurturing this unique and cherished bonsai tree. Let’s dive in!

1. The Fascinating World of Jade Bonsai Plants

1.1 What is a Jade Bonsai Plant?

So you’re probably wondering, what exactly is a jade bonsai plant? Well, imagine a miniature tree with glossy, fleshy leaves that resemble little green coins. That’s right, a jade bonsai plant is a small version of the Crassula ovata, a resilient and beautiful succulent native to South Africa.

1.2 Why Jade Bonsai Plants are Popular

Jade bonsai plants have gained popularity among plant enthusiasts, and it’s not hard to see why. These little beauties are not only aesthetically pleasing, but they also bring a touch of tranquility and nature into any space. Plus, their compact size makes them perfect for people with limited space or who want to add a touch of greenery to their desks or windowsills.

1.3 Benefits of Cultivating Jade Bonsai Plants

Besides being delightful to look at, cultivating a jade bonsai plant can bring a host of benefits. For one, taking care of these little trees can be a therapeutic and rewarding hobby. It’s a chance to slow down, connect with nature, and nurture something beautiful. Additionally, jade bonsai plants are known to improve indoor air quality by purifying the air around them. So not only do they look good, but they also help you breathe easier.

2. Understanding Crassula ovata: Origins, Characteristics, and Varieties

2.1 A Brief History of Crassula ovata

Let’s take a little trip back in time to learn about the fascinating history of Crassula ovata. Native to South Africa, it’s believed that this plant was brought to China over a thousand years ago, where it was cultivated and transformed into the beloved jade bonsai plants we know today. It’s a living testament to the creativity and passion of horticulturists throughout history.

2.2 Exploring the Unique Characteristics of Crassula ovata

Now, let’s dive into what makes Crassula ovata special. One of its most distinctive features is its succulent leaves, which store water to withstand dry periods. These leaves are a glossy green, giving the plant a vibrant and fresh appearance. Another notable characteristic is its ability to develop a thick, gnarly trunk over time, adding a touch of character and wisdom to its overall aesthetic.

2.3 Popular Varieties of Crassula ovata

Just like people, Crassula ovata comes in various shapes and sizes. Some popular varieties include the “Hummel’s Sunset” with its striking red-tipped leaves, the “Gollum” with its tubular and elongated leaves, and the classic “Jade Plant” with its compact and bushy form. Each variety brings its own unique charm to the world of jade bonsai plants.

3. Getting Started: Selecting and Acquiring a Healthy Jade Bonsai Plant

3.1 Factors to Consider When Choosing a Jade Bonsai Plant

Ready to start your own jade bonsai journey? Great! But before you rush to get one, it’s important to consider a few factors. First, think about your level of experience with bonsai and choose a plant that matches your skill level. Additionally, take into account the amount of light and space available in your home, as different varieties of jade bonsai plants have different light and space requirements.

3.2 Where to Find and Purchase Jade Bonsai Plants

Now that you know what to look for in a jade bonsai plant, you may be wondering where to find one. Luckily, there are various options available. Local nurseries, garden centers, and even online marketplaces can be great sources for finding healthy jade bonsai plants. Just make sure to do your research, read reviews, and purchase from reputable sellers.

3.3 Assessing the Health and Quality of a Jade Bonsai Plant

When you lay your eyes on a potential jade bonsai plant, it’s important to check its health and quality before bringing it home. Look for signs of pest infestation, such as webbing or discolored leaves. Additionally, inspect the roots to ensure they are evenly distributed and not overcrowded. Remember, a healthy plant is the foundation for a successful bonsai journey.

4. Essential Tools and Materials for Cultivating Jade Bonsai

4.1 Must-Have Tools for Jade Bonsai Cultivation

Now that you have your jade bonsai plant, it’s time to gather the essential tools for cultivation. You’ll need a pair of sharp pruning shears to trim and shape the plant, as well as a bonsai wire to gently guide its branches. A root rake and scissors will also come in handy when it’s time to repot your jade bonsai. And don’t forget a water can or spray bottle to keep your plant hydrated.

4.2 Suitable Containers and Potting Soil for Jade Bonsai

Choosing the right container and potting soil is crucial for the health and growth of your jade bonsai plant. Opt for a shallow ceramic or plastic container with drainage holes to allow excess water to escape. As for the soil, a well-draining mix specifically designed for succulents will help your jade bonsai thrive. Remember, a happy plant starts with a happy home.

4.3 Additional Materials for Proper Growth and Development

To ensure your jade bonsai plant has everything it needs to flourish, consider using organic fertilizer to provide it with the necessary nutrients. Additionally, having a humidity tray or a small pebble tray can help maintain a humid environment around your plant, replicating its natural habitat. And of course, don’t forget to give your jade bonsai lots of love and attention – water it when the soil is dry, keep it in the right amount of light, and watch it grow into a beautiful miniature tree before your eyes.

Now that you’re armed with knowledge about jade bonsai plants and how to care for them, go forth and start your own miniature arboreal adventure. May your jade bonsai be a source of joy, serenity, and green goodness in your life. Happy cultivating!Bonsai Plants

5. Cultivation Techniques: Step-by-Step Guide for Proper Planting and Potting

5.1 Preparing the Jade Bonsai Plant for Planting

Before diving into the exciting world of jade bonsai plants, it’s important to prepare your plant for planting. Start by selecting a healthy and vibrant jade plant and ensure that it is free from any pests or diseases. You can give it a gentle rinse to remove any dirt or dust from the foliage. Additionally, prune away any dead or damaged branches to promote healthy growth.

5.2 Potting and Repotting Jade Bonsai Plants

When it comes to potting your jade bonsai, choose a shallow container with adequate drainage holes to prevent waterlogged roots. Fill the pot with well-draining bonsai soil, which is a mixture of coarse sand, peat moss, and perlite. Carefully place the plant in the pot and gently pat down the soil around the roots. Remember not to bury the trunk too deep, as it can lead to rot.

Repotting is necessary every two to three years to refresh the soil and promote healthy root growth. To repot your jade bonsai, gently remove it from its current pot, trim the roots slightly, and replant it in fresh bonsai soil. This process helps prevent root binding and provides the plant with fresh nutrients.

5.3 Sunlight, Temperature, and Humidity Requirements for Optimal Growth

Jade bonsai plants are sun-loving creatures that thrive in bright light. Place your bonsai in a location where it can receive at least six hours of direct sunlight each day. If you notice the leaves turning yellow or pale, it’s a sign that your plant may be receiving too much direct sunlight, so you may need to provide some shade during the hottest part of the day.

In terms of temperature, jade bonsai plants prefer a moderate to warm climate. They can withstand temperatures as low as 50°F (10°C) but thrive in temperatures between 65°F (18°C) and 75°F (24°C). It’s important to protect your bonsai from frost or extreme temperature fluctuations.

As for humidity, jades are known for their ability to tolerate dry conditions. However, they will benefit from occasional misting or placing a tray of water near the plant to increase humidity levels.

6. Caring for Your Jade Bonsai: Watering, Pruning, and Fertilizing Tips

6.1 Watering Techniques for Jade Bonsai Plants

When it comes to watering your jade bonsai, it’s essential to strike a balance. Overwatering can lead to root rot, while underwatering can cause the plant to wither. The key is to allow the soil to partially dry out between waterings. Stick your finger into the soil up to the first knuckle, and if it feels dry at that depth, it’s time to water. Avoid leaving your bonsai sitting in a saucer filled with water, as it can lead to root suffocation.

6.2 Pruning and Trimming to Maintain Shape and Health

Pruning is an essential part of maintaining the shape and health of your jade bonsai. Remove any dead, damaged, or overgrown branches to encourage new growth and maintain an aesthetically pleasing shape. Jade bonsai plants are forgiving, so don’t be afraid to prune, but make sure to use clean and sharp tools to prevent any infections.

6.3 Fertilizing Schedule and Nutritional Needs of Jade Bonsai Plants

To keep your jade bonsai thriving, it’s important to provide it with the necessary nutrients. Use a balanced liquid fertilizer specifically formulated for bonsai plants during the growing season, typically from spring to early autumn. Follow the manufacturer’s instructions for the appropriate dilution and frequency of application. During the winter months, reduce or eliminate fertilization as the plant enters a dormant phase.

Remember, caring for a jade bonsai plant is a journey that requires observation, patience, and a touch of love. Follow these tips, and enjoy the rewarding experience of cultivating and caring for your very own miniature tree.

With this comprehensive guide, you now have the knowledge and tools to successfully cultivate and care for your very own Jade Bonsai Plant. Remember, patience and dedication are key as you embark on this rewarding journey of bonsai cultivation. By understanding the origins, characteristics, and varieties of Crassula ovata, and by following the step-by-step techniques for planting, potting, and caring, you can create a stunning and thriving Jade Bonsai. Enjoy the process, embrace the artistry, and witness the beauty of your Jade Bonsai as it grows and flourishes under your expert care. Happy bonsai gardening!

FAQ

1. How often should I water my Jade Bonsai Plant?

Watering frequency for Jade Bonsai Plants can vary depending on factors such as the size of the pot, climate, and time of year. As a general guideline, it is recommended to water your Jade Bonsai thoroughly when the topsoil feels slightly dry, ensuring that excess water drains properly. Avoid overwatering or allowing the soil to become completely dry between waterings.

2. Can I grow Jade Bonsai indoors?

Yes, Jade Bonsai Plants can be grown indoors successfully, provided they receive sufficient light. Place your Jade Bonsai near a window where it can receive bright, indirect sunlight for several hours each day. Additionally, ensure proper air circulation and avoid placing the bonsai near drafty areas or heating vents.

3. How often should I prune my Jade Bonsai?

Pruning is an essential part of maintaining the shape and health of your Jade Bonsai Plant. Regular pruning should be done during the growing season, typically in spring or early summer. Trim back any overgrown branches or foliage to maintain the desired form and encourage new growth. Remember to use clean, sterile pruning tools to prevent the spread of diseases.

4. Do Jade Bonsai Plants require special fertilizer?

Jade Bonsai Plants benefit from regular fertilization, especially during the growing season. It is recommended to use a balanced, organic bonsai fertilizer or a slow-release fertilizer specifically formulated for bonsai trees. Follow the package instructions for application rates and frequency, and adjust the dosage based on the age and health of your Jade Bonsai.

How To Propagate Anthurium: A Step-by-Step Comprehensive Guide

Anthuriums, with their vibrant and captivating flowers, are popular houseplants that add a touch of tropical elegance to any space. If you are an avid plant enthusiast or simply looking to expand your indoor garden, learning how to propagate anthuriums can be a rewarding endeavor. Propagation allows you to create new plants from existing ones, giving you the opportunity to share the beauty of anthuriums with others or expand your collection. In this comprehensive guide, we will explore the various methods of anthurium propagation, including seeds and cuttings, providing you with step-by-step instructions, helpful tips, and insights into caring for newly propagated plants. Whether you are a beginner or have some experience in plant propagation, this article will equip you with the knowledge you need to successfully propagate anthuriums and enjoy the satisfaction of nurturing new life.

1. Introduction to Anthurium Propagation

Propagation, a fancy word for making more plant babies, is an exciting way to expand your plant collection without breaking the bank. And if you’re a fan of colorful, heart-shaped flowers, then propagating Anthurium plants should be high on your to-do list. But before we dive into the nitty-gritty of Anthurium propagation, let’s first understand what it actually means and why it’s worth your time.

1.1 What is Anthurium Propagation?

Anthurium propagation is the process of creating new Anthurium plants from existing ones. Think of it as a magical way to clone your favorite plant and watch it grow into a thriving beauty. With a little bit of knowledge and some TLC, you can propagate Anthuriums and enjoy their stunning blooms in various corners of your home or garden.

1.2 Benefits of Propagating Anthurium Plants

Aside from the sheer satisfaction of nurturing new life, propagating Anthurium plants offers several benefits. First and foremost, you get to expand your plant collection without spending a fortune on buying new plants. Plus, by propagating your existing Anthuriums, you can preserve unique varieties or share the love by gifting them to friends and family. So not only does it save you money, but it’s also a great way to spread some green joy!

2. Understanding Anthurium Plant Anatomy

Before we delve into the art of propagation, let’s take a quick tour of an Anthurium plant’s anatomy. Knowing the different parts of the plant will help you make informed decisions when it comes to choosing the right propagation method.

2.1 Anatomy of Anthurium Flowers

Anthurium flowers are like nature’s way of showing off. With their vibrant colors and heart-shaped spathes, they captivate everyone who lays eyes on them. The spathe, a modified leaf, encloses the spadix, which is responsible for producing tiny flowers. These flowers contain both male and female reproductive organs, making them perfect for propagating Anthuriums.

2.2 Anatomy of Anthurium Leaves

Anthurium leaves are a sight to behold, with their glossy texture and elongated shape. These leaves serve as the plant’s energy factories, converting sunlight into food through a process called photosynthesis. Understanding the anatomy of Anthurium leaves is crucial because certain propagation methods require specific leaf sections to be successful.

2.3 Understanding Anthurium Root Systems

Beneath the surface, Anthurium plants boast a network of roots that provide them with essential nutrients and anchor them in their pots or soil. The root system plays a vital role in the health and growth of the plant, so it’s important to take it into consideration when propagating Anthuriums. Now, let’s dive into the exciting world of propagation methods!

3. Methods of Anthurium Propagation

When it comes to propagating Anthuriums, you have a few tricks up your green thumb. Each method has its own quirks and success rate, so it’s worth exploring all of them and figuring out which one works best for you. Let’s take a look at the three main methods of Anthurium propagation.

3.1 Division Method

If you have a mature Anthurium plant with multiple stems or clumps, the division method is your go-to. It’s as simple as separating the clumps into individual plants, each with its own roots and leaves. This method ensures that each new plant has a head start in life and can thrive independently.

3.2 Seed Propagation Method

For the patient and adventurous plant lovers out there, seed propagation is an option worth exploring. It involves collecting and sowing Anthurium seeds, allowing you to witness the entire lifecycle of the plant from start to finish. While it may take longer than other methods, the satisfaction of growing a plant from a tiny seed is unparalleled.

3.3 Stem Cutting Method

If you’ve ever had a magic wand fantasy, then the stem cutting method might be right up your alley. By taking a section of the stem and providing it with the right conditions, you can encourage the growth of new roots and create a whole new Anthurium plant. It’s like casting a spell, except the only magic involved is the power of nature.

4. Propagating Anthurium from Seeds

Now that we’ve piqued your curiosity about seed propagation, let’s dig deeper into this fascinating method. Although it requires a little more patience, the process is incredibly rewarding. So put on your gardening gloves (or wizard robes, if you prefer), and let’s learn how to propagate Anthuriums from seeds.

4.1 Collecting and Preparing Anthurium Seeds

The journey of seed propagation starts with collecting mature Anthurium seeds. These seeds are typically found inside the berries that develop after the plant is pollinated. To ensure successful propagation, it’s crucial to collect ripe berries, remove the seeds, and prepare them for planting. Don’t worry, we’ll guide you through each step of the way!

4.2 Sowing Anthurium Seeds

Once you have your Anthurium seeds all prepped and ready, it’s time to sow them. Whether you choose to sow them directly in pots or opt for a seed tray, creating the perfect environment for seed germination is key. We’ll walk you through the process, providing tips to maximize your chances of success.

4.3 Germination Process and Care

With your seeds sown, it’s time to sit back, relax, and let nature work its magic. The germination process may take anywhere from a few weeks to a couple of months, so patience is an essential virtue here. We’ll cover the care and maintenance required during this stage to ensure healthy seedlings and increase their chances of growing into strong, blooming Anthurium plants.

Propagation opens up a whole new world of possibilities for Anthurium enthusiasts. Whether you choose to divide, sow seeds, or try your hand at stem cuttings, each method brings its own excitement and rewards. So go forth, aspiring plant propagators, and let your Anthurium collection flourish!

5. Propagating Anthurium from Cuttings

If you’ve fallen in love with the beauty of anthurium plants and want to expand your collection, propagating them from cuttings is a fantastic way to do it. It’s relatively simple and doesn’t require a green thumb of any kind. Here’s what you need to know to get started.

5.1 Selecting and Preparing Anthurium Cuttings

When selecting cuttings for propagation, look for healthy and mature stems with at least two or three leaves. Make sure to use a clean, sharp pair of scissors or pruning shears to make a clean cut just below a leaf node. Remove any flowers or buds from the cutting as they can divert energy from root development.

5.2 Choosing the Right Propagation Medium

To give your anthurium cuttings the best chance of success, you’ll need a suitable propagation medium. A mix of equal parts perlite and peat moss works well, providing good drainage and moisture retention. Fill a small pot or tray with this mixture, ensuring it is moist but not soaked.

5.3 Rooting Anthurium Cuttings

Dip the bottom end of your anthurium cutting in a rooting hormone to encourage root development. Then, create a small hole in the propagation medium and gently place the cutting inside. Press the medium around the cutting to ensure good contact. Keep the cuttings in a warm, bright location but out of direct sunlight. Mist them regularly to maintain humidity and prevent the medium from drying out.

6. Caring for Newly Propagated Anthurium Plants

Congratulations! You’ve successfully rooted your anthurium cuttings, and now it’s time to give them the care they need to thrive.

6.1 Transferring Anthurium Cuttings or Seedlings to Pots

Once the roots have developed, usually after a few weeks, carefully transfer your rooted anthurium cuttings or seedlings to individual pots. Use a well-draining potting mix that retains moisture without becoming waterlogged. Ensure the plant is at the same level it was in the propagation medium and water thoroughly after repotting.

6.2 Providing Optimal Light, Temperature, and Humidity

Anthuriums thrive in bright, indirect light, so place your newly propagated plants near a window with filtered sunlight. Maintain a temperature between 60-80°F (15-27°C) and humidity levels around 60-70%. You can increase humidity by placing a tray of water near the plants or using a humidifier.

6.3 Watering and Fertilizing Newly Propagated Anthurium Plants

Water your anthurium plants when the top inch of the soil feels dry to the touch. Avoid overwatering as it can lead to root rot. As for fertilizing, use a balanced liquid fertilizer diluted to half strength every two to four weeks during the growing season. However, remember that less is more – anthuriums can be sensitive to over-fertilization.

7. Troubleshooting Common Issues in Anthurium Propagation

Even the most experienced gardeners face challenges, but fear not! Here are some common issues you may encounter during anthurium propagation and how to tackle them.

7.1 Dealing with Root Rot and Overwatering

Overwatering is the enemy of healthy anthurium plants. Ensure the potting mix has good drainage, and only water when the soil is dry. If you suspect root rot, carefully remove the plant from the pot, trim away any rotted roots, and replant in fresh, well-draining soil.

7.2 Managing Pests and Diseases

Anthuriums can be susceptible to pests like aphids, mealybugs, and spider mites. Regularly inspect your plants for signs of infestation, such as tiny bugs, sticky residue, or distorted leaves. Treat infestations with organic insecticidal soap or neem oil, ensuring you cover both sides of the leaves.

7.3 Addressing Leaf Yellowing and Wilting

Yellowing leaves can be a sign of overwatering, underwatering, or nutrient deficiencies. Check the soil moisture, adjust your watering routine, and consider fertilizing with a balanced houseplant fertilizer. Wilting leaves may indicate dehydration or extreme temperature fluctuations. Adjust watering and ensure your plant is not exposed to drafts or direct heat sources.

8. Conclusion and Final Tips for Successful Anthurium Propagation

Propagation is a rewarding way to grow your anthurium collection and share the beauty with others. Remember to be patient and give your cuttings time to establish roots. Keep an eye on watering, light, temperature, and humidity to provide optimal conditions for growth. And most importantly, have fun with it! Happy propagating!

8. Conclusion and Final Tips for Successful Anthurium Propagation

Propagating anthurium plants is an exciting and rewarding process that allows you to expand your collection and share the beauty of these tropical plants with others. By understanding the anatomy of anthuriums and learning the various propagation methods such as seeds and cuttings, you can successfully create new plants and enjoy the satisfaction of watching them grow. Remember to provide the right care and attention to your newly propagated anthuriums, ensuring they have the optimal conditions of light, temperature, humidity, and watering. By troubleshooting common issues and addressing them promptly, you can set your propagated anthurium plants on a path to thrive. So go ahead, get your hands dirty, and embark on this botanical adventure – happy anthurium propagation!

FAQ

1. Can I propagate anthurium plants from seeds?

Yes, anthurium plants can be propagated from seeds. However, it’s important to note that the process of growing anthuriums from seeds can be more time-consuming and challenging compared to other propagation methods, such as stem cuttings. Proper seed collection, preparation, and germination techniques are crucial for successful seed propagation.

2. How long does it take for anthurium cuttings to root?

The time it takes for anthurium cuttings to root can vary depending on several factors, including the environmental conditions, the type of cutting, and the overall health of the plant. Generally, it can take anywhere from a few weeks to a couple of months for the cuttings to develop a robust root system. Providing the right level of humidity, temperature, and moisture during the rooting process can significantly aid in the successful establishment of roots.

3. What are some common problems I might encounter during anthurium propagation?

While anthurium propagation can be a rewarding experience, it’s not without potential challenges. Some common problems you may encounter include root rot due to overwatering, pests such as aphids or mites, and issues like leaf yellowing and wilting. However, with proper care, attention, and timely intervention, most problems can be managed effectively, ensuring the healthy growth of your propagated anthurium plants.

4. Can I propagate anthuriums if I only have one plant?

Yes, it is possible to propagate anthurium plants even if you only have one individual plant. While the division method may not be applicable in this case, you can still propagate anthuriums through other methods such as stem cuttings. By taking stem cuttings from the parent plant and following the appropriate procedures, you can successfully create new anthurium plants and expand your collection.

How to Grow and Care for Juniper Bonsai

Welcome to the world of Juniper Bonsai, a fascinating and rewarding art form that combines horticulture and aesthetics. Juniper Bonsai is derived from the Juniperus genus of trees and shrubs, known for their resilience and ability to thrive in various climates. These miniature trees, meticulously grown and shaped, encapsulate the beauty and tranquility of nature in a small, captivating package. In this article, we will explore the art of growing and caring for Juniper Bonsai, covering everything from selecting the right variety to pruning techniques and pest management. Whether you are a seasoned bonsai enthusiast or a beginner looking to embark on this journey, this guide will provide you with the essential knowledge to nurture and cultivate your own stunning Juniper Bonsai tree.

1. Introduction to Juniper Bonsai

1.1 What is Juniper Bonsai?

If you’ve ever wanted a tree that fits on a coffee table, then juniper bonsai is your new best friend. Juniper bonsai is a miniature version of the iconic juniper tree, carefully cultivated to fit in a small pot. It’s like having a tiny forest in your own home, except with less wildlife and more pruning.

1.2 History and Significance of Juniper Bonsai

Juniper bonsai has a rich history spanning centuries. Originating in China and later popularized in Japan, these tiny trees have been cherished for their aesthetic beauty and symbolic significance. In the world of bonsai, juniper bonsai is often revered for its resilience, longevity, and ability to withstand harsh conditions. It’s like the Chuck Norris of the bonsai world, except with more finesse and fewer roundhouse kicks.

2. Selecting the Right Juniper Bonsai Variety

2.1 Understanding Different Juniper Bonsai Varieties

Just like there are different flavors of ice cream, there are different varieties of juniper bonsai. From the versatile Juniperus procumbens to the elegant Juniperus rigida, each variety brings its own unique characteristics to the bonsai table. It’s like assembling a diverse squad of miniature trees, ready to impress your guests and make your neighbors jealous.

2.2 Factors to Consider when Choosing a Juniper Bonsai

Choosing the right juniper bonsai is like finding the perfect partner compatibility is key. Factors to consider include the growth pattern, foliage type, and overall shape of the tree. Make sure you find a juniper bonsai that matches your aesthetic preferences and fits well with the space you have available. It’s like finding the yin to your yang, but with less soul-searching and more horticulture.

3. Essential Tools and Materials for Juniper Bonsai Care

3.1 Basic Tools for Juniper Bonsai Care

To care for your juniper bonsai, you’ll need a few basic tools. These include concave cutters for precise pruning, wire cutters for shaping branches, and a pair of chopsticks for those important bonsai conversations. Okay, maybe not the last one, but it’s always good to have chopsticks nearby for a quick snack break.

3.2 Required Materials for Juniper Bonsai Care

Apart from tools, you’ll also need some materials to keep your juniper bonsai happy. This includes a well-draining soil mix, a bonsai pot to showcase your tree’s swag, and some wire for training those branches to strike a pose. Think of it as a mini spa day for your bonsai, complete with a trendy pot and a soil massage.

4. Proper Placement and Sunlight Requirements

4.1 Identifying Optimal Placement for Juniper Bonsai

Finding the perfect spot for your juniper bonsai is like playing a game of bonsai hide-and-seek. You’ll want to place it somewhere that provides a balance of light and shade, avoiding extreme temperature fluctuations and drafty spots. Think of your juniper bonsai as a diva that prefers the Goldilocks zone—not too hot, not too cold, just right.

4.2 Understanding Sunlight Needs for Juniper Bonsai

Sunlight is like fuel for your juniper bonsai—it needs just the right amount to thrive. Most juniper bonsai varieties love a good dose of direct sunlight, but be careful not to fry them like an overcooked pancake. Keep an eye on their sunbathing sessions and make sure they get enough shade breaks to prevent sunburn. It’s like finding the perfect balance between a solar panel and a beach umbrella.

Now that you’re armed with the basics of growing and caring for juniper bonsai, it’s time to embark on your miniature tree journey. Remember, bonsai care is a combination of art and science, but with a dash of whimsy thrown in. So grab your tools, embrace your inner bonsai artist, and let your juniper bonsai thrive!

5. Watering and Fertilizing Juniper Bonsai

5.1 Watering Techniques for Juniper Bonsai

Watering your Juniper bonsai is like finding the perfect balance in a relationship. Too much water, and it may drown; too little, and it may wither away. So, how do you know when and how much to water?

The key is to keep the soil moist but not soggy. Stick your finger into the soil about an inch deep, and if it feels dry, it’s time to water. Use a watering can or a gentle spray nozzle to ensure even watering throughout the pot.

Remember, Juniper bonsai prefers well-drained soil, so avoid overwatering or letting it sit in a tray of water. And don’t be surprised if your Juniper bonsai demands a little extra hydration during the hot summer months.

5.2 Fertilizing Guidelines for Juniper Bonsai

Juniper bonsai, like a diva, needs its fair share of nutrients to stay healthy and vibrant. Fertilizing is like giving it a mini spa treatment to keep it looking its best.

Use a balanced, organic fertilizer specifically formulated for bonsai trees. During the growing season from spring to autumn, feed your Juniper bonsai every two weeks. But hold back during winter when it’s taking a well-deserved rest, and fertilize only once every two months.

Remember, bonsai trees are like high-maintenance houseplants. So, be sure not to overdo the fertilizer, as it can lead to burnt roots. Follow the instructions on the packaging, and your Juniper bonsai will thank you with lush greenery.

6. Pruning and Shaping Techniques

6.1 Importance of Pruning for Juniper Bonsai

If your Juniper bonsai were a hairstyle, pruning would be the equivalent of going to the salon for a trim. It enhances the tree’s shape, encourages new growth, and keeps it looking sharp.

Regular pruning allows you to maintain the desired shape and size of your Juniper bonsai. Remove any dead, diseased, or damaged branches, and thin out dense areas to improve airflow and sunlight penetration. This will help keep your tree healthy and prevent pests and diseases from taking hold.

Pruning is best done during the active growth period in spring or early summer. Remember to use sharp, clean tools and sterilize them between cuts to avoid spreading any potential diseases.

6.2 Different Shaping Techniques for Juniper Bonsai

Shaping your Juniper bonsai is like sculpting a masterpiece. You have the power to transform it into various styles, depending on your artistic vision.

Some popular shaping techniques for Juniper bonsai include the formal upright style, informal upright style, cascade style, and windswept style. Each style requires careful wiring, bending, and trimming to achieve the desired look.

Remember, shaping a bonsai takes time and patience. Don’t rush the process, and let your creativity shine through. With a little practice, you’ll soon become a bonsai hairstylist extraordinaire.

7. Preventing and Managing Juniper Bonsai Pests and Diseases

7.1 Common Pests Affecting Juniper Bonsai

Pests are like unwanted guests crashing a party—annoying and potentially destructive. Protect your Juniper bonsai by keeping an eye out for these common pests that may try to join the party:

  • Spider mites: These tiny arachnids suck the sap from the leaves, causing yellowing and webbing.
  • Scale insects: These sneaky insects attach themselves to the branches and suck out the plant’s juices, leading to weakened growth.
  • Aphids: These tiny, sap-sucking insects can multiply quickly and cause leaf curling and general decline.

7.2 Effective Pest Prevention and Control Measures

To prevent these uninvited guests from wreaking havoc on your Juniper bonsai, regularly inspect the foliage and branches. If you spot any pests, act swiftly!

Start by gently washing the affected areas with a spray of water to dislodge the pests. For persistent infestations, you can use an organic insecticidal soap or horticultural oil spray. Just remember to follow the instructions carefully to avoid harming your bonsai.

Prevention is key, so maintain a clean and healthy growing environment for your Juniper bonsai. Remove any dead leaves or debris that may attract pests, and avoid overcrowding your bonsai with other plants.

7.3 Identifying and Treating Juniper Bonsai Diseases

Diseases can hit your Juniper bonsai like a bad case of the flu. Keep an eye out for these common diseases and take appropriate action to nurse your bonsai back to health:

  • Cedar apple rust: This fungal disease causes orange, gelatinous growths on the branches and affects both the Juniper bonsai and nearby apple trees.
  • Phomopsis tip blight: This fungal disease causes browning and dieback of the tips of branches, leading to an overall decline in the tree’s health.

If you suspect your Juniper bonsai has a disease, promptly remove and destroy the affected branches or foliage. Avoid overwatering and ensure good airflow around the tree. If the problem persists, consult a local horticulturist or bonsai expert for specific treatment options.

8. Repotting and Root Maintenance for Juniper Bonsai

8.1 When and How to Repot a Juniper Bonsai

Repotting your Juniper bonsai is like giving it a fresh start in a bigger home. It provides the tree with fresh soil, promotes healthy root growth, and prevents it from becoming root-bound.

The best time to repot your Juniper bonsai is in early spring, just before the growing season begins. Carefully remove the tree from its pot, trim any circling roots, and repot it into a slightly larger container. Use well-draining bonsai soil to ensure proper water retention and airflow.

Remember, repotting can be stressful for your bonsai, so be gentle and avoid disturbing the root ball too much. After repotting, place your bonsai in a shaded area for a few weeks to allow it to recover before gradually reintroducing it to full sunlight.

8.2 Proper Root Maintenance Techniques

Root maintenance is like providing your Juniper bonsai with a comfortable pair of shoes. It ensures healthy root development and overall vitality.

Regularly check the roots of your Juniper bonsai to make sure they’re not growing out of control. Trim any long or tangled roots, and gently comb out the root ball with a root rake to separate and aerate the roots.

Remember to repot your Juniper bonsai every two to three years to keep it happy and prevent it from becoming root-bound. And don’t forget to reward your bonsai with a little extra fertilizer after repotting to help it recover and grow strong.

In conclusion, growing and caring for Juniper Bonsai is an art form that requires patience, skill, and a deep appreciation for nature’s beauty. By following the guidelines outlined in this article, you can embark on a fulfilling journey of tending to these miniature trees, watching them thrive and evolve over time. Remember to enjoy the process and embrace the unique character of each Juniper Bonsai variety. With proper care and attention, your Juniper Bonsai can become a stunning centerpiece, bringing a sense of tranquility and natural harmony to your living space. Happy bonsai gardening!

FAQ

1. Can I grow Juniper Bonsai indoors?

While it is possible to grow Juniper Bonsai indoors, it is important to note that Junipers thrive in outdoor conditions. They require direct sunlight and proper airflow to thrive. If growing indoors, ensure that you place the bonsai near a bright window or provide supplemental grow lights to mimic natural sunlight.

2. How often should I water my Juniper Bonsai?

The watering frequency for Juniper Bonsai depends on several factors, including the climate, pot size, and soil type. As a general rule, it is best to water thoroughly when the topsoil appears dry, but before the tree becomes completely dry. Check the moisture level by inserting a finger into the soil to ensure it is moist but not waterlogged.

3. Do Juniper Bonsai require special soil or fertilizer?

Juniper Bonsai thrive in well-draining soil that allows water to flow freely. A mix of bonsai-specific soil, such as Akadama, pumice, and lava rock, is ideal. As for fertilizer, a balanced bonsai fertilizer is recommended, applied during the growing season. Follow the instructions on the fertilizer package and avoid over-fertilization, which can harm the tree.

4. How often should I prune and shape my Juniper Bonsai?

Pruning and shaping frequency depends on the growth rate and desired shape of your Juniper Bonsai. Regular pruning is necessary to maintain its shape and enhance ramification. It is best to prune during the active growing season, typically in spring or early summer. However, avoid excessive pruning, as it may weaken the tree. Consult pruning guides or seek guidance from experienced bonsai enthusiasts to develop and maintain the desired shape of your Juniper Bonsai.

Unveiling the Cherry Blossom Bonsai Care Guide

Imagine a miniature world where delicate pink blooms erupt from a gnarled, ancient-looking tree. This isn’t a scene from a fantasy novel, but the reality of owning a cherry blossom bonsai. These captivating trees, with their cascade of flowers and compact forms, are living works of art that require dedicated care. But fear not, aspiring bonsai masters! This detailed care guide will equip you with the knowledge to nurture your miniature cherry tree to its full potential.

1.1 What is Cherry Blossom Bonsai?

Cherry Blossom Bonsai is a miniature version of the iconic cherry blossom trees that bloom in spring. These delicate and beautiful trees can be grown and nurtured in small pots, allowing you to enjoy their captivating blooms within the confines of your own home or garden.

1.2 Why Choose Cherry Blossom Bonsai?

Choosing Cherry Blossom Bonsai is like inviting a touch of Japan into your life. These bonsai trees not only offer stunning beauty, but also symbolize grace, elegance, and the fleeting nature of life. They are a constant reminder to appreciate nature’s fleeting moments and find beauty in simplicity.

1.3 Understanding the Basics of Bonsai Care

Bonsai care involves more than just watering and pruning. It’s about creating the perfect environment for your miniature tree to thrive. Understanding the basics of bonsai care, such as proper watering, fertilizing, and choosing the right soil, will ensure the longevity and health of your Cherry Blossom Bonsai.

2. Choosing the Right Cherry Blossom Bonsai Tree

2.1 Different Varieties of Cherry Blossom Bonsai

There are several varieties of cherry blossom bonsai, each with its own unique characteristics. Some popular varieties include the Yoshino cherry, Kwanzan cherry, and Weeping cherry. Understanding the traits of different varieties will help you choose the one that best suits your preferences and care capabilities.

2.2 Factors to Consider when Selecting a Cherry Blossom Bonsai Tree

Choosing the right cherry blossom bonsai tree involves considering factors such as size, age, style, and overall health. Assessing these factors will help you find a tree that matches your aesthetic preferences and fits well into your care routine.

2.3 Evaluating the Health and Quality of a Bonsai Tree

When selecting a cherry blossom bonsai, it’s crucial to evaluate its health and quality. Look out for signs of disease or pests, inspect the foliage and branches for any damage, and consider the overall balance and proportion of the tree. A healthy and well-maintained bonsai tree will have a better chance of thriving under your care.

Lighting Up Your Bonsai Life:

Cherry blossoms crave sunlight, but just like Goldilocks’ porridge, it needs to be “just right.” Partial sun, with dappled morning and evening light, is ideal. Harsh afternoon sun can scorch leaves and blooms, so consider providing shade during peak hours. Remember, during winter dormancy, cooler temperatures and less light are preferred.

Watering Wisdom:

Think of your bonsai as a thirsty traveler in a desert. Don’t let it dry out! Moist soil is key, but avoid waterlogging. A good rule of thumb: stick your finger into the soil. If it’s dry up to your first knuckle, give it a thorough drink until water trickles through the drainage holes. Watering frequency will vary depending on season and temperature, so adjust accordingly.

Feeding Your Miniature Masterpiece:

Cherry blossoms require regular feeding during the growing season. Choose a bona fide bonsai fertilizer, diluted as per instructions, and apply it monthly as a liquid or pellet. In the winter, however, let your tree rest; hold off on fertilizer during dormancy.

Potting and Repotting:

Bonsai live in tight quarters, mimicking their natural mountainside habitat. Use a shallow bonsai pot with good drainage holes and a specialized bonsai soil mix that allows for airflow and water retention. Repotting is needed every 2-3 years for younger trees, less often for mature ones. Late winter, before flowering, is the perfect time.

Pruning with Precision:

Pruning shapes your bonsai and encourages blooming. Use sharp, sterilized tools to pinch new growth and remove unwanted branches. Remember, less is often more when it comes to pruning cherry blossoms. For major branch removal, consult an experienced bonsai artist.

Winter Wonderland:

Don’t forget, even miniature trees get chilly! During winter, provide your bonsai with a cool (but frost-free) location with plenty of light. Reduce watering and avoid fertilizing. This dormancy period is crucial for healthy growth and future blooms.

Bonus Tips for Blossom Bliss:

  • Humidity is your friend: Mist your bonsai regularly, especially during hot days.
  • Pests and diseases: Keep an eye out for common bonsai threats and treat them promptly with organic methods whenever possible.
  • Talk to your tree: While it may seem strange, spending time with your bonsai, observing its changes, and providing gentle care can build a connection that enhances your bonsai journey.

Mastering the Miniature Oasis:

The core principles outlined in the previous post will establish a solid foundation for your cherry blossom bonsai’s health and happiness. But for those yearning to delve deeper, here are some advanced tips to refine your bonsai artistry:

Fine-Tuning Your Technique:

  • Refine Branching: Prune strategically to create layers and asymmetry, mimicking the natural flow of mature trees. Learn about techniques like jin (deadwood) and shari (exposed bark) to add character and depth.
  • Root Work: During repotting, gently expose and sculpt the roots to enhance the tree’s character and stability. This requires careful technique and understanding of root functions.
  • Wiring Wonders: Use thin wires to gently bend branches into your desired shape. Remember, patience and gradual adjustments are key to avoid damaging the tree.

Secrets of the Blooming Season:

  • Flower Power: Pruning just after flowering encourages bud development for the following year. Learn about specific techniques like pinching and bud selection to maximize future blooms.
  • Color Alchemy: Certain varieties of cherry blossoms respond to specific soil pH levels, allowing you to influence the intensity of their color. Research your specific cultivar and experiment cautiously.
  • Bonsai Bonanza: Consider showcasing your blooming masterpiece in competitions or exhibitions. Sharing your passion and learning from fellow bonsai enthusiasts is a rewarding experience.

Embracing the Holistic Approach:

  • Seasonal Cycles: Observe and understand the natural rhythms of your bonsai throughout the year. Adjust your care practices accordingly, respecting its needs during periods of growth, dormancy, and blooming.
  • Location, Location, Location: Experiment with different outdoor locations throughout the year, providing the optimal balance of sunlight, air circulation, and protection from harsh elements.
  • Inner Harmony: Beyond technique, develop a deep connection with your bonsai. Observe its subtle changes, respond to its needs intuitively, and let your creativity flourish alongside your tiny tree.

Remember, the journey of a cherry blossom bonsai is a marathon, not a sprint. Embrace the learning process, celebrate small victories, and be patient with yourself and your miniature masterpiece. With dedication and a dash of artistry, you’ll witness the breathtaking transformation of your tiny tree into a living testament to your bonsai care mastery.

So, dive deeper, explore the nuances, and let your passion for cherry blossom bonsai blossom into something truly extraordinary!

FAQ

1. How often should I water my Cherry Blossom Bonsai?

Proper watering is crucial for the health of your Cherry Blossom Bonsai. The frequency of watering depends on various factors such as the size of the tree, the type of soil, and the climate. As a general rule, it is recommended to check the moisture level of the soil regularly and water when the top layer feels slightly dry. Avoid overwatering, which can lead to root rot, and ensure proper drainage to prevent waterlogged soil.

2. Do Cherry Blossom Bonsai trees require special fertilizers?

Cherry Blossom Bonsai trees benefit from regular fertilization during the growing season to promote healthy growth and vibrant blooms. You can use specialized bonsai fertilizers or balanced slow-release fertilizers, following the recommended dosage instructions. It is essential to choose a fertilizer with the appropriate balance of nutrients to support the specific needs of your Cherry Blossom Bonsai.

3. How do I prune and shape my Cherry Blossom Bonsai?

Pruning and shaping are vital aspects of Cherry Blossom Bonsai care to maintain the desired size, shape, and aesthetics of the tree. Start by removing any dead, damaged, or overgrown branches. Then, carefully trim back new growth to maintain the desired shape. Wiring can also be used to guide the branches into the desired position. It is crucial to proceed with caution, using sharp and clean tools, and to understand the specific pruning requirements for Cherry Blossom Bonsai trees.

4. What are the common pests and diseases that affect Cherry Blossom Bonsai?

Cherry Blossom Bonsai trees can be susceptible to various pests and diseases, including aphids, spider mites, scale insects, and fungal infections. Regular inspection is essential to detect any signs of infestation or disease early on. Take preventive measures such as maintaining good hygiene, providing proper air circulation, and using organic pest control methods when necessary. If you notice any issues, promptly address them with appropriate treatments to protect the health of your Cherry Blossom Bonsai.

How to Use Chamomile Tea to Prevent House Plant Diseases

Hello plant enthusiasts! Today, we’re diving into the world of chamomile tea and its remarkable benefits for your house plants. Who would have thought that a cup of chamomile tea could be the superhero your leafy friends need to stay healthy and disease-free? Let’s unlock the secrets of chamomile tea and its incredible powers in preventing and treating common plant diseases.

Unveiling the Power of Chamomile:

Chamomile tea isn’t just a soothing bedtime drink; it’s a powerhouse with natural properties that can shield your plants from diseases. Packed with anti-fungal and anti-bacterial qualities, chamomile tea is here to revolutionize your plant care routine.

The Recipe for Chamomile Tea Elixir:

Creating your chamomile tea solution is as easy as making your morning cuppa. Here’s the simple recipe:

Ingredients:

  1. Chamomile tea bags or dried chamomile flowers
  2. Boiling water

Steps:

  1. Steep chamomile tea bags or dried flowers in boiling water, just as you would for your regular tea.
  2. Let the tea cool completely.

Using Chamomile Tea as a Preventive Measure:

  1. Guarding Against Damping Off:
    • Damping off, the sneaky fungal disease that can harm your plants, is no match for chamomile tea. Use it as a preventive measure by making a solution from fresh or dried chamomile flowers. Spray the solution on your seedlings or soak your seeds before planting.

Understanding Damping Off:

Damping off is a group of fungal diseases that attack seedlings, causing rot in the stem and root tissues. Look out for yellowing leaves, wilting, and stunted growth – the telltale signs of damping off. This pesky condition thrives in wet, cold soil with poor drainage.

Preventing Damping Off with Chamomile Tea:

  1. Brew a Strong Batch:
    • Make a robust chamomile tea by steeping fresh or dried chamomile flowers in hot water for up to 24 hours. This releases the active compounds that repel pests and control their populations.
  2. Spray Infested Plants:
    • Transfer the chamomile tea to a spray bottle and apply it directly on infested plants, covering both the foliage and the soil around them.
  3. Time Your Spraying:
    • To protect beneficial insects like bees and butterflies, spray chamomile tea early in the morning or late in the evening when they are less active.
  4. Repeat as Needed:
    • Depending on the severity of the infestation, repeat the chamomile tea spray every few days to keep pests in check and promote healthy plant growth.
  5. Eco-Friendly Solution:
    • Unlike chemical insecticides that harm the environment, chamomile tea is a natural and eco-friendly alternative. You’re not just protecting your plants; you’re contributing to a healthier garden ecosystem.

Creating a Chamomile Fungicide Spray:

Making a chamomile fungicide spray is simple and effective. Here’s a quick guide:

  1. Gather Chamomile Flowers:
    • Start by collecting fresh or dried chamomile flowers. Rinse fresh flowers gently to remove any dirt.
  2. Brewing the Tea:
    • Boil water and steep the chamomile flowers for about 10 minutes. Strain the flowers to get a golden liquid.
  3. Into the Spray Bottle:
    • Pour the chamomile liquid into a spray bottle. Your homemade chamomile fungicide spray is ready!
  4. Application:
    • Spray the chamomile fungicide directly on seedlings or the affected soil. Repeat every few days for optimal results.

Other Diseases Chamomile Can Treat:

  1. White Mold:
    • Spray chamomile tea on the soil and seedlings to eliminate fungal spores causing white mold.
  2. Powdery Mildew:
    • Combat powdery mildew by applying a strong brew of chamomile tea to affected plants’ foliage every few days.

Using Chamomile Fungicide Preventatively:

  1. Vegetable Gardens:
    • Spray chamomile tea on the entire vegetable garden to prevent fungal diseases and repel insect pests.
  2. Apple Trees:
    • Protect apple trees from diseases by spraying chamomile tea in the dormant season. This creates a protective layer against fungal growth.
  3. Hygiene for Seeds:
    • Soak older seeds in chamomile tea before planting to prevent potential fungal diseases.
  4. Ongoing Care:
    • As seedlings mature, continue using chamomile tea as a preventive measure by watering the plants with a diluted solution.

Benefits of Chamomile Tea for Plant Health:

Chamomile tea isn’t just about preventing diseases; it’s a holistic solution for overall plant health.

  1. Promotes Seed Germination:
    • Softens seed casings, aiding faster and more successful germination.
  2. Natural Insecticide:
    • Controls pests without harming beneficial insects, contributing to a balanced garden ecosystem.
  3. Calming Effects:
    • Just as it relaxes us, chamomile tea promotes overall plant well-being, helping them withstand environmental stressors.

How to Grow and Harvest Chamomile:

  1. Start Early:
    • Begin growing chamomile from seeds in early spring for optimal results.
  2. Dedicated Bed:
    • Chamomile plants thrive when they have their dedicated bed, allowing them to grow and spread freely.
  3. Harvesting:
    • Harvest chamomile flowers when fully opened, about two months after planting, by snipping them just above the soil line.
  4. Leaves Too:
    • Don’t forget about the leaves! Harvest them for culinary delights or skincare preparations.

Medicinal Benefits of Chamomile:

  1. Calming Effects:
    • Known for its calming properties, chamomile tea promotes relaxation and improved sleep quality.
  2. Treats Various Conditions:
    • Recognized by medical authorities for treating conditions like indigestion and colic.
  3. Ancient Healing:
    • Cherished by ancient civilizations for its remarkable healing properties.
  4. Wide Range of Benefits:
    • Lowers blood pressure, reduces swelling and inflammation, boosts immunity, and provides relief from discomfort caused by various conditions.

Chamomile tea isn’t just a beverage; it’s a game-changer for your plants. From preventing diseases to promoting overall health, chamomile tea is a natural and effective ally in your gardening journey. Embrace the magic of chamomile, and watch your indoor garden thrive with vitality. Happy gardening!

Can I water my bonsai with chamomile tea?

Using chamomile tea to water your bonsai can have both advantages and potential drawbacks. Here are some considerations:

Advantages:

  1. Mild Antifungal Properties: Chamomile tea is known for its mild antifungal properties. Using it as a watering solution may help prevent or control certain fungal issues in the soil.
  2. Gentle Nutrients: Chamomile tea contains trace nutrients that can be beneficial for plant health in moderation. It provides a mild and organic supplement.

Considerations:

  1. Dilution is Key: If you choose to use chamomile tea, it’s crucial to dilute it significantly with water. Pure chamomile tea may be too concentrated and could potentially harm the bonsai due to its natural compounds.
  2. Frequency: While chamomile tea can be used occasionally, it should not replace regular watering with plain water. Bonsai trees have specific water requirements, and using chamomile tea too frequently might disrupt the balance.

Drawbacks:

  1. pH Considerations: Chamomile tea has a slightly acidic pH. While this can be beneficial for some plants, not all bonsai trees prefer acidic conditions. It’s important to know the pH preferences of your specific bonsai species before using chamomile tea.
  2. Possible Allergies: Some plants may be sensitive to chamomile or its constituents. Before using chamomile tea, observe your bonsai’s reaction to a small amount to ensure it doesn’t cause any adverse effects.

Alternative: Instead of chamomile tea, you might consider using a balanced, diluted liquid fertilizer specifically designed for bonsai trees. This ensures that your bonsai receives essential nutrients without the risk of unintended side effects.

FAQ:

  1. What does chamomile do for the body?
    • Answer: Chamomile has anti-inflammatory and antioxidant properties, promoting relaxation, improved sleep, and digestive health.
  2. Who should not drink chamomile tea?
    • Answer: Individuals allergic to ragweed or those taking blood thinners should avoid chamomile. Consult a doctor if pregnant or nursing.
  3. Does chamomile tea make you sleepy?
    • Answer: Yes, chamomile tea is known for its mild sedative effects, aiding in relaxation and promoting better sleep.
  4. Is it OK to drink chamomile tea every day?
    • Answer: Yes, moderate daily consumption of chamomile tea is generally considered safe and may offer various health benefits.
  5. Is chamomile good for belly fat?
    • Answer: While chamomile may aid digestion and reduce inflammation, it is not a direct solution for belly fat. A balanced diet and exercise are key.
  6. Does chamomile tea flush toxins?
    • Answer: Chamomile tea may support liver function and digestion but does not have a direct detoxifying effect on toxins.
  7. Does chamomile help with weight loss?
    • Answer: Chamomile indirectly supports weight loss by promoting better digestion and reducing stress, but it’s not a direct weight loss remedy.
  8. How long does it take chamomile tea to kick in?
    • Answer: Chamomile tea’s calming effects can be felt within 30 minutes to an hour after consumption, promoting relaxation and aiding in sleep.