Bamboo Bonsai: History and Best Care Guide

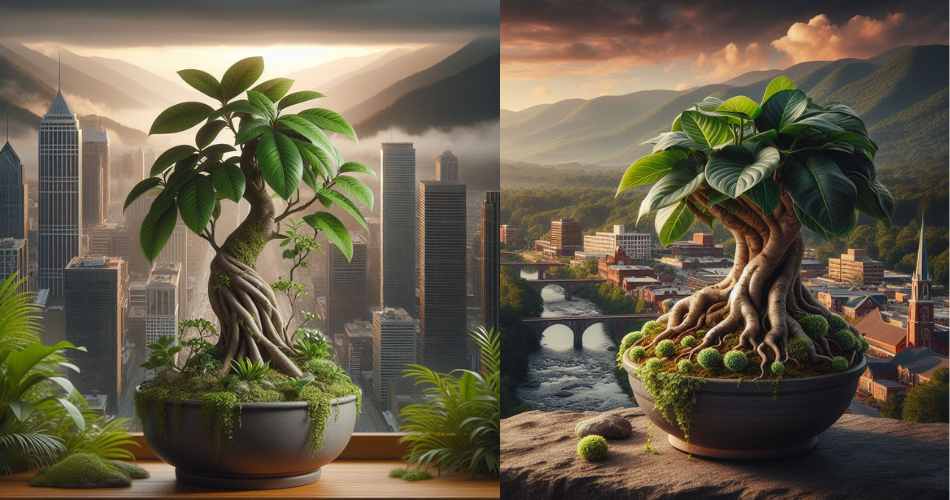
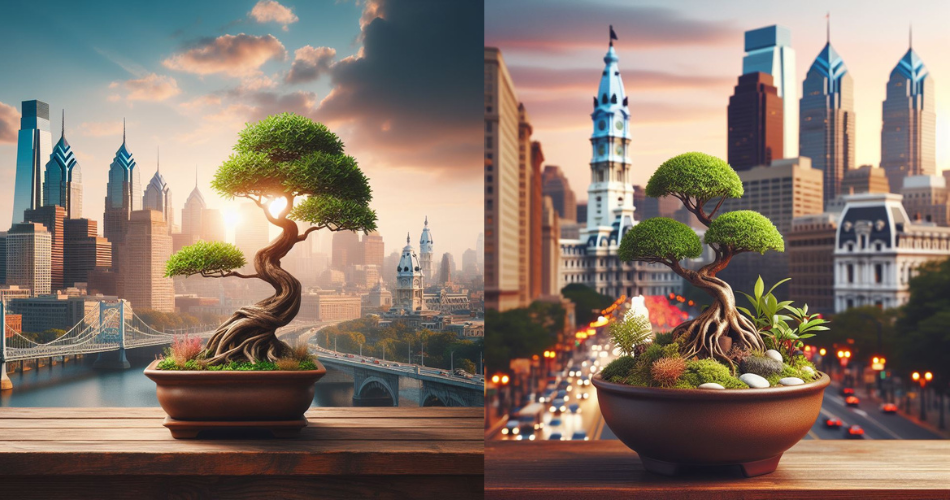
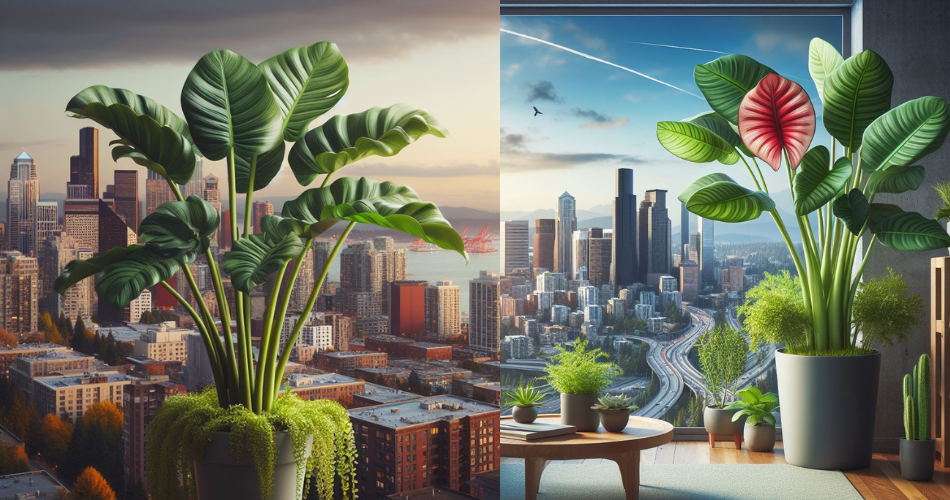
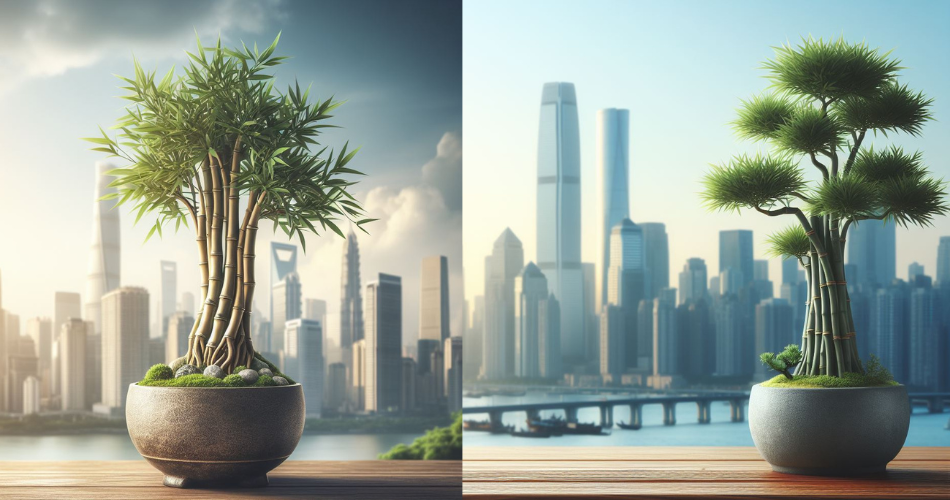
Bamboo bonsai, a miniature representation of the elegant and versatile bamboo plant, has gained immense popularity among bonsai enthusiasts worldwide. In this article, we will delve into the captivating world of bamboo bonsai, exploring its rich history and cultural significance. We will also provide comprehensive guidance on selecting the right bamboo species for bonsai cultivation, along with essential care techniques to ensure the health and vigor of your bonsai. Additionally, we will discuss shaping and pruning methods, potting and repotting guidelines, advanced techniques for experienced enthusiasts, and troubleshooting common issues that may arise during the care of bamboo bonsai. So, let us embark on this journey, unlocking the secrets to creating unique and beautiful bamboo bonsai arrangements.

Bamboo Bonsai: History and Significance

1.1 The Origins of Bamboo Bonsai

Bamboo bonsai may seem like a recent invention, but its history actually dates back thousands of years. Originating in ancient China and Japan, bamboo bonsai has evolved from a traditional art form into a popular practice for plant enthusiasts worldwide. The art of cultivating bamboo in miniature form started as a way to bring nature indoors and create a sense of tranquility and balance in the home.

1.2 Cultural Significance and Symbolism

Bamboo bonsai holds a special place in Chinese and Japanese cultures, symbolizing strength, flexibility, and resilience. It is often associated with good luck, prosperity, and longevity. The intricate beauty of the twisted trunks and delicate foliage reflects the harmony between man and nature. Displaying a bamboo bonsai in your home not only adds a touch of elegance but also brings positive energy and a sense of zen.

2. Selecting the Right Bamboo Species for Bonsai

2.1 Characteristics of Ideal Bamboo Species for Bonsai

When choosing a bamboo species for bonsai, certain characteristics are desirable. Look for bamboo varieties with compact growth habits, small leaves, and flexible canes that can be easily shaped. The ideal bamboo bonsai species should also be able to withstand indoor conditions, such as lower light levels and regulated temperatures.

2.2 Popular Bamboo Species for Bonsai

Some popular bamboo species for bonsai include:

– Dwarf Buddha Belly Bamboo (Bambusa ventricosa): This compact variety has unique swollen internodes that resemble a belly, adding an interesting texture to your bonsai collection.

– Arrow Bamboo (Pseudosasa japonica): Known for its slender and gracefully arching canes, this bamboo species is an excellent choice for creating dynamic and flowing bonsai designs.

– Golden Bamboo (Phyllostachys aurea): With its striking yellow culms, this bamboo variety adds a vibrant and eye-catching element to any bonsai display.

3. Essential Care Techniques for Bamboo Bonsai

3.1 Light and Temperature Requirements

Bamboo bonsai thrive in bright, indirect light. Place your bonsai near a window that receives ample sunlight, but avoid direct sunlight as it can scorch the leaves. As for temperature, bamboo bonsai prefer a moderate range of 60-80°F (15-26°C). Protect them from extreme cold or heat as it can stress the plant.

3.2 Watering and Humidity Control

Proper watering is crucial for the health of your bamboo bonsai. Water the plant thoroughly when the top inch of soil feels dry, allowing excess water to drain away. Avoid overwatering, as it can lead to root rot. Bamboo bonsai also appreciate higher humidity levels, so misting the foliage or placing the pot on a humidity tray can help create a more favorable environment.

3.3 Soil Composition and Fertilization

Bamboo bonsai prefer well-draining soil with good moisture retention. A mix of bonsai soil, perlite, and organic matter like compost or coco coir works well. Fertilize your bamboo bonsai regularly during the growing season with a balanced liquid fertilizer. This will ensure that your bonsai receives the necessary nutrients to maintain its health and vigor.

4. Shaping and Pruning Bamboo Bonsai: Methods and Tools

4.1 Basic Principles of Shaping Bamboo Bonsai

Shaping bamboo bonsai involves a combination of wiring and pruning techniques. Understand the natural growth pattern of the bamboo species you are working with and use wire to gently guide the canes into desired shapes. Be patient, as bamboo grows at its own pace. Remember that bonsai is a long-term project and shaping should be done gradually to avoid stressing the plant.

4.2 Techniques for Pruning and Trimming

Regular pruning is essential for maintaining the shape and aesthetics of your bamboo bonsai. Remove any dead, damaged, or overcrowded branches to encourage healthy growth. To control the overall height and density of the plant, selectively prune branches back to a desired length or remove excessive shoots. Always use clean and sharp pruning shears to minimize damage to the plant.

4.3 Tools and Equipment for Shaping and Pruning

To shape and prune your bamboo bonsai effectively, you will need a few basic tools. These include:

Wire: Use aluminum or copper wire to gently bend and shape the canes without causing damage.

Pruning Shears: Invest in a good pair of bonsai pruning shears for precise and clean cuts. Make sure to keep them clean and sharp for optimal performance.

Root Hook: A root hook comes in handy when repotting your bamboo bonsai, helping to untangle and prune any circling roots.

With the right techniques, care, and a touch of creativity, growing and shaping bamboo bonsai can be a rewarding and enjoyable experience. So go ahead, delve into this ancient art form and create your own miniature bamboo paradise!.1 Yellowing or Browning Leaves: Possible Causes and Solutions

8.2 Overwatering or Underwatering: How to Find the Right Balance

8.3 Stunted Growth or Lack of Vigor: Identifying and Addressing Nutritional Deficiencies

5. Maintaining the Health and Vigor of Bamboo Bonsai

5.1 Recognizing and Preventing Common Pests and Diseases

Bamboo bonsai, just like any other plant, can fall victim to various pests and diseases. It’s essential to be able to identify common issues early on and take prompt action. Keep an eye out for pests such as aphids, spider mites, and scale insects. If you notice any signs of infestation, don’t panic! A gentle insecticidal soap or neem oil spray should help eliminate the unwanted visitors. As for diseases, bamboo bonsai is generally hardy, but overwatering can lead to root rot or fungal infections. Be mindful of the watering schedule and ensure proper drainage to prevent these issues.

5.2 Regular Inspections and Maintenance Practices

To keep your bamboo bonsai in top shape, regular inspections and maintenance are crucial. Check the leaves and stems for any signs of discoloration, wilting, or damage. Prune away any dead or yellowing foliage to promote new growth and maintain a clean appearance. Additionally, be sure to remove any weeds that may appear around the bonsai. Weeds can compete with the bamboo for nutrients and water, affecting its overall health. With a little TLC, your bamboo bonsai will thrive and impress!

5.3 Enhancing the Bonsai’s Overall Health and Vitality

Apart from the standard care routine, several practices can help boost the overall health and vitality of your bamboo bonsai. Regularly fertilizing with a balanced bonsai fertilizer will provide the necessary nutrients for growth. Additionally, consider using a root stimulant to encourage strong root development. Every few years, you may also need to perform root pruning to prevent the roots from becoming overly compacted. Remember, a healthy bamboo bonsai is a happy bamboo bonsai!

6. Potting and Repotting Bamboo Bonsai: Tips and Guidelines

6.1 Understanding the Timing and Frequency of Repotting

When it comes to repotting your bamboo bonsai, timing is everything. The ideal time for repotting is during the early spring when the plant is entering its active growing phase. Repotting too late or too early can disrupt the tree’s growth. As for the frequency, bamboo bonsai typically requires repotting every two to three years. However, this may vary depending on the growth rate and size of your bonsai.

6.2 Selecting the Right Pot and Soil Mix

Choosing the right pot and soil mix is crucial for the health and development of your bamboo bonsai. Opt for a pot with adequate drainage holes to allow excess water to escape. As for the soil mix, using a well-draining bonsai soil with a blend of organic materials and inorganic components (such as perlite or pumice) is ideal. This ensures proper water retention and prevents the roots from getting waterlogged.

6.3 Step-by-Step Repotting Process

The repotting process can seem daunting, but with the right approach, it’s a breeze. Start by gently removing the bonsai from its current pot, being careful not to damage the roots. Once removed, examine the roots and trim any circling or damaged ones. Then, place a layer of fresh soil mix at the bottom of the new pot, position the bonsai in the center, and carefully fill it with the remaining soil, ensuring the roots are well-covered. Finally, give your bamboo bonsai a good watering to settle the soil.

7. Advanced Techniques for Bamboo Bonsai Enthusiasts

7.1 Air Layering and Propagation Methods

For the adventurous bamboo bonsai enthusiasts, there are advanced techniques to explore. Air layering is one such method that allows you to propagate new plants from an existing bamboo bonsai without disturbing the main tree. It involves creating a root system on a section of the stem, which can then be separated and potted as a new bonsai. This technique opens up endless possibilities for expanding your bamboo bonsai collection.

7.2 Developing Advanced Branching and Root Systems

To create a more mature and aesthetically pleasing bamboo bonsai, advanced techniques can be employed to develop intricate branching and root systems. By selectively pruning and wiring the branches, you can create the desired shape and structure for your bonsai. Similarly, root pruning and manipulation can help create a more distinctive and impressive root system. These techniques require patience and skill but can yield remarkable results.

7.3 Alternative Styling and Design Approaches

For those looking to push the boundaries of traditional bamboo bonsai aesthetics, exploring alternative styling and design approaches can be tremendously exciting. From cascading styles to creative arrangements in unique containers, the possibilities are endless. Don’t be afraid to experiment and let your creativity run wild. After all, bonsai is a true art form that allows for personal expression and individuality.

8. Troubleshooting Common Issues in Bamboo Bonsai Care

8.1 Yellowing or Browning Leaves: Possible Causes and Solutions

If you notice your bamboo bonsai’s leaves turning yellow or browning, there might be underlying issues causing this discoloration. Overwatering, underwatering, nutrient deficiencies, or excessive sun exposure can all contribute to leaf problems. Adjusting the watering schedule, ensuring proper nutrient balance, and providing adequate shade can help alleviate these issues and restore the vibrant green color of your bonsai’s foliage.

8.2 Overwatering or Underwatering: How to Find the Right Balance

Proper watering is crucial for the health of your bamboo bonsai. Both overwatering and underwatering can have detrimental effects. To find the right balance, observe the soil’s moisture level and get to know your bonsai’s specific needs. Stick your finger into the soil to check for dryness before watering. If it feels slightly moist, hold off on watering. However, if it feels dry, give your bonsai a thorough watering until water starts coming out of the drainage holes.

8.3 Stunted Growth or Lack of Vigor: Identifying and Addressing Nutritional Deficiencies

Is your bamboo bonsai not growing as vigorously as you’d like? Nutritional deficiencies could be the culprit. Nitrogen, phosphorus, and potassium are essential elements for healthy plant growth. If you suspect a deficiency, considering adjusting the fertilizer regimen or using a specialized bonsai fertilizer that provides the necessary nutrients. Additionally, regular inspections and prompt action against pests and diseases will ensure your bonsai is receiving optimal care and thriving.In conclusion, bamboo bonsai is a remarkable art form that combines the beauty of bamboo with the intricate techniques of bonsai cultivation. By understanding the history, selecting the right species, and mastering the essential care techniques, you can create stunning and unique bamboo bonsai arrangements. With patience, dedication, and a passion for this ancient art, your bamboo bonsai will thrive and bring joy for years to come. So, embrace the challenge, explore your creativity, and let the elegance of bamboo bonsai breathe life into your living space. Happy bonsai gardening!

FAQs

Q: Can any species of bamboo be used for bonsai?

A: While not all bamboo species are suitable for bonsai cultivation, there are several species that work exceptionally well for creating bamboo bonsai. These species have naturally small leaves, flexible branches, and a compact growth habit, making them ideal for bonsai styling.

Q: How often should I water my bamboo bonsai?

A: The watering frequency for bamboo bonsai depends on various factors such as the species, pot size, climate, and season. As a general guideline, it is recommended to allow the top layer of soil to dry out slightly between watering sessions. Always monitor the moisture levels and adjust the watering schedule accordingly.

Q: Can I shape my bamboo bonsai into different styles and designs?

A: Absolutely! Bamboo bonsai can be shaped into various styles such as formal upright, slanting, cascade, and semi-cascade, among others. With proper pruning and wiring techniques, you can create your desired shape and design, adding a unique touch to your bamboo bonsai.

Q: How can I prevent common pests and diseases in bamboo bonsai?

A: Regular inspections and proper care practices can help prevent common pests and diseases in bamboo bonsai. Ensure your bonsai is placed in an appropriate environment with adequate ventilation and sunlight. Additionally, maintaining good hygiene, such as removing fallen leaves and debris, can help deter pests and reduce the risk of diseases.

Philodendron Pedatum Bonsai Care Guide

Welcome to the comprehensive guide on caring for Philodendron Pedatum bonsai trees. Philodendron Pedatum, also known as the Horsehead Philodendron, is a popular choice among bonsai enthusiasts due to its unique foliage and manageable size. In this article, we will delve into the essential aspects of Philodendron Pedatum bonsai care, including choosing the right environment, providing proper care techniques, pruning and shaping methods, watering and fertilizing guidelines, pest and disease prevention, as well as repotting and root pruning tips. Whether you are a beginner or an experienced bonsai gardener, this guide will equip you with the knowledge and skills needed to ensure the health and beauty of your Philodendron Pedatum bonsai.

1.1 What is Philodendron Pedatum?

When it comes to unique and captivating bonsai trees, the Philodendron Pedatum is a true gem. This particular species is known for its beautiful heart-shaped leaves with distinct lobes, resembling a bird’s foot. Don’t worry, we won’t quiz you on the scientific name, just remember “Philodendron Pedatum” for your next trivia night!

1.2 Why Choose Philodendron Pedatum as a Bonsai Tree?

So, why should you consider Philodendron Pedatum as your bonsai companion? Well, apart from its eye-catching foliage, this plant is relatively low-maintenance, making it perfect for beginners or those without a green thumb. It has a natural ability to adapt to various environments and can thrive indoors or outdoors, depending on your preference. Plus, who doesn’t love a bonsai tree that brings a touch of whimsy to their living space?

2. Choosing the Right Environment for Your Philodendron Pedatum Bonsai

2.1 Indoor vs. Outdoor Cultivation

Deciding where to grow your Philodendron Pedatum bonsai tree is an important consideration. It can be cultivated both indoors and outdoors, depending on the climate you live in. Indoors, it loves bright, indirect light and can be placed near a window with filtered sunlight. Outdoors, it thrives in partial shade, avoiding direct sunlight during the hottest parts of the day.

2.2 Light Requirements for Philodendron Pedatum Bonsai

Philodendron Pedatum enjoys a good balance of light. While it appreciates bright conditions, direct sunlight can scorch its delicate leaves. Think of it as a plant that enjoys a cozy spot under a tree canopy rather than basking in the harsh rays of the sun. If you’re growing it indoors, placing it near a window with filtered sunlight or using grow lights can help provide the necessary light intensity.

2.3 Temperature and Humidity Considerations

When it comes to temperature, Philodendron Pedatum prefers a warm and humid environment. It thrives in temperatures between 65°F to 75°F (18°C to 24°C), so make sure to keep it away from cold drafts or extreme temperature fluctuations. As for humidity, this tropical plant appreciates higher levels, so misting the leaves or using a humidifier can help create a comfortable environment for your leafy friend.

3. Essential Care Techniques for Philodendron Pedatum Bonsai Trees

3.1 Watering Guidelines and Frequency

As with any plant, proper watering is crucial for the health of your Philodendron Pedatum bonsai. Keep the soil evenly moist, but not waterlogged. Remember, this isn’t a sponge-bob, and it doesn’t appreciate soggy feet. To avoid overwatering, check the soil’s moisture level before watering and adjust accordingly. It’s better to underwater than to drown this bonsai beauty!

3.2 Soil Selection and Repotting Schedule

When it comes to soil, Philodendron Pedatum prefers well-draining soil that retains some moisture. A mixture of bonsai soil, peat moss, and perlite or sand can provide the ideal growing medium. As for repotting, aim to do so every two years during the spring season. This allows the roots to have enough space to grow and ensures your bonsai remains happy and healthy.

3.3 Feeding and Fertilization Recommendations

To give your Philodendron Pedatum bonsai a boost, feeding it with a balanced liquid fertilizer every two weeks during the growing season is beneficial. Be sure to follow the manufacturer’s instructions for dilution and avoid overdoing it, as too much fertilizer can harm this tropical beauty. Remember, a little bit of fertilizer can go a long way in promoting healthy growth.

4. Pruning and Shaping Your Philodendron Pedatum Bonsai

4.1 Understanding Pruning Techniques for Bonsai

Pruning is a vital part of bonsai care, and Philodendron Pedatum is no exception. It’s important to understand the different pruning techniques to keep your bonsai in shape. These techniques include pinching back new growth, trimming long stems, and removing any dead or diseased foliage. Pruning not only helps maintain the desired shape but also encourages bushier growth.

4.2 Pruning for Shape and Size Control

If you want to unleash your inner bonsai artist, shaping your Philodendron Pedatum bonsai is a fun process. You can prune and trim the branches to create the desired shape and size. Just remember to take it slow and steady, as bonsai shaping is an ongoing process that requires patience and finesse. Take breaks if you need to, and remember that a perfectly shaped bonsai is like a fine wine – it takes time to mature.

4.3 Wiring and Branch Manipulation

Wiring is another technique used in bonsai to guide the growth of branches and achieve the desired shape. For your Philodendron Pedatum bonsai, it’s important to use gentle wiring techniques to avoid damaging the delicate stems and leaves. Be mindful of the wire tension and regularly check for any signs of wire cutting into the branches. Remember, the goal is to create a harmonious shape, not give your bonsai a bad hair day.

With these care techniques under your belt, you’re well on your way to becoming a proud Philodendron Pedatum bonsai parent. Remember, bonsai care is an art form that requires dedication and love, but the rewards of a beautifully thriving miniature tree are well worth it. Happy bonsai-ing!

5. Watering and Fertilizing Guidelines for Philodendron Pedatum Bonsai

5.1 Proper Watering Techniques

Watering your Philodendron Pedatum bonsai can be a bit tricky, but fear not, we’ve got you covered. This little guy likes to stay slightly moist but not drenched. Think of it as having a good balance between quenching its thirst and not drowning it in the process. A good rule of thumb is to water it when the top inch of the soil feels dry. Make sure to water evenly and avoid leaving stagnant water in the pot, because no one likes sitting in a puddle!

5.2 Choosing the Right Fertilizer and Application

Just like we need our daily dose of nutrients, so does our Philodendron Pedatum bonsai. When it comes to fertilizer, opt for a well-balanced, water-soluble fertilizer designed specifically for houseplants. Look for one with a balanced N-P-K ratio (nitrogen, phosphorus, potassium) to ensure your bonsai gets a well-rounded meal. Follow the instructions on the package for the correct dosage, and remember, less is always more when it comes to fertilizer.

5.3 Frequency and Timing of Fertilization

Timing is everything, even when it comes to fertilizing your bonsai. During the growing season, which is typically spring and summer, you can feed your Philodendron Pedatum bonsai every two to four weeks. As the weather cools down and growth slows down in fall and winter, you can reduce the frequency to every six to eight weeks. Always pay attention to your bonsai’s needs and adjust accordingly. It’s like having a personal chef, but for plants.

6. Common Pests and Diseases: Prevention and Treatment for Philodendron Pedatum Bonsai

6.1 Identifying Common Pests Affecting Philodendron Pedatum

No bonsai is safe from the occasional unwanted visitors. Philodendron Pedatum bonsai can be prone to pests such as aphids, spider mites, and mealybugs. Keep an eye out for any tiny, crawling critters or signs of damage like yellowing leaves or sticky residue. If you spot any of these troublemakers, it’s time to take action.

6.2 Preventive Measures for Pest Infestations

Preventing pests from invading your beloved bonsai is like building a fortress for your plant. Start by regularly inspecting your bonsai for any signs of pests. Keep your bonsai clean and tidy by removing dead leaves and debris, which can serve as hiding spots or breeding grounds for pests. You can also give your bonsai a gentle shower or wipe down its leaves with a damp cloth to keep those buggers at bay.

6.3 Effective Methods for Treating Pests and Diseases

So, your bonsai has fallen victim to a pesky infestation? Don’t fret, there are ways to fight back. One effective method is using an insecticidal soap or neem oil spray, which can help rid your plant of pests. Just make sure to follow the instructions carefully and test it on a small area before applying it to the entire bonsai. If the infestation persists or you’re unsure about how to handle it, don’t hesitate to seek advice from a local horticulturist or bonsai expert. Remember, we can’t let those pests win!

7. Repotting and Root Pruning Tips for Philodendron Pedatum Bonsai

7.1 Signs that Your Philodendron Pedatum Bonsai Needs Repotting

Nobody likes feeling cramped, including our bonsai friends. If you notice that your Philodendron Pedatum bonsai has roots poking out of the drainage holes or the soil seems compacted, it might be time for a new home. Another sign is if the water doesn’t absorb as quickly as before, indicating that the roots have taken up most of the space. Repotting allows for fresh soil, better drainage, and more growing room for your bonsai. It’s like giving them a little vacation to a bigger and better pot!

8. Conclusion and Additional Resources for Philodendron Pedatum Bonsai Care

Congratulations! You are now equipped with the knowledge and understanding required to provide excellent care for your Philodendron Pedatum bonsai tree. By creating the ideal environment, implementing proper care techniques, and staying vigilant against pests and diseases, your bonsai will thrive and bring joy for years to come. Remember, bonsai care is a continuous learning process, so feel free to explore additional resources and connect with fellow bonsai enthusiasts for further guidance and inspiration. Now, go forth and enjoy the artistry and tranquility of your Philodendron Pedatum bonsai!

FAQ

1. How often should I water my Philodendron Pedatum bonsai?

Watering frequency for your Philodendron Pedatum bonsai depends on various factors such as the climate, pot size, and soil composition. As a general rule, it is recommended to water your bonsai when the top layer of soil feels slightly dry to the touch. Avoid overwatering as it can lead to root rot, but also ensure the soil does not completely dry out. Regularly monitor the moisture levels and adjust the watering schedule accordingly.

2. Can I keep my Philodendron Pedatum bonsai indoors?

While Philodendron Pedatum bonsai can be grown indoors, they thrive best when placed in a location with ample sunlight. If you choose to keep your bonsai indoors, ensure it receives sufficient indirect light or consider using artificial grow lights to supplement. Additionally, be mindful of the temperature and humidity levels in the indoor environment, as Philodendron Pedatum bonsai trees prefer warm and humid conditions.

3. How do I prune and shape my Philodendron Pedatum bonsai?

Pruning and shaping are essential for maintaining the desired form and aesthetics of your Philodendron Pedatum bonsai. Begin by removing any dead, damaged, or excessive growth using clean bonsai pruning shears. To shape the bonsai, carefully trim the branches and foliage to create the desired silhouette. Wiring can also be used to guide the branches in the desired direction. Remember to step back and assess the overall shape regularly to ensure balanced growth.

4. What are some common pests and diseases that affect Philodendron Pedatum bonsai?

Philodendron Pedatum bonsai trees are susceptible to pests such as aphids, spider mites, and scale insects. Regularly inspect your bonsai for any signs of infestation, such as sticky residue, webbing, or yellowing leaves. To prevent pests, maintain good hygiene, provide proper ventilation, and avoid overwatering. In terms of diseases, root rot and fungal infections can occur if the bonsai is kept in excessively wet conditions. Proper watering techniques and well-draining soil can help prevent these issues.

Ficus Bonsai Care Guide: Unlocking Success with Care and Expert Tips

Welcome to the captivating realm of Ficus Bonsai care! In this comprehensive guide, we will delve into the intricacies of nurturing and maintaining these exquisite miniature trees, unlocking the secrets to their success. Ficus Bonsai, with its stunning foliage and intricate root systems, has gained immense popularity among bonsai enthusiasts worldwide. Whether you are a seasoned bonsai lover or a beginner looking to embark on this rewarding journey, this article will provide you with a wealth of information, expert tips, and practical advice on how to care for your Ficus Bonsai and ensure its thriving growth. So, let us embark on this adventure together and discover the art of unlocking success with care and expert tips for your Ficus Bonsai.

Exploring the Fascinating World of Ficus Bonsai

1.1 What is a Ficus Bonsai?

When you think of bonsai, you might picture a tiny tree in a pot. Well, that’s exactly what a Ficus Bonsai is! Ficus Bonsai is a form of bonsai art that involves growing and shaping Ficus trees in miniature versions. These captivating creations bring the beauty and tranquility of nature right into your home or garden.

1.2 The History and Origins of Ficus Bonsai

Ficus Bonsai has its roots (pun intended) in ancient Chinese and Japanese cultures. It originated thousands of years ago as a way to bring nature into small spaces. Over time, the art of bonsai spread across the globe, captivating enthusiasts with its intricate designs and meditative qualities.

1.3 Why Ficus Bonsai is a Popular Choice among Bonsai Enthusiasts

Ficus Bonsai has gained immense popularity among bonsai enthusiasts for several reasons. Firstly, the Ficus tree is known for its resilience, making it an excellent choice for beginner bonsai enthusiasts. Additionally, the Ficus Bonsai offers stunning foliage and can be styled in various ways, allowing for endless creativity and expression. So, whether you’re a seasoned bonsai pro or just starting your green-thumb journey, Ficus Bonsai is sure to captivate your attention.

2. Understanding the Basics: Essential Care Requirements for Ficus Bonsai

2.1 Climate and Temperature Considerations

Like most plants, Ficus Bonsai has specific climate and temperature preferences. It thrives in warm, tropical conditions, so it’s important to keep it away from extreme cold or heat. Aim for a temperature range of 60-75°F (15-24°C) to keep your Ficus Bonsai happy and healthy.

2.2 Soil Composition and Drainage

The type of soil and its drainage capabilities play a crucial role in the care of your Ficus Bonsai. Use well-draining soil that allows water to flow freely, preventing root rot. A mix of bonsai soil, peat moss, and perlite works wonders for Ficus Bonsai, ensuring it receives the right amount of moisture while allowing excess water to escape.

2.3 The Importance of Proper Potting and Repotting

Potting and repotting your Ficus Bonsai is an essential part of its care routine. It’s recommended to repot your bonsai every 1-2 years to provide fresh soil and encourage healthy root growth. Be sure to choose a pot that allows for proper drainage and gives enough space for the tree’s roots to grow.

3. Choosing the Right Location: Optimal Placement and Lighting for Ficus Bonsai

3.1 Indoor vs. Outdoor Placement

Deciding whether to keep your Ficus Bonsai indoors or outdoors depends on your climate and personal preference. Indoors, it thrives in bright, indirect sunlight. Outdoors, it can tolerate full sun but needs protection from harsh afternoon rays. So, give your Ficus Bonsai the best of both worlds by placing it outdoors during the warmer months and bringing it indoors during winter.

3.2 Ideal Lighting Conditions for Ficus Bonsai

Ficus Bonsai loves bright light but not direct sunlight that scalds its delicate leaves. Place it near a window with filtered light or use a grow light for optimal results. Rotate your bonsai every few weeks to ensure even growth and prevent it from leaning towards the light like a teenage plant trying to take a selfie.

3.3 Protecting Ficus Bonsai from Harsh Weather Elements

While Ficus Bonsai can handle a variety of weather conditions, extreme cold or heat can cause harm. If temperatures drop below 50°F (10°C), it’s crucial to bring your bonsai indoors to shield it from the chill. Likewise, during scorching summer days, provide shade or move it to a cooler spot to avoid wilting foliage.

4. Watering Techniques: Mastering the Art of Properly Hydrating Your Ficus Bonsai

4.1 Understanding Ficus Bonsai’s Watering Needs

Watering your Ficus Bonsai is a delicate dance that requires balance. It’s important to keep the soil moist but not waterlogged. Check the top inch of soil regularly, and when it feels slightly dry, water your bonsai thoroughly. Remember, overwatering can drown your tree, while underwatering can leave it parched and sad.

4.2 How to Water Ficus Bonsai Correctly

When watering, ensure that the water reaches all parts of the soil, allowing the roots to absorb moisture evenly. Water until it drains out of the drainage holes, ensuring excess water doesn’t sit in the pot. Pro tip: To maintain a healthy humidity level, mist the leaves of your Ficus Bonsai occasionally, but don’t go overboard—no bonsai showers, please!

4.3 Signs of Overwatering and Underwatering

Knowing when to water can be a bit tricky, but your Ficus Bonsai will give you subtle hints. If the leaves turn yellow and droopy, it may be a sign of overwatering. On the other hand, if the leaves start losing their luster or become brittle, your bonsai might be thirsty. So, keep a close eye on your Ficus Bonsai’s foliage to avoid any moisture-related mishaps.

5. Pruning and Shaping: Techniques for Maintaining the Aesthetic Appeal of Ficus Bonsai

5.1 Timing and Frequency of Pruning

Pruning your Ficus Bonsai is like giving it a stylish haircut. It helps maintain its shape and keeps it looking sharp. But just like with our own hair, timing is everything. Pruning should be done during the active growing season when your bonsai is feeling energetic and ready for a trim. As for how often to prune, well, that depends on how fast your Ficus Bonsai grows. Keep an eye on those branches and give them a snip when they start to get a bit too wild.

5.2 Pruning Methods for Ficus Bonsai

When it comes to pruning your Ficus Bonsai, you have a few options. You can use a pair of bonsai pruning shears for simple trimming, or you can go all out and bust out the bonsai branch cutters for more serious pruning. The choice is yours, but remember, less is sometimes more when it comes to bonsai. Take your time, step back every now and then, and make sure you’re not going overboard with the snips. You don’t want your bonsai to end up looking like a pinecone with too many branches missing.

5.3 Wiring and Shaping Ficus Bonsai Branches

Now, this is where things get a little more adventurous. If you’re feeling like a bonsai sculptor, you can use wiring techniques to shape your Ficus Bonsai branches into graceful curves and angles. It’s like giving your bonsai a yoga session. Just make sure you’re using bonsai wire that’s the right thickness and won’t dig into the branches. And remember, patience is key. Bending branches takes time, so don’t rush it. Your bonsai will thank you for the gentle touch and the stylish new look.

6. Nutrient Management: Nourishing Your Ficus Bonsai for Vibrant Growth and Health

6.1 Understanding Ficus Bonsai’s Nutritional Needs

We all need our daily dose of nutrients to stay healthy and vibrant, and your Ficus Bonsai is no different. Understanding what your bonsai craves is essential for its growth and overall well-being. Ficus Bonsai love a balanced diet, so make sure they’re getting the right nutrients like nitrogen, phosphorus, and potassium. Think of it as a gourmet meal for your mini tree.

6.2 Choosing the Right Fertilizer for Ficus Bonsai

Now that you know what your Ficus Bonsai needs, it’s time to choose the right fertilizer. Think of yourself standing in the fertilizer aisle, scratching your head, wondering which one is best. Well, fear not! Look for a balanced fertilizer specifically formulated for bonsai trees. It should have all the essential nutrients your Ficus Bonsai craves. Just remember, moderation is key. Too much fertilizer can do more harm than good, just like eating a whole tub of ice cream in one sitting.

6.3 Feeding Schedule and Application Techniques

Alright, you’ve got the perfect fertilizer, now what? It’s time to create a feeding schedule for your Ficus Bonsai. Think of it as setting up a meal plan. Feed your bonsai every couple of weeks during the growing season, and take a break during the dormant period. And when it comes to application techniques, remember to follow the instructions on the fertilizer package. Don’t go rogue and start experimenting with unconventional methods. Your bonsai might not appreciate being the guinea pig for your fertilizer experiments.

So there you have it, the secrets to pruning, shaping, and feeding your Ficus Bonsai. With a little care and expert tips, your bonsai will be thriving and turning heads in no time. Just remember to have fun with it and embrace your inner bonsai guru. Happy growing!In conclusion, caring for a Ficus Bonsai requires patience, dedication, and a deep understanding of its unique needs. By following the essential care requirements outlined in this guide, from providing the right lighting and watering techniques to mastering pruning and nutrient management, you can create an optimal environment for your Ficus Bonsai to flourish. Remember to consult expert advice, stay attuned to your tree’s specific needs, and enjoy the journey of nurturing and witnessing the growth of your Ficus Bonsai. With proper care and attention, your Ficus Bonsai will become a living work of art, bringing beauty and tranquility to your space for years to come.

FAQ

1. How often should I water my Ficus Bonsai?

The frequency of watering your Ficus Bonsai depends on several factors such as the climate, pot size, and soil composition. As a general guideline, you should check the soil regularly and water when the top inch feels slightly dry. Avoid overwatering as it can lead to root rot, and ensure proper drainage to prevent waterlogging.

2. Can I keep my Ficus Bonsai indoors?

Yes, Ficus Bonsai can thrive indoors. However, it is important to provide sufficient light for its growth. Place your bonsai near a well-lit window or provide supplemental artificial lighting. Keep in mind that indoor conditions may require more attention to humidity levels and proper air circulation.

3. How should I prune my Ficus Bonsai?

Pruning is essential to maintain the desired shape and size of your Ficus Bonsai. Use sharp, clean tools and prune during the active growing season. Start by removing any dead or unhealthy branches, and then proceed with selective pruning to promote a balanced structure. Regularly trim the foliage to encourage denser growth and refine the overall appearance of your bonsai.

4. What type of fertilizer should I use for my Ficus Bonsai?

A balanced, slow-release bonsai fertilizer is recommended for feeding your Ficus Bonsai. Look for a fertilizer specifically formulated for bonsai or one with a ratio of nitrogen (N), phosphorus (P), and potassium (K) that is suitable for woody plants. Follow the instructions on the fertilizer package for proper application and timing, adjusting the dosage based on the age and health of your bonsai.

Bougainvillea Bonsai Bliss: A Complete Guide to Care and Cultivation

Bougainvillea bonsai is a delightful and captivating plant that has gained popularity among bonsai enthusiasts worldwide. This unique form of bonsai showcases the vibrant and colorful blooms of the Bougainvillea plant, adding a touch of tropical beauty to any collection. In this complete guide, we will explore the fascinating world of Bougainvillea bonsai, from selecting the right species to caring for its specific needs. Whether you are a seasoned bonsai enthusiast or a beginner looking to embark on this bonsai adventure, this article will provide you with valuable insights and techniques to cultivate and maintain Bougainvillea bonsai plants successfully. Let’s dive into the enchanting world of Bougainvillea bonsai and unlock the secrets of its care and cultivation.

1. Introduction to Bougainvillea Bonsai: A Captivating Plant for Enthusiasts

1.1 Understanding the Appeal of Bougainvillea Bonsai

If you’re looking for a plant that will add a burst of color and beauty to your bonsai collection, look no further than the captivating bougainvillea bonsai. With its vibrant flowers and delicate foliage, this plant is a showstopper that never fails to impress. Its unique charm lies in its ability to create an enchanting miniature version of the larger bougainvillea tree, making it a favorite among bonsai enthusiasts.

1.2 Historical Background and Significance of Bougainvillea Bonsai

The history of bougainvillea bonsai dates back to ancient civilizations, where it was revered for its striking appearance and symbolic meaning. Originating from South America, this plant was later introduced to different parts of the world, gaining popularity for its resilience and adaptability. Over the years, bonsai artists have honed their skills in cultivating and shaping bougainvillea into breathtaking miniature trees that tell a story of beauty and perseverance.

1.3 Exploring the Unique Characteristics of Bougainvillea Bonsai

What sets bougainvillea bonsai apart from other bonsai trees is its stunning array of colorful bracts, which are actually modified leaves that surround the small white flowers. These bracts come in various shades of pink, red, orange, and purple, creating a visual spectacle that is hard to resist. Additionally, bougainvillea bonsai thrives in warm climates and can withstand dry conditions, making it a resilient and low-maintenance option for bonsai enthusiasts.

2. Selecting the Right Bougainvillea Species for Bonsai Cultivation

2.1 Overview of Bougainvillea Species Suitable for Bonsai

When it comes to choosing the perfect bougainvillea species for bonsai cultivation, there are several options to consider. Some popular choices include Bougainvillea glabra, Bougainvillea spectabilis, and Bougainvillea bonsai hybrids. Each species has its own unique characteristics and growth habits, allowing bonsai enthusiasts to select the one that best suits their preferences and climate conditions.

2.2 Factors to Consider when Choosing a Bougainvillea Species

Before diving into the world of bougainvillea bonsai, it’s important to consider a few factors when selecting a species. Factors such as sunlight requirements, cold hardiness, and growth patterns should be taken into account to ensure successful cultivation. Additionally, considering the color and size of the bracts can also play a role in choosing the right bougainvillea species that fits your vision for your bonsai collection.

2.3 Popular Bougainvillea Varieties for Bonsai and Their Features

There are several popular bougainvillea varieties that are well-suited for bonsai cultivation. For example, Bougainvillea ‘Barbara Karst’ is known for its vibrant red bracts and vigorous growth, making it a popular choice among bonsai enthusiasts. Bougainvillea ‘Pixie Queen’ is another variety that features delicate pink bracts, creating an elegant and feminine look. Explore the wide range of bougainvillea varieties available and choose the one that resonates with your style and preferences.

3. Essential Tools and Supplies for Bougainvillea Bonsai Care

3.1 Basic Tools Required for Bougainvillea Bonsai Care

To properly care for your bougainvillea bonsai, you’ll need a few essential tools in your arsenal. These include bonsai shears for pruning, concave cutters to remove branches, and wire cutters for shaping and training purposes. Additionally, having a root hook, a rake, and a pair of tweezers can also come in handy during repotting and maintenance tasks.

3.2 Additional Supplies for Optimal Bougainvillea Bonsai Cultivation

In addition to basic tools, there are a few supplies that can greatly improve the cultivation of your bougainvillea bonsai. A high-quality bonsai soil mix that provides good drainage and a balanced fertilizer specifically formulated for bonsai plants are essential. Furthermore, having a spray bottle for misting and a humidity tray can help create the ideal growing environment for your bougainvillea bonsai.

3.3 Understanding the Importance of Quality Tools and Supplies

Investing in good-quality tools and supplies is crucial for the long-term health and success of your bougainvillea bonsai. Well-crafted tools ensure precise cuts and minimize stress on the tree, while quality soil and fertilizer provide the necessary nutrients for growth and development. Remember, a happy and thriving bougainvillea bonsai starts with the right tools and supplies.

4. Key Steps for Proper Bougainvillea Bonsai Cultivation

4.1 Preparing the Ideal Growing Environment for Bougainvillea Bonsai

Creating the perfect growing environment for your bougainvillea bonsai is essential for its overall health and vitality. This includes placing it in a sunny spot where it can receive at least six hours of direct sunlight per day. Bougainvillea bonsai also thrive in well-draining soil, so make sure to choose a suitable bonsai mix and consider using a training pot or container with adequate drainage holes.

4.2 Potting and Repotting Bougainvillea Bonsai: Techniques and Considerations

Potting and repotting your bougainvillea bonsai is an important step in its cultivation. It’s generally recommended to repot every two to three years to refresh the soil and encourage healthy root growth. When repotting, carefully remove the old soil, trim any excessively long or tangled roots, and place the tree in a slightly larger pot with fresh bonsai soil mix. Remember to water thoroughly after repotting to ensure proper hydration.

4.3 Watering, Fertilizing, and Sunlight Requirements for Healthy Growth

Proper watering, fertilizing, and sunlight are crucial for the healthy growth of your bougainvillea bonsai. Watering should be done when the soil feels slightly dry, but avoid overwatering as it can lead to root rot. Using a balanced fertilizer during the growing season can provide the necessary nutrients for vibrant blooms and foliage. Additionally, ensure your bonsai receives adequate sunlight to promote healthy photosynthesis and overall vitality.

4.4 Nurturing Bougainvillea Bonsai: Pruning and Wiring Techniques

Regular pruning and wiring are essential for shaping and maintaining the desired form of your bougainvillea bonsai. Pruning should be done during the dormant season to avoid excessive bleeding of sap. Remove any dead or unhealthy branches, and shape the branches to create an aesthetically pleasing silhouette. Wiring can be used to gently guide branches into the desired position, but caution must be2>5. Understanding Bougainvillea Bonsai Pruning and Shaping Techniques

5.1 Pruning Basics: Why, When, and How to Prune Bougainvillea Bonsai

Pruning…it’s like giving your Bougainvillea Bonsai a fancy haircut, except instead of scissors, you’re using pruning shears. And instead of hair, you’re snipping away at branches. Okay, maybe it’s not exactly the same, but you get the idea.

So why do we prune? Well, first of all, your Bougainvillea Bonsai doesn’t want to look like Cousin It from the Addams Family. Pruning helps maintain a neat and tidy appearance. Plus, it encourages new growth and strengthens the overall structure of your bonsai.

Timing is crucial when it comes to pruning your Bougainvillea Bonsai. The best time to prune is during its dormant period, typically in late winter or early spring. This allows your bonsai to recover and grow vigorously when the warmer months roll around.

Now, how the heck do you prune a Bougainvillea Bonsai without ending up with a botched job? First, identify any dead, diseased, or crossing branches and remove them. Then, trim back excessive growth to maintain the desired shape. Remember, don’t go overboard—less is more when it comes to pruning.

5.2 Shaping Bougainvillea Bonsai: Techniques for Creating Desired Forms

Creating the perfect shape for your Bougainvillea Bonsai is like sculpting a masterpiece, except instead of marble, you’re working with living plant material. It’s like being Michelangelo, but with more dirt under your fingernails.

When it comes to shaping your bonsai, there are a few techniques you can employ. One popular method is wiring, where you gently wrap the branches with wire to guide them into the desired position. Think of it as giving your bonsai a little nudge in the right direction, like a gentle suggestion rather than a forceful command.

Another technique is pruning for structure. This involves removing branches strategically to create an aesthetically pleasing shape. You can think of it as bonsai feng shui—finding the perfect balance between form and function.

Remember, shaping your Bougainvillea Bonsai is an art form, and like any artist, you’ll need some practice to master it. Don’t be discouraged if your bonsai doesn’t look like a work of art right away. Rome wasn’t built in a day, and bonsai masterpieces aren’t either.

5.3 Promoting Ramification and Branch Density in Bougainvillea Bonsai

Ramification and branch density—two fancy terms that basically mean your Bougainvillea Bonsai is filling out nicely, like a well-fitting pair of jeans. It’s all about creating a lush and full canopy that makes your bonsai a showstopper.

To promote ramification and branch density, you’ll need to encourage the growth of new branches. One way to do this is through careful pruning. By selectively pruning back certain branches, you stimulate the growth of new ones. It’s like giving your bonsai a little motivational pep talk: “Come on, buddy, you can do it, grow some more branches!”

Another technique is defoliation. This involves removing some or all of the leaves, which prompts your Bougainvillea Bonsai to produce new foliage. It’s like giving your bonsai a fresh start, a chance to sprout new growth and become even more beautiful.

But remember, don’t go overboard with the pruning and defoliation. Your bonsai needs some leaves to photosynthesize and fuel its growth. Plus, you don’t want your bonsai to look like a naked twig in the meantime.

So go ahead, give your Bougainvillea Bonsai the TLC it deserves. Prune, shape, and promote ramification like a pro, and watch your bonsai flourish into a stunning masterpiece. And hey, if all else fails, at least you’ll have a great excuse to spend more time in the garden.In conclusion, Bougainvillea bonsai is a captivating and rewarding plant to cultivate. By following the guidelines and techniques outlined in this complete guide, you can create and maintain a thriving Bougainvillea bonsai that showcases its vibrant colors and intricate forms. Remember to stay patient, as bonsai cultivation is an art that requires time and dedication. With proper care and attention, your Bougainvillea bonsai will continue to bring you joy and admiration for years to come. So, embark on this bonsai journey and enjoy the bliss of Bougainvillea bonsai cultivation.

FAQ

1. Are Bougainvillea bonsai suitable for indoor cultivation?

Bougainvillea bonsai are generally better suited for outdoor cultivation due to their sunlight and temperature requirements. However, certain Bougainvillea species can tolerate indoor conditions if provided with adequate light and suitable growing conditions.

2. How often should I water my Bougainvillea bonsai?

The frequency of watering your Bougainvillea bonsai will depend on various factors, including the climate, pot size, and soil composition. As a general rule, it is recommended to water thoroughly when the top layer of soil feels dry to the touch. Avoid overwatering, as Bougainvillea bonsai prefer slightly drier soil between watering sessions.

3. Can Bougainvillea bonsai be shaped into different bonsai styles?

Yes, Bougainvillea bonsai can be shaped into various bonsai styles, including formal upright, informal upright, cascade, and broom. However, it is important to keep in mind the natural growth habit and characteristics of the Bougainvillea plant when shaping it into different styles.

4. How can I promote blooming in my Bougainvillea bonsai?

To promote blooming in your Bougainvillea bonsai, ensure that it receives adequate sunlight. Bougainvillea plants require at least six hours of direct sunlight per day to encourage blooming. Additionally, providing a balanced fertilizer with higher phosphorus content during the flowering season can also help stimulate blooming.

Mastering Philodendron Camposportoanum Care: A Comprehensive Guide

Philodendron Camposportoanum, also known as the Velvet-Leaf Philodendron, is a stunning tropical plant that has gained popularity among plant enthusiasts. With its unique velvety leaves and relatively easy care requirements, this species has become a favorite choice for both beginner and experienced plant owners. This ultimate care guide will provide valuable insights into the ideal growing conditions, watering and humidity requirements, light and temperature preferences, soil and fertilizer needs, pruning and propagation techniques, common pests and diseases, as well as essential tips for successful care and maintenance of Philodendron Camposportoanum. Whether you are a seasoned plant lover or just starting your journey, this comprehensive guide will equip you with the knowledge and skills necessary to cultivate a thriving and thriving Philodendron Camposportoanum in your home or garden.

1.1 What is Philodendron Camposportoanum?

If you’re tired of the same old, basic houseplants and are craving something a little more unique, let me introduce you to the Philodendron Camposportoanum. It’s like the hipster cousin of the Philodendron family, bringing a touch of coolness to your indoor jungle. Native to the rainforests of Brazil, this plant is sure to catch the eye with its stunning foliage and quirky charm.

1.2 Features and Characteristics

The Philodendron Camposportoanum is known for its heart-shaped leaves that come in a vibrant shade of green with prominent venation. But what really sets it apart from the crowd are the unique fringed edges on its leaves, giving it a touch of whimsy that screams “I’m not your average houseplant!”

This little attention seeker enjoys showing off its climbing abilities, so be prepared to provide it with some support or a trellis if you want it to reach its full potential. Don’t worry though, it won’t take up your entire living room – it’s a compact plant that stays relatively small, making it perfect for those with limited space.

2. Ideal Growing Conditions for Philodendron Camposportoanum

2.1 Light Requirements

When it comes to lighting, the Philodendron Camposportoanum prefers bright, indirect light. It’s like the plant version of Goldilocks – not too much, not too little, just the right amount. So, find a spot near a window where it can soak up some rays without getting scorched. If you notice its leaves starting to turn yellow, it’s a sign that it’s getting too much sun, so adjust accordingly.

2.2 Temperature Range

This tropical beauty thrives in temperatures between 65°F and 85°F (18°C to 29°C). It’s like a diva that likes to keep things comfortably warm. Avoid exposing it to drafts or sudden temperature changes, as it prefers a stable environment. So, keep it cozy and it will reward you with its stunning foliage.

2.3 Humidity Levels

Philodendron Camposportoanum is all about that moisture, so it will appreciate a humid environment. If you live in a dry climate, don’t fret! You can increase humidity by placing a water tray near the plant or misting its leaves regularly. It’s like giving it a little spa treatment and who doesn’t love a pampered plant?

2.4 Suitable Potting Options

When it comes to choosing the perfect home for your Philodendron Camposportoanum, opt for a well-draining potting mix. You don’t want it sitting in soggy soil, as that can lead to root rot – a definite buzzkill. A mix of peat moss, perlite, and orchid bark will keep it happy and ensure its roots can breathe. Plus, it’s like giving it a fancy, designer outfit to show off to all your friends.

3. Watering and Humidity Requirements

3.1 Proper Watering Techniques

Watering your Philodendron Camposportoanum is like finding the balance in life – not too much, not too little. Allow the top inch or so of soil to dry out before watering it again. Stick your finger in the soil to check its moisture level, or use a moisture meter if you want to feel like a high-tech plant parent. Remember, overwatering is a no-no, so give it a little sip, not a full-on water fountain.

3.2 Understanding Moisture Needs

This plant enjoys being kept slightly moist, but not waterlogged. Think of it as a plant that likes to keep its toes damp, but not swimming in a lake. Too much water can lead to root rot, which is like a death sentence for this beauty. So, avoid the soggy situation and find that perfect balance of moisture.

3.3 Managing Humidity Levels

As mentioned earlier, Philodendron Camposportoanum appreciates a humid environment. You can increase humidity by misting its leaves with water or placing it near a humidifier. It’s like giving it a tropical vacation without the hassle of airport security.

4. Proper Light and Temperature for Philodendron Camposportoanum

4.1 Finding the Right Amount of Light

When it comes to light, this plant wants to be just like Goldilocks – not too bright, not too dim, but just right. Find a spot near a window where it can bask in bright, indirect light. If the leaves start to look pale or leggy, it’s a sign that it’s not getting enough light. So, move it closer to the window and let it soak up those rays.

4.2 Avoiding Direct Sunlight

While Philodendron Camposportoanum enjoys bright light, direct sunlight can be a bit too harsh for its delicate leaves. It’s like a plant that’s sensitive to sunburn. So, protect it from those scorching rays by placing it in a spot where it receives filtered or indirect light. It’s like giving it a stylish parasol to shield it from the sun.

4.3 Maintaining Optimal Temperature Range

This plant likes to keep things warm, but not too hot. It’s like a diva that prefers a cozy, comfortable environment. Maintain temperatures between 65°F and 85°F (18°C to 29°C) to keep it happy. Avoid exposing it to drafts or extreme temperature fluctuations, as it can cause stress. So, find that sweet spot and keep the temperature just right for your Camposportoanum companion.

5. Soil and Fertilizer Needs

5.1 Choosing the Right Soil Mix

When it comes to keeping your Philodendron Camposportoanum happy, the right soil mix is key. Think of it like finding the perfect foundation for a beautiful building – you want something sturdy and well-draining. A well-balanced mix of peat moss, perlite, and a touch of sand should do the trick. This will ensure that excess water doesn’t hang around for too long, preventing root rot and other nasty problems.

5.2 Fertilizing Schedule

Now that you have your soil sorted, it’s time to talk about feeding your Philodendron Camposportoanum. These plants aren’t too demanding when it comes to fertilizer, but a little boost every now and then can go a long way. During the growing season (spring and summer), feed your plant once a month with a balanced fertilizer. In the cooler months, you can cut back to every two to three months. Remember, it’s always better to under-fertilize than overdo it. Nobody likes a hangry plant!

5.3 Nutrient Requirements

Just like humans need their vitamins, Philodendron Camposportoanum also has some specific nutrient needs. The three main macronutrients they crave are nitrogen, phosphorus, and potassium. These can be found in balanced fertilizers labeled with an NPK ratio (those numbers on the packaging). Aim for a ratio of 10-10-10 or something similar. Additionally, don’t forget about micronutrients like iron, magnesium, and zinc. They might be tiny, but they play an essential role in your plant’s overall health. Consider adding a micronutrient supplement to your feeding routine to keep your Philodendron thriving.

6. Pruning and Propagation Techniques

6.1 Importance of Pruning

Pruning may sound like a fancy term, but it’s just a fancy way of saying “trimming.” Just like you might give yourself a haircut to tidy up, your Philodendron could use a little grooming too. Regular pruning helps control the plant’s size, shape, and can even encourage more bushy growth. Plus, it gives you a chance to show off your fancy gardening shears. Talk about a win-win situation!

6.2 Step-by-Step Pruning Guide

Ready to get your hands dirty? Pruning your Philodendron Camposportoanum is a relatively simple process. Start by identifying any dead or dying leaves – those are the ones that need to go first. Use clean and sharp shears to make a clean cut just above the leaf node (the point where the leaf meets the stem). This will promote new growth. If you want to shape your plant, you can also trim back any leggy or unruly stems. Just remember: moderation is key. Don’t go all Edward Scissorhands on your poor Philodendron!

6.3 Propagation Methods

Once you’ve mastered the art of pruning, you might want to expand your Philodendron family. Luckily, propagating Philodendron Camposportoanum is as easy as can be. You have a few different options to choose from: stem cuttings, air layering, or division. Stem cuttings are perhaps the most popular and straightforward method. Simply cut a healthy stem with a few leaves attached, remove the lower leaves, and place it in a glass of water or moist soil. Before you know it, you’ll have a brand new Philodendron baby to brag about!

6.4 Caring for Newly Propagated Plants

Now that you’re a proud parent of some baby Philodendrons, it’s time to make sure they have the best start in life. These little ones are more delicate than a snowflake on a summer’s day, so handle them with care. Keep them in a warm and humid environment, away from direct sunlight. Water them regularly, but be cautious not to overwater – they’re tiny and can’t handle too much moisture just yet. With a little TLC, your Philodendron offspring will grow into strong, independent plants in no time.

7. Common Pests and Diseases

7.1 Identifying Common Pests

Let’s face it, pests are like the uninvited guests that show up at your party and eat all your snacks. Unfortunately, Philodendron Camposportoanum can also fall victim to some unwanted visitors. Keep an eye out for pests such as spider mites, mealybugs, and aphids. These sneaky critters can cause damage to your plant by sucking the sap or leaving behind unsightly webs. Not exactly the kind of decoration you were going for.

7.2 Preventing and Treating Pests

To prevent these pesky critters from wreaking havoc on your Philodendron, it’s essential to maintain good plant hygiene. Regularly inspect your plant for any signs of infestation. If you do spot some unwanted guests, there are a few ways to show them the exit door. You can try using natural remedies like neem oil or insecticidal soap. For severe cases, you may need to bring out the big guns and use a chemical pesticide, but be cautious and always follow the instructions carefully. Nobody wants to accidentally harm their precious plant.

7.3 Recognizing Common Diseases

Just like humans catch the occasional cold, Philodendron Camposportoanum can also fall ill from time to time. Keep an eye out for common diseases such as root rot, leaf spot, or powdery mildew. These can be caused by overwatering, poor air circulation, or excessive humidity. Not exactly the most glamorous ailments, but they can definitely put a damper on your plant’s overall health.

7.4 Disease Prevention and Treatment

Prevention is always better than a cure, so make sure to provide your Philodendron with the right conditions to avoid diseases. Ensure proper drainage, don’t overwater, and maintain good air circulation around your plant. If you do spot signs of disease, act quickly to prevent it from spreading further. Remove affected leaves or stems, adjust watering habits, and consider using a fungicide if necessary. Your Philodendron will thank you for taking care of its well-being!

8. Tips for Successful Care and Maintenance

8.1 Monitoring Growth and Development

Just like a proud parent tracking their child’s growth milestones, it’s important to keep an eye on your Philodendron Camposportoanum’s progress. Monitor its growth rate, leaf color, and overall appearance. If you notice any sudden changes, it could be a sign that something isn’t quite right. Maybe it needs more sunlight, less water, or perhaps just a little pep talk to boost its confidence. Don’t worry; we won’t judge if you start having conversations withIn conclusion, Philodendron Camposportoanum is a remarkable plant that brings beauty and tropical vibes to any space. By providing the right growing conditions, proper care, and attention, you can enjoy the lush foliage and velvety leaves of this stunning plant for years to come. Remember to monitor its needs, adjust watering and light levels accordingly, and address any issues promptly. With the knowledge and tips shared in this care guide, you are well-equipped to create an environment where your Philodendron Camposportoanum can thrive. So, go ahead and embark on the rewarding journey of caring for this unique plant, and enjoy the natural beauty it brings to your home or garden.

FAQ

1. Is Philodendron Camposportoanum suitable for beginners?

Philodendron Camposportoanum is considered a relatively easy plant to care for, making it suitable for beginners. With the right growing conditions and regular maintenance, even those new to plant care can successfully nurture and enjoy this beautiful tropical plant.

2. How often should I water my Philodendron Camposportoanum?

The watering frequency for Philodendron Camposportoanum may vary depending on various factors such as humidity levels, temperature, and potting medium. As a general guideline, it is recommended to water the plant when the top inch of soil feels slightly dry. Avoid overwatering, as it can lead to root rot, but also ensure that the plant doesn’t dry out completely between waterings.

3. Can Philodendron Camposportoanum tolerate low light conditions?

While Philodendron Camposportoanum prefers bright, indirect light, it can tolerate lower light conditions to some extent. However, it is important to note that inadequate light may result in reduced growth and less vibrant foliage. If placing the plant in a low light area, ensure it still receives some natural or artificial light to maintain its overall health and vitality.

4. How do I propagate Philodendron Camposportoanum?

Philodendron Camposportoanum can be propagated through stem cuttings. Choose a healthy stem with at least two or three leaves and make a clean cut just below a node. Place the cutting in a suitable potting medium, keep it moist, and provide indirect light. With time and proper care, the cutting will develop roots, and you will have successfully propagated a new Philodendron Camposportoanum plant.

How To Propagate Anthurium: A Step-by-Step Comprehensive Guide

Anthuriums, with their vibrant and captivating flowers, are popular houseplants that add a touch of tropical elegance to any space. If you are an avid plant enthusiast or simply looking to expand your indoor garden, learning how to propagate anthuriums can be a rewarding endeavor. Propagation allows you to create new plants from existing ones, giving you the opportunity to share the beauty of anthuriums with others or expand your collection. In this comprehensive guide, we will explore the various methods of anthurium propagation, including seeds and cuttings, providing you with step-by-step instructions, helpful tips, and insights into caring for newly propagated plants. Whether you are a beginner or have some experience in plant propagation, this article will equip you with the knowledge you need to successfully propagate anthuriums and enjoy the satisfaction of nurturing new life.

1. Introduction to Anthurium Propagation

Propagation, a fancy word for making more plant babies, is an exciting way to expand your plant collection without breaking the bank. And if you’re a fan of colorful, heart-shaped flowers, then propagating Anthurium plants should be high on your to-do list. But before we dive into the nitty-gritty of Anthurium propagation, let’s first understand what it actually means and why it’s worth your time.

1.1 What is Anthurium Propagation?

Anthurium propagation is the process of creating new Anthurium plants from existing ones. Think of it as a magical way to clone your favorite plant and watch it grow into a thriving beauty. With a little bit of knowledge and some TLC, you can propagate Anthuriums and enjoy their stunning blooms in various corners of your home or garden.

1.2 Benefits of Propagating Anthurium Plants

Aside from the sheer satisfaction of nurturing new life, propagating Anthurium plants offers several benefits. First and foremost, you get to expand your plant collection without spending a fortune on buying new plants. Plus, by propagating your existing Anthuriums, you can preserve unique varieties or share the love by gifting them to friends and family. So not only does it save you money, but it’s also a great way to spread some green joy!

2. Understanding Anthurium Plant Anatomy

Before we delve into the art of propagation, let’s take a quick tour of an Anthurium plant’s anatomy. Knowing the different parts of the plant will help you make informed decisions when it comes to choosing the right propagation method.

2.1 Anatomy of Anthurium Flowers

Anthurium flowers are like nature’s way of showing off. With their vibrant colors and heart-shaped spathes, they captivate everyone who lays eyes on them. The spathe, a modified leaf, encloses the spadix, which is responsible for producing tiny flowers. These flowers contain both male and female reproductive organs, making them perfect for propagating Anthuriums.

2.2 Anatomy of Anthurium Leaves

Anthurium leaves are a sight to behold, with their glossy texture and elongated shape. These leaves serve as the plant’s energy factories, converting sunlight into food through a process called photosynthesis. Understanding the anatomy of Anthurium leaves is crucial because certain propagation methods require specific leaf sections to be successful.

2.3 Understanding Anthurium Root Systems

Beneath the surface, Anthurium plants boast a network of roots that provide them with essential nutrients and anchor them in their pots or soil. The root system plays a vital role in the health and growth of the plant, so it’s important to take it into consideration when propagating Anthuriums. Now, let’s dive into the exciting world of propagation methods!

3. Methods of Anthurium Propagation

When it comes to propagating Anthuriums, you have a few tricks up your green thumb. Each method has its own quirks and success rate, so it’s worth exploring all of them and figuring out which one works best for you. Let’s take a look at the three main methods of Anthurium propagation.

3.1 Division Method

If you have a mature Anthurium plant with multiple stems or clumps, the division method is your go-to. It’s as simple as separating the clumps into individual plants, each with its own roots and leaves. This method ensures that each new plant has a head start in life and can thrive independently.

3.2 Seed Propagation Method

For the patient and adventurous plant lovers out there, seed propagation is an option worth exploring. It involves collecting and sowing Anthurium seeds, allowing you to witness the entire lifecycle of the plant from start to finish. While it may take longer than other methods, the satisfaction of growing a plant from a tiny seed is unparalleled.

3.3 Stem Cutting Method

If you’ve ever had a magic wand fantasy, then the stem cutting method might be right up your alley. By taking a section of the stem and providing it with the right conditions, you can encourage the growth of new roots and create a whole new Anthurium plant. It’s like casting a spell, except the only magic involved is the power of nature.

4. Propagating Anthurium from Seeds

Now that we’ve piqued your curiosity about seed propagation, let’s dig deeper into this fascinating method. Although it requires a little more patience, the process is incredibly rewarding. So put on your gardening gloves (or wizard robes, if you prefer), and let’s learn how to propagate Anthuriums from seeds.

4.1 Collecting and Preparing Anthurium Seeds

The journey of seed propagation starts with collecting mature Anthurium seeds. These seeds are typically found inside the berries that develop after the plant is pollinated. To ensure successful propagation, it’s crucial to collect ripe berries, remove the seeds, and prepare them for planting. Don’t worry, we’ll guide you through each step of the way!

4.2 Sowing Anthurium Seeds

Once you have your Anthurium seeds all prepped and ready, it’s time to sow them. Whether you choose to sow them directly in pots or opt for a seed tray, creating the perfect environment for seed germination is key. We’ll walk you through the process, providing tips to maximize your chances of success.

4.3 Germination Process and Care

With your seeds sown, it’s time to sit back, relax, and let nature work its magic. The germination process may take anywhere from a few weeks to a couple of months, so patience is an essential virtue here. We’ll cover the care and maintenance required during this stage to ensure healthy seedlings and increase their chances of growing into strong, blooming Anthurium plants.

Propagation opens up a whole new world of possibilities for Anthurium enthusiasts. Whether you choose to divide, sow seeds, or try your hand at stem cuttings, each method brings its own excitement and rewards. So go forth, aspiring plant propagators, and let your Anthurium collection flourish!

5. Propagating Anthurium from Cuttings

If you’ve fallen in love with the beauty of anthurium plants and want to expand your collection, propagating them from cuttings is a fantastic way to do it. It’s relatively simple and doesn’t require a green thumb of any kind. Here’s what you need to know to get started.

5.1 Selecting and Preparing Anthurium Cuttings

When selecting cuttings for propagation, look for healthy and mature stems with at least two or three leaves. Make sure to use a clean, sharp pair of scissors or pruning shears to make a clean cut just below a leaf node. Remove any flowers or buds from the cutting as they can divert energy from root development.

5.2 Choosing the Right Propagation Medium

To give your anthurium cuttings the best chance of success, you’ll need a suitable propagation medium. A mix of equal parts perlite and peat moss works well, providing good drainage and moisture retention. Fill a small pot or tray with this mixture, ensuring it is moist but not soaked.

5.3 Rooting Anthurium Cuttings

Dip the bottom end of your anthurium cutting in a rooting hormone to encourage root development. Then, create a small hole in the propagation medium and gently place the cutting inside. Press the medium around the cutting to ensure good contact. Keep the cuttings in a warm, bright location but out of direct sunlight. Mist them regularly to maintain humidity and prevent the medium from drying out.

6. Caring for Newly Propagated Anthurium Plants

Congratulations! You’ve successfully rooted your anthurium cuttings, and now it’s time to give them the care they need to thrive.

6.1 Transferring Anthurium Cuttings or Seedlings to Pots

Once the roots have developed, usually after a few weeks, carefully transfer your rooted anthurium cuttings or seedlings to individual pots. Use a well-draining potting mix that retains moisture without becoming waterlogged. Ensure the plant is at the same level it was in the propagation medium and water thoroughly after repotting.

6.2 Providing Optimal Light, Temperature, and Humidity

Anthuriums thrive in bright, indirect light, so place your newly propagated plants near a window with filtered sunlight. Maintain a temperature between 60-80°F (15-27°C) and humidity levels around 60-70%. You can increase humidity by placing a tray of water near the plants or using a humidifier.

6.3 Watering and Fertilizing Newly Propagated Anthurium Plants

Water your anthurium plants when the top inch of the soil feels dry to the touch. Avoid overwatering as it can lead to root rot. As for fertilizing, use a balanced liquid fertilizer diluted to half strength every two to four weeks during the growing season. However, remember that less is more – anthuriums can be sensitive to over-fertilization.

7. Troubleshooting Common Issues in Anthurium Propagation

Even the most experienced gardeners face challenges, but fear not! Here are some common issues you may encounter during anthurium propagation and how to tackle them.

7.1 Dealing with Root Rot and Overwatering

Overwatering is the enemy of healthy anthurium plants. Ensure the potting mix has good drainage, and only water when the soil is dry. If you suspect root rot, carefully remove the plant from the pot, trim away any rotted roots, and replant in fresh, well-draining soil.

7.2 Managing Pests and Diseases

Anthuriums can be susceptible to pests like aphids, mealybugs, and spider mites. Regularly inspect your plants for signs of infestation, such as tiny bugs, sticky residue, or distorted leaves. Treat infestations with organic insecticidal soap or neem oil, ensuring you cover both sides of the leaves.

7.3 Addressing Leaf Yellowing and Wilting

Yellowing leaves can be a sign of overwatering, underwatering, or nutrient deficiencies. Check the soil moisture, adjust your watering routine, and consider fertilizing with a balanced houseplant fertilizer. Wilting leaves may indicate dehydration or extreme temperature fluctuations. Adjust watering and ensure your plant is not exposed to drafts or direct heat sources.

8. Conclusion and Final Tips for Successful Anthurium Propagation

Propagation is a rewarding way to grow your anthurium collection and share the beauty with others. Remember to be patient and give your cuttings time to establish roots. Keep an eye on watering, light, temperature, and humidity to provide optimal conditions for growth. And most importantly, have fun with it! Happy propagating!

8. Conclusion and Final Tips for Successful Anthurium Propagation

Propagating anthurium plants is an exciting and rewarding process that allows you to expand your collection and share the beauty of these tropical plants with others. By understanding the anatomy of anthuriums and learning the various propagation methods such as seeds and cuttings, you can successfully create new plants and enjoy the satisfaction of watching them grow. Remember to provide the right care and attention to your newly propagated anthuriums, ensuring they have the optimal conditions of light, temperature, humidity, and watering. By troubleshooting common issues and addressing them promptly, you can set your propagated anthurium plants on a path to thrive. So go ahead, get your hands dirty, and embark on this botanical adventure – happy anthurium propagation!

FAQ

1. Can I propagate anthurium plants from seeds?

Yes, anthurium plants can be propagated from seeds. However, it’s important to note that the process of growing anthuriums from seeds can be more time-consuming and challenging compared to other propagation methods, such as stem cuttings. Proper seed collection, preparation, and germination techniques are crucial for successful seed propagation.

2. How long does it take for anthurium cuttings to root?

The time it takes for anthurium cuttings to root can vary depending on several factors, including the environmental conditions, the type of cutting, and the overall health of the plant. Generally, it can take anywhere from a few weeks to a couple of months for the cuttings to develop a robust root system. Providing the right level of humidity, temperature, and moisture during the rooting process can significantly aid in the successful establishment of roots.

3. What are some common problems I might encounter during anthurium propagation?

While anthurium propagation can be a rewarding experience, it’s not without potential challenges. Some common problems you may encounter include root rot due to overwatering, pests such as aphids or mites, and issues like leaf yellowing and wilting. However, with proper care, attention, and timely intervention, most problems can be managed effectively, ensuring the healthy growth of your propagated anthurium plants.

4. Can I propagate anthuriums if I only have one plant?

Yes, it is possible to propagate anthurium plants even if you only have one individual plant. While the division method may not be applicable in this case, you can still propagate anthuriums through other methods such as stem cuttings. By taking stem cuttings from the parent plant and following the appropriate procedures, you can successfully create new anthurium plants and expand your collection.