Jade Bonsai Plant: A Comprehensive Guide to Cultivating and Caring for Crassula ovata

Welcome to our comprehensive guide on cultivating and caring for Crassula ovata, commonly known as the Jade Bonsai Plant. In this article, we will delve into the captivating world of Jade Bonsai, exploring its origins, characteristics, and various varieties. Whether you are a seasoned bonsai enthusiast or a beginner looking to embark on a new horticultural journey, this guide will provide you with valuable insights and practical tips to cultivate and care for your own beautiful Jade Bonsai Plant. From selecting a healthy plant to mastering essential techniques like watering, pruning, and fertilizing, get ready to unlock the secrets of nurturing this unique and cherished bonsai tree. Let’s dive in!

1. The Fascinating World of Jade Bonsai Plants

1.1 What is a Jade Bonsai Plant?

So you’re probably wondering, what exactly is a jade bonsai plant? Well, imagine a miniature tree with glossy, fleshy leaves that resemble little green coins. That’s right, a jade bonsai plant is a small version of the Crassula ovata, a resilient and beautiful succulent native to South Africa.

1.2 Why Jade Bonsai Plants are Popular

Jade bonsai plants have gained popularity among plant enthusiasts, and it’s not hard to see why. These little beauties are not only aesthetically pleasing, but they also bring a touch of tranquility and nature into any space. Plus, their compact size makes them perfect for people with limited space or who want to add a touch of greenery to their desks or windowsills.

1.3 Benefits of Cultivating Jade Bonsai Plants

Besides being delightful to look at, cultivating a jade bonsai plant can bring a host of benefits. For one, taking care of these little trees can be a therapeutic and rewarding hobby. It’s a chance to slow down, connect with nature, and nurture something beautiful. Additionally, jade bonsai plants are known to improve indoor air quality by purifying the air around them. So not only do they look good, but they also help you breathe easier.

2. Understanding Crassula ovata: Origins, Characteristics, and Varieties

2.1 A Brief History of Crassula ovata

Let’s take a little trip back in time to learn about the fascinating history of Crassula ovata. Native to South Africa, it’s believed that this plant was brought to China over a thousand years ago, where it was cultivated and transformed into the beloved jade bonsai plants we know today. It’s a living testament to the creativity and passion of horticulturists throughout history.

2.2 Exploring the Unique Characteristics of Crassula ovata

Now, let’s dive into what makes Crassula ovata special. One of its most distinctive features is its succulent leaves, which store water to withstand dry periods. These leaves are a glossy green, giving the plant a vibrant and fresh appearance. Another notable characteristic is its ability to develop a thick, gnarly trunk over time, adding a touch of character and wisdom to its overall aesthetic.

2.3 Popular Varieties of Crassula ovata

Just like people, Crassula ovata comes in various shapes and sizes. Some popular varieties include the “Hummel’s Sunset” with its striking red-tipped leaves, the “Gollum” with its tubular and elongated leaves, and the classic “Jade Plant” with its compact and bushy form. Each variety brings its own unique charm to the world of jade bonsai plants.

3. Getting Started: Selecting and Acquiring a Healthy Jade Bonsai Plant

3.1 Factors to Consider When Choosing a Jade Bonsai Plant

Ready to start your own jade bonsai journey? Great! But before you rush to get one, it’s important to consider a few factors. First, think about your level of experience with bonsai and choose a plant that matches your skill level. Additionally, take into account the amount of light and space available in your home, as different varieties of jade bonsai plants have different light and space requirements.

3.2 Where to Find and Purchase Jade Bonsai Plants

Now that you know what to look for in a jade bonsai plant, you may be wondering where to find one. Luckily, there are various options available. Local nurseries, garden centers, and even online marketplaces can be great sources for finding healthy jade bonsai plants. Just make sure to do your research, read reviews, and purchase from reputable sellers.

3.3 Assessing the Health and Quality of a Jade Bonsai Plant

When you lay your eyes on a potential jade bonsai plant, it’s important to check its health and quality before bringing it home. Look for signs of pest infestation, such as webbing or discolored leaves. Additionally, inspect the roots to ensure they are evenly distributed and not overcrowded. Remember, a healthy plant is the foundation for a successful bonsai journey.

4. Essential Tools and Materials for Cultivating Jade Bonsai

4.1 Must-Have Tools for Jade Bonsai Cultivation

Now that you have your jade bonsai plant, it’s time to gather the essential tools for cultivation. You’ll need a pair of sharp pruning shears to trim and shape the plant, as well as a bonsai wire to gently guide its branches. A root rake and scissors will also come in handy when it’s time to repot your jade bonsai. And don’t forget a water can or spray bottle to keep your plant hydrated.

4.2 Suitable Containers and Potting Soil for Jade Bonsai

Choosing the right container and potting soil is crucial for the health and growth of your jade bonsai plant. Opt for a shallow ceramic or plastic container with drainage holes to allow excess water to escape. As for the soil, a well-draining mix specifically designed for succulents will help your jade bonsai thrive. Remember, a happy plant starts with a happy home.

4.3 Additional Materials for Proper Growth and Development

To ensure your jade bonsai plant has everything it needs to flourish, consider using organic fertilizer to provide it with the necessary nutrients. Additionally, having a humidity tray or a small pebble tray can help maintain a humid environment around your plant, replicating its natural habitat. And of course, don’t forget to give your jade bonsai lots of love and attention – water it when the soil is dry, keep it in the right amount of light, and watch it grow into a beautiful miniature tree before your eyes.

Now that you’re armed with knowledge about jade bonsai plants and how to care for them, go forth and start your own miniature arboreal adventure. May your jade bonsai be a source of joy, serenity, and green goodness in your life. Happy cultivating!Bonsai Plants

5. Cultivation Techniques: Step-by-Step Guide for Proper Planting and Potting

5.1 Preparing the Jade Bonsai Plant for Planting

Before diving into the exciting world of jade bonsai plants, it’s important to prepare your plant for planting. Start by selecting a healthy and vibrant jade plant and ensure that it is free from any pests or diseases. You can give it a gentle rinse to remove any dirt or dust from the foliage. Additionally, prune away any dead or damaged branches to promote healthy growth.

5.2 Potting and Repotting Jade Bonsai Plants

When it comes to potting your jade bonsai, choose a shallow container with adequate drainage holes to prevent waterlogged roots. Fill the pot with well-draining bonsai soil, which is a mixture of coarse sand, peat moss, and perlite. Carefully place the plant in the pot and gently pat down the soil around the roots. Remember not to bury the trunk too deep, as it can lead to rot.

Repotting is necessary every two to three years to refresh the soil and promote healthy root growth. To repot your jade bonsai, gently remove it from its current pot, trim the roots slightly, and replant it in fresh bonsai soil. This process helps prevent root binding and provides the plant with fresh nutrients.

5.3 Sunlight, Temperature, and Humidity Requirements for Optimal Growth

Jade bonsai plants are sun-loving creatures that thrive in bright light. Place your bonsai in a location where it can receive at least six hours of direct sunlight each day. If you notice the leaves turning yellow or pale, it’s a sign that your plant may be receiving too much direct sunlight, so you may need to provide some shade during the hottest part of the day.

In terms of temperature, jade bonsai plants prefer a moderate to warm climate. They can withstand temperatures as low as 50°F (10°C) but thrive in temperatures between 65°F (18°C) and 75°F (24°C). It’s important to protect your bonsai from frost or extreme temperature fluctuations.

As for humidity, jades are known for their ability to tolerate dry conditions. However, they will benefit from occasional misting or placing a tray of water near the plant to increase humidity levels.

6. Caring for Your Jade Bonsai: Watering, Pruning, and Fertilizing Tips

6.1 Watering Techniques for Jade Bonsai Plants

When it comes to watering your jade bonsai, it’s essential to strike a balance. Overwatering can lead to root rot, while underwatering can cause the plant to wither. The key is to allow the soil to partially dry out between waterings. Stick your finger into the soil up to the first knuckle, and if it feels dry at that depth, it’s time to water. Avoid leaving your bonsai sitting in a saucer filled with water, as it can lead to root suffocation.

6.2 Pruning and Trimming to Maintain Shape and Health

Pruning is an essential part of maintaining the shape and health of your jade bonsai. Remove any dead, damaged, or overgrown branches to encourage new growth and maintain an aesthetically pleasing shape. Jade bonsai plants are forgiving, so don’t be afraid to prune, but make sure to use clean and sharp tools to prevent any infections.

6.3 Fertilizing Schedule and Nutritional Needs of Jade Bonsai Plants

To keep your jade bonsai thriving, it’s important to provide it with the necessary nutrients. Use a balanced liquid fertilizer specifically formulated for bonsai plants during the growing season, typically from spring to early autumn. Follow the manufacturer’s instructions for the appropriate dilution and frequency of application. During the winter months, reduce or eliminate fertilization as the plant enters a dormant phase.

Remember, caring for a jade bonsai plant is a journey that requires observation, patience, and a touch of love. Follow these tips, and enjoy the rewarding experience of cultivating and caring for your very own miniature tree.

With this comprehensive guide, you now have the knowledge and tools to successfully cultivate and care for your very own Jade Bonsai Plant. Remember, patience and dedication are key as you embark on this rewarding journey of bonsai cultivation. By understanding the origins, characteristics, and varieties of Crassula ovata, and by following the step-by-step techniques for planting, potting, and caring, you can create a stunning and thriving Jade Bonsai. Enjoy the process, embrace the artistry, and witness the beauty of your Jade Bonsai as it grows and flourishes under your expert care. Happy bonsai gardening!

FAQ

1. How often should I water my Jade Bonsai Plant?

Watering frequency for Jade Bonsai Plants can vary depending on factors such as the size of the pot, climate, and time of year. As a general guideline, it is recommended to water your Jade Bonsai thoroughly when the topsoil feels slightly dry, ensuring that excess water drains properly. Avoid overwatering or allowing the soil to become completely dry between waterings.

2. Can I grow Jade Bonsai indoors?

Yes, Jade Bonsai Plants can be grown indoors successfully, provided they receive sufficient light. Place your Jade Bonsai near a window where it can receive bright, indirect sunlight for several hours each day. Additionally, ensure proper air circulation and avoid placing the bonsai near drafty areas or heating vents.

3. How often should I prune my Jade Bonsai?

Pruning is an essential part of maintaining the shape and health of your Jade Bonsai Plant. Regular pruning should be done during the growing season, typically in spring or early summer. Trim back any overgrown branches or foliage to maintain the desired form and encourage new growth. Remember to use clean, sterile pruning tools to prevent the spread of diseases.

4. Do Jade Bonsai Plants require special fertilizer?

Jade Bonsai Plants benefit from regular fertilization, especially during the growing season. It is recommended to use a balanced, organic bonsai fertilizer or a slow-release fertilizer specifically formulated for bonsai trees. Follow the package instructions for application rates and frequency, and adjust the dosage based on the age and health of your Jade Bonsai.

How To Propagate Anthurium: A Step-by-Step Comprehensive Guide

Anthuriums, with their vibrant and captivating flowers, are popular houseplants that add a touch of tropical elegance to any space. If you are an avid plant enthusiast or simply looking to expand your indoor garden, learning how to propagate anthuriums can be a rewarding endeavor. Propagation allows you to create new plants from existing ones, giving you the opportunity to share the beauty of anthuriums with others or expand your collection. In this comprehensive guide, we will explore the various methods of anthurium propagation, including seeds and cuttings, providing you with step-by-step instructions, helpful tips, and insights into caring for newly propagated plants. Whether you are a beginner or have some experience in plant propagation, this article will equip you with the knowledge you need to successfully propagate anthuriums and enjoy the satisfaction of nurturing new life.

1. Introduction to Anthurium Propagation

Propagation, a fancy word for making more plant babies, is an exciting way to expand your plant collection without breaking the bank. And if you’re a fan of colorful, heart-shaped flowers, then propagating Anthurium plants should be high on your to-do list. But before we dive into the nitty-gritty of Anthurium propagation, let’s first understand what it actually means and why it’s worth your time.

1.1 What is Anthurium Propagation?

Anthurium propagation is the process of creating new Anthurium plants from existing ones. Think of it as a magical way to clone your favorite plant and watch it grow into a thriving beauty. With a little bit of knowledge and some TLC, you can propagate Anthuriums and enjoy their stunning blooms in various corners of your home or garden.

1.2 Benefits of Propagating Anthurium Plants

Aside from the sheer satisfaction of nurturing new life, propagating Anthurium plants offers several benefits. First and foremost, you get to expand your plant collection without spending a fortune on buying new plants. Plus, by propagating your existing Anthuriums, you can preserve unique varieties or share the love by gifting them to friends and family. So not only does it save you money, but it’s also a great way to spread some green joy!

2. Understanding Anthurium Plant Anatomy

Before we delve into the art of propagation, let’s take a quick tour of an Anthurium plant’s anatomy. Knowing the different parts of the plant will help you make informed decisions when it comes to choosing the right propagation method.

2.1 Anatomy of Anthurium Flowers

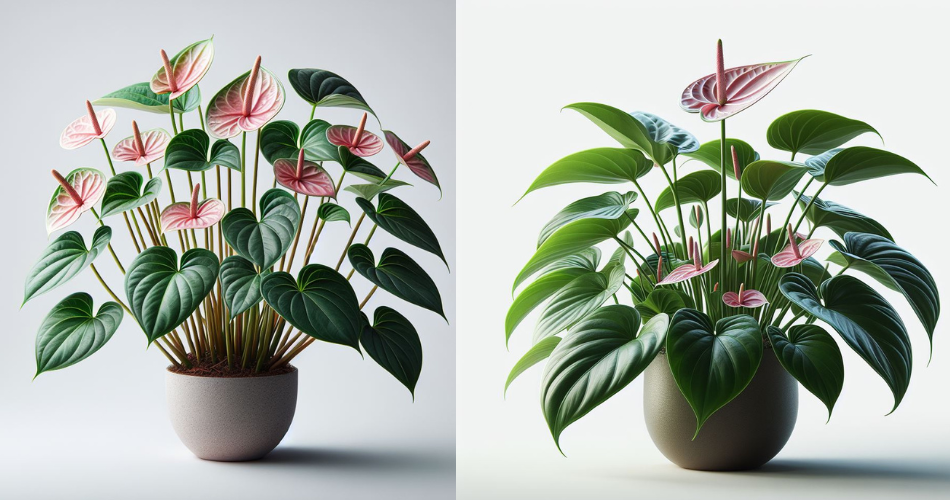
Anthurium flowers are like nature’s way of showing off. With their vibrant colors and heart-shaped spathes, they captivate everyone who lays eyes on them. The spathe, a modified leaf, encloses the spadix, which is responsible for producing tiny flowers. These flowers contain both male and female reproductive organs, making them perfect for propagating Anthuriums.

2.2 Anatomy of Anthurium Leaves

Anthurium leaves are a sight to behold, with their glossy texture and elongated shape. These leaves serve as the plant’s energy factories, converting sunlight into food through a process called photosynthesis. Understanding the anatomy of Anthurium leaves is crucial because certain propagation methods require specific leaf sections to be successful.

2.3 Understanding Anthurium Root Systems

Beneath the surface, Anthurium plants boast a network of roots that provide them with essential nutrients and anchor them in their pots or soil. The root system plays a vital role in the health and growth of the plant, so it’s important to take it into consideration when propagating Anthuriums. Now, let’s dive into the exciting world of propagation methods!

3. Methods of Anthurium Propagation

When it comes to propagating Anthuriums, you have a few tricks up your green thumb. Each method has its own quirks and success rate, so it’s worth exploring all of them and figuring out which one works best for you. Let’s take a look at the three main methods of Anthurium propagation.

3.1 Division Method

If you have a mature Anthurium plant with multiple stems or clumps, the division method is your go-to. It’s as simple as separating the clumps into individual plants, each with its own roots and leaves. This method ensures that each new plant has a head start in life and can thrive independently.

3.2 Seed Propagation Method

For the patient and adventurous plant lovers out there, seed propagation is an option worth exploring. It involves collecting and sowing Anthurium seeds, allowing you to witness the entire lifecycle of the plant from start to finish. While it may take longer than other methods, the satisfaction of growing a plant from a tiny seed is unparalleled.

3.3 Stem Cutting Method

If you’ve ever had a magic wand fantasy, then the stem cutting method might be right up your alley. By taking a section of the stem and providing it with the right conditions, you can encourage the growth of new roots and create a whole new Anthurium plant. It’s like casting a spell, except the only magic involved is the power of nature.

4. Propagating Anthurium from Seeds

Now that we’ve piqued your curiosity about seed propagation, let’s dig deeper into this fascinating method. Although it requires a little more patience, the process is incredibly rewarding. So put on your gardening gloves (or wizard robes, if you prefer), and let’s learn how to propagate Anthuriums from seeds.

4.1 Collecting and Preparing Anthurium Seeds

The journey of seed propagation starts with collecting mature Anthurium seeds. These seeds are typically found inside the berries that develop after the plant is pollinated. To ensure successful propagation, it’s crucial to collect ripe berries, remove the seeds, and prepare them for planting. Don’t worry, we’ll guide you through each step of the way!

4.2 Sowing Anthurium Seeds

Once you have your Anthurium seeds all prepped and ready, it’s time to sow them. Whether you choose to sow them directly in pots or opt for a seed tray, creating the perfect environment for seed germination is key. We’ll walk you through the process, providing tips to maximize your chances of success.

4.3 Germination Process and Care

With your seeds sown, it’s time to sit back, relax, and let nature work its magic. The germination process may take anywhere from a few weeks to a couple of months, so patience is an essential virtue here. We’ll cover the care and maintenance required during this stage to ensure healthy seedlings and increase their chances of growing into strong, blooming Anthurium plants.

Propagation opens up a whole new world of possibilities for Anthurium enthusiasts. Whether you choose to divide, sow seeds, or try your hand at stem cuttings, each method brings its own excitement and rewards. So go forth, aspiring plant propagators, and let your Anthurium collection flourish!

5. Propagating Anthurium from Cuttings

If you’ve fallen in love with the beauty of anthurium plants and want to expand your collection, propagating them from cuttings is a fantastic way to do it. It’s relatively simple and doesn’t require a green thumb of any kind. Here’s what you need to know to get started.

5.1 Selecting and Preparing Anthurium Cuttings

When selecting cuttings for propagation, look for healthy and mature stems with at least two or three leaves. Make sure to use a clean, sharp pair of scissors or pruning shears to make a clean cut just below a leaf node. Remove any flowers or buds from the cutting as they can divert energy from root development.

5.2 Choosing the Right Propagation Medium

To give your anthurium cuttings the best chance of success, you’ll need a suitable propagation medium. A mix of equal parts perlite and peat moss works well, providing good drainage and moisture retention. Fill a small pot or tray with this mixture, ensuring it is moist but not soaked.

5.3 Rooting Anthurium Cuttings

Dip the bottom end of your anthurium cutting in a rooting hormone to encourage root development. Then, create a small hole in the propagation medium and gently place the cutting inside. Press the medium around the cutting to ensure good contact. Keep the cuttings in a warm, bright location but out of direct sunlight. Mist them regularly to maintain humidity and prevent the medium from drying out.

6. Caring for Newly Propagated Anthurium Plants

Congratulations! You’ve successfully rooted your anthurium cuttings, and now it’s time to give them the care they need to thrive.

6.1 Transferring Anthurium Cuttings or Seedlings to Pots

Once the roots have developed, usually after a few weeks, carefully transfer your rooted anthurium cuttings or seedlings to individual pots. Use a well-draining potting mix that retains moisture without becoming waterlogged. Ensure the plant is at the same level it was in the propagation medium and water thoroughly after repotting.

6.2 Providing Optimal Light, Temperature, and Humidity

Anthuriums thrive in bright, indirect light, so place your newly propagated plants near a window with filtered sunlight. Maintain a temperature between 60-80°F (15-27°C) and humidity levels around 60-70%. You can increase humidity by placing a tray of water near the plants or using a humidifier.

6.3 Watering and Fertilizing Newly Propagated Anthurium Plants

Water your anthurium plants when the top inch of the soil feels dry to the touch. Avoid overwatering as it can lead to root rot. As for fertilizing, use a balanced liquid fertilizer diluted to half strength every two to four weeks during the growing season. However, remember that less is more – anthuriums can be sensitive to over-fertilization.

7. Troubleshooting Common Issues in Anthurium Propagation

Even the most experienced gardeners face challenges, but fear not! Here are some common issues you may encounter during anthurium propagation and how to tackle them.

7.1 Dealing with Root Rot and Overwatering

Overwatering is the enemy of healthy anthurium plants. Ensure the potting mix has good drainage, and only water when the soil is dry. If you suspect root rot, carefully remove the plant from the pot, trim away any rotted roots, and replant in fresh, well-draining soil.

7.2 Managing Pests and Diseases

Anthuriums can be susceptible to pests like aphids, mealybugs, and spider mites. Regularly inspect your plants for signs of infestation, such as tiny bugs, sticky residue, or distorted leaves. Treat infestations with organic insecticidal soap or neem oil, ensuring you cover both sides of the leaves.

7.3 Addressing Leaf Yellowing and Wilting

Yellowing leaves can be a sign of overwatering, underwatering, or nutrient deficiencies. Check the soil moisture, adjust your watering routine, and consider fertilizing with a balanced houseplant fertilizer. Wilting leaves may indicate dehydration or extreme temperature fluctuations. Adjust watering and ensure your plant is not exposed to drafts or direct heat sources.

8. Conclusion and Final Tips for Successful Anthurium Propagation

Propagation is a rewarding way to grow your anthurium collection and share the beauty with others. Remember to be patient and give your cuttings time to establish roots. Keep an eye on watering, light, temperature, and humidity to provide optimal conditions for growth. And most importantly, have fun with it! Happy propagating!

8. Conclusion and Final Tips for Successful Anthurium Propagation

Propagating anthurium plants is an exciting and rewarding process that allows you to expand your collection and share the beauty of these tropical plants with others. By understanding the anatomy of anthuriums and learning the various propagation methods such as seeds and cuttings, you can successfully create new plants and enjoy the satisfaction of watching them grow. Remember to provide the right care and attention to your newly propagated anthuriums, ensuring they have the optimal conditions of light, temperature, humidity, and watering. By troubleshooting common issues and addressing them promptly, you can set your propagated anthurium plants on a path to thrive. So go ahead, get your hands dirty, and embark on this botanical adventure – happy anthurium propagation!

FAQ

1. Can I propagate anthurium plants from seeds?

Yes, anthurium plants can be propagated from seeds. However, it’s important to note that the process of growing anthuriums from seeds can be more time-consuming and challenging compared to other propagation methods, such as stem cuttings. Proper seed collection, preparation, and germination techniques are crucial for successful seed propagation.

2. How long does it take for anthurium cuttings to root?

The time it takes for anthurium cuttings to root can vary depending on several factors, including the environmental conditions, the type of cutting, and the overall health of the plant. Generally, it can take anywhere from a few weeks to a couple of months for the cuttings to develop a robust root system. Providing the right level of humidity, temperature, and moisture during the rooting process can significantly aid in the successful establishment of roots.

3. What are some common problems I might encounter during anthurium propagation?

While anthurium propagation can be a rewarding experience, it’s not without potential challenges. Some common problems you may encounter include root rot due to overwatering, pests such as aphids or mites, and issues like leaf yellowing and wilting. However, with proper care, attention, and timely intervention, most problems can be managed effectively, ensuring the healthy growth of your propagated anthurium plants.

4. Can I propagate anthuriums if I only have one plant?

Yes, it is possible to propagate anthurium plants even if you only have one individual plant. While the division method may not be applicable in this case, you can still propagate anthuriums through other methods such as stem cuttings. By taking stem cuttings from the parent plant and following the appropriate procedures, you can successfully create new anthurium plants and expand your collection.

How to Use Chamomile Tea to Prevent House Plant Diseases

Hello plant enthusiasts! Today, we’re diving into the world of chamomile tea and its remarkable benefits for your house plants. Who would have thought that a cup of chamomile tea could be the superhero your leafy friends need to stay healthy and disease-free? Let’s unlock the secrets of chamomile tea and its incredible powers in preventing and treating common plant diseases.

Unveiling the Power of Chamomile:

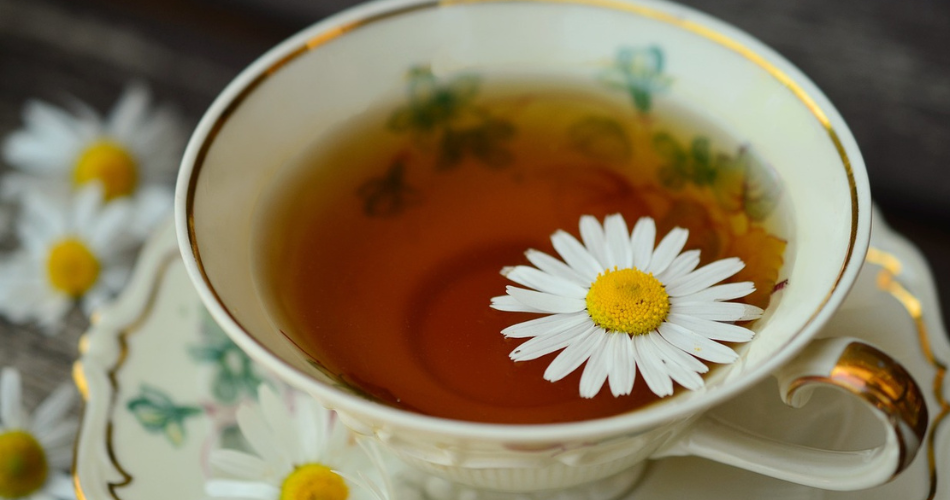
Chamomile tea isn’t just a soothing bedtime drink; it’s a powerhouse with natural properties that can shield your plants from diseases. Packed with anti-fungal and anti-bacterial qualities, chamomile tea is here to revolutionize your plant care routine.

The Recipe for Chamomile Tea Elixir:

Creating your chamomile tea solution is as easy as making your morning cuppa. Here’s the simple recipe:

Ingredients:

  1. Chamomile tea bags or dried chamomile flowers
  2. Boiling water

Steps:

  1. Steep chamomile tea bags or dried flowers in boiling water, just as you would for your regular tea.
  2. Let the tea cool completely.

Using Chamomile Tea as a Preventive Measure:

  1. Guarding Against Damping Off:
    • Damping off, the sneaky fungal disease that can harm your plants, is no match for chamomile tea. Use it as a preventive measure by making a solution from fresh or dried chamomile flowers. Spray the solution on your seedlings or soak your seeds before planting.

Understanding Damping Off:

Damping off is a group of fungal diseases that attack seedlings, causing rot in the stem and root tissues. Look out for yellowing leaves, wilting, and stunted growth – the telltale signs of damping off. This pesky condition thrives in wet, cold soil with poor drainage.

Preventing Damping Off with Chamomile Tea:

  1. Brew a Strong Batch:
    • Make a robust chamomile tea by steeping fresh or dried chamomile flowers in hot water for up to 24 hours. This releases the active compounds that repel pests and control their populations.
  2. Spray Infested Plants:
    • Transfer the chamomile tea to a spray bottle and apply it directly on infested plants, covering both the foliage and the soil around them.
  3. Time Your Spraying:
    • To protect beneficial insects like bees and butterflies, spray chamomile tea early in the morning or late in the evening when they are less active.
  4. Repeat as Needed:
    • Depending on the severity of the infestation, repeat the chamomile tea spray every few days to keep pests in check and promote healthy plant growth.
  5. Eco-Friendly Solution:
    • Unlike chemical insecticides that harm the environment, chamomile tea is a natural and eco-friendly alternative. You’re not just protecting your plants; you’re contributing to a healthier garden ecosystem.

Creating a Chamomile Fungicide Spray:

Making a chamomile fungicide spray is simple and effective. Here’s a quick guide:

  1. Gather Chamomile Flowers:
    • Start by collecting fresh or dried chamomile flowers. Rinse fresh flowers gently to remove any dirt.
  2. Brewing the Tea:
    • Boil water and steep the chamomile flowers for about 10 minutes. Strain the flowers to get a golden liquid.
  3. Into the Spray Bottle:
    • Pour the chamomile liquid into a spray bottle. Your homemade chamomile fungicide spray is ready!
  4. Application:
    • Spray the chamomile fungicide directly on seedlings or the affected soil. Repeat every few days for optimal results.

Other Diseases Chamomile Can Treat:

  1. White Mold:
    • Spray chamomile tea on the soil and seedlings to eliminate fungal spores causing white mold.
  2. Powdery Mildew:
    • Combat powdery mildew by applying a strong brew of chamomile tea to affected plants’ foliage every few days.

Using Chamomile Fungicide Preventatively:

  1. Vegetable Gardens:
    • Spray chamomile tea on the entire vegetable garden to prevent fungal diseases and repel insect pests.
  2. Apple Trees:
    • Protect apple trees from diseases by spraying chamomile tea in the dormant season. This creates a protective layer against fungal growth.
  3. Hygiene for Seeds:
    • Soak older seeds in chamomile tea before planting to prevent potential fungal diseases.
  4. Ongoing Care:
    • As seedlings mature, continue using chamomile tea as a preventive measure by watering the plants with a diluted solution.

Benefits of Chamomile Tea for Plant Health:

Chamomile tea isn’t just about preventing diseases; it’s a holistic solution for overall plant health.

  1. Promotes Seed Germination:
    • Softens seed casings, aiding faster and more successful germination.
  2. Natural Insecticide:
    • Controls pests without harming beneficial insects, contributing to a balanced garden ecosystem.
  3. Calming Effects:
    • Just as it relaxes us, chamomile tea promotes overall plant well-being, helping them withstand environmental stressors.

How to Grow and Harvest Chamomile:

  1. Start Early:
    • Begin growing chamomile from seeds in early spring for optimal results.
  2. Dedicated Bed:
    • Chamomile plants thrive when they have their dedicated bed, allowing them to grow and spread freely.
  3. Harvesting:
    • Harvest chamomile flowers when fully opened, about two months after planting, by snipping them just above the soil line.
  4. Leaves Too:
    • Don’t forget about the leaves! Harvest them for culinary delights or skincare preparations.

Medicinal Benefits of Chamomile:

  1. Calming Effects:
    • Known for its calming properties, chamomile tea promotes relaxation and improved sleep quality.
  2. Treats Various Conditions:
    • Recognized by medical authorities for treating conditions like indigestion and colic.
  3. Ancient Healing:
    • Cherished by ancient civilizations for its remarkable healing properties.
  4. Wide Range of Benefits:
    • Lowers blood pressure, reduces swelling and inflammation, boosts immunity, and provides relief from discomfort caused by various conditions.

Chamomile tea isn’t just a beverage; it’s a game-changer for your plants. From preventing diseases to promoting overall health, chamomile tea is a natural and effective ally in your gardening journey. Embrace the magic of chamomile, and watch your indoor garden thrive with vitality. Happy gardening!

Can I water my bonsai with chamomile tea?

Using chamomile tea to water your bonsai can have both advantages and potential drawbacks. Here are some considerations:

Advantages:

  1. Mild Antifungal Properties: Chamomile tea is known for its mild antifungal properties. Using it as a watering solution may help prevent or control certain fungal issues in the soil.
  2. Gentle Nutrients: Chamomile tea contains trace nutrients that can be beneficial for plant health in moderation. It provides a mild and organic supplement.

Considerations:

  1. Dilution is Key: If you choose to use chamomile tea, it’s crucial to dilute it significantly with water. Pure chamomile tea may be too concentrated and could potentially harm the bonsai due to its natural compounds.
  2. Frequency: While chamomile tea can be used occasionally, it should not replace regular watering with plain water. Bonsai trees have specific water requirements, and using chamomile tea too frequently might disrupt the balance.

Drawbacks:

  1. pH Considerations: Chamomile tea has a slightly acidic pH. While this can be beneficial for some plants, not all bonsai trees prefer acidic conditions. It’s important to know the pH preferences of your specific bonsai species before using chamomile tea.
  2. Possible Allergies: Some plants may be sensitive to chamomile or its constituents. Before using chamomile tea, observe your bonsai’s reaction to a small amount to ensure it doesn’t cause any adverse effects.

Alternative: Instead of chamomile tea, you might consider using a balanced, diluted liquid fertilizer specifically designed for bonsai trees. This ensures that your bonsai receives essential nutrients without the risk of unintended side effects.

FAQ:

  1. What does chamomile do for the body?
    • Answer: Chamomile has anti-inflammatory and antioxidant properties, promoting relaxation, improved sleep, and digestive health.
  2. Who should not drink chamomile tea?
    • Answer: Individuals allergic to ragweed or those taking blood thinners should avoid chamomile. Consult a doctor if pregnant or nursing.
  3. Does chamomile tea make you sleepy?
    • Answer: Yes, chamomile tea is known for its mild sedative effects, aiding in relaxation and promoting better sleep.
  4. Is it OK to drink chamomile tea every day?
    • Answer: Yes, moderate daily consumption of chamomile tea is generally considered safe and may offer various health benefits.
  5. Is chamomile good for belly fat?
    • Answer: While chamomile may aid digestion and reduce inflammation, it is not a direct solution for belly fat. A balanced diet and exercise are key.
  6. Does chamomile tea flush toxins?
    • Answer: Chamomile tea may support liver function and digestion but does not have a direct detoxifying effect on toxins.
  7. Does chamomile help with weight loss?
    • Answer: Chamomile indirectly supports weight loss by promoting better digestion and reducing stress, but it’s not a direct weight loss remedy.
  8. How long does it take chamomile tea to kick in?
    • Answer: Chamomile tea’s calming effects can be felt within 30 minutes to an hour after consumption, promoting relaxation and aiding in sleep.