Bringing home a vibrant new plant is exciting! But then the question arises: should you repot it right away? This seemingly simple decision can trigger anxiety in even the most seasoned plant parent.
The Case for Waiting:
Acclimatization: Imagine moving to a new country – it takes time to adjust! Similarly, your plant needs to acclimate to your home’s light, humidity, and temperature. Repotting adds another stressor, potentially leading to leaf drop or stunted growth.
Root Disruption: Nursery pots are often small, but that doesn’t necessarily mean they’re bad. The roots have likely adapted to the confined space, and repotting can damage them, hindering water and nutrient uptake.
Post-Purchase Blues: Plants often experience “transplant shock” after purchase due to changes in environment and handling. Repotting on top of that can double the shock, delaying recovery.
Signs Your Plant Needs a New Pot:
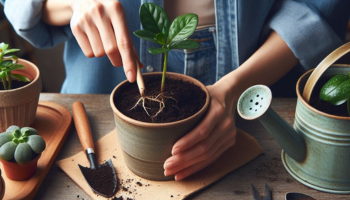
So you’ve recently brought home a new plant and you’re wondering if it needs a new pot? Well, there are some signs to look out for. Firstly, check the roots of your plant. If they have started to grow through the drainage holes at the bottom or are tightly circling around the inside of the pot, it’s time for an upgrade. Another indication is when your plant is showing signs of stunted growth or wilting despite regular watering. This could mean that the current pot is too small, restricting root development and causing waterlogged soil. Additionally, if you notice that water is not properly draining from the pot after watering or there is a strong odor coming from it, it’s a clear sign that your plant needs a new home. Remember, choosing a pot with proper drainage and sufficient size will allow room for healthy root growth and support your plant’s overall well-being!
Roots Overflowing: If roots are peeking out of drainage holes or circling the top of the soil, it’s time for a bigger pot.
Stunted Growth: Despite proper care, if your plant isn’t growing for months, it might be rootbound, restricting its ability to expand.
Frequent Watering: Does the soil dry out super quickly, requiring constant watering? This could indicate insufficient soil volume for the root system.
Top-Heavy Wobble: If your plant seems unstable and prone to tipping over, it might need a larger pot for better balance and root support.
Making the Decision:
Ultimately, the repotting decision depends on your specific plant and situation. Here’s a quick guide:
Wait 2-4 weeks: Generally, it’s best to let your plant settle in for a few weeks before repotting. This gives it time to adjust and reduces transplant shock.
Exceptions exist: If the plant shows signs of rootboundness, overwatering, or unsuitable soil (like peat moss for moisture-loving plants), immediate repotting might be necessary.
Choose the right pot: Opt for a pot only 1-2 inches larger than the current one. Avoid oversized pots, as they can lead to waterlogging.
Gentle repotting: Carefully loosen the roots, remove old soil (if needed), and place the plant in fresh, well-draining potting mix.
Remember:Repotting is a stressful event for any plant. Be patient, provide proper care, and your new leafy friend will soon thrive in its new home. Happy planting!
Bonus Tips:
Research your specific plant’s needs for repotting frequency and pot size.
Use high-quality, well-draining potting mix suitable for your plant type.
Water the plant thoroughly after repotting to settle the soil and encourage root growth.
Avoid fertilizing for a few weeks after repotting to allow the plant to recover.
With a little knowledge and care, you can ensure a smooth transition for your new plant, setting it up for success in its leafy journey. And remember, even if you make a mistake, plants are resilient! Just learn from the experience and keep nurturing your green companions.
Houseplants not only add beauty and warmth to our homes but also provide numerous benefits for our well-being. They improve indoor air quality, boost mood and productivity, and create a soothing ambiance. To fully enjoy these advantages, it is crucial to keep our houseplants healthy and thriving. This comprehensive guide will provide you with ten essential tips to ensure the well-being of your houseplants. From choosing the right plants for your home to understanding their basic needs, optimizing lighting and temperature conditions, implementing proper watering techniques, and preventing common pests and diseases, we will cover all aspects of houseplant care. So, let’s dive in and discover how to maintain flourishing and vibrant houseplants that will enhance your living space.
1. The Importance of Keeping Houseplants Healthy
Houseplants are like the unsung heroes of our homes. They add a touch of greenery, improve air quality, and can even boost our mood. But let’s face it, keeping them alive and thriving can sometimes feel like an uphill battle. Fear not, dear plant lovers! In this article, we’ll delve into the essential tips for keeping your houseplants happy and healthy. So grab your watering can and let’s dive in!
2. Choosing the Right Houseplants for Your Home
When it comes to selecting houseplants, it’s crucial to find the right match for your home. Here are a few considerations to keep in mind:
2.1 Consider Light Requirements
Just like us, plants need their daily dose of sunshine. Some plants thrive in bright, indirect light, while others can tolerate lower light conditions. Assess the lighting conditions in your home and choose plants that will flourish in those conditions.
2.2 Assess Space and Size
Space might be a limited resource in your home, but that doesn’t mean you can’t have houseplants. Determine the available space and consider the size of the plants you’re eyeing. You don’t want your vibrant green friend turning into an overgrown jungle in your living room.
2.3 Evaluate Maintenance Levels
Let’s be honest, not all of us are green thumbs. Before bringing a plant home, consider your commitment level to their care. Some plants require more attention and care, while others are low-maintenance and forgiving. Choose plants that align with your lifestyle and level of dedication.
3. Understanding the Basic Needs of Houseplants
To keep your houseplants thriving, it’s crucial to understand their basic needs. Let’s take a closer look:
3.1 Importance of Proper Watering
Watering your plants is like finding the balance between hydration and drowning. Overwatering can lead to root rot, while underwatering can cause your plants to wither away. Strike the right balance by checking the soil moisture regularly and adjusting your watering routine accordingly.
3.2 Significance of Light and Temperature
Light and temperature are the dynamic duo that can make or break your plants’ happiness. Different plants have specific light requirements, so find the optimal spot for each one. As for temperature, avoid placing your plants too close to drafty windows or heaters that might disrupt their cozy environment.
3.3 Role of Humidity
Humidity, oh sweet humidity! While some plants enjoy a humid environment, others can tolerate drier conditions. Consider grouping plants with similar humidity needs together or using a pebble tray or humidifier to create the right level of moisture for your leafy friends.
4. Providing Proper Lighting and Temperature for Houseplants
Now that we understand the importance of light and temperature, let’s explore how to provide the best environment for your plant pals:
4.1 Determining the Right Amount of Light
Finding the perfect lighting conditions can sometimes feel like a quest for a pot of gold at the end of a rainbow. Pay attention to the intensity and duration of sunlight in different areas of your home. If needed, you can also supplement natural light with artificial grow lights to keep your plants happy throughout the year.
4.2 Managing Temperature Variations
While we enjoy snuggling up with a warm blanket during chilly months, not all houseplants appreciate extreme temperature variations. Avoid placing your plants near drafty windows or air conditioning units. Keep an eye on temperature fluctuations and adjust accordingly to create a stable and comfortable environment for your leafy companions.
With these essential tips, you’ll be well on your way to becoming a houseplant whisperer. Remember, each plant has its own preferences and quirks, so don’t be afraid to experiment and learn along the way. Happy gardening, my fellow plant enthusiasts!
5. Watering Techniques and Moisture Control for Houseplants
5.1 Understanding Watering Frequency
Watering your houseplants can sometimes feel like a guessing game. Do they need water every day? Every week? Well, it depends on the plant. Some plants prefer to be kept on the drier side, while others thrive in moist soil. Understanding the specific watering needs of your houseplants is the key to keeping them happy and healthy.
5.2 Techniques for Proper Watering
Just like Goldilocks and her porridge, you want to get the watering just right. Overwatering can lead to root rot and other issues, while underwatering can leave your plants parched. So, here are a few tips for proper watering:
– Check the soil: Before watering, stick your finger about an inch into the soil. If it feels dry, it’s time to water. If it’s still moist, hold off for a bit.
– Water thoroughly: When you do water, make sure to give your plants a good drink until you see water draining out of the bottom. This ensures that the roots are properly hydrated.
– Avoid wet foliage: Try to avoid getting water on the leaves of your plants, as this can create a humid environment that encourages the growth of mold and mildew.
5.3 Managing Humidity and Moisture Levels
Houseplants come from a variety of environments, and some thrive in higher humidity levels than others. To keep your plants happy, you can try a few tricks to increase humidity:
– Grouping plants together: By clustering your plants, they can create a microclimate with higher humidity levels.
– Using a humidifier: If you have a particularly dry home, investing in a humidifier can provide the extra moisture your plants need.
– Mist them gently: For plants that love humidity, a light misting of water can help simulate their natural environment.
Remember, every plant is different, so it’s essential to research the specific needs of your houseplants to ensure they receive the right amount of water and humidity.
6. Fertilizing and Nutrient Management for Houseplants
6.1 Importance of Nutrient-Rich Soil
Just like humans need a balanced diet to stay healthy, houseplants need nutrient-rich soil to thrive. The soil provides essential minerals and elements that plants need for growth and overall health. Opt for high-quality potting soil or mix in organic matter like compost to ensure your plants get the nutrients they crave.
6.2 Choosing the Right Fertilizer
Fertilizing your houseplants is like giving them a little boost of nutrients to keep them going strong. There are many types of fertilizers available, from slow-release granules to liquid options. Choose a fertilizer specifically formulated for houseplants and follow the instructions for application.
6.3 Application and Frequency of Fertilizing
When it comes to fertilizing, it’s all about balance. Too much fertilizer can lead to burnt roots, while too little can leave your plants malnourished. Here are some tips for proper fertilization:
– Follow the instructions: Always read and follow the instructions on your chosen fertilizer to ensure you’re using the correct amount.
– Don’t overdo it: It’s better to under-fertilize than over-fertilize. Start with a smaller amount and gradually increase if needed.
– Watch for signs: Keep an eye out for signs of nutrient deficiencies, such as yellowing leaves or stunted growth. This may indicate that your plants need a little extra feeding.
Remember, fertilizing should be done during the active growing season, typically spring and summer. During the dormant winter months, it’s best to hold off on fertilizing.
7. Preventing and Treating Common Houseplant Pests and Diseases
7.1 Identifying Common Pests
Nobody likes uninvited guests, especially when they come in the form of pests invading your beloved houseplants. Common pests you may encounter include aphids, spider mites, mealybugs, and fungus gnats. The sooner you identify these intruders, the quicker you can take action.
7.2 Natural and Chemical Pest Control Methods
When it comes to pest control, you have options. If you prefer a natural approach, you can try methods like manually removing pests, introducing beneficial insects, or using homemade insecticidal soap. For more severe infestations, chemical pesticides may be necessary. Just be sure to choose products labeled safe for houseplants and follow the instructions carefully.
7.3 Recognizing and Addressing Plant Diseases
Plant diseases can be a real downer for both you and your houseplants. Common diseases include powdery mildew, root rot, and leaf spot. If you notice any signs of disease, such as discolored or wilting leaves, act quickly to prevent the spread. Remove affected leaves, ensure proper airflow, and, if needed, treat with a suitable fungicide.
8. Pruning, Repotting, and Proper Maintenance of Houseplants
8.1 Benefits of Pruning
Just like a good haircut can make someone look and feel better, pruning can work wonders for your houseplants. Regular pruning helps remove dead or diseased foliage, encourages new growth, and improves the overall shape and appearance of your plants.
8.2 When and How to Repot Houseplants
As your houseplants grow, they may outgrow their current pots. This is where repotting comes in. Signs that it’s time to repot include roots growing out of drainage holes or the plant becoming top-heavy. When repotting, choose a slightly larger pot with good drainage, and gently loosen the roots before placing the plant in its new home.
8.3 General Maintenance Tips for Healthy Houseplants
Taking care of houseplants doesn’t stop at watering, fertilizing, and pest control. Here are a few extra tips to keep your green friends thriving:
– Dust off those leaves: Dust can accumulate on your plant’s leaves, blocking sunlight and inhibiting photosynthesis. Give them a gentle wipe with a damp cloth or take them for a shower (yes, some plants enjoy a light shower!).
– Rotate for even growth: To ensure your plants grow evenly, rotate them every few weeks to expose all sides to the light source.
– Keep an eye out for warning signs: Monitor your plants regularly for any changes in appearance, such as wilting, discoloration, or drooping. These can be early indicators of problems that need attention.
By following these tips and showing a little love and attention to your houseplants, you’ll have a thriving indoor garden that will bring joy and beauty to your home. Happy gardening!Incorporating these ten essential tips into your houseplant care routine will set you on the path to maintaining healthy and thriving indoor greenery. With proper knowledge and consistent attention, your houseplants will continue to bring beauty and joy to your home for years to come. Remember, each plant is unique, so observe and adapt to their individual needs as you nurture them. By prioritizing their well-being, you can enjoy the benefits of lush and vibrant houseplants that create a refreshing and inviting atmosphere in your living space.
FAQ
1. How often should I water my houseplants?
Finding the right watering frequency depends on various factors such as the type of plant, the size of the pot, and the environmental conditions. As a general rule of thumb, it’s best to allow the top inch of soil to dry out before watering again. However, it’s crucial to assess each plant’s specific moisture requirements and adjust accordingly.
2. What are some common signs of plant pests and diseases?
Common signs of plant pests include visible insects, sticky residue on leaves, yellowing or wilting foliage, and distorted growth. Plant diseases can manifest as spots, discoloration, stunted growth, or fungal growth on leaves or stems. Regularly inspecting your houseplants will help you identify and address any issues promptly.
3. Can I use any type of fertilizer for my houseplants?
Different houseplants have varying nutritional needs, so it’s essential to choose a fertilizer specifically formulated for indoor plants. Look for a balanced fertilizer with equal parts nitrogen, phosphorus, and potassium (NPK), or consider using organic alternatives. Follow the instructions on the fertilizer packaging for proper application and frequency.
4. When should I consider repotting my houseplants?
Repotting is typically necessary when a plant becomes root-bound, meaning its roots have outgrown the current pot. Signs of a root-bound plant include roots growing out of drainage holes, slow growth, or water draining too quickly. It’s best to repot in the spring when plants are entering their active growth phase. Choose a pot that is slightly larger than the current one and use fresh, well-draining potting soil.
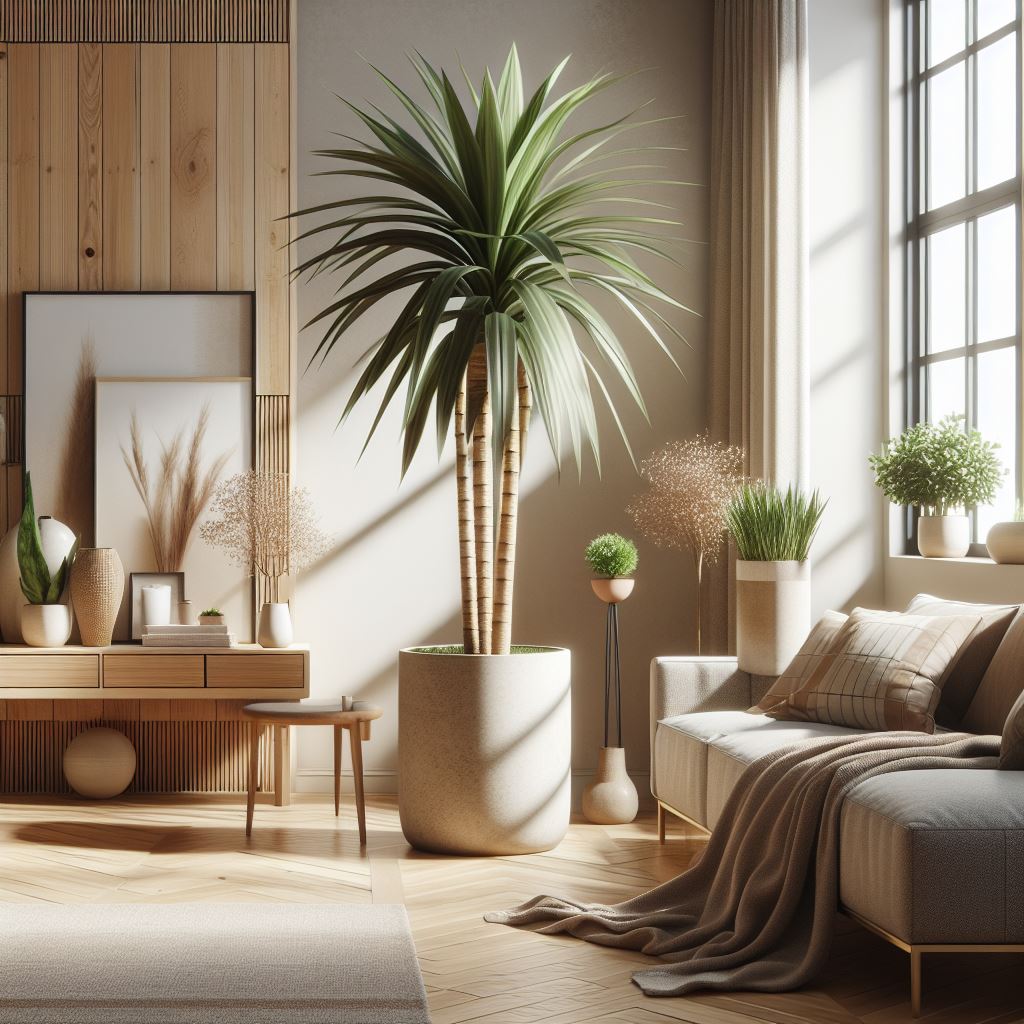
Are you prepared to transform your indoor space into a lush, green paradise, even if the sun’s rays are scarce? In this comprehensive guide, we’ll delve into an exquisite array of tall and large indoor plants 🌱 that thrive effortlessly in low-light conditions, ensuring your home stays vibrant year-round.
These resilient indoor plants are not just green companions; they’re statements of elegance that demand minimal sunlight.
Snake Plant (Dracaena trifasciata)
Indoor Size: 6 inches to 8 ft. tall Care Level: Low Light: Shade, partial sun Temperature: 70 – 90°F Humidity: 30 – 50%
The Snake Plant, recognized for its architectural elegance, not only thrives in low-light conditions but also stands out as an exceptional air purifier. Its ability to convert carbon dioxide into oxygen, even during the night, makes it an ideal choice for enhancing indoor air quality and promoting a healthier living environment.
The Snake Plant, with its sword-shaped leaves, is an excellent choice for low-light conditions. Known for its adaptability and drought resistance, it’s a perfect match for beginners. However, pet owners should exercise caution as it’s toxic to both dogs and cats.
Monstera (Monstera Deliciosa)
Indoor Size: 3 – 8 ft. tall, 1 – 3 ft. wide Care Level: Low Light: Partial sun Temperature: 60 – 85°F Humidity: 50% and above
Monstera, with its iconic Swiss cheese-like leaves, brings a touch of tropical sophistication to your space. Beyond its aesthetic appeal, this plant is known for its resilience and adaptability, making it an excellent choice for both novice and experienced plant enthusiasts. Its lush foliage adds a vibrant and lively atmosphere to any room.
The Monstera, with its iconic Swiss cheese-like leaves, is not just a plant; it’s a work of art. Easy to care for and adaptable, it can be pruned to control its growth. However, it’s toxic to pets, so be cautious with placement.
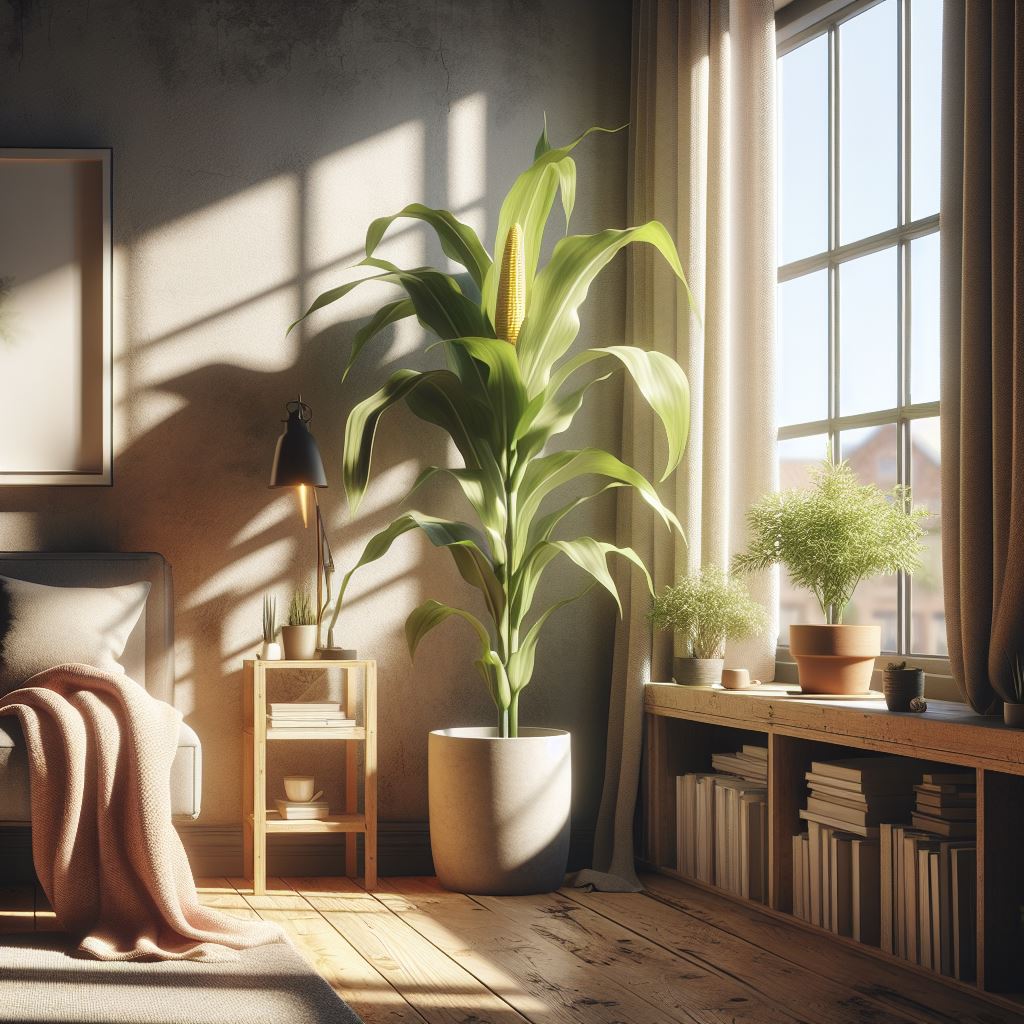
Corn Plant (Dracaena Fragrans)
Indoor Size: Up to 6 ft. tall Care Level: Low Light: Partial sun Temperature: 60 – 75°F Humidity: 40 – 50%
The Corn Plant, a slow-growing African evergreen, not only thrives in low light but also contributes to the aesthetic appeal of your indoor space. Its distinctive upright growth and glossy leaves make it a visually appealing addition, requiring minimal care while infusing a touch of natural charm into your home.
The slow-growing Corn Plant, an African evergreen tree, thrives in low-light conditions. With minimal care requirements, it’s a low-maintenance beauty. Consider a humidifier if your home’s humidity falls below 40%, and avoid direct sunlight.
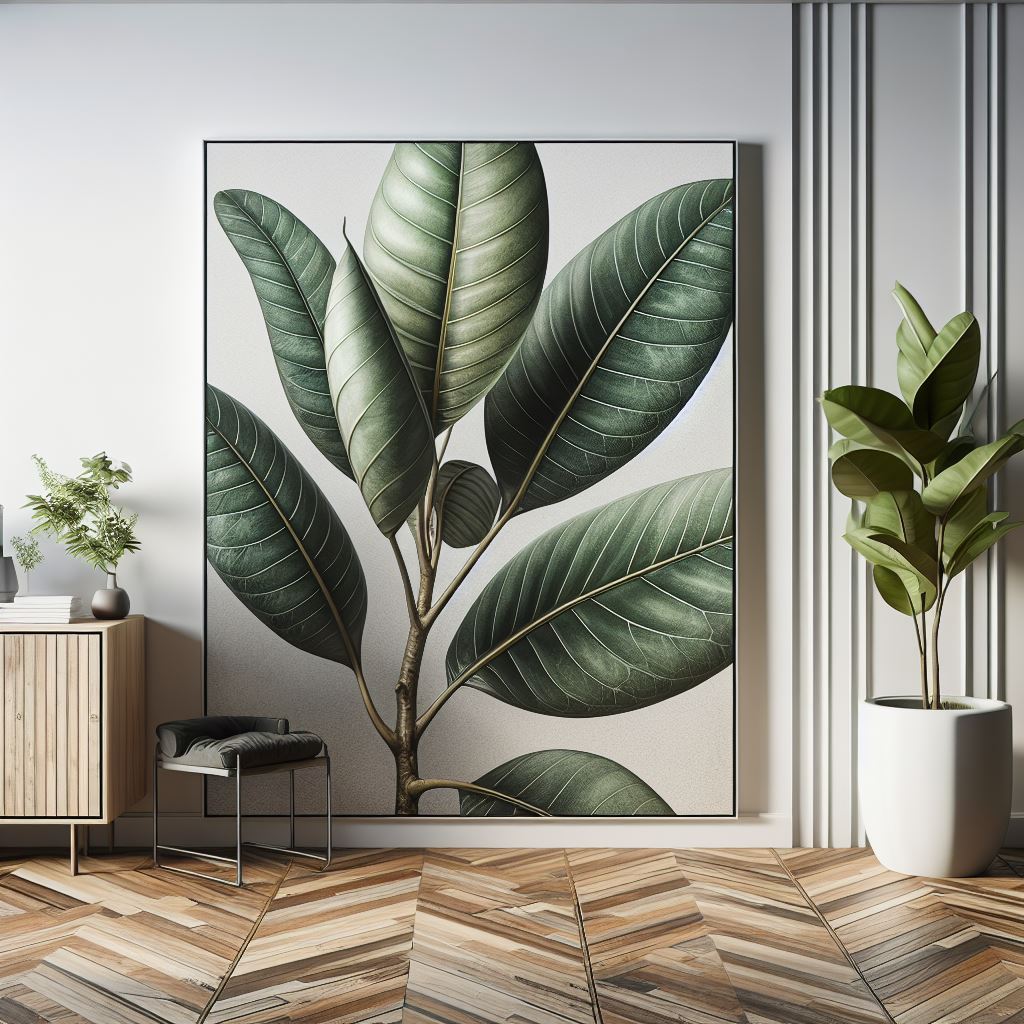
Rubber Plant (Ficus Elastica)
Indoor Size: 4 – 10 ft. tall Care Level: Medium Light: Partial shade Temperature: 60 – 75°F Humidity: 45 – 50%
The Rubber Plant, characterized by its large, waxy leaves, serves as more than just a decorative element. This low-maintenance beauty is an excellent air purifier, helping to remove common indoor pollutants and improve overall air quality. Its adaptability to various lighting conditions adds versatility to your indoor garden.
The Rubber Plant, adorned with large waxy leaves, prefers indirect light and can reach up to ten feet in height indoors. Pruning can help control its size, but it’s not suitable for extremely dark rooms.
Dragon Tree (Dracaena Marginata)
Indoor Size: 4 to 10 feet Care Level: Low Light: Bright, indirect light Temperature: 60 – 80°F Humidity: 40% and above
The Dragon Tree, appreciated for its teardrop leaves, not only enhances the visual appeal of your space but also contributes to a serene atmosphere. This low-maintenance plant thrives in filtered light, making it an easy and elegant choice for indoor greenery that complements your decor while requiring minimal attention.
Appreciated for its teardrop leaves and simplicity in care, the Dragon Tree thrives in filtered light indoors. However, it’s toxic to both pets and humans, so be cautious with its placement.
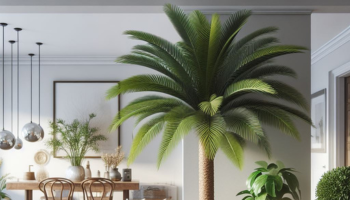
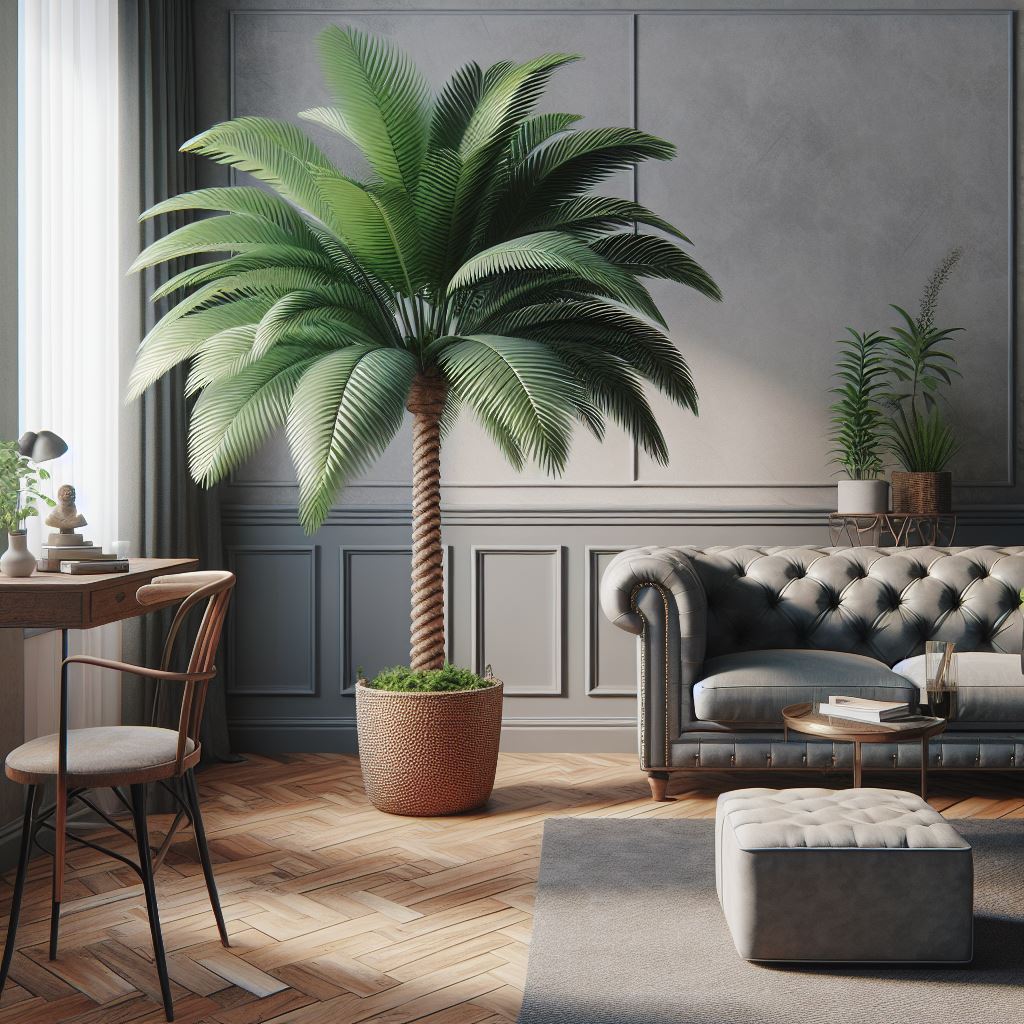
Parlor Palm (Chamaedorea Elegans)
Indoor Size: Up to 6 ft. tall, up to 4 ft. wide Care Level: Low Light: Partial sun, shade Temperature: 60 – 80°F Humidity: 50% and above
The Parlor Palm, an elegant and graceful plant, offers more than just aesthetic charm. Tolerant of lower-lighting conditions, it requires minimal pruning and repotting, making it an excellent choice for those seeking a low-maintenance yet sophisticated indoor companion that adds a touch of timeless elegance to your home.
The elegant Parlor Palm requires minimal pruning and biennial repotting, making it an excellent low-light choice. Avoid direct sunlight for optimal growth.
ZZ Plant (Zamioculcas Zamiifolia)
Indoor Size: 2 – 4 ft. (height and width) Care Level: Low Light: Partial sun Temperature: 60 – 75°F Humidity: 40 – 50%
The ZZ Plant, characterized by its glossy, dark green leaves, is a true survivor in various lighting conditions. Beyond its adaptability, this slow-growing beauty is recognized for its air-purifying qualities. It effortlessly removes pollutants from the air, promoting a healthier indoor environment while adding a touch of modern simplicity to your decor.
The ZZ Plant, a slow grower, adapts to most lighting conditions, making it an excellent choice for those seeking an easy-to-care-for indoor plant.
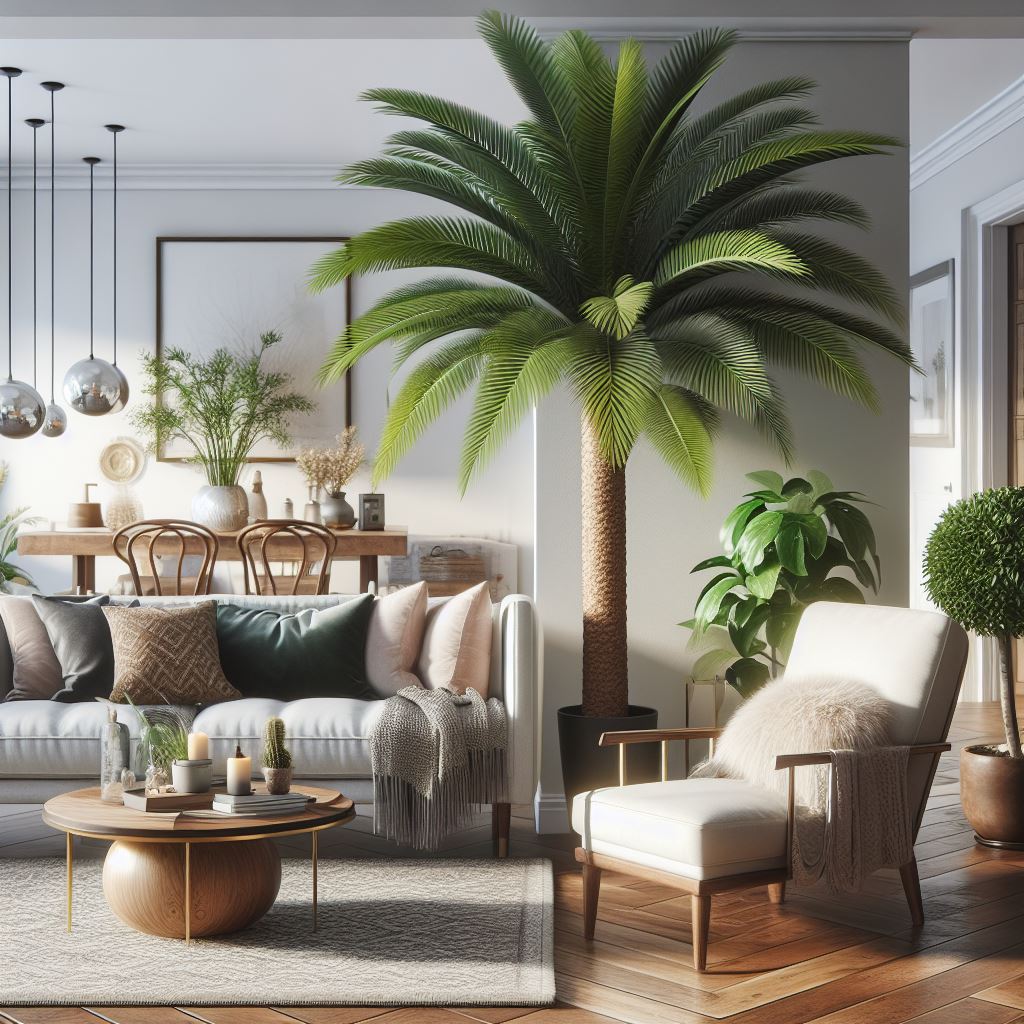
Kentia Palm (Howea Forsteriana)
Indoor Size: 2 to 12 feet in height Care Level: Low Light: Bright, indirect light Temperature: 65 – 75°F Humidity: 40 – 50%
The Kentia Palm, known for its graceful fronds, brings the allure of the tropics into your home. Beyond its aesthetic appeal, this low-maintenance plant thrives in bright, indirect light and contributes to a tranquil atmosphere. Its presence adds a classic touch, transforming your space into a sophisticated oasis.
Known for its graceful fronds, the Kentia Palm adds a touch of the tropics to your home. It thrives in bright, indirect light and is relatively low-maintenance.
Money Tree (Pachira Aquatica)
Indoor Size: 3 to 8 feet in height Care Level: Low to moderate Light: Bright, indirect light Temperature: 65 – 75°F Humidity: Moderate
The Money Tree, with its distinctive braided trunk, is more than a symbol of good luck. This versatile plant thrives in bright, indirect light and creates an ambiance of prosperity. Its low-maintenance nature, coupled with its symbolic significance, makes it a unique addition to your indoor garden, adding both visual and metaphorical richness to your space.
With its enchanting braided trunk, the Money Tree is a symbol of good fortune. Flourishing in the gentle glow of bright, indirect light, this plant embraces a rhythm of drying out between waterings, creating an atmosphere of luck and vitality in your space.
This diverse selection of indoor plants not only promises greenery but also serves as living art, enhancing your indoor space with elegance and tranquility.
FAQ:
What makes indoor plants suitable for low-light conditions?
Indoor plants for low-light conditions are typically species that have adapted to thrive in environments with minimal sunlight. They often have features such as larger leaves to capture more light and the ability to tolerate lower light levels.
How do I know if my home has low-light conditions?
Low-light conditions are common in spaces with limited access to natural sunlight, such as rooms with small windows, north-facing windows, or areas shaded by buildings or trees. If you notice that direct sunlight is scarce, it’s likely a low-light environment.
Can these plants survive in completely dark rooms?
While these plants are resilient in low-light conditions, they still need some degree of light to carry out photosynthesis. Completely dark rooms are not suitable for most plants, and they typically require at least some indirect or filtered sunlight.
Are these plants suitable for beginners?
Yes, many of the mentioned plants, such as the Snake Plant and ZZ Plant, are known for their resilience and adaptability, making them ideal for beginners. They require minimal care and can withstand occasional neglect.
Do these plants need frequent watering?
The watering frequency varies among different plants. Generally, plants like the Snake Plant and ZZ Plant are drought-tolerant and prefer slightly drier conditions. It’s crucial to let the soil dry out between waterings to prevent overwatering.
Are any of these plants pet-friendly?
Some plants on the list, such as the Snake Plant, Monstera, and Corn Plant, can be toxic to pets if ingested. It’s essential to place toxic plants out of reach of pets or choose pet-friendly alternatives if you have animals at home.
Can I keep these plants in bathrooms with lower light levels?
Yes, many of these plants, such as the Boston Fern and Parlor Palm, can thrive in bathrooms with lower light levels. However, the humidity levels in bathrooms can vary, so it’s essential to monitor the specific needs of each plant.
How do I prevent overgrowth of tall plants indoors?
Pruning is an effective way to control the growth of tall indoor plants. Regularly trimming back excess growth helps maintain the desired size and shape. Additionally, repotting and dividing certain plants can prevent them from becoming too large for their containers.
Do these plants improve indoor air quality?
Yes, many of the mentioned plants, including the Snake Plant and Rubber Plant, are known for their air-purifying qualities. They can help remove toxins from the air and contribute to a healthier indoor environment.
What is the ideal humidity level for these plants?
The humidity preferences vary among plants, but many of them, such as the Boston Fern and Calathea, prefer higher humidity levels. Regular misting, placing a tray of water nearby, or using a humidifier can help create a more favorable environment for these plants.
Remember to check the specific care requirements for each plant, as individual needs may vary.
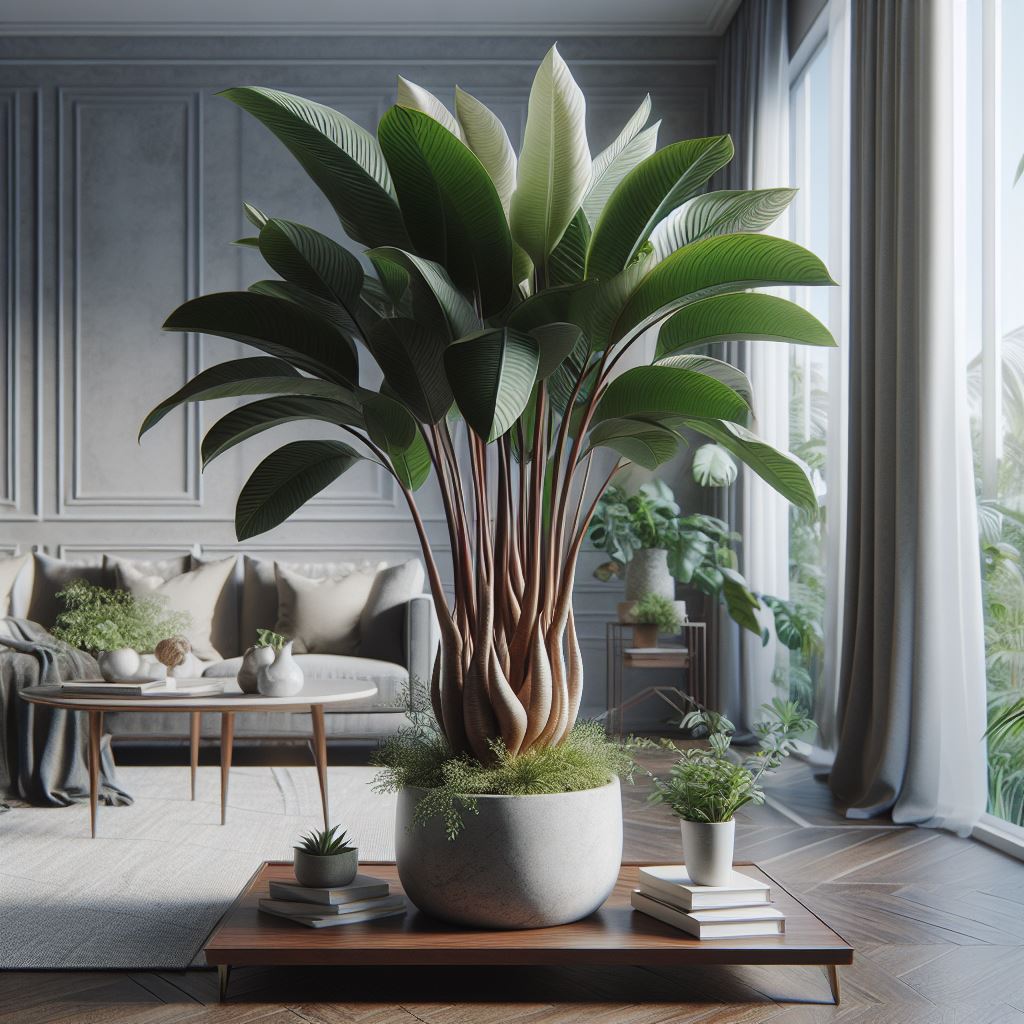
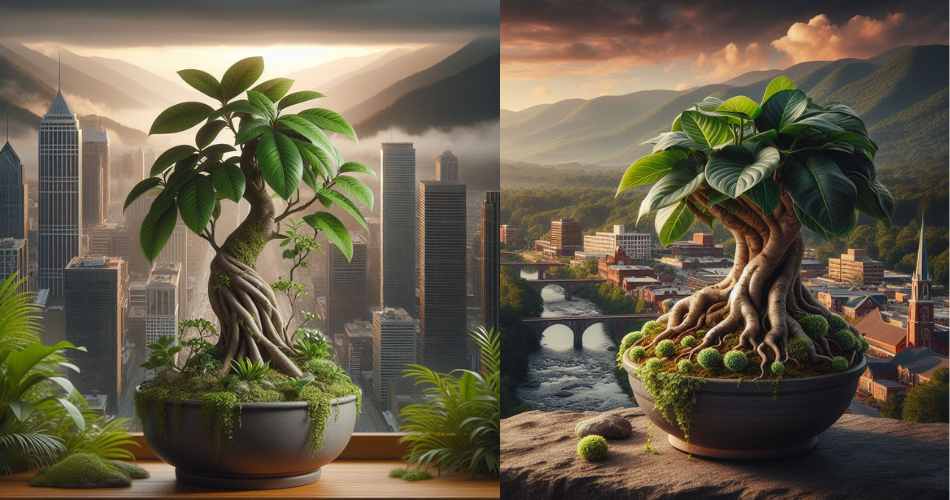
Welcome to our comprehensive guide on Philodendron Giganteum. If you are a plant enthusiast or a lover of lush greenery, you are in for a treat! Philodendron Giganteum is a stunning and captivating plant known for its impressive size and unique foliage. In this article, we will delve into the care insights and beyond, providing you with essential information to help you successfully care for this magnificent plant. Whether you are a beginner or an experienced gardener, this guide will equip you with the knowledge and tips to ensure the health and vitality of your Philodendron Giganteum. So, let’s embark on this botanical journey and uncover the secrets of caring for this remarkable plant species.
1.1 What is Philodendron Giganteum?
If you’re looking for a plant that will make a statement in your home, the Philodendron Giganteum is the way to go. As the name suggests, this plant is truly gigantic, with its leaves growing up to 3 feet long and 2 feet wide! It’s the perfect centerpiece for any plant enthusiast looking to add a touch of drama to their collection.
1.2 History and Origins of Philodendron Giganteum
The Philodendron Giganteum is native to the tropical rainforests of Brazil, where it thrives in the warm and humid conditions. This impressive plant has been captivating gardeners and plant lovers for centuries, with its origins dating back to ancient times. Its unique foliage and ability to adapt to various environments have made it a popular choice among plant enthusiasts around the world.
2. Understanding the Care Requirements for Philodendron Giganteum
2.1 Temperature and Climate Considerations
When it comes to caring for your Philodendron Giganteum, it’s essential to create the right climate. These plants prefer temperatures between 65°F and 75°F (18°C to 24°C), so make sure to keep them away from drafts or extreme temperature fluctuations.
2.2 Soil Type and Potting Mix
To keep your Philodendron Giganteum happy, it needs well-draining soil that retains some moisture. A mix of peat moss, perlite, and potting soil is ideal. Avoid overwatering, as this plant is susceptible to root rot.
2.3 Fertilization and Nutrient Needs
Philodendron Giganteum plants are not heavy feeders, but they appreciate a balanced fertilizer during the growing season. A slow-release fertilizer applied every few months should provide the necessary nutrients for healthy growth.
3. The Importance of Proper Lighting for Philodendron Giganteum
3.1 Ideal Light Conditions for Philodendron Giganteum
These giants love bright, indirect light. Place them near a window where they can receive bright, filtered sunlight. However, be cautious of direct sunlight as it can scorch the leaves.
3.2 Adjusting Light Intensity for Different Seasons
In the winter months, when the sun is weaker, you might need to move your Philodendron Giganteum closer to a window to provide adequate light. Conversely, during the summer, you might want to protect it from intense afternoon sun by moving it slightly away from the window.
4. Watering and Humidity Tips for Philodendron Giganteum
4.1 Establishing a Watering Routine
Finding the right watering routine is crucial for the health of your Philodendron Giganteum. Allow the top inch of soil to dry out before watering again, and make sure not to let it sit in water to avoid root rot. As a general rule, it’s better to underwater than overwater.
4.2 Humidity Preferences and Creating a Suitable Environment
Philodendron Giganteum plants thrive in high humidity environments, similar to their natural habitat. To create a suitable environment, consider misting the leaves regularly or placing a tray of water nearby to increase humidity levels. You can also group your plants together to create a microclimate that retains moisture.
Now that you have the care insights for your Philodendron Giganteum, get ready for your home to become the talk of the town. These impressive plants are sure to make a bold statement and become the centerpiece of any room. Happy gardening!um
8.2 Creative Ways to Incorporate Philodendron Giganteum in Home Decor
5. Philodendron Giganteum Propagation Techniques and Best Practices
Propagation techniques for the Philodendron Giganteum may sound fancy, but don’t worry, it’s not as complicated as it sounds. One popular method is propagating from stem cuttings. Just snip off a healthy stem, make sure it has a few leaves, and pop it into a container with water or moist soil. And voila! You’ve got a new baby Philodendron Giganteum ready to grow.
If you’re feeling a bit more adventurous, you can try air layering. It’s like giving your plant a little backpack to carry its new roots. By creating a small wound on the stem and wrapping it with moist sphagnum moss and plastic wrap, you’re encouraging it to develop roots in that spot. Once the roots are established, you can cut the stem below the new root system and plant it separately. It’s like magic, but for plants.
6. Common Pests and Diseases that Affect Philodendron Giganteum
Even the mighty Philodendron Giganteum is not immune to the occasional pesky pests and diseases. The key is to spot them early and nip them in the bud (pun intended). Some common pests you might encounter are spider mites, mealybugs, and aphids. These little buggers can wreak havoc on your plants, but luckily, there are natural and chemical remedies available to show them who’s boss.
As for diseases, the Philodendron Giganteum can be prone to root rot and fungal infections if its soil is too moist. So, make sure you strike the right balance between watering and letting the soil dry out between waterings. Prevention is key, my friend!
7. Tips for Pruning and Maintaining Philodendron Giganteum
Pruning may sound like a fancy salon treatment for your plants, but it’s actually an important part of keeping your Philodendron Giganteum happy and healthy. Pruning helps maintain its shape, encourages new growth, and prevents it from getting too leggy.
To prune your Philodendron Giganteum, simply look for any dead or yellowing leaves and snip them off. You can also trim any unruly stems to keep it looking neat and tidy. Just remember to use clean and sharp pruning shears to avoid causing unnecessary stress to your plant.
8. Beyond Care: Exploring the Unique Features and Benefits of Philodendron Giganteum
Now that we’ve covered the basics of care, let’s dive into the unique features and benefits of the Philodendron Giganteum. This plant is a real showstopper with its huge, glossy leaves that can reach up to 3 feet in length. It’s like having your very own personal jungle at home!
Not only is it a stunning addition to your indoor space, but the Philodendron Giganteum also helps purify the air by removing toxins and increasing oxygen levels. Talk about a multitasking plant!
If you’re feeling creative, there are plenty of ways to incorporate the Philodendron Giganteum in your home decor. You can use it as a statement piece in a tall floor pot, let it climb up a trellis, or even hang it from the ceiling for a cascading effect. The possibilities are endless, so let your imagination run wild!
So, there you have it – the inside scoop on caring for the majestic Philodendron Giganteum. Whether you’re a seasoned plant parent or just starting your green journey, this tropical beauty is sure to bring a touch of exotic charm to your home. So go ahead, give it a try, and let the Philodendron Giganteum work its magic!
In conclusion, Philodendron Giganteum is a remarkable plant that can bring beauty and vibrancy to any space. By understanding its care requirements, providing proper lighting and watering, mastering propagation techniques, and being aware of common pests and diseases, you can ensure the health and longevity of your Philodendron Giganteum. Remember to regularly prune and maintain your plant to encourage growth and maintain its unique features. Beyond care, the Philodendron Giganteum offers a sense of wonder and a touch of nature’s splendor to your indoor or outdoor environment. So, go ahead and embark on this rewarding journey of cultivating and enjoying the beauty of Philodendron Giganteum.
FAQ
1. How big does Philodendron Giganteum grow?
Philodendron Giganteum is known for its impressive size, with its leaves reaching up to 3 feet in length. The plant can grow up to 6-8 feet in height, creating a dramatic presence in any space.
2. Can Philodendron Giganteum tolerate low light conditions?
While Philodendron Giganteum prefers bright, indirect light, it can tolerate lower light conditions. However, it is important to note that insufficient light may slow down its growth and result in less vibrant foliage. If you are placing it in a low light area, make sure to provide supplemental lighting to maintain its health and appearance.
3. How often should I water Philodendron Giganteum?
The watering frequency for Philodendron Giganteum depends on various factors such as temperature, humidity, pot size, and soil moisture. In general, it is recommended to water the plant when the top inch of the soil feels slightly dry. Overwatering should be avoided as it can lead to root rot, while underwatering can cause stress to the plant. Regularly check the moisture levels and adjust your watering schedule accordingly.
4. Is Philodendron Giganteum safe for pets?
No, Philodendron Giganteum is toxic to both cats and dogs if ingested. It contains calcium oxalate crystals, which can cause oral irritation, difficulty swallowing, and other symptoms in pets. It is advisable to keep the plant out of reach of your furry friends or opt for pet-friendly plants if you have pets at home.
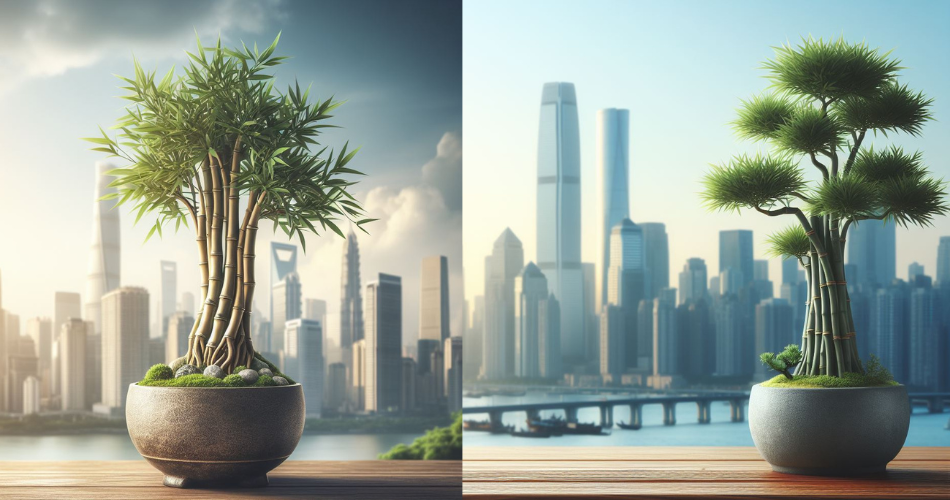
Bamboo bonsai, a miniature representation of the elegant and versatile bamboo plant, has gained immense popularity among bonsai enthusiasts worldwide. In this article, we will delve into the captivating world of bamboo bonsai, exploring its rich history and cultural significance. We will also provide comprehensive guidance on selecting the right bamboo species for bonsai cultivation, along with essential care techniques to ensure the health and vigor of your bonsai. Additionally, we will discuss shaping and pruning methods, potting and repotting guidelines, advanced techniques for experienced enthusiasts, and troubleshooting common issues that may arise during the care of bamboo bonsai. So, let us embark on this journey, unlocking the secrets to creating unique and beautiful bamboo bonsai arrangements.
Bamboo Bonsai: History and Significance
1.1 The Origins of Bamboo Bonsai
Bamboo bonsai may seem like a recent invention, but its history actually dates back thousands of years. Originating in ancient China and Japan, bamboo bonsai has evolved from a traditional art form into a popular practice for plant enthusiasts worldwide. The art of cultivating bamboo in miniature form started as a way to bring nature indoors and create a sense of tranquility and balance in the home.
1.2 Cultural Significance and Symbolism
Bamboo bonsai holds a special place in Chinese and Japanese cultures, symbolizing strength, flexibility, and resilience. It is often associated with good luck, prosperity, and longevity. The intricate beauty of the twisted trunks and delicate foliage reflects the harmony between man and nature. Displaying a bamboo bonsai in your home not only adds a touch of elegance but also brings positive energy and a sense of zen.
2. Selecting the Right Bamboo Species for Bonsai
2.1 Characteristics of Ideal Bamboo Species for Bonsai
When choosing a bamboo species for bonsai, certain characteristics are desirable. Look for bamboo varieties with compact growth habits, small leaves, and flexible canes that can be easily shaped. The ideal bamboo bonsai species should also be able to withstand indoor conditions, such as lower light levels and regulated temperatures.
2.2 Popular Bamboo Species for Bonsai
Some popular bamboo species for bonsai include:
– Dwarf Buddha Belly Bamboo (Bambusa ventricosa): This compact variety has unique swollen internodes that resemble a belly, adding an interesting texture to your bonsai collection.
– Arrow Bamboo (Pseudosasa japonica): Known for its slender and gracefully arching canes, this bamboo species is an excellent choice for creating dynamic and flowing bonsai designs.
– Golden Bamboo (Phyllostachys aurea): With its striking yellow culms, this bamboo variety adds a vibrant and eye-catching element to any bonsai display.
3. Essential Care Techniques for Bamboo Bonsai
3.1 Light and Temperature Requirements
Bamboo bonsai thrive in bright, indirect light. Place your bonsai near a window that receives ample sunlight, but avoid direct sunlight as it can scorch the leaves. As for temperature, bamboo bonsai prefer a moderate range of 60-80°F (15-26°C). Protect them from extreme cold or heat as it can stress the plant.
3.2 Watering and Humidity Control
Proper watering is crucial for the health of your bamboo bonsai. Water the plant thoroughly when the top inch of soil feels dry, allowing excess water to drain away. Avoid overwatering, as it can lead to root rot. Bamboo bonsai also appreciate higher humidity levels, so misting the foliage or placing the pot on a humidity tray can help create a more favorable environment.
3.3 Soil Composition and Fertilization
Bamboo bonsai prefer well-draining soil with good moisture retention. A mix of bonsai soil, perlite, and organic matter like compost or coco coir works well. Fertilize your bamboo bonsai regularly during the growing season with a balanced liquid fertilizer. This will ensure that your bonsai receives the necessary nutrients to maintain its health and vigor.
4. Shaping and Pruning Bamboo Bonsai: Methods and Tools
4.1 Basic Principles of Shaping Bamboo Bonsai
Shaping bamboo bonsai involves a combination of wiring and pruning techniques. Understand the natural growth pattern of the bamboo species you are working with and use wire to gently guide the canes into desired shapes. Be patient, as bamboo grows at its own pace. Remember that bonsai is a long-term project and shaping should be done gradually to avoid stressing the plant.
4.2 Techniques for Pruning and Trimming
Regular pruning is essential for maintaining the shape and aesthetics of your bamboo bonsai. Remove any dead, damaged, or overcrowded branches to encourage healthy growth. To control the overall height and density of the plant, selectively prune branches back to a desired length or remove excessive shoots. Always use clean and sharp pruning shears to minimize damage to the plant.
4.3 Tools and Equipment for Shaping and Pruning
To shape and prune your bamboo bonsai effectively, you will need a few basic tools. These include:
Wire: Use aluminum or copper wire to gently bend and shape the canes without causing damage.
Pruning Shears: Invest in a good pair of bonsai pruning shears for precise and clean cuts. Make sure to keep them clean and sharp for optimal performance.
Root Hook: A root hook comes in handy when repotting your bamboo bonsai, helping to untangle and prune any circling roots.
With the right techniques, care, and a touch of creativity, growing and shaping bamboo bonsai can be a rewarding and enjoyable experience. So go ahead, delve into this ancient art form and create your own miniature bamboo paradise!.1 Yellowing or Browning Leaves: Possible Causes and Solutions
8.2 Overwatering or Underwatering: How to Find the Right Balance
8.3 Stunted Growth or Lack of Vigor: Identifying and Addressing Nutritional Deficiencies
5. Maintaining the Health and Vigor of Bamboo Bonsai
5.1 Recognizing and Preventing Common Pests and Diseases
Bamboo bonsai, just like any other plant, can fall victim to various pests and diseases. It’s essential to be able to identify common issues early on and take prompt action. Keep an eye out for pests such as aphids, spider mites, and scale insects. If you notice any signs of infestation, don’t panic! A gentle insecticidal soap or neem oil spray should help eliminate the unwanted visitors. As for diseases, bamboo bonsai is generally hardy, but overwatering can lead to root rot or fungal infections. Be mindful of the watering schedule and ensure proper drainage to prevent these issues.
5.2 Regular Inspections and Maintenance Practices
To keep your bamboo bonsai in top shape, regular inspections and maintenance are crucial. Check the leaves and stems for any signs of discoloration, wilting, or damage. Prune away any dead or yellowing foliage to promote new growth and maintain a clean appearance. Additionally, be sure to remove any weeds that may appear around the bonsai. Weeds can compete with the bamboo for nutrients and water, affecting its overall health. With a little TLC, your bamboo bonsai will thrive and impress!
5.3 Enhancing the Bonsai’s Overall Health and Vitality
Apart from the standard care routine, several practices can help boost the overall health and vitality of your bamboo bonsai. Regularly fertilizing with a balanced bonsai fertilizer will provide the necessary nutrients for growth. Additionally, consider using a root stimulant to encourage strong root development. Every few years, you may also need to perform root pruning to prevent the roots from becoming overly compacted. Remember, a healthy bamboo bonsai is a happy bamboo bonsai!
6. Potting and Repotting Bamboo Bonsai: Tips and Guidelines
6.1 Understanding the Timing and Frequency of Repotting
When it comes to repotting your bamboo bonsai, timing is everything. The ideal time for repotting is during the early spring when the plant is entering its active growing phase. Repotting too late or too early can disrupt the tree’s growth. As for the frequency, bamboo bonsai typically requires repotting every two to three years. However, this may vary depending on the growth rate and size of your bonsai.
6.2 Selecting the Right Pot and Soil Mix
Choosing the right pot and soil mix is crucial for the health and development of your bamboo bonsai. Opt for a pot with adequate drainage holes to allow excess water to escape. As for the soil mix, using a well-draining bonsai soil with a blend of organic materials and inorganic components (such as perlite or pumice) is ideal. This ensures proper water retention and prevents the roots from getting waterlogged.
6.3 Step-by-Step Repotting Process
The repotting process can seem daunting, but with the right approach, it’s a breeze. Start by gently removing the bonsai from its current pot, being careful not to damage the roots. Once removed, examine the roots and trim any circling or damaged ones. Then, place a layer of fresh soil mix at the bottom of the new pot, position the bonsai in the center, and carefully fill it with the remaining soil, ensuring the roots are well-covered. Finally, give your bamboo bonsai a good watering to settle the soil.
7. Advanced Techniques for Bamboo Bonsai Enthusiasts
7.1 Air Layering and Propagation Methods
For the adventurous bamboo bonsai enthusiasts, there are advanced techniques to explore. Air layering is one such method that allows you to propagate new plants from an existing bamboo bonsai without disturbing the main tree. It involves creating a root system on a section of the stem, which can then be separated and potted as a new bonsai. This technique opens up endless possibilities for expanding your bamboo bonsai collection.
7.2 Developing Advanced Branching and Root Systems
To create a more mature and aesthetically pleasing bamboo bonsai, advanced techniques can be employed to develop intricate branching and root systems. By selectively pruning and wiring the branches, you can create the desired shape and structure for your bonsai. Similarly, root pruning and manipulation can help create a more distinctive and impressive root system. These techniques require patience and skill but can yield remarkable results.
7.3 Alternative Styling and Design Approaches
For those looking to push the boundaries of traditional bamboo bonsai aesthetics, exploring alternative styling and design approaches can be tremendously exciting. From cascading styles to creative arrangements in unique containers, the possibilities are endless. Don’t be afraid to experiment and let your creativity run wild. After all, bonsai is a true art form that allows for personal expression and individuality.
8. Troubleshooting Common Issues in Bamboo Bonsai Care
8.1 Yellowing or Browning Leaves: Possible Causes and Solutions
If you notice your bamboo bonsai’s leaves turning yellow or browning, there might be underlying issues causing this discoloration. Overwatering, underwatering, nutrient deficiencies, or excessive sun exposure can all contribute to leaf problems. Adjusting the watering schedule, ensuring proper nutrient balance, and providing adequate shade can help alleviate these issues and restore the vibrant green color of your bonsai’s foliage.
8.2 Overwatering or Underwatering: How to Find the Right Balance
Proper watering is crucial for the health of your bamboo bonsai. Both overwatering and underwatering can have detrimental effects. To find the right balance, observe the soil’s moisture level and get to know your bonsai’s specific needs. Stick your finger into the soil to check for dryness before watering. If it feels slightly moist, hold off on watering. However, if it feels dry, give your bonsai a thorough watering until water starts coming out of the drainage holes.
8.3 Stunted Growth or Lack of Vigor: Identifying and Addressing Nutritional Deficiencies
Is your bamboo bonsai not growing as vigorously as you’d like? Nutritional deficiencies could be the culprit. Nitrogen, phosphorus, and potassium are essential elements for healthy plant growth. If you suspect a deficiency, considering adjusting the fertilizer regimen or using a specialized bonsai fertilizer that provides the necessary nutrients. Additionally, regular inspections and prompt action against pests and diseases will ensure your bonsai is receiving optimal care and thriving.In conclusion, bamboo bonsai is a remarkable art form that combines the beauty of bamboo with the intricate techniques of bonsai cultivation. By understanding the history, selecting the right species, and mastering the essential care techniques, you can create stunning and unique bamboo bonsai arrangements. With patience, dedication, and a passion for this ancient art, your bamboo bonsai will thrive and bring joy for years to come. So, embrace the challenge, explore your creativity, and let the elegance of bamboo bonsai breathe life into your living space. Happy bonsai gardening!
FAQs
Q: Can any species of bamboo be used for bonsai?
A: While not all bamboo species are suitable for bonsai cultivation, there are several species that work exceptionally well for creating bamboo bonsai. These species have naturally small leaves, flexible branches, and a compact growth habit, making them ideal for bonsai styling.
Q: How often should I water my bamboo bonsai?
A: The watering frequency for bamboo bonsai depends on various factors such as the species, pot size, climate, and season. As a general guideline, it is recommended to allow the top layer of soil to dry out slightly between watering sessions. Always monitor the moisture levels and adjust the watering schedule accordingly.
Q: Can I shape my bamboo bonsai into different styles and designs?
A: Absolutely! Bamboo bonsai can be shaped into various styles such as formal upright, slanting, cascade, and semi-cascade, among others. With proper pruning and wiring techniques, you can create your desired shape and design, adding a unique touch to your bamboo bonsai.
Q: How can I prevent common pests and diseases in bamboo bonsai?
A: Regular inspections and proper care practices can help prevent common pests and diseases in bamboo bonsai. Ensure your bonsai is placed in an appropriate environment with adequate ventilation and sunlight. Additionally, maintaining good hygiene, such as removing fallen leaves and debris, can help deter pests and reduce the risk of diseases.
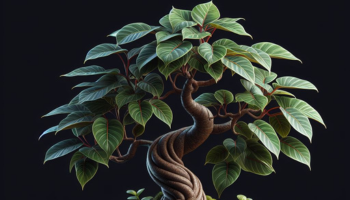
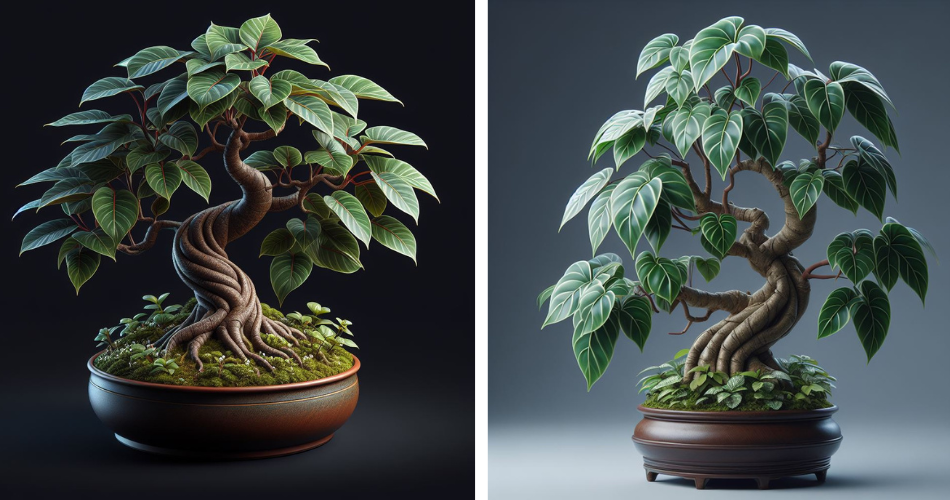
Welcome to the comprehensive guide on caring for Philodendron Pedatum bonsai trees. Philodendron Pedatum, also known as the Horsehead Philodendron, is a popular choice among bonsai enthusiasts due to its unique foliage and manageable size. In this article, we will delve into the essential aspects of Philodendron Pedatum bonsai care, including choosing the right environment, providing proper care techniques, pruning and shaping methods, watering and fertilizing guidelines, pest and disease prevention, as well as repotting and root pruning tips. Whether you are a beginner or an experienced bonsai gardener, this guide will equip you with the knowledge and skills needed to ensure the health and beauty of your Philodendron Pedatum bonsai.
1.1 What is Philodendron Pedatum?
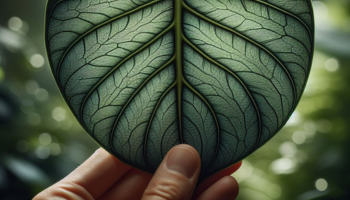
When it comes to unique and captivating bonsai trees, the Philodendron Pedatum is a true gem. This particular species is known for its beautiful heart-shaped leaves with distinct lobes, resembling a bird’s foot. Don’t worry, we won’t quiz you on the scientific name, just remember “Philodendron Pedatum” for your next trivia night!
1.2 Why Choose Philodendron Pedatum as a Bonsai Tree?
So, why should you consider Philodendron Pedatum as your bonsai companion? Well, apart from its eye-catching foliage, this plant is relatively low-maintenance, making it perfect for beginners or those without a green thumb. It has a natural ability to adapt to various environments and can thrive indoors or outdoors, depending on your preference. Plus, who doesn’t love a bonsai tree that brings a touch of whimsy to their living space?
2. Choosing the Right Environment for Your Philodendron Pedatum Bonsai
2.1 Indoor vs. Outdoor Cultivation
Deciding where to grow your Philodendron Pedatum bonsai tree is an important consideration. It can be cultivated both indoors and outdoors, depending on the climate you live in. Indoors, it loves bright, indirect light and can be placed near a window with filtered sunlight. Outdoors, it thrives in partial shade, avoiding direct sunlight during the hottest parts of the day.
2.2 Light Requirements for Philodendron Pedatum Bonsai
Philodendron Pedatum enjoys a good balance of light. While it appreciates bright conditions, direct sunlight can scorch its delicate leaves. Think of it as a plant that enjoys a cozy spot under a tree canopy rather than basking in the harsh rays of the sun. If you’re growing it indoors, placing it near a window with filtered sunlight or using grow lights can help provide the necessary light intensity.
2.3 Temperature and Humidity Considerations
When it comes to temperature, Philodendron Pedatum prefers a warm and humid environment. It thrives in temperatures between 65°F to 75°F (18°C to 24°C), so make sure to keep it away from cold drafts or extreme temperature fluctuations. As for humidity, this tropical plant appreciates higher levels, so misting the leaves or using a humidifier can help create a comfortable environment for your leafy friend.
3. Essential Care Techniques for Philodendron Pedatum Bonsai Trees
3.1 Watering Guidelines and Frequency
As with any plant, proper watering is crucial for the health of your Philodendron Pedatum bonsai. Keep the soil evenly moist, but not waterlogged. Remember, this isn’t a sponge-bob, and it doesn’t appreciate soggy feet. To avoid overwatering, check the soil’s moisture level before watering and adjust accordingly. It’s better to underwater than to drown this bonsai beauty!
3.2 Soil Selection and Repotting Schedule
When it comes to soil, Philodendron Pedatum prefers well-draining soil that retains some moisture. A mixture of bonsai soil, peat moss, and perlite or sand can provide the ideal growing medium. As for repotting, aim to do so every two years during the spring season. This allows the roots to have enough space to grow and ensures your bonsai remains happy and healthy.
3.3 Feeding and Fertilization Recommendations
To give your Philodendron Pedatum bonsai a boost, feeding it with a balanced liquid fertilizer every two weeks during the growing season is beneficial. Be sure to follow the manufacturer’s instructions for dilution and avoid overdoing it, as too much fertilizer can harm this tropical beauty. Remember, a little bit of fertilizer can go a long way in promoting healthy growth.
4. Pruning and Shaping Your Philodendron Pedatum Bonsai
4.1 Understanding Pruning Techniques for Bonsai
Pruning is a vital part of bonsai care, and Philodendron Pedatum is no exception. It’s important to understand the different pruning techniques to keep your bonsai in shape. These techniques include pinching back new growth, trimming long stems, and removing any dead or diseased foliage. Pruning not only helps maintain the desired shape but also encourages bushier growth.
4.2 Pruning for Shape and Size Control
If you want to unleash your inner bonsai artist, shaping your Philodendron Pedatum bonsai is a fun process. You can prune and trim the branches to create the desired shape and size. Just remember to take it slow and steady, as bonsai shaping is an ongoing process that requires patience and finesse. Take breaks if you need to, and remember that a perfectly shaped bonsai is like a fine wine – it takes time to mature.
4.3 Wiring and Branch Manipulation
Wiring is another technique used in bonsai to guide the growth of branches and achieve the desired shape. For your Philodendron Pedatum bonsai, it’s important to use gentle wiring techniques to avoid damaging the delicate stems and leaves. Be mindful of the wire tension and regularly check for any signs of wire cutting into the branches. Remember, the goal is to create a harmonious shape, not give your bonsai a bad hair day.
With these care techniques under your belt, you’re well on your way to becoming a proud Philodendron Pedatum bonsai parent. Remember, bonsai care is an art form that requires dedication and love, but the rewards of a beautifully thriving miniature tree are well worth it. Happy bonsai-ing!
5. Watering and Fertilizing Guidelines for Philodendron Pedatum Bonsai
5.1 Proper Watering Techniques
Watering your Philodendron Pedatum bonsai can be a bit tricky, but fear not, we’ve got you covered. This little guy likes to stay slightly moist but not drenched. Think of it as having a good balance between quenching its thirst and not drowning it in the process. A good rule of thumb is to water it when the top inch of the soil feels dry. Make sure to water evenly and avoid leaving stagnant water in the pot, because no one likes sitting in a puddle!
5.2 Choosing the Right Fertilizer and Application
Just like we need our daily dose of nutrients, so does our Philodendron Pedatum bonsai. When it comes to fertilizer, opt for a well-balanced, water-soluble fertilizer designed specifically for houseplants. Look for one with a balanced N-P-K ratio (nitrogen, phosphorus, potassium) to ensure your bonsai gets a well-rounded meal. Follow the instructions on the package for the correct dosage, and remember, less is always more when it comes to fertilizer.
5.3 Frequency and Timing of Fertilization
Timing is everything, even when it comes to fertilizing your bonsai. During the growing season, which is typically spring and summer, you can feed your Philodendron Pedatum bonsai every two to four weeks. As the weather cools down and growth slows down in fall and winter, you can reduce the frequency to every six to eight weeks. Always pay attention to your bonsai’s needs and adjust accordingly. It’s like having a personal chef, but for plants.
6. Common Pests and Diseases: Prevention and Treatment for Philodendron Pedatum Bonsai
6.1 Identifying Common Pests Affecting Philodendron Pedatum
No bonsai is safe from the occasional unwanted visitors. Philodendron Pedatum bonsai can be prone to pests such as aphids, spider mites, and mealybugs. Keep an eye out for any tiny, crawling critters or signs of damage like yellowing leaves or sticky residue. If you spot any of these troublemakers, it’s time to take action.
6.2 Preventive Measures for Pest Infestations
Preventing pests from invading your beloved bonsai is like building a fortress for your plant. Start by regularly inspecting your bonsai for any signs of pests. Keep your bonsai clean and tidy by removing dead leaves and debris, which can serve as hiding spots or breeding grounds for pests. You can also give your bonsai a gentle shower or wipe down its leaves with a damp cloth to keep those buggers at bay.
6.3 Effective Methods for Treating Pests and Diseases
So, your bonsai has fallen victim to a pesky infestation? Don’t fret, there are ways to fight back. One effective method is using an insecticidal soap or neem oil spray, which can help rid your plant of pests. Just make sure to follow the instructions carefully and test it on a small area before applying it to the entire bonsai. If the infestation persists or you’re unsure about how to handle it, don’t hesitate to seek advice from a local horticulturist or bonsai expert. Remember, we can’t let those pests win!
7. Repotting and Root Pruning Tips for Philodendron Pedatum Bonsai
7.1 Signs that Your Philodendron Pedatum Bonsai Needs Repotting
Nobody likes feeling cramped, including our bonsai friends. If you notice that your Philodendron Pedatum bonsai has roots poking out of the drainage holes or the soil seems compacted, it might be time for a new home. Another sign is if the water doesn’t absorb as quickly as before, indicating that the roots have taken up most of the space. Repotting allows for fresh soil, better drainage, and more growing room for your bonsai. It’s like giving them a little vacation to a bigger and better pot!
8. Conclusion and Additional Resources for Philodendron Pedatum Bonsai Care
Congratulations! You are now equipped with the knowledge and understanding required to provide excellent care for your Philodendron Pedatum bonsai tree. By creating the ideal environment, implementing proper care techniques, and staying vigilant against pests and diseases, your bonsai will thrive and bring joy for years to come. Remember, bonsai care is a continuous learning process, so feel free to explore additional resources and connect with fellow bonsai enthusiasts for further guidance and inspiration. Now, go forth and enjoy the artistry and tranquility of your Philodendron Pedatum bonsai!
FAQ
1. How often should I water my Philodendron Pedatum bonsai?
Watering frequency for your Philodendron Pedatum bonsai depends on various factors such as the climate, pot size, and soil composition. As a general rule, it is recommended to water your bonsai when the top layer of soil feels slightly dry to the touch. Avoid overwatering as it can lead to root rot, but also ensure the soil does not completely dry out. Regularly monitor the moisture levels and adjust the watering schedule accordingly.
2. Can I keep my Philodendron Pedatum bonsai indoors?
While Philodendron Pedatum bonsai can be grown indoors, they thrive best when placed in a location with ample sunlight. If you choose to keep your bonsai indoors, ensure it receives sufficient indirect light or consider using artificial grow lights to supplement. Additionally, be mindful of the temperature and humidity levels in the indoor environment, as Philodendron Pedatum bonsai trees prefer warm and humid conditions.
3. How do I prune and shape my Philodendron Pedatum bonsai?
Pruning and shaping are essential for maintaining the desired form and aesthetics of your Philodendron Pedatum bonsai. Begin by removing any dead, damaged, or excessive growth using clean bonsai pruning shears. To shape the bonsai, carefully trim the branches and foliage to create the desired silhouette. Wiring can also be used to guide the branches in the desired direction. Remember to step back and assess the overall shape regularly to ensure balanced growth.
4. What are some common pests and diseases that affect Philodendron Pedatum bonsai?
Philodendron Pedatum bonsai trees are susceptible to pests such as aphids, spider mites, and scale insects. Regularly inspect your bonsai for any signs of infestation, such as sticky residue, webbing, or yellowing leaves. To prevent pests, maintain good hygiene, provide proper ventilation, and avoid overwatering. In terms of diseases, root rot and fungal infections can occur if the bonsai is kept in excessively wet conditions. Proper watering techniques and well-draining soil can help prevent these issues.
Welcome to the captivating realm of Ficus Bonsai care! In this comprehensive guide, we will delve into the intricacies of nurturing and maintaining these exquisite miniature trees, unlocking the secrets to their success. Ficus Bonsai, with its stunning foliage and intricate root systems, has gained immense popularity among bonsai enthusiasts worldwide. Whether you are a seasoned bonsai lover or a beginner looking to embark on this rewarding journey, this article will provide you with a wealth of information, expert tips, and practical advice on how to care for your Ficus Bonsai and ensure its thriving growth. So, let us embark on this adventure together and discover the art of unlocking success with care and expert tips for your Ficus Bonsai.
Exploring the Fascinating World of Ficus Bonsai
1.1 What is a Ficus Bonsai?
When you think of bonsai, you might picture a tiny tree in a pot. Well, that’s exactly what a Ficus Bonsai is! Ficus Bonsai is a form of bonsai art that involves growing and shaping Ficus trees in miniature versions. These captivating creations bring the beauty and tranquility of nature right into your home or garden.
1.2 The History and Origins of Ficus Bonsai
Ficus Bonsai has its roots (pun intended) in ancient Chinese and Japanese cultures. It originated thousands of years ago as a way to bring nature into small spaces. Over time, the art of bonsai spread across the globe, captivating enthusiasts with its intricate designs and meditative qualities.
1.3 Why Ficus Bonsai is a Popular Choice among Bonsai Enthusiasts
Ficus Bonsai has gained immense popularity among bonsai enthusiasts for several reasons. Firstly, the Ficus tree is known for its resilience, making it an excellent choice for beginner bonsai enthusiasts. Additionally, the Ficus Bonsai offers stunning foliage and can be styled in various ways, allowing for endless creativity and expression. So, whether you’re a seasoned bonsai pro or just starting your green-thumb journey, Ficus Bonsai is sure to captivate your attention.
2. Understanding the Basics: Essential Care Requirements for Ficus Bonsai
2.1 Climate and Temperature Considerations
Like most plants, Ficus Bonsai has specific climate and temperature preferences. It thrives in warm, tropical conditions, so it’s important to keep it away from extreme cold or heat. Aim for a temperature range of 60-75°F (15-24°C) to keep your Ficus Bonsai happy and healthy.
2.2 Soil Composition and Drainage
The type of soil and its drainage capabilities play a crucial role in the care of your Ficus Bonsai. Use well-draining soil that allows water to flow freely, preventing root rot. A mix of bonsai soil, peat moss, and perlite works wonders for Ficus Bonsai, ensuring it receives the right amount of moisture while allowing excess water to escape.
2.3 The Importance of Proper Potting and Repotting
Potting and repotting your Ficus Bonsai is an essential part of its care routine. It’s recommended to repot your bonsai every 1-2 years to provide fresh soil and encourage healthy root growth. Be sure to choose a pot that allows for proper drainage and gives enough space for the tree’s roots to grow.
3. Choosing the Right Location: Optimal Placement and Lighting for Ficus Bonsai
3.1 Indoor vs. Outdoor Placement
Deciding whether to keep your Ficus Bonsai indoors or outdoors depends on your climate and personal preference. Indoors, it thrives in bright, indirect sunlight. Outdoors, it can tolerate full sun but needs protection from harsh afternoon rays. So, give your Ficus Bonsai the best of both worlds by placing it outdoors during the warmer months and bringing it indoors during winter.
3.2 Ideal Lighting Conditions for Ficus Bonsai
Ficus Bonsai loves bright light but not direct sunlight that scalds its delicate leaves. Place it near a window with filtered light or use a grow light for optimal results. Rotate your bonsai every few weeks to ensure even growth and prevent it from leaning towards the light like a teenage plant trying to take a selfie.
3.3 Protecting Ficus Bonsai from Harsh Weather Elements
While Ficus Bonsai can handle a variety of weather conditions, extreme cold or heat can cause harm. If temperatures drop below 50°F (10°C), it’s crucial to bring your bonsai indoors to shield it from the chill. Likewise, during scorching summer days, provide shade or move it to a cooler spot to avoid wilting foliage.
4. Watering Techniques: Mastering the Art of Properly Hydrating Your Ficus Bonsai
4.1 Understanding Ficus Bonsai’s Watering Needs
Watering your Ficus Bonsai is a delicate dance that requires balance. It’s important to keep the soil moist but not waterlogged. Check the top inch of soil regularly, and when it feels slightly dry, water your bonsai thoroughly. Remember, overwatering can drown your tree, while underwatering can leave it parched and sad.
4.2 How to Water Ficus Bonsai Correctly
When watering, ensure that the water reaches all parts of the soil, allowing the roots to absorb moisture evenly. Water until it drains out of the drainage holes, ensuring excess water doesn’t sit in the pot. Pro tip: To maintain a healthy humidity level, mist the leaves of your Ficus Bonsai occasionally, but don’t go overboard—no bonsai showers, please!
4.3 Signs of Overwatering and Underwatering
Knowing when to water can be a bit tricky, but your Ficus Bonsai will give you subtle hints. If the leaves turn yellow and droopy, it may be a sign of overwatering. On the other hand, if the leaves start losing their luster or become brittle, your bonsai might be thirsty. So, keep a close eye on your Ficus Bonsai’s foliage to avoid any moisture-related mishaps.
5. Pruning and Shaping: Techniques for Maintaining the Aesthetic Appeal of Ficus Bonsai
5.1 Timing and Frequency of Pruning
Pruning your Ficus Bonsai is like giving it a stylish haircut. It helps maintain its shape and keeps it looking sharp. But just like with our own hair, timing is everything. Pruning should be done during the active growing season when your bonsai is feeling energetic and ready for a trim. As for how often to prune, well, that depends on how fast your Ficus Bonsai grows. Keep an eye on those branches and give them a snip when they start to get a bit too wild.
5.2 Pruning Methods for Ficus Bonsai
When it comes to pruning your Ficus Bonsai, you have a few options. You can use a pair of bonsai pruning shears for simple trimming, or you can go all out and bust out the bonsai branch cutters for more serious pruning. The choice is yours, but remember, less is sometimes more when it comes to bonsai. Take your time, step back every now and then, and make sure you’re not going overboard with the snips. You don’t want your bonsai to end up looking like a pinecone with too many branches missing.
5.3 Wiring and Shaping Ficus Bonsai Branches
Now, this is where things get a little more adventurous. If you’re feeling like a bonsai sculptor, you can use wiring techniques to shape your Ficus Bonsai branches into graceful curves and angles. It’s like giving your bonsai a yoga session. Just make sure you’re using bonsai wire that’s the right thickness and won’t dig into the branches. And remember, patience is key. Bending branches takes time, so don’t rush it. Your bonsai will thank you for the gentle touch and the stylish new look.
6. Nutrient Management: Nourishing Your Ficus Bonsai for Vibrant Growth and Health
We all need our daily dose of nutrients to stay healthy and vibrant, and your Ficus Bonsai is no different. Understanding what your bonsai craves is essential for its growth and overall well-being. Ficus Bonsai love a balanced diet, so make sure they’re getting the right nutrients like nitrogen, phosphorus, and potassium. Think of it as a gourmet meal for your mini tree.
6.2 Choosing the Right Fertilizer for Ficus Bonsai
Now that you know what your Ficus Bonsai needs, it’s time to choose the right fertilizer. Think of yourself standing in the fertilizer aisle, scratching your head, wondering which one is best. Well, fear not! Look for a balanced fertilizer specifically formulated for bonsai trees. It should have all the essential nutrients your Ficus Bonsai craves. Just remember, moderation is key. Too much fertilizer can do more harm than good, just like eating a whole tub of ice cream in one sitting.
6.3 Feeding Schedule and Application Techniques
Alright, you’ve got the perfect fertilizer, now what? It’s time to create a feeding schedule for your Ficus Bonsai. Think of it as setting up a meal plan. Feed your bonsai every couple of weeks during the growing season, and take a break during the dormant period. And when it comes to application techniques, remember to follow the instructions on the fertilizer package. Don’t go rogue and start experimenting with unconventional methods. Your bonsai might not appreciate being the guinea pig for your fertilizer experiments.
So there you have it, the secrets to pruning, shaping, and feeding your Ficus Bonsai. With a little care and expert tips, your bonsai will be thriving and turning heads in no time. Just remember to have fun with it and embrace your inner bonsai guru. Happy growing!In conclusion, caring for a Ficus Bonsai requires patience, dedication, and a deep understanding of its unique needs. By following the essential care requirements outlined in this guide, from providing the right lighting and watering techniques to mastering pruning and nutrient management, you can create an optimal environment for your Ficus Bonsai to flourish. Remember to consult expert advice, stay attuned to your tree’s specific needs, and enjoy the journey of nurturing and witnessing the growth of your Ficus Bonsai. With proper care and attention, your Ficus Bonsai will become a living work of art, bringing beauty and tranquility to your space for years to come.
FAQ
1. How often should I water my Ficus Bonsai?
The frequency of watering your Ficus Bonsai depends on several factors such as the climate, pot size, and soil composition. As a general guideline, you should check the soil regularly and water when the top inch feels slightly dry. Avoid overwatering as it can lead to root rot, and ensure proper drainage to prevent waterlogging.
2. Can I keep my Ficus Bonsai indoors?
Yes, Ficus Bonsai can thrive indoors. However, it is important to provide sufficient light for its growth. Place your bonsai near a well-lit window or provide supplemental artificial lighting. Keep in mind that indoor conditions may require more attention to humidity levels and proper air circulation.
3. How should I prune my Ficus Bonsai?
Pruning is essential to maintain the desired shape and size of your Ficus Bonsai. Use sharp, clean tools and prune during the active growing season. Start by removing any dead or unhealthy branches, and then proceed with selective pruning to promote a balanced structure. Regularly trim the foliage to encourage denser growth and refine the overall appearance of your bonsai.
4. What type of fertilizer should I use for my Ficus Bonsai?
A balanced, slow-release bonsai fertilizer is recommended for feeding your Ficus Bonsai. Look for a fertilizer specifically formulated for bonsai or one with a ratio of nitrogen (N), phosphorus (P), and potassium (K) that is suitable for woody plants. Follow the instructions on the fertilizer package for proper application and timing, adjusting the dosage based on the age and health of your bonsai.
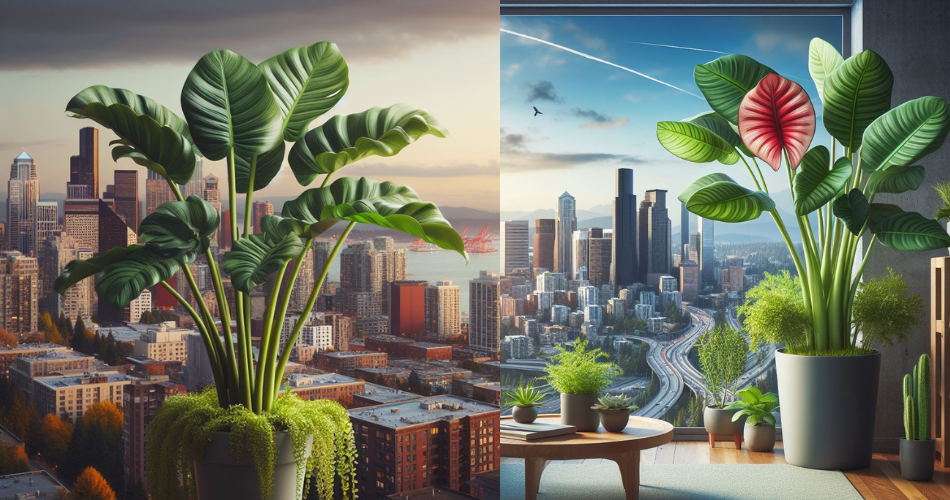
Philodendron Billietiae Bonsai is a stunning miniature version of the popular Philodendron Billietiae plant, known for its lush green foliage and unique bonsai form. This exquisite plant has gained popularity among plant enthusiasts and bonsai lovers due to its elegant appearance and relatively manageable care requirements. In this comprehensive guide, we will delve into the world of caring for Philodendron Billietiae Bonsai, offering valuable insights, expert tips, and step-by-step instructions to help you achieve thriving, vibrant greenery in your bonsai collection. Whether you’re a seasoned bonsai enthusiast or a beginner looking to explore this captivating plant, our guide will equip you with the knowledge and skills necessary to nurture and maintain the beauty and health of your Philodendron Billietiae Bonsai.
1. Introduction to Philodendron Billietiae Bonsai: An Exquisite Plant with Lush Green Foliage
The Beauty of Philodendron Billietiae Bonsai
Welcome to the wonderful world of Philodendron Billietiae Bonsai, where lush greenery and elegance meet. This exquisite plant is renowned for its captivating foliage, making it a favorite among bonsai enthusiasts. With its compact size and vibrant leaves, this bonsai adds a touch of natural beauty to any space, whether it’s your home, office, or secret underground lair. So, let’s dive into the unique care requirements of this stunning plant and learn how to keep it thriving.
2. Understanding the Unique Care Requirements of Philodendron Billietiae Bonsai
Exploring the Origins and Characteristics of Philodendron Billietiae Bonsai
The Importance of Tailoring Care to Philodendron Billietiae Bonsai
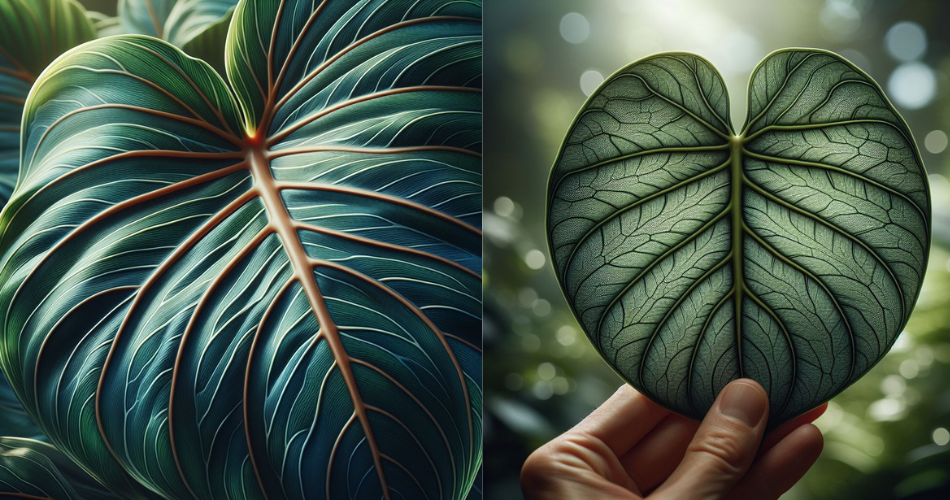
Before we embark on the journey of caring for our Philodendron Billietiae Bonsai, let’s take a moment to appreciate its origins. Native to the tropical regions of Brazil, this bonsai is accustomed to warmth and humidity. It boasts deep green, heart-shaped leaves that gracefully cascade down, creating an enchanting visual display.
As each bonsai has its own unique needs, it’s crucial to understand and adapt to the specific care requirements of the Philodendron Billietiae Bonsai. By tailoring our care to suit this plant, we can ensure its longevity, health, and of course, that Instagram-worthy lushness.
3. Selecting the Perfect Location: Light, Temperature, and Humidity for Optimal Growth
Providing Adequate Light for Philodendron Billietiae Bonsai
Understanding the Ideal Temperature Range for Thriving Bonsai
Creating the Right Humidity Levels for Philodendron Billietiae Bonsai
Now that we’re familiar with the unique characteristics of our Philodendron Billietiae Bonsai, let’s find the perfect spot for it to flourish. This bonsai craves bright, indirect light, similar to that found in a trendy hipster café where the sunlight streams in through the vintage windows. Too much direct sunlight can scorch its delicate leaves, so let’s keep it shady.
When it comes to temperature, our Philodendron Billietiae Bonsai loves warmth. It’s like a tropical vacation for this plant, so keep it cozy at temperatures above 65°F (18°C). Avoid placing it near drafty windows or chilly air conditioning units, as it prefers a balmy environment.
To recreate the humid rainforest it hails from, we need to up our game in the humidity department. Mist your bonsai regularly or place a dish of water nearby to increase moisture in the air. Feel free to add a tiny beach umbrella and turn your living room into a tropical paradise.
4. Watering and Feeding: Nurturing the Philodendron Billietiae Bonsai to Achieve Lushness
Mastering the Art of Proper Watering Techniques
Choosing the Right Fertilizer and Feeding Schedule
Ah, the all-important task of watering our beloved Philodendron Billietiae Bonsai. Unlike your neighbor’s prize-winning orchid collection that requires meticulous attention, our bonsai prefers to be kept moist but not drenched. Stick your finger into the soil up to your first knuckle; if it feels dry, it’s time to water. Just be sure not to drown the poor thing; it doesn’t appreciate being treated like a contestant on a reality TV show.
When it comes to feeding our bonsai, we need to choose the right fertilizer and establish a regular feeding schedule. Opt for a balanced liquid fertilizer formulated for indoor plants, diluted to half the recommended strength. Feed your Philodendron Billietiae Bonsai every two to four weeks during the growing season, and watch those leaves flourish with gratitude.
Now that we’ve unlocked the secrets of caring for our Philodendron Billietiae Bonsai, go forth and create a lush green oasis in your home. Remember, a happy bonsai is a beautiful bonsai, so shower it with love, but not too much water. Happy growing!5. Pruning and Training Techniques for Shaping and Maintaining the Bonsai’s Elegant Form
The Importance of Pruning for Philodendron Billietiae Bonsai
Ah, the art of bonsai pruning! It’s like giving your Philodendron Billietiae bonsai a stylish haircut. Pruning is essential for maintaining the bonsai’s shape and encouraging healthy growth. By removing excess foliage and branches, you allow for better airflow and light penetration, resulting in lush greenery that will make your neighbors green with envy.
Training Methods to Achieve the Desired Bonsai Shape
Training a bonsai is like playing the role of a botanical hairstylist. You have the power to shape and mold your Philodendron Billietiae bonsai into the form of your dreams! Whether you prefer a cascading waterfall or a windswept tree look, there are a few techniques you can try. Wiring helps you gently bend branches and guide them into the desired position. You can also use pruning to encourage certain growth patterns. Just remember, patience is key. Rome wasn’t built in a day, and neither is your perfectly shaped bonsai!
6. Preventing Common Pests and Diseases: Tips for a Healthy Philodendron Billietiae Bonsai
Identifying and Dealing with Common Pests
You’ve put so much love and effort into your Philodendron Billietiae bonsai – the last thing you want is uninvited guests ruining the party. Pests like aphids and spider mites can wreak havoc on your plant’s health. If you spot any suspicious crawlies, it’s time to take action! Regularly inspect your bonsai and look out for tell-tale signs like wilting leaves or tiny webs. Treat the infestation promptly with organic pest control methods or mild insecticides. Remember, a little bug battle won’t stop you from achieving lush greenery!
Tackling Common Diseases and Preventive Measures
Just like us humans, bonsais can also fall victim to diseases. But fear not, brave bonsai caretaker! Most diseases can be prevented with proper care and attention. Overwatering is a common culprit, leading to root rot and other fungal infections. Avoid this tragedy by ensuring your bonsai’s soil is well-draining and letting it dry out slightly between waterings. If your bonsai does develop any disease symptoms, such as yellowing leaves or powdery mildew, act swiftly. Prune affected areas, enhance air circulation, and consider using organic fungicides. With a little TLC and preventive measures, your Philodendron Billietiae bonsai will stand strong against any disease!
7. Repotting and Propagation: Ensuring Longevity and Expanding Your Bonsai Collection
Knowing When and How to Repot Philodendron Billietiae Bonsai
Like humans, bonsais sometimes outgrow their homes. When your Philodendron Billietiae bonsai’s roots become cramped, it’s time to give it some breathing room! Repotting allows for fresh soil and adequate root space, promoting healthy growth. Keep an eye out for signs like roots escaping through drainage holes or stunted growth. The best time to repot is in early spring before the growing season begins. Gently remove the bonsai from its current pot, trim back any excessively long roots, and replant it in a slightly larger pot with fresh soil. Voila! Your bonsai will thank you for its newfound space.
Exploring Propagation Techniques for Philodendron Billietiae Bonsai
If you’re anything like me, you want to grow your bonsai family tree. Propagation is the way to go! Luckily, Philodendron Billietiae bonsai can be propagated through stem cuttings. Choose a healthy stem with two to three leaf nodes, remove the lower leaves, and place it in a well-draining soil mix. Keep the soil moist, provide indirect light, and be patient. In a few weeks, your cutting will sprout roots, and you’ll have a new baby bonsai to nurture. It’s like witnessing a tiny miracle! So grab your gardening gloves and start spreading the bonsai love.
8. Troubleshooting Common Issues: Expert Advice
Oh, the ups and downs of bonsai parenthood! Just when you think you’ve got it all figured out, a problem pops up. But fear not, fellow bonsai enthusiast, for I bring you expert advice to overcome those pesky hurdles. Whether your bonsai is suffering from yellowing leaves, droopy branches, or a lack of growth, there’s always a solution. So don’t panic, don’t fret. Instead, take a deep breath, observe your plant, and consult the wisdom of experienced bonsai enthusiasts. With a little guidance and perseverance, you’ll conquer any obstacle and be the proud parent of a thriving Philodendron Billietiae bonsai.In conclusion, caring for Philodendron Billietiae Bonsai is a rewarding and fulfilling experience. By understanding its unique care requirements, providing the right environment, and implementing proper pruning and maintenance techniques, you can achieve a lush and thriving bonsai display. Remember to regularly monitor your bonsai, address any issues promptly, and enjoy the beauty and elegance that Philodendron Billietiae Bonsai brings to your home or garden. With proper care and dedication, your Philodendron Billietiae Bonsai will continue to flourish for years to come, delighting you with its vibrant green foliage and captivating presence.
FAQ
1. How often should I water my Philodendron Billietiae Bonsai?
Proper watering is essential for the health of your Philodendron Billietiae Bonsai. It is recommended to water your bonsai when the top inch of the soil feels dry to the touch. However, it’s important to avoid overwatering, as excessive moisture can lead to root rot. Allow the soil to slightly dry out between waterings, and always ensure proper drainage to prevent waterlogging.
2. Does Philodendron Billietiae Bonsai require a specific type of soil?
Yes, Philodendron Billietiae Bonsai thrives in well-draining, nutrient-rich soil. A mix of quality bonsai soil, such as a combination of organic matter, peat moss, and perlite, is ideal. This type of soil promotes healthy root growth, allows for proper moisture retention, and provides essential nutrients for the bonsai’s overall health and vitality.
3. Can I place my Philodendron Billietiae Bonsai outdoors?
Philodendron Billietiae Bonsai can be placed outdoors, but it is crucial to consider the climate and environmental conditions. These bonsai prefer warm and tropical conditions with filtered sunlight, so if you live in a region with cold winters or extreme temperatures, it’s best to keep your bonsai indoors. If placing your bonsai outdoors, ensure it is protected from strong winds, direct sunlight, and temperature fluctuations.
4. How often should I prune my Philodendron Billietiae Bonsai?
Regular pruning is necessary to maintain the shape, size, and overall aesthetic appeal of your Philodendron Billietiae Bonsai. It is recommended to prune your bonsai during its active growth period, typically in spring or early summer. Remove any dead or yellowing leaves, trim back overgrown branches, and shape the bonsai to your desired form. Remember to use clean and sharp pruning tools to avoid causing damage to the plant.
Philodendron Camposportoanum, also known as the Velvet-Leaf Philodendron, is a stunning tropical plant that has gained popularity among plant enthusiasts. With its unique velvety leaves and relatively easy care requirements, this species has become a favorite choice for both beginner and experienced plant owners. This ultimate care guide will provide valuable insights into the ideal growing conditions, watering and humidity requirements, light and temperature preferences, soil and fertilizer needs, pruning and propagation techniques, common pests and diseases, as well as essential tips for successful care and maintenance of Philodendron Camposportoanum. Whether you are a seasoned plant lover or just starting your journey, this comprehensive guide will equip you with the knowledge and skills necessary to cultivate a thriving and thriving Philodendron Camposportoanum in your home or garden.
1.1 What is Philodendron Camposportoanum?
If you’re tired of the same old, basic houseplants and are craving something a little more unique, let me introduce you to the Philodendron Camposportoanum. It’s like the hipster cousin of the Philodendron family, bringing a touch of coolness to your indoor jungle. Native to the rainforests of Brazil, this plant is sure to catch the eye with its stunning foliage and quirky charm.
1.2 Features and Characteristics
The Philodendron Camposportoanum is known for its heart-shaped leaves that come in a vibrant shade of green with prominent venation. But what really sets it apart from the crowd are the unique fringed edges on its leaves, giving it a touch of whimsy that screams “I’m not your average houseplant!”
This little attention seeker enjoys showing off its climbing abilities, so be prepared to provide it with some support or a trellis if you want it to reach its full potential. Don’t worry though, it won’t take up your entire living room – it’s a compact plant that stays relatively small, making it perfect for those with limited space.
2. Ideal Growing Conditions for Philodendron Camposportoanum
2.1 Light Requirements
When it comes to lighting, the Philodendron Camposportoanum prefers bright, indirect light. It’s like the plant version of Goldilocks – not too much, not too little, just the right amount. So, find a spot near a window where it can soak up some rays without getting scorched. If you notice its leaves starting to turn yellow, it’s a sign that it’s getting too much sun, so adjust accordingly.
2.2 Temperature Range
This tropical beauty thrives in temperatures between 65°F and 85°F (18°C to 29°C). It’s like a diva that likes to keep things comfortably warm. Avoid exposing it to drafts or sudden temperature changes, as it prefers a stable environment. So, keep it cozy and it will reward you with its stunning foliage.
2.3 Humidity Levels
Philodendron Camposportoanum is all about that moisture, so it will appreciate a humid environment. If you live in a dry climate, don’t fret! You can increase humidity by placing a water tray near the plant or misting its leaves regularly. It’s like giving it a little spa treatment and who doesn’t love a pampered plant?
2.4 Suitable Potting Options
When it comes to choosing the perfect home for your Philodendron Camposportoanum, opt for a well-draining potting mix. You don’t want it sitting in soggy soil, as that can lead to root rot – a definite buzzkill. A mix of peat moss, perlite, and orchid bark will keep it happy and ensure its roots can breathe. Plus, it’s like giving it a fancy, designer outfit to show off to all your friends.
3. Watering and Humidity Requirements
3.1 Proper Watering Techniques
Watering your Philodendron Camposportoanum is like finding the balance in life – not too much, not too little. Allow the top inch or so of soil to dry out before watering it again. Stick your finger in the soil to check its moisture level, or use a moisture meter if you want to feel like a high-tech plant parent. Remember, overwatering is a no-no, so give it a little sip, not a full-on water fountain.
3.2 Understanding Moisture Needs
This plant enjoys being kept slightly moist, but not waterlogged. Think of it as a plant that likes to keep its toes damp, but not swimming in a lake. Too much water can lead to root rot, which is like a death sentence for this beauty. So, avoid the soggy situation and find that perfect balance of moisture.
3.3 Managing Humidity Levels
As mentioned earlier, Philodendron Camposportoanum appreciates a humid environment. You can increase humidity by misting its leaves with water or placing it near a humidifier. It’s like giving it a tropical vacation without the hassle of airport security.
4. Proper Light and Temperature for Philodendron Camposportoanum
4.1 Finding the Right Amount of Light
When it comes to light, this plant wants to be just like Goldilocks – not too bright, not too dim, but just right. Find a spot near a window where it can bask in bright, indirect light. If the leaves start to look pale or leggy, it’s a sign that it’s not getting enough light. So, move it closer to the window and let it soak up those rays.
4.2 Avoiding Direct Sunlight
While Philodendron Camposportoanum enjoys bright light, direct sunlight can be a bit too harsh for its delicate leaves. It’s like a plant that’s sensitive to sunburn. So, protect it from those scorching rays by placing it in a spot where it receives filtered or indirect light. It’s like giving it a stylish parasol to shield it from the sun.
4.3 Maintaining Optimal Temperature Range
This plant likes to keep things warm, but not too hot. It’s like a diva that prefers a cozy, comfortable environment. Maintain temperatures between 65°F and 85°F (18°C to 29°C) to keep it happy. Avoid exposing it to drafts or extreme temperature fluctuations, as it can cause stress. So, find that sweet spot and keep the temperature just right for your Camposportoanum companion.
5. Soil and Fertilizer Needs
5.1 Choosing the Right Soil Mix
When it comes to keeping your Philodendron Camposportoanum happy, the right soil mix is key. Think of it like finding the perfect foundation for a beautiful building – you want something sturdy and well-draining. A well-balanced mix of peat moss, perlite, and a touch of sand should do the trick. This will ensure that excess water doesn’t hang around for too long, preventing root rot and other nasty problems.
5.2 Fertilizing Schedule
Now that you have your soil sorted, it’s time to talk about feeding your Philodendron Camposportoanum. These plants aren’t too demanding when it comes to fertilizer, but a little boost every now and then can go a long way. During the growing season (spring and summer), feed your plant once a month with a balanced fertilizer. In the cooler months, you can cut back to every two to three months. Remember, it’s always better to under-fertilize than overdo it. Nobody likes a hangry plant!
5.3 Nutrient Requirements
Just like humans need their vitamins, Philodendron Camposportoanum also has some specific nutrient needs. The three main macronutrients they crave are nitrogen, phosphorus, and potassium. These can be found in balanced fertilizers labeled with an NPK ratio (those numbers on the packaging). Aim for a ratio of 10-10-10 or something similar. Additionally, don’t forget about micronutrients like iron, magnesium, and zinc. They might be tiny, but they play an essential role in your plant’s overall health. Consider adding a micronutrient supplement to your feeding routine to keep your Philodendron thriving.
6. Pruning and Propagation Techniques
6.1 Importance of Pruning
Pruning may sound like a fancy term, but it’s just a fancy way of saying “trimming.” Just like you might give yourself a haircut to tidy up, your Philodendron could use a little grooming too. Regular pruning helps control the plant’s size, shape, and can even encourage more bushy growth. Plus, it gives you a chance to show off your fancy gardening shears. Talk about a win-win situation!
6.2 Step-by-Step Pruning Guide
Ready to get your hands dirty? Pruning your Philodendron Camposportoanum is a relatively simple process. Start by identifying any dead or dying leaves – those are the ones that need to go first. Use clean and sharp shears to make a clean cut just above the leaf node (the point where the leaf meets the stem). This will promote new growth. If you want to shape your plant, you can also trim back any leggy or unruly stems. Just remember: moderation is key. Don’t go all Edward Scissorhands on your poor Philodendron!
6.3 Propagation Methods
Once you’ve mastered the art of pruning, you might want to expand your Philodendron family. Luckily, propagating Philodendron Camposportoanum is as easy as can be. You have a few different options to choose from: stem cuttings, air layering, or division. Stem cuttings are perhaps the most popular and straightforward method. Simply cut a healthy stem with a few leaves attached, remove the lower leaves, and place it in a glass of water or moist soil. Before you know it, you’ll have a brand new Philodendron baby to brag about!
6.4 Caring for Newly Propagated Plants
Now that you’re a proud parent of some baby Philodendrons, it’s time to make sure they have the best start in life. These little ones are more delicate than a snowflake on a summer’s day, so handle them with care. Keep them in a warm and humid environment, away from direct sunlight. Water them regularly, but be cautious not to overwater – they’re tiny and can’t handle too much moisture just yet. With a little TLC, your Philodendron offspring will grow into strong, independent plants in no time.
7. Common Pests and Diseases
7.1 Identifying Common Pests
Let’s face it, pests are like the uninvited guests that show up at your party and eat all your snacks. Unfortunately, Philodendron Camposportoanum can also fall victim to some unwanted visitors. Keep an eye out for pests such as spider mites, mealybugs, and aphids. These sneaky critters can cause damage to your plant by sucking the sap or leaving behind unsightly webs. Not exactly the kind of decoration you were going for.
7.2 Preventing and Treating Pests
To prevent these pesky critters from wreaking havoc on your Philodendron, it’s essential to maintain good plant hygiene. Regularly inspect your plant for any signs of infestation. If you do spot some unwanted guests, there are a few ways to show them the exit door. You can try using natural remedies like neem oil or insecticidal soap. For severe cases, you may need to bring out the big guns and use a chemical pesticide, but be cautious and always follow the instructions carefully. Nobody wants to accidentally harm their precious plant.
7.3 Recognizing Common Diseases
Just like humans catch the occasional cold, Philodendron Camposportoanum can also fall ill from time to time. Keep an eye out for common diseases such as root rot, leaf spot, or powdery mildew. These can be caused by overwatering, poor air circulation, or excessive humidity. Not exactly the most glamorous ailments, but they can definitely put a damper on your plant’s overall health.
7.4 Disease Prevention and Treatment
Prevention is always better than a cure, so make sure to provide your Philodendron with the right conditions to avoid diseases. Ensure proper drainage, don’t overwater, and maintain good air circulation around your plant. If you do spot signs of disease, act quickly to prevent it from spreading further. Remove affected leaves or stems, adjust watering habits, and consider using a fungicide if necessary. Your Philodendron will thank you for taking care of its well-being!
8. Tips for Successful Care and Maintenance
8.1 Monitoring Growth and Development
Just like a proud parent tracking their child’s growth milestones, it’s important to keep an eye on your Philodendron Camposportoanum’s progress. Monitor its growth rate, leaf color, and overall appearance. If you notice any sudden changes, it could be a sign that something isn’t quite right. Maybe it needs more sunlight, less water, or perhaps just a little pep talk to boost its confidence. Don’t worry; we won’t judge if you start having conversations withIn conclusion, Philodendron Camposportoanum is a remarkable plant that brings beauty and tropical vibes to any space. By providing the right growing conditions, proper care, and attention, you can enjoy the lush foliage and velvety leaves of this stunning plant for years to come. Remember to monitor its needs, adjust watering and light levels accordingly, and address any issues promptly. With the knowledge and tips shared in this care guide, you are well-equipped to create an environment where your Philodendron Camposportoanum can thrive. So, go ahead and embark on the rewarding journey of caring for this unique plant, and enjoy the natural beauty it brings to your home or garden.
FAQ
1. Is Philodendron Camposportoanum suitable for beginners?
2. How often should I water my Philodendron Camposportoanum?
The watering frequency for Philodendron Camposportoanum may vary depending on various factors such as humidity levels, temperature, and potting medium. As a general guideline, it is recommended to water the plant when the top inch of soil feels slightly dry. Avoid overwatering, as it can lead to root rot, but also ensure that the plant doesn’t dry out completely between waterings.
3. Can Philodendron Camposportoanum tolerate low light conditions?
While Philodendron Camposportoanum prefers bright, indirect light, it can tolerate lower light conditions to some extent. However, it is important to note that inadequate light may result in reduced growth and less vibrant foliage. If placing the plant in a low light area, ensure it still receives some natural or artificial light to maintain its overall health and vitality.
4. How do I propagate Philodendron Camposportoanum?
Philodendron Camposportoanum can be propagated through stem cuttings. Choose a healthy stem with at least two or three leaves and make a clean cut just below a node. Place the cutting in a suitable potting medium, keep it moist, and provide indirect light. With time and proper care, the cutting will develop roots, and you will have successfully propagated a new Philodendron Camposportoanum plant.
Indoor greenery has become increasingly popular as people seek to bring nature’s beauty into their homes. Among the wide array of indoor plants, the Philodendron family stands out for its stunning variety and ability to thrive in indoor environments. In this blog post, we present “The Philodendron Paradise: A Complete Catalog of 76 Varieties for Indoor Greenery,” a comprehensive guide that showcases the unique characteristics of each Philodendron species. However, this catalog is more than just a list—it is an exploration of the captivating world of Philodendrons, presented in a manner that is both accessible and engaging. To ensure an enjoyable and informative reading experience, we will delve into the importance of using unique and simple language, choosing the right tone and style, simplifying complex plant terminology, and employing descriptive language and imagery. Join us as we embark on a journey to discover the beauty and simplicity of indoor greenery through the lens of Philodendron Paradise.
1. Introduction to The Philodendron Paradise: A Complete Catalog of 76 Varieties for Indoor Greenery
Welcome to The Philodendron Paradise, where we have compiled a complete catalog of 76 varieties for all your indoor greenery needs! If you’re looking to enhance your living spaces with the beauty of nature, you’ve come to the right place. Our catalog is filled with a wide range of Philodendron species, each offering its unique charm and benefits. So, let’s dive into the lush world of indoor greenery and discover the perfect Philodendron for you!
1.1 The significance of indoor greenery in enhancing living spaces
Who wouldn’t want to bring a slice of nature indoors? Indoor greenery has an incredible ability to transform any living space into a vibrant and rejuvenating oasis. Not only do plants add a touch of natural beauty, but they also have numerous benefits for our well-being. From purifying the air to reducing stress and boosting productivity, indoor greenery has a positive impact on our lives in more ways than one. So, get ready to create your own personal paradise with the help of our Philodendron catalog!
2. Understanding the Importance of Unique and Simple Language in Blog Posts
When it comes to writing a blog post that stands out from the crowd, using unique language is key. It’s like giving your post a splash of personality and flair that sets it apart from the rest. By infusing your writing with your own voice and style, you create a connection with your readers that keeps them coming back for more. So, don’t be afraid to let your creativity flow and sprinkle your words with a touch of uniqueness.
2.1 Why using unique language sets your blog post apart
In a sea of similar blog posts, using unique language is like a breath of fresh air. It captivates your readers’ attention and makes them curious to discover what you have to say. By avoiding clichés and putting your own spin on things, you provide a refreshing perspective that stands out from the crowd. So, embrace your inner wordsmith and let your unique language shine through your blog posts!
2.2 The benefits of using simple language for better reader comprehension
While unique language adds a delightful flavor to your writing, simplicity is equally important. Simple language ensures that your message is easily understood by readers of all backgrounds. By distilling complex ideas into concise and relatable sentences, you make your content accessible to a wider audience. So, keep it simple, my friend. Your readers will thank you for it!
3. Choosing the Right Tone and Style for Writing About Indoor Greenery
When it comes to writing about the beauty of indoor greenery, finding the right tone and style is essential. It’s all about striking a balance between informative and engaging, while staying true to the enchanting nature of plants. So, let’s explore how you can create a writing style that beautifully reflects the allure of indoor greenery.
3.1 Determining the appropriate tone for engaging readers
When engaging readers in the world of indoor greenery, a friendly and conversational tone works wonders. Imagine chatting with a plant enthusiast friend over a cup of tea. You want to create that same warm and inviting atmosphere in your writing. By being approachable and relatable, you’ll draw readers in and keep them hooked on your words.
3.2 Finding a writing style that reflects the beauty of indoor greenery
Just as each plant in your indoor garden has its unique beauty, your writing style should reflect that too. Let your words flourish like the leaves of a Philodendron, painting vivid images in the minds of your readers. Whether you choose a whimsical poetic style or a straightforward descriptive approach, make sure it captures the essence of the indoor greenery you’re showcasing.
4. Highlighting the Uniqueness of Each Philodendron Variety in the Catalog
In our catalog, we celebrate the diversity and distinct characteristics of each Philodendron variety. Get ready to embark on a journey through a world of lush foliage and stunning features. From the heart-shaped leaves of the Philodendron cordatum to the vibrant colors of the Philodendron prince of orange, there’s a Philodendron for every taste and style.
4.1 The diversity and characteristics of Philodendron species
Philodendron species come in all shapes and sizes, making them a joy to discover. From climbing vines to compact shrubs, each species has its own unique growth pattern and leaf structure. Some Philodendrons have glossy leaves, while others boast intricate patterns or striking colors. Exploring the diversity of Philodendron species is like embarking on a botanical adventure full of surprises and delights.
4.2 Exploring the distinct features of popular Philodendron varieties
Among the vast array of Philodendron varieties, some have captured the hearts of indoor plant enthusiasts worldwide. From the velvety leaves of the Philodendron Birkin to the dramatic foliage of the Philodendron Pink Princess, these popular varieties are adored for their striking aesthetics and unique traits. We’ll dive into the details and uncover the fascinating features that make these Philodendrons truly special. Get ready to fall in love with these green gems!
5. Simplifying Complex Plant Terminology for Easy Understanding
5.1 Breaking down botanical jargon for beginner plant enthusiasts
Botanical jargon can sometimes feel like a foreign language, especially for those new to the plant world. In this section, we’ll decode those complicated terms so even the most novice plant enthusiasts can understand them. From dissecting words like “photosynthesis” to explaining the purpose of terms like “node” and “aerial roots,” we’ll make sure you have a firm grasp on the basics.
5.2 Providing simplified explanations of scientific terms related to Philodendrons
Scientific terms can be intimidating, but fear not! We’re here to break them down in simple terms. Whether it’s explaining the role of “chlorophyll” in Philodendron’s green leaves or unraveling the mysteries behind “epiphytic” or “hemiepiphytic” growth habits, we’ll make sure you’re equipped with the knowledge to impress your friends at your next plant chat.
6. Engaging Readers with Clear and Concise Descriptions of Philodendron Species
6.1 Crafting captivating descriptions that capture the essence of each variety
Philodendron species are as diverse as they come, and we want to ensure you can understand their unique qualities. In this section, we’ll take you on a journey through concise yet captivating descriptions of each variety. From the heart-shaped leaves of the Philodendron cordatum to the vibrant foliage of the Philodendron gloriosum, you’ll feel like you’re exploring a botanical wonderland.
6.2 Using vivid language to depict the unique qualities of Philodendron species
Let’s paint a picture with words! We’ll use vivid and expressive language to bring the unique qualities of Philodendron species to life. Get ready to delve into a world of “lush, velvety leaves” and “graceful vines that dance through the air.” Our goal is to let your imagination run wild with the enchanting beauty of these indoor green marvels.
7. Creating an Enjoyable Reading Experience through Descriptive Language and Imagery
7.1 Enhancing the reader’s visual experience through descriptive language
A picture may be worth a thousand words, but we’ll strive to make those words count. Through descriptive language, we’ll paint vivid pictures in your mind’s eye, allowing you to envision the stunning details of each Philodendron variety. Prepare to be transported to a lush paradise, where you can almost feel the velvety leaves beneath your fingertips.
7.2 Incorporating vivid imagery to bring Philodendron varieties to life
Why only imagine when we can make these Philodendron varieties spring to life? Through the power of vivid imagery, we’ll take you on a visual journey that will leave you feeling like you’re standing amidst a thriving Philodendron jungle. From the deep emerald hues of the Philodendron birkin to the intricate patterns of the Philodendron pink princess, you’ll get to experience the beauty firsthand.
8. Tips for Writing a Blog Post that Captures the Beauty and Simplicity of Indoor Greenery
8.1 Strategies for conveying the allure of indoor greenery through words
Writing about indoor greenery is an art form, and we want to equip you with the best strategies to capture its allure. Whether it’s using sensory language to describe the scent of blooming flowers or employing expressive metaphors to convey the tranquility plants bring, we’ll help you infuse your writing with the magic of indoor greenery.
8.2 Maximizing the impact of simple language in creating a delightful reading experience
Who says simple language can’t be impactful? We’ll show you how to harness the power of concise, relatable language to create a delightful reading experience. No need for convoluted phrases or stuffy prose – we’ll provide tips and tricks to make your writing shine with ease, ensuring your readers are charmed from the first word to the last.In conclusion, “The Philodendron Paradise: A Complete Catalog of 76 Varieties for Indoor Greenery” invites you to explore the world of Philodendrons and discover the wonders of indoor greenery. By using unique and simple language, capturing the essence of each variety, and incorporating vivid descriptions and imagery, we aim to provide a delightful reading experience. Whether you are a seasoned plant enthusiast or just starting your indoor gardening journey, this catalog offers a wealth of information and inspiration. So, embrace the beauty of Philodendrons and let them transform your living spaces into verdant paradises. Happy planting!
FAQ
1. Are Philodendrons suitable for beginners in indoor gardening?
Philodendrons are often recommended for beginners due to their resilience and adaptability. They are relatively easy to care for, making them a great choice for those new to indoor gardening. With proper lighting, watering, and basic plant care practices, Philodendrons can thrive and bring beauty to your indoor spaces.
2. How do I determine the right Philodendron variety for my home?
Choosing the right Philodendron variety depends on various factors such as the amount of available natural light, the space you have, and your personal preferences. Some Philodendrons thrive in low light conditions, while others prefer bright, indirect light. Consider the size and growth habits of different varieties to ensure they fit well within your space. Additionally, take into account the care requirements and level of maintenance you are comfortable with.
3. Can Philodendrons be grown in water or should they be potted with soil?
Philodendrons can be grown in both water and soil, depending on the variety and personal preference. Many Philodendron species can be propagated in water and will develop roots before being transferred to soil. However, some gardeners prefer to keep their Philodendrons in water permanently, using specialized containers and nutrient solutions. Ultimately, the choice between water and soil cultivation depends on your gardening style and the specific needs of the Philodendron variety you have.
4. How often should I water my Philodendron?
The frequency of watering your Philodendron depends on several factors, including the environment, potting medium, and season. As a general rule, it’s best to allow the top inch or two of the soil to dry out before watering again. Over-watering can lead to root rot, while under-watering can cause stress and dehydration. It’s important to strike a balance and monitor the moisture levels of your Philodendron’s soil to ensure optimal growth and health.