Serenity Blooms: Mastering Serissa Bonsai (Snow Rose) Care with Pro Tips

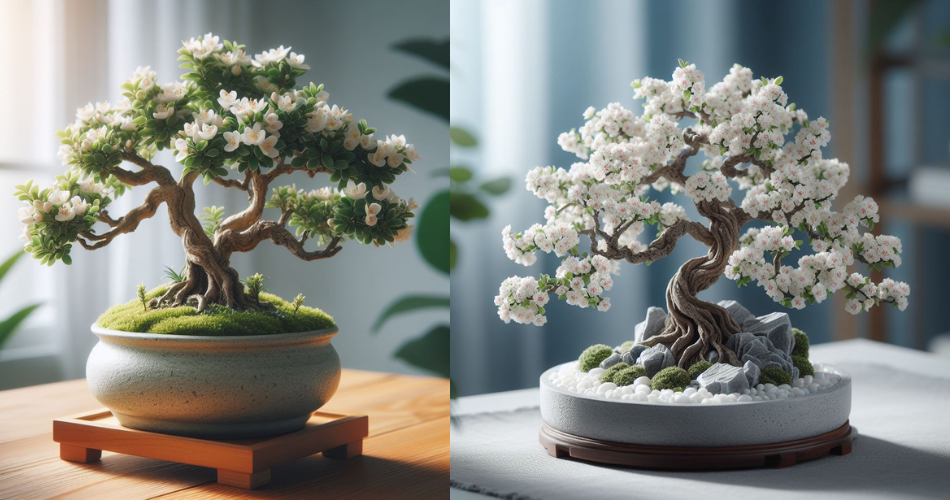
Serissa Bonsai, also known as Snow Rose, is a captivating and delicate bonsai tree species that has captured the hearts of bonsai enthusiasts worldwide. With its small, white, star-shaped flowers and fine foliage, Serissa Bonsai offers a unique beauty that can bring tranquility and elegance to any space. However, caring for this miniature tree requires a deep understanding of its specific needs and preferences. In this comprehensive care guide, we will explore the essential aspects of Serissa Bonsai care, providing detailed tips and insights to help you nurture and maintain the health and vitality of your Serissa Bonsai tree. Whether you are a beginner or an experienced bonsai enthusiast, this guide will serve as a valuable resource on your journey to creating a thriving Serissa Bonsai masterpiece.

1.1 What is Serissa Bonsai (Snow Rose)?

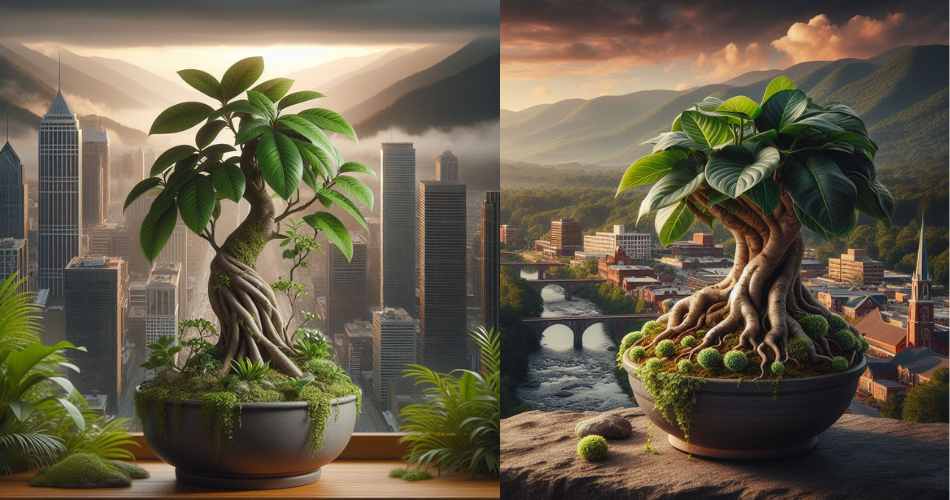
Serissa bonsai, also known as Snow Rose, is a delicate and captivating plant that captures the hearts of bonsai enthusiasts worldwide. With its small leaves, beautiful white flowers, and intricate trunk structure, Serissa bonsai is a favorite among bonsai lovers.

1.2 History and Origins

Originating from Southeast Asia, Serissa bonsai has a rich history that spans over centuries. It has been cultivated in China and Japan for hundreds of years, where it is highly valued for its aesthetic appeal and artistic expression. Today, Serissa bonsai can be found in various parts of the world, bringing beauty and tranquility to many homes and gardens.

2. Understanding the Care Needs of Serissa Bonsai

2.1 Light Requirements

Just like any other plant, Serissa bonsai relies on proper lighting conditions to thrive. It prefers bright, indirect sunlight, making it a great fit for a sunny window sill or a well-lit spot in your garden. However, be cautious of excessive exposure to intense afternoon sun, as it can scorch the delicate leaves.

2.2 Temperature Considerations

Serissa bonsai enjoys a temperate climate and is sensitive to extreme temperatures. It thrives best in a range of 60-75°F (15-24°C), making it suitable for both indoor and outdoor environments. During winter, protect your Serissa bonsai from frost and keep it in a sheltered area to prevent damage.

2.3 Importance of Proper Air Circulation

Adequate air circulation is crucial for the health of your Serissa bonsai. Stagnant air can lead to mold growth and other issues. You can promote air circulation by placing your bonsai in an area with good ventilation or using a small fan to gently move the air around.

3. Choosing the Right Environment for Serissa Bonsai

3.1 Indoor vs. Outdoor Placement

When it comes to deciding whether to keep your Serissa bonsai indoors or outdoors, it’s all about finding the right balance. Serissa bonsai can thrive indoors, but they also benefit from spending time outdoors during the warmer months. Regularly alternating between indoor and outdoor environments can promote healthy growth.

3.2 Ideal Placement Conditions

Whether indoors or outdoors, Serissa bonsai prefers a spot with ample natural light. Avoid placing it near drafts or heat sources, as it can adversely affect its health. If you opt for indoor placement, consider using grow lights to supplement natural light and provide the necessary brightness it needs.

3.3 Protection from Extreme Weather

While Serissa bonsai can tolerate mild weather fluctuations, it’s important to protect it from extreme weather conditions. During hot summer days or cold winter nights, provide shade or move your bonsai to a more suitable location to shield it from harsh elements.

4. Watering and Humidity Requirements for Serissa Bonsai

4.1 Watering Frequency and Techniques

Proper watering is crucial for maintaining the health of your Serissa bonsai. It’s important to keep the soil evenly moist but not waterlogged. Check the moisture level by inserting your finger about an inch into the soil; if it feels dry, it’s time to water. Remember, consistency is key!

4.2 Balancing Moisture Levels

Finding the right balance between not too dry and not too wet is essential for Serissa bonsai. It’s better to slightly underwater than overwater, as excessive moisture can lead to root rot. Use a well-draining bonsai soil mix to ensure proper water drainage and avoid water stagnation.

4.3 Humidity Considerations

Serissa bonsai appreciates a humid environment, but excessively dry or humid conditions can cause problems. You can increase humidity by placing the bonsai on a humidity tray filled with water or misting the leaves occasionally. Just don’t go overboard, as excessive humidity can invite pests to join the bonsai party.

Now that you have a better understanding of Serissa bonsai care, it’s time to put your knowledge into practice. With a little patience and TLC, your Serissa bonsai will reward you with its timeless beauty and captivating charm. Happy bonsai-ing!

5. Pruning and Shaping Techniques for Serissa Bonsai

5.1 Importance of Pruning

Pruning is like giving your Serissa bonsai a fancy haircut, but with a purpose. It helps maintain the shape and size of your bonsai and encourages new growth. Plus, it’s a great way to unleash your inner creativity. Who knew plant haircuts could be so important?

5.2 Pruning Tools and Techniques

You might think that pruning a bonsai requires a magical, ancient tool passed down from bonsai masters. But fear not, regular gardening tools will do just fine. Just make sure they’re clean and sharp. And remember, snip with care and precision. You don’t want to accidentally create a bonsai mullet.

5.3 Shaping and Wiring

Shaping your Serissa bonsai is like guiding its growth in the direction you desire. Wiring is like adding some bonsai bling to hold branches in place while they develop. Just remember to move the wires occasionally, or else your bonsai might end up with those dreaded wire marks. Nobody wants their bonsai rocking the metal accessories look.

6. Fertilizing and Soil Requirements for Serissa Bonsai

6.1 Choosing the Right Fertilizer

Finding the perfect fertilizer for your Serissa bonsai can feel like searching for a needle in a haystack. But fear not, there are many bonsai-specific fertilizers out there. Just make sure to follow the instructions and avoid overfeeding. No one wants a bonsai with a food baby.

6.2 Understanding Soil Mixtures

Soil mixtures for bonsai can be as confusing as trying to solve a Rubik’s Cube blindfolded. But don’t worry, it’s not as complicated as it seems. The key is finding a well-draining soil mixture that retains enough moisture without drowning your bonsai. It’s all about balance, just like in life.

6.3 Fertilizing Schedule and Techniques

To fertilize or not to fertilize, that is the question. And the answer is yes, but in moderation. Too much fertilizer can be harmful to your bonsai’s health. So, follow a fertilizing schedule recommended for Serissa bonsai, and your little green friend will thank you with lush foliage and vibrant flowers.

7. Common Pests and Diseases of Serissa Bonsai

7.1 Identifying and Preventing Pests

Nobody likes uninvited guests, especially when they come in the form of pests on your Serissa bonsai. Look out for pesky critters like aphids, spider mites, and mealybugs. Keep a close eye on your bonsai, and if you spot any unwanted visitors, take action swiftly. A good old-fashioned spray bottle can work wonders.

7.2 Common Diseases and Their Treatment

Just like humans, bonsai trees can also fall ill. Some common diseases for Serissa bonsai include root rot and powdery mildew. Catching these diseases early is key, so regularly inspect your bonsai for any signs of trouble. And remember, prevention is better than cure, so ensure your bonsai has good airflow and avoid overwatering.

8. Tips and Tricks for Successful Serissa Bonsai Care

8.1 Maintaining a Balanced Environment

Serissa bonsai thrive in a balanced environment, just like we do. Make sure your bonsai gets the right amount of sunlight, water, and humidity. Think of it as creating a cozy and inviting atmosphere for your little green friend. A bonsai spa day, if you will.

8.2 Seasonal Considerations

Seasons change, and so do the needs of your Serissa bonsai. Adjust your care routine accordingly, whether it’s protecting your bonsai from frost in winter or providing shade during hot summer days. Pay attention to the cues nature gives you, and your bonsai will be happier than a beach bum on vacation.

8.3 Troubleshooting Common Issues

No matter how green-thumbed you are, sometimes things just don’t go as planned. But don’t fret! If your Serissa bonsai is looking sad or throwing tantrums, there’s usually a solution. From yellowing leaves to drooping branches, a little research and some TLC can often solve the problem. And remember, even bonsai experts have bad hair days. It’s all part of the journey.In conclusion, Serissa Bonsai, with its delicate beauty and intricate care requirements, is a rewarding and fulfilling bonsai tree to cultivate. By understanding its specific needs for light, temperature, watering, pruning, fertilizing, and protection against pests and diseases, you can create an ideal environment for your Serissa Bonsai to thrive. Remember to approach its care with patience, attention to detail, and a willingness to learn from the tree itself. With the knowledge and tips provided in this guide, you are equipped to embark on a successful journey in caring for your Serissa Bonsai, creating a stunning and harmonious addition to your home or garden. Happy bonsai cultivation!

FAQ

1. Is Serissa Bonsai suitable for beginners?

Serissa Bonsai can be a bit challenging for beginners due to its specific care requirements. However, with proper research, patience, and attention to detail, beginners can successfully care for Serissa Bonsai. It is essential to understand the tree’s needs and provide the right environment, watering schedule, and pruning techniques to ensure its health and vitality.

2. Can Serissa Bonsai be kept indoors?

Yes, Serissa Bonsai can be kept indoors. However, it requires adequate light, humidity, and air circulation. Placing the bonsai near a bright window or providing supplemental grow lights can help meet its light requirements. Additionally, regularly misting the foliage and using humidity trays can help maintain the necessary humidity levels for indoor cultivation.

3. How often should I fertilize my Serissa Bonsai?

Serissa Bonsai benefits from regular fertilization during the growing season, typically from spring to early fall. It is recommended to use a balanced, slow-release bonsai fertilizer or a liquid fertilizer diluted to half strength. Apply the fertilizer according to the package instructions, ensuring not to over-fertilize, as it can lead to root burn and other issues. Adjust the fertilization frequency based on the tree’s growth and health.

4. What should I do if my Serissa Bonsai develops pests or diseases?

If your Serissa Bonsai develops pests or diseases, it is important to identify the issue promptly and take appropriate action. Common pests that can affect Serissa Bonsai include aphids, spider mites, and scale insects. Treat the infestation by using insecticidal sprays or natural remedies, ensuring thorough coverage of the affected areas. In the case of diseases, such as fungal infections, remove the affected parts and apply appropriate fungicides. Consulting with a local bonsai expert or horticulturist can provide specific guidance for your region and situation.

Philodendron Pedatum Bonsai Care Guide

Welcome to the comprehensive guide on caring for Philodendron Pedatum bonsai trees. Philodendron Pedatum, also known as the Horsehead Philodendron, is a popular choice among bonsai enthusiasts due to its unique foliage and manageable size. In this article, we will delve into the essential aspects of Philodendron Pedatum bonsai care, including choosing the right environment, providing proper care techniques, pruning and shaping methods, watering and fertilizing guidelines, pest and disease prevention, as well as repotting and root pruning tips. Whether you are a beginner or an experienced bonsai gardener, this guide will equip you with the knowledge and skills needed to ensure the health and beauty of your Philodendron Pedatum bonsai.

1.1 What is Philodendron Pedatum?

When it comes to unique and captivating bonsai trees, the Philodendron Pedatum is a true gem. This particular species is known for its beautiful heart-shaped leaves with distinct lobes, resembling a bird’s foot. Don’t worry, we won’t quiz you on the scientific name, just remember “Philodendron Pedatum” for your next trivia night!

1.2 Why Choose Philodendron Pedatum as a Bonsai Tree?

So, why should you consider Philodendron Pedatum as your bonsai companion? Well, apart from its eye-catching foliage, this plant is relatively low-maintenance, making it perfect for beginners or those without a green thumb. It has a natural ability to adapt to various environments and can thrive indoors or outdoors, depending on your preference. Plus, who doesn’t love a bonsai tree that brings a touch of whimsy to their living space?

2. Choosing the Right Environment for Your Philodendron Pedatum Bonsai

2.1 Indoor vs. Outdoor Cultivation

Deciding where to grow your Philodendron Pedatum bonsai tree is an important consideration. It can be cultivated both indoors and outdoors, depending on the climate you live in. Indoors, it loves bright, indirect light and can be placed near a window with filtered sunlight. Outdoors, it thrives in partial shade, avoiding direct sunlight during the hottest parts of the day.

2.2 Light Requirements for Philodendron Pedatum Bonsai

Philodendron Pedatum enjoys a good balance of light. While it appreciates bright conditions, direct sunlight can scorch its delicate leaves. Think of it as a plant that enjoys a cozy spot under a tree canopy rather than basking in the harsh rays of the sun. If you’re growing it indoors, placing it near a window with filtered sunlight or using grow lights can help provide the necessary light intensity.

2.3 Temperature and Humidity Considerations

When it comes to temperature, Philodendron Pedatum prefers a warm and humid environment. It thrives in temperatures between 65°F to 75°F (18°C to 24°C), so make sure to keep it away from cold drafts or extreme temperature fluctuations. As for humidity, this tropical plant appreciates higher levels, so misting the leaves or using a humidifier can help create a comfortable environment for your leafy friend.

3. Essential Care Techniques for Philodendron Pedatum Bonsai Trees

3.1 Watering Guidelines and Frequency

As with any plant, proper watering is crucial for the health of your Philodendron Pedatum bonsai. Keep the soil evenly moist, but not waterlogged. Remember, this isn’t a sponge-bob, and it doesn’t appreciate soggy feet. To avoid overwatering, check the soil’s moisture level before watering and adjust accordingly. It’s better to underwater than to drown this bonsai beauty!

3.2 Soil Selection and Repotting Schedule

When it comes to soil, Philodendron Pedatum prefers well-draining soil that retains some moisture. A mixture of bonsai soil, peat moss, and perlite or sand can provide the ideal growing medium. As for repotting, aim to do so every two years during the spring season. This allows the roots to have enough space to grow and ensures your bonsai remains happy and healthy.

3.3 Feeding and Fertilization Recommendations

To give your Philodendron Pedatum bonsai a boost, feeding it with a balanced liquid fertilizer every two weeks during the growing season is beneficial. Be sure to follow the manufacturer’s instructions for dilution and avoid overdoing it, as too much fertilizer can harm this tropical beauty. Remember, a little bit of fertilizer can go a long way in promoting healthy growth.

4. Pruning and Shaping Your Philodendron Pedatum Bonsai

4.1 Understanding Pruning Techniques for Bonsai

Pruning is a vital part of bonsai care, and Philodendron Pedatum is no exception. It’s important to understand the different pruning techniques to keep your bonsai in shape. These techniques include pinching back new growth, trimming long stems, and removing any dead or diseased foliage. Pruning not only helps maintain the desired shape but also encourages bushier growth.

4.2 Pruning for Shape and Size Control

If you want to unleash your inner bonsai artist, shaping your Philodendron Pedatum bonsai is a fun process. You can prune and trim the branches to create the desired shape and size. Just remember to take it slow and steady, as bonsai shaping is an ongoing process that requires patience and finesse. Take breaks if you need to, and remember that a perfectly shaped bonsai is like a fine wine – it takes time to mature.

4.3 Wiring and Branch Manipulation

Wiring is another technique used in bonsai to guide the growth of branches and achieve the desired shape. For your Philodendron Pedatum bonsai, it’s important to use gentle wiring techniques to avoid damaging the delicate stems and leaves. Be mindful of the wire tension and regularly check for any signs of wire cutting into the branches. Remember, the goal is to create a harmonious shape, not give your bonsai a bad hair day.

With these care techniques under your belt, you’re well on your way to becoming a proud Philodendron Pedatum bonsai parent. Remember, bonsai care is an art form that requires dedication and love, but the rewards of a beautifully thriving miniature tree are well worth it. Happy bonsai-ing!

5. Watering and Fertilizing Guidelines for Philodendron Pedatum Bonsai

5.1 Proper Watering Techniques

Watering your Philodendron Pedatum bonsai can be a bit tricky, but fear not, we’ve got you covered. This little guy likes to stay slightly moist but not drenched. Think of it as having a good balance between quenching its thirst and not drowning it in the process. A good rule of thumb is to water it when the top inch of the soil feels dry. Make sure to water evenly and avoid leaving stagnant water in the pot, because no one likes sitting in a puddle!

5.2 Choosing the Right Fertilizer and Application

Just like we need our daily dose of nutrients, so does our Philodendron Pedatum bonsai. When it comes to fertilizer, opt for a well-balanced, water-soluble fertilizer designed specifically for houseplants. Look for one with a balanced N-P-K ratio (nitrogen, phosphorus, potassium) to ensure your bonsai gets a well-rounded meal. Follow the instructions on the package for the correct dosage, and remember, less is always more when it comes to fertilizer.

5.3 Frequency and Timing of Fertilization

Timing is everything, even when it comes to fertilizing your bonsai. During the growing season, which is typically spring and summer, you can feed your Philodendron Pedatum bonsai every two to four weeks. As the weather cools down and growth slows down in fall and winter, you can reduce the frequency to every six to eight weeks. Always pay attention to your bonsai’s needs and adjust accordingly. It’s like having a personal chef, but for plants.

6. Common Pests and Diseases: Prevention and Treatment for Philodendron Pedatum Bonsai

6.1 Identifying Common Pests Affecting Philodendron Pedatum

No bonsai is safe from the occasional unwanted visitors. Philodendron Pedatum bonsai can be prone to pests such as aphids, spider mites, and mealybugs. Keep an eye out for any tiny, crawling critters or signs of damage like yellowing leaves or sticky residue. If you spot any of these troublemakers, it’s time to take action.

6.2 Preventive Measures for Pest Infestations

Preventing pests from invading your beloved bonsai is like building a fortress for your plant. Start by regularly inspecting your bonsai for any signs of pests. Keep your bonsai clean and tidy by removing dead leaves and debris, which can serve as hiding spots or breeding grounds for pests. You can also give your bonsai a gentle shower or wipe down its leaves with a damp cloth to keep those buggers at bay.

6.3 Effective Methods for Treating Pests and Diseases

So, your bonsai has fallen victim to a pesky infestation? Don’t fret, there are ways to fight back. One effective method is using an insecticidal soap or neem oil spray, which can help rid your plant of pests. Just make sure to follow the instructions carefully and test it on a small area before applying it to the entire bonsai. If the infestation persists or you’re unsure about how to handle it, don’t hesitate to seek advice from a local horticulturist or bonsai expert. Remember, we can’t let those pests win!

7. Repotting and Root Pruning Tips for Philodendron Pedatum Bonsai

7.1 Signs that Your Philodendron Pedatum Bonsai Needs Repotting

Nobody likes feeling cramped, including our bonsai friends. If you notice that your Philodendron Pedatum bonsai has roots poking out of the drainage holes or the soil seems compacted, it might be time for a new home. Another sign is if the water doesn’t absorb as quickly as before, indicating that the roots have taken up most of the space. Repotting allows for fresh soil, better drainage, and more growing room for your bonsai. It’s like giving them a little vacation to a bigger and better pot!

8. Conclusion and Additional Resources for Philodendron Pedatum Bonsai Care

Congratulations! You are now equipped with the knowledge and understanding required to provide excellent care for your Philodendron Pedatum bonsai tree. By creating the ideal environment, implementing proper care techniques, and staying vigilant against pests and diseases, your bonsai will thrive and bring joy for years to come. Remember, bonsai care is a continuous learning process, so feel free to explore additional resources and connect with fellow bonsai enthusiasts for further guidance and inspiration. Now, go forth and enjoy the artistry and tranquility of your Philodendron Pedatum bonsai!

FAQ

1. How often should I water my Philodendron Pedatum bonsai?

Watering frequency for your Philodendron Pedatum bonsai depends on various factors such as the climate, pot size, and soil composition. As a general rule, it is recommended to water your bonsai when the top layer of soil feels slightly dry to the touch. Avoid overwatering as it can lead to root rot, but also ensure the soil does not completely dry out. Regularly monitor the moisture levels and adjust the watering schedule accordingly.

2. Can I keep my Philodendron Pedatum bonsai indoors?

While Philodendron Pedatum bonsai can be grown indoors, they thrive best when placed in a location with ample sunlight. If you choose to keep your bonsai indoors, ensure it receives sufficient indirect light or consider using artificial grow lights to supplement. Additionally, be mindful of the temperature and humidity levels in the indoor environment, as Philodendron Pedatum bonsai trees prefer warm and humid conditions.

3. How do I prune and shape my Philodendron Pedatum bonsai?

Pruning and shaping are essential for maintaining the desired form and aesthetics of your Philodendron Pedatum bonsai. Begin by removing any dead, damaged, or excessive growth using clean bonsai pruning shears. To shape the bonsai, carefully trim the branches and foliage to create the desired silhouette. Wiring can also be used to guide the branches in the desired direction. Remember to step back and assess the overall shape regularly to ensure balanced growth.

4. What are some common pests and diseases that affect Philodendron Pedatum bonsai?

Philodendron Pedatum bonsai trees are susceptible to pests such as aphids, spider mites, and scale insects. Regularly inspect your bonsai for any signs of infestation, such as sticky residue, webbing, or yellowing leaves. To prevent pests, maintain good hygiene, provide proper ventilation, and avoid overwatering. In terms of diseases, root rot and fungal infections can occur if the bonsai is kept in excessively wet conditions. Proper watering techniques and well-draining soil can help prevent these issues.

Best Guide to Understanding and Growing Bonsai Tree With Tips

Bonsai trees have captivated people around the world with their miniature beauty and profound symbolism. Originating from ancient Chinese and Japanese cultures, these meticulously cultivated trees have become a cherished art form and a serene addition to any space. In this comprehensive article, we will delve into the fascinating world of bonsai trees, exploring their origins, the various types and styles available, the techniques behind bonsai art, step-by-step instructions on creating your own bonsai tree, and essential tips for their care. Whether you are a beginner eager to learn about this ancient practice or a seasoned bonsai enthusiast looking for new insights, join us on this journey of discovery as we uncover the exquisite allure and timeless elegance of bonsai trees.

1.1 What are Bonsai Trees?

So, you’re walking through a garden center, minding your own business, when suddenly you come across these adorable miniature trees. “What sorcery is this?” you wonder. Well, my friend, those mini marvels are bonsai trees.

Bonsai, which literally means “planted in a container” in Japanese, is an ancient horticultural art form that involves growing and shaping trees and shrubs in miniature form. These pint-sized plants are not genetically modified or stunted in growth but are meticulously cultivated to mimic the appearance of full-grown trees in nature.

1.2 The Fascinating History of Bonsai

Now that you know what bonsai trees are, it’s time for a little history lesson. Bonsai has a rich and fascinating past that stretches back thousands of years.

The art of bonsai originated in China during the Han dynasty (206 BC – 220 AD) and was later adopted and refined by the Japanese. Initially, bonsai was considered a luxury reserved for the elite, but over time, it became more accessible to the general public.

Bonsai has gone through many cultural shifts and stylistic changes throughout its history, but its core principles remain the same: cultivating a living work of art that captures the essence of nature in miniature form.

2. The Origins and History of Bonsai

2.1 Ancient Roots: Bonsai Origins in China

Let’s take a trip back in time to ancient China, where the story of bonsai begins. The concept of growing trees in containers can be traced back to the Chinese practice of penjing, which means “tray scenery.” Penjing involved creating miniature landscapes that included rocks, water features, and yes, you guessed it, trees.

Chinese scholars and artists were captivated by the idea of replicating majestic mountains and ancient forests in a small-scale, portable format. They often used trees like pines, junipers, and cypresses, carefully pruning and training them to achieve the desired form.

2.2 Japanese Influence: Bonsai’s Expansion and Development

During the Tang dynasty (618 – 907 AD), the art of penjing made its way to Japan, where it underwent its own evolution. The Japanese, known for their meticulous attention to detail, took the concept of penjing and transformed it into what we now know as bonsai.

Japanese bonsai enthusiasts brought new techniques and aesthetics to the art form, emphasizing a more naturalistic style and a deeper connection between the tree and its container. Bonsai became an integral part of Japanese culture, with dedicated practitioners devoting their lives to perfecting this living art.

3. Different Types and Varieties of Bonsai Trees

3.1 Traditional Bonsai Styles

Just like there are different fashion styles, bonsai has its own array of “tree fashion” if you will. These various styles follow certain guidelines and techniques to showcase different aspects of a tree’s character. Some of the traditional bonsai styles include formal upright, informal upright, slanting, cascade, and windswept. Each style has its own unique charm, representing different natural growth patterns and environmental conditions.

3.2 Popular Bonsai Varieties

When it comes to bonsai, the variety is the spice of life. There is an extensive range of tree species that can be cultivated as bonsai, each with its own distinct characteristics. From the classic Japanese maple with its delicate foliage to the rugged and resilient juniper, there’s a bonsai tree to suit every taste and skill level. Other popular bonsai varieties include pine, azalea, elm, and ficus, just to name a few. The possibilities are endless!

4. The Art of Bonsai: Techniques and Styles

4.1 Understanding Bonsai Techniques

So, you’re ready to dive into the world of bonsai and create your mini masterpiece. But where do you start? Well, my friend, it all begins with understanding the basic techniques of bonsai cultivation. From pruning and wiring to repotting and root pruning, these techniques are the building blocks of shaping and maintaining a healthy bonsai tree. It may sound daunting, but with a little practice and patience, you’ll soon be pruning like a pro.

4.2 Exploring Bonsai Styles and Aesthetics

Just like a painting or a sculpture, bonsai is a form of artistic expression. The beauty of bonsai lies not only in its techniques but also in its aesthetics. There are different schools of thought when it comes to bonsai design, each emphasizing different aspects of visual balance and harmony. From the minimalist elegance of the Bunjin style to the dynamic and dramatic windswept style, exploring bonsai aesthetics is like embarking on a creative adventure. So, channel your inner artist and let your bonsai tree reflect your unique personality and style.

Now that you’ve learned the origins, types, and techniques of bonsai, it’s time to get your hands dirty and embark on this rewarding journey into the world of miniature trees. Remember, bonsai is not just about tending to plants but also about cultivating patience, mindfulness, and a deep appreciation for the beauty of nature in its tiniest form. Happy bonsai-ing!

5. How to Create Your Own Bonsai Tree

Creating your own bonsai tree is like giving birth to a little green masterpiece. Okay, maybe not quite as dramatic, but it’s definitely a rewarding and artistic process. Here’s a step-by-step guide on how to turn a regular tree into a miniature work of art.

5.1 Selecting the Right Tree Species

Choosing the right tree species for your bonsai is crucial. You want a tree that can thrive in a pot and be easily shaped. Some popular choices include juniper, pine, maple, and ficus. So, step away from the oak tree in your backyard and opt for something more bonsai-friendly.

5.2 Step-by-Step Bonsai Creation Process

Now comes the fun part! Here’s a simplified breakdown of the bonsai creation process:

1. Start with a young, healthy tree sapling or nursery-grown plant.
2. Carefully prune the roots to fit the size of your desired bonsai pot.
3. Repot the tree using a well-draining bonsai soil mixture.
4. Trim the branches to achieve the desired shape and overall aesthetic.
5. Wire the branches gently to encourage them to grow in the desired direction.
6. Regularly water, fertilize, and care for your bonsai to keep it happy and healthy.
7. Be patient and enjoy the rewarding journey as your tree gradually transforms into a stunning bonsai masterpiece.

6. A Comprehensive Guide to Bonsai Tree Care

Congratulations! You’ve successfully created your bonsai tree. Now, it’s time to learn how to keep it flourishing and thriving. Bonsai tree care is more than just giving it a little water now and then. It requires attention to detail and a nurturing touch.

6.1 Essential Care Practices for Bonsai Trees

To give your bonsai the best chance at a long and healthy life, remember these essential care practices:

– Place your bonsai in a spot that receives suitable sunlight for its specific species.
– Water your bonsai regularly, ensuring the soil is moist but not waterlogged.
– Don’t forget to fertilize your bonsai to provide it with essential nutrients.
– Trim and prune your bonsai regularly to maintain its shape and promote healthy growth.

6.2 Watering, Fertilizing, and Pruning Techniques

Proper techniques are key when it comes to watering, fertilizing, and pruning your bonsai. Here are a few tips to keep in mind:

– Water your bonsai thoroughly, allowing the water to soak through the soil and drain out the bottom.
– Use a balanced, slow-release fertilizer specifically formulated for bonsai trees.
– When pruning, always use clean, sharp tools to prevent damage and infection.
– Remember to prune back to a new bud or branch to encourage healthy growth.

7. Common Mistakes to Avoid in Bonsai Tree Care

Now that you know the basics of bonsai tree care, let’s talk about what not to do. We all make mistakes, but when it comes to caring for your miniature tree, there are a few common slip-ups to avoid.

7.1 Overwatering and Underwatering

Finding the right balance of water for your bonsai can be a bit like Goldilocks searching for the perfect porridge. Too much water can drown the roots, while too little water can cause dehydration. Pay attention to your bonsai’s specific water needs and adjust accordingly.

7.2 Pruning Errors and Improper Shaping

Think of pruning as giving your bonsai a stylish haircut rather than hacking away at it like Edward Scissorhands. Improper pruning can stunt growth, weaken the tree, or even lead to irreversible damage. Take your time and make deliberate cuts to achieve the desired shape.

7.3 Common Bonsai Tree Species to Grow

Juniper (Juniperus spp.): The Juniper, an emblem of hardiness, features needle-like leaves and rugged bark. Resilient and adaptable, it thrives in various climates and is a symbol of enduring strength in the bonsai world.

Ficus (Ficus spp.): With its diverse range of species, Ficus is a versatile bonsai choice. Glossy leaves and a propensity for aerial roots characterize these trees, making them suitable for both indoor and outdoor cultivation.

Pine (Pinus spp.): Pines evoke the grandeur of nature in miniature form. Known for their evergreen needles and distinctive cones, they embody strength and longevity, adding an element of timelessness to bonsai landscapes.

Maple (Acer spp.): The Japanese Maple, with its delicate, palmate leaves, brings a touch of elegance to bonsai collections. Its vibrant foliage transforms with the seasons, offering a dynamic display of color throughout the year.

Elm (Ulmus spp.): Elms contribute an air of refinement to bonsai gardens with their fine branches and serrated leaves. These deciduous trees adapt well to pruning, allowing for the creation of intricate designs.

Bonsai Fig (Ficus carica): The Bonsai Fig, a cultural icon, carries a rich history. Known for its broad leaves and twisting trunk, it embodies the artful fusion of nature and human creativity.

Japanese Maple (Acer palmatum): Revered for its captivating foliage, the Japanese Maple graces bonsai collections with its intricate branches and stunning autumnal transformation. Its presence exudes a sense of tranquil beauty.

Crabapple (Malus spp.): A harbinger of delicate blossoms, the Crabapple bonsai delights with its petite flowers and miniature fruit. Symbolic of nature’s ephemeral beauty, it captures fleeting moments in a bonsai setting.

Azalea (Rhododendron spp.): Azaleas burst into a riot of color, adorning bonsai landscapes with their vibrant blooms. These flowering shrubs add a touch of elegance and seasonal spectacle to collections.

Beech (Fagus spp.): Beeches, with their smooth bark and dense foliage, radiate a sense of enduring tranquility. These deciduous trees create a calming presence in bonsai compositions.

Wisteria (Wisteria spp.): Cascading clusters of lavender or white flowers define Wisteria bonsai. Known for their graceful appearance, they bring a sense of flowing elegance to the miniature world of bonsai.

Boxwood (Buxus spp.): Boxwood, prized for its small leaves and dense growth habit, lends itself well to bonsai artistry. Its compact nature makes it a versatile choice for shaping intricate designs.

Pomegranate (Punica granatum): Symbolizing fertility and abundance, the Pomegranate bonsai bears tiny, ornamental fruit. Its small, glossy leaves contribute to a captivating and symbolic display.

Olive (Olea europaea): The Olive bonsai, with its gnarled trunk and silver-green foliage, captures the essence of the Mediterranean landscape. A symbol of peace and endurance, it adds a touch of timeless beauty.

Cotoneaster (Cotoneaster spp.): Cotoneasters, with their delicate leaves and tiny berries, create bonsai scenes of intricate beauty. These deciduous or evergreen shrubs offer diversity in both form and color.

Schefflera (Schefflera arboricola): The Schefflera bonsai, known for its vibrant green leaves and tropical appearance, brings an exotic touch to collections. Its compound leaves and adaptability make it a popular choice.

Trident Maple (Acer buergerianum): Characterized by distinctive three-lobed leaves, the Trident Maple embodies balance and harmony. Its elegant structure and adaptability make it a sought-after species in bonsai cultivation.

Serissa (Serissa foetida): Serissas, with their small leaves and delicate white flowers, create an air of refinement in bonsai compositions. Known for their tolerance of pruning, they allow for intricate designs.

Jade (Crassula ovata): Resilient and symbolic of prosperity, the Jade bonsai, with its fleshy leaves and sturdy trunk, is a favorite among succulent enthusiasts venturing into the world of bonsai.

Rosemary (Rosmarinus officinalis): Infusing bonsai collections with aromatic charm, Rosemary bonsai delights the senses. Its fragrant leaves and compact growth habit make it a unique and flavorful addition to the miniature garden.

How to make bonsai soil?

Okay, so if you’re thinking of getting into bonsai and want to make your own soil mix, here are some unique details that could really make a difference. Firstly, bonsai trees require well-draining soil to prevent root rot and provide adequate oxygenation. A great mix typically consists of three components: akadama, pumice, and lava rock. Akadama is a clay-like substance that retains moisture while allowing excess water to drain away. Pumice, on the other hand, helps retain moisture without becoming too compacted. Lastly, lava rock adds stability and promotes healthy root growth by allowing air circulation within the soil mix. For a basic ratio, you can consider mixing 1 part akadama with 1 part pumice and 0.5 parts lava rock; however, this can be adjusted based on the specific needs of your tree species or personal preference. It’s always best to thoroughly research the requirements of your specific bonsai tree before creating your custom soil mix! Happy planting!

TopicDetails
Ingredients– Akadama soil, Pumice, Lava rock, Organic potting mix
Proportions– Akadama: 1 part, Pumice: 1 part, Lava rock: 1 part, Potting mix: 1 part
Mixing Steps1. Measure each component.
2. Combine in a large container.
3. Mix thoroughly until well-combined.
4. Adjust ratios if needed for specific bonsai species.
Testing Soil– Check drainage by watering the soil and observing runoff.
– Ensure soil retains moisture without becoming waterlogged.
– Adjust proportions based on plant needs and environmental factors.
Storage Tips– Store in a dry, cool place to prevent moisture absorption.
– Keep in an airtight container to maintain freshness.
– Check for any mold or pests before use.
Application– Gently pack the soil around the bonsai’s roots during repotting.
– Top-dress the soil annually to refresh nutrients and improve aeration.
Considerations– Tailor the mix to suit the specific needs of your bonsai species.
– Monitor plant health and adjust soil composition as necessary.

How to start growing a bonsai tree from seed?

Growing a bonsai tree from a seed is a fun and rewarding project. Start by choosing good-quality seeds that match the type of bonsai you want. Follow the instructions for preparing the seeds, like stratification or scarification. Plant the seeds in bonsai soil, keep them moist, and make sure they stay warm. It takes time for the seeds to sprout, so be patient. Once they grow into seedlings, take good care of them by protecting them from too much sun, watering them just right, and introducing fertilizer gradually. As your bonsai tree grows, trim and shape it to create your unique miniature masterpiece. Growing a bonsai from a seed takes time and care, but the end result is a beautiful and one-of-a-kind living artwork.

When to start clipping bonsai tree after growing one from a seed?


After growing a bonsai tree from a seed, it’s essential to allow it to establish a strong root system and develop a sturdy trunk before starting the clipping and shaping process. Generally, you should wait until the bonsai tree has reached a height of about 6 inches (15 centimeters) or has developed several sets of leaves. This may take anywhere from 6 months to a few years, depending on the tree species.

Once your bonsai has reached the desired height and has sufficient foliage, you can begin pruning and shaping. Start by removing any unwanted branches, focusing on maintaining a balanced and aesthetically pleasing structure. Regularly check the tree’s health, and only prune during the growing season, usually in spring or early summer.

Remember to use proper bonsai pruning techniques, including clean cuts with sharp tools, and avoid removing more than a third of the tree’s foliage at once. Patience and gradual shaping will help your bonsai tree develop into a beautiful and well-balanced miniature masterpiece.

How to Repot Bonsai?

Repotting your bonsai is a crucial step in its care routine, ensuring health and vitality. Discover the art of how to repot bonsai with precision. From choosing the right time to executing the process, our guide covers essential steps, materials, and tips for a successful bonsai transplant. Keep your miniature masterpiece thriving with proper repotting techniques.

8. Conclusion: Embracing the Beauty and Serenity of Bonsai Trees

Bonsai trees are more than just tiny plants in cute pots. They represent art, dedication, and a connection to nature. By following the steps to create your own bonsai and caring for it with love, you’ll be able to embrace the beauty and serenity that these miniature trees bring into your life. So, let your green thumb shine and embark on this rewarding bonsai journey today!

In conclusion, bonsai trees offer not just a stunning visual appeal but also a profound connection to nature and the artistry of cultivation. By understanding their origins, exploring different types and styles, mastering the techniques, and providing proper care, you can embark on a rewarding journey with these miniature marvels. Whether you choose to create your own bonsai tree or simply appreciate the art form, embracing the beauty and serenity of bonsai trees is a truly enriching experience. So, let the tranquility and harmony of bonsai trees inspire you as you embark on your own personal bonsai adventure.

FAQ

1. Are bonsai trees difficult to care for?

Bonsai trees do require specific care and attention, but with the right knowledge and commitment, they can be successfully maintained. Understanding their unique watering, pruning, and fertilizing needs is essential for their health and longevity.

2. Can any tree be turned into a bonsai?

While not all tree species are suitable for bonsai cultivation, a wide variety of trees can be transformed into bonsai. Some popular choices include junipers, maples, pines, and ficus trees. It’s important to research the specific requirements of each species before embarking on the bonsai journey.

3. How long does it take to create a bonsai tree?

Creating a bonsai tree is a patient and gradual process. It can take several years, or even decades, to transform a young tree into a mature and well-styled bonsai. The timeline depends on factors such as the desired style, tree species, and the skills of the bonsai artist.

4. Can bonsai trees be kept indoors?

While some bonsai trees can be kept indoors, it’s important to remember that most bonsai trees are outdoor plants that require sunlight, fresh air, and seasonal changes. Some tropical species can thrive indoors, but they still benefit from being placed outdoors periodically to maintain their overall health and vigor.

5. How often should I water my bonsai tree?

The watering frequency may fluctuate based on the bonsai tree species and its surroundings. Typically, you should water your bonsai when the upper layer of soil exhibits a slight dryness. Overwatering should be avoided, as it may result in root rot. Keep in mind that it’s preferable to underwater rather than overwater.

How to Grow and Care for Juniper Bonsai

Welcome to the world of Juniper Bonsai, a fascinating and rewarding art form that combines horticulture and aesthetics. Juniper Bonsai is derived from the Juniperus genus of trees and shrubs, known for their resilience and ability to thrive in various climates. These miniature trees, meticulously grown and shaped, encapsulate the beauty and tranquility of nature in a small, captivating package. In this article, we will explore the art of growing and caring for Juniper Bonsai, covering everything from selecting the right variety to pruning techniques and pest management. Whether you are a seasoned bonsai enthusiast or a beginner looking to embark on this journey, this guide will provide you with the essential knowledge to nurture and cultivate your own stunning Juniper Bonsai tree.

1. Introduction to Juniper Bonsai

1.1 What is Juniper Bonsai?

If you’ve ever wanted a tree that fits on a coffee table, then juniper bonsai is your new best friend. Juniper bonsai is a miniature version of the iconic juniper tree, carefully cultivated to fit in a small pot. It’s like having a tiny forest in your own home, except with less wildlife and more pruning.

1.2 History and Significance of Juniper Bonsai

Juniper bonsai has a rich history spanning centuries. Originating in China and later popularized in Japan, these tiny trees have been cherished for their aesthetic beauty and symbolic significance. In the world of bonsai, juniper bonsai is often revered for its resilience, longevity, and ability to withstand harsh conditions. It’s like the Chuck Norris of the bonsai world, except with more finesse and fewer roundhouse kicks.

2. Selecting the Right Juniper Bonsai Variety

2.1 Understanding Different Juniper Bonsai Varieties

Just like there are different flavors of ice cream, there are different varieties of juniper bonsai. From the versatile Juniperus procumbens to the elegant Juniperus rigida, each variety brings its own unique characteristics to the bonsai table. It’s like assembling a diverse squad of miniature trees, ready to impress your guests and make your neighbors jealous.

2.2 Factors to Consider when Choosing a Juniper Bonsai

Choosing the right juniper bonsai is like finding the perfect partner compatibility is key. Factors to consider include the growth pattern, foliage type, and overall shape of the tree. Make sure you find a juniper bonsai that matches your aesthetic preferences and fits well with the space you have available. It’s like finding the yin to your yang, but with less soul-searching and more horticulture.

3. Essential Tools and Materials for Juniper Bonsai Care

3.1 Basic Tools for Juniper Bonsai Care

To care for your juniper bonsai, you’ll need a few basic tools. These include concave cutters for precise pruning, wire cutters for shaping branches, and a pair of chopsticks for those important bonsai conversations. Okay, maybe not the last one, but it’s always good to have chopsticks nearby for a quick snack break.

3.2 Required Materials for Juniper Bonsai Care

Apart from tools, you’ll also need some materials to keep your juniper bonsai happy. This includes a well-draining soil mix, a bonsai pot to showcase your tree’s swag, and some wire for training those branches to strike a pose. Think of it as a mini spa day for your bonsai, complete with a trendy pot and a soil massage.

4. Proper Placement and Sunlight Requirements

4.1 Identifying Optimal Placement for Juniper Bonsai

Finding the perfect spot for your juniper bonsai is like playing a game of bonsai hide-and-seek. You’ll want to place it somewhere that provides a balance of light and shade, avoiding extreme temperature fluctuations and drafty spots. Think of your juniper bonsai as a diva that prefers the Goldilocks zone—not too hot, not too cold, just right.

4.2 Understanding Sunlight Needs for Juniper Bonsai

Sunlight is like fuel for your juniper bonsai—it needs just the right amount to thrive. Most juniper bonsai varieties love a good dose of direct sunlight, but be careful not to fry them like an overcooked pancake. Keep an eye on their sunbathing sessions and make sure they get enough shade breaks to prevent sunburn. It’s like finding the perfect balance between a solar panel and a beach umbrella.

Now that you’re armed with the basics of growing and caring for juniper bonsai, it’s time to embark on your miniature tree journey. Remember, bonsai care is a combination of art and science, but with a dash of whimsy thrown in. So grab your tools, embrace your inner bonsai artist, and let your juniper bonsai thrive!

5. Watering and Fertilizing Juniper Bonsai

5.1 Watering Techniques for Juniper Bonsai

Watering your Juniper bonsai is like finding the perfect balance in a relationship. Too much water, and it may drown; too little, and it may wither away. So, how do you know when and how much to water?

The key is to keep the soil moist but not soggy. Stick your finger into the soil about an inch deep, and if it feels dry, it’s time to water. Use a watering can or a gentle spray nozzle to ensure even watering throughout the pot.

Remember, Juniper bonsai prefers well-drained soil, so avoid overwatering or letting it sit in a tray of water. And don’t be surprised if your Juniper bonsai demands a little extra hydration during the hot summer months.

5.2 Fertilizing Guidelines for Juniper Bonsai

Juniper bonsai, like a diva, needs its fair share of nutrients to stay healthy and vibrant. Fertilizing is like giving it a mini spa treatment to keep it looking its best.

Use a balanced, organic fertilizer specifically formulated for bonsai trees. During the growing season from spring to autumn, feed your Juniper bonsai every two weeks. But hold back during winter when it’s taking a well-deserved rest, and fertilize only once every two months.

Remember, bonsai trees are like high-maintenance houseplants. So, be sure not to overdo the fertilizer, as it can lead to burnt roots. Follow the instructions on the packaging, and your Juniper bonsai will thank you with lush greenery.

6. Pruning and Shaping Techniques

6.1 Importance of Pruning for Juniper Bonsai

If your Juniper bonsai were a hairstyle, pruning would be the equivalent of going to the salon for a trim. It enhances the tree’s shape, encourages new growth, and keeps it looking sharp.

Regular pruning allows you to maintain the desired shape and size of your Juniper bonsai. Remove any dead, diseased, or damaged branches, and thin out dense areas to improve airflow and sunlight penetration. This will help keep your tree healthy and prevent pests and diseases from taking hold.

Pruning is best done during the active growth period in spring or early summer. Remember to use sharp, clean tools and sterilize them between cuts to avoid spreading any potential diseases.

6.2 Different Shaping Techniques for Juniper Bonsai

Shaping your Juniper bonsai is like sculpting a masterpiece. You have the power to transform it into various styles, depending on your artistic vision.

Some popular shaping techniques for Juniper bonsai include the formal upright style, informal upright style, cascade style, and windswept style. Each style requires careful wiring, bending, and trimming to achieve the desired look.

Remember, shaping a bonsai takes time and patience. Don’t rush the process, and let your creativity shine through. With a little practice, you’ll soon become a bonsai hairstylist extraordinaire.

7. Preventing and Managing Juniper Bonsai Pests and Diseases

7.1 Common Pests Affecting Juniper Bonsai

Pests are like unwanted guests crashing a party—annoying and potentially destructive. Protect your Juniper bonsai by keeping an eye out for these common pests that may try to join the party:

  • Spider mites: These tiny arachnids suck the sap from the leaves, causing yellowing and webbing.
  • Scale insects: These sneaky insects attach themselves to the branches and suck out the plant’s juices, leading to weakened growth.
  • Aphids: These tiny, sap-sucking insects can multiply quickly and cause leaf curling and general decline.

7.2 Effective Pest Prevention and Control Measures

To prevent these uninvited guests from wreaking havoc on your Juniper bonsai, regularly inspect the foliage and branches. If you spot any pests, act swiftly!

Start by gently washing the affected areas with a spray of water to dislodge the pests. For persistent infestations, you can use an organic insecticidal soap or horticultural oil spray. Just remember to follow the instructions carefully to avoid harming your bonsai.

Prevention is key, so maintain a clean and healthy growing environment for your Juniper bonsai. Remove any dead leaves or debris that may attract pests, and avoid overcrowding your bonsai with other plants.

7.3 Identifying and Treating Juniper Bonsai Diseases

Diseases can hit your Juniper bonsai like a bad case of the flu. Keep an eye out for these common diseases and take appropriate action to nurse your bonsai back to health:

  • Cedar apple rust: This fungal disease causes orange, gelatinous growths on the branches and affects both the Juniper bonsai and nearby apple trees.
  • Phomopsis tip blight: This fungal disease causes browning and dieback of the tips of branches, leading to an overall decline in the tree’s health.

If you suspect your Juniper bonsai has a disease, promptly remove and destroy the affected branches or foliage. Avoid overwatering and ensure good airflow around the tree. If the problem persists, consult a local horticulturist or bonsai expert for specific treatment options.

8. Repotting and Root Maintenance for Juniper Bonsai

8.1 When and How to Repot a Juniper Bonsai

Repotting your Juniper bonsai is like giving it a fresh start in a bigger home. It provides the tree with fresh soil, promotes healthy root growth, and prevents it from becoming root-bound.

The best time to repot your Juniper bonsai is in early spring, just before the growing season begins. Carefully remove the tree from its pot, trim any circling roots, and repot it into a slightly larger container. Use well-draining bonsai soil to ensure proper water retention and airflow.

Remember, repotting can be stressful for your bonsai, so be gentle and avoid disturbing the root ball too much. After repotting, place your bonsai in a shaded area for a few weeks to allow it to recover before gradually reintroducing it to full sunlight.

8.2 Proper Root Maintenance Techniques

Root maintenance is like providing your Juniper bonsai with a comfortable pair of shoes. It ensures healthy root development and overall vitality.

Regularly check the roots of your Juniper bonsai to make sure they’re not growing out of control. Trim any long or tangled roots, and gently comb out the root ball with a root rake to separate and aerate the roots.

Remember to repot your Juniper bonsai every two to three years to keep it happy and prevent it from becoming root-bound. And don’t forget to reward your bonsai with a little extra fertilizer after repotting to help it recover and grow strong.

In conclusion, growing and caring for Juniper Bonsai is an art form that requires patience, skill, and a deep appreciation for nature’s beauty. By following the guidelines outlined in this article, you can embark on a fulfilling journey of tending to these miniature trees, watching them thrive and evolve over time. Remember to enjoy the process and embrace the unique character of each Juniper Bonsai variety. With proper care and attention, your Juniper Bonsai can become a stunning centerpiece, bringing a sense of tranquility and natural harmony to your living space. Happy bonsai gardening!

FAQ

1. Can I grow Juniper Bonsai indoors?

While it is possible to grow Juniper Bonsai indoors, it is important to note that Junipers thrive in outdoor conditions. They require direct sunlight and proper airflow to thrive. If growing indoors, ensure that you place the bonsai near a bright window or provide supplemental grow lights to mimic natural sunlight.

2. How often should I water my Juniper Bonsai?

The watering frequency for Juniper Bonsai depends on several factors, including the climate, pot size, and soil type. As a general rule, it is best to water thoroughly when the topsoil appears dry, but before the tree becomes completely dry. Check the moisture level by inserting a finger into the soil to ensure it is moist but not waterlogged.

3. Do Juniper Bonsai require special soil or fertilizer?

Juniper Bonsai thrive in well-draining soil that allows water to flow freely. A mix of bonsai-specific soil, such as Akadama, pumice, and lava rock, is ideal. As for fertilizer, a balanced bonsai fertilizer is recommended, applied during the growing season. Follow the instructions on the fertilizer package and avoid over-fertilization, which can harm the tree.

4. How often should I prune and shape my Juniper Bonsai?

Pruning and shaping frequency depends on the growth rate and desired shape of your Juniper Bonsai. Regular pruning is necessary to maintain its shape and enhance ramification. It is best to prune during the active growing season, typically in spring or early summer. However, avoid excessive pruning, as it may weaken the tree. Consult pruning guides or seek guidance from experienced bonsai enthusiasts to develop and maintain the desired shape of your Juniper Bonsai.