Which Bonsai Tree Is Good For Home?

Bonsai trees, with their intricate beauty and captivating presence, have become increasingly popular as a unique form of indoor and outdoor decor. These miniature trees, carefully cultivated and pruned to mimic their larger counterparts, offer a sense of tranquility and natural elegance to any home. Choosing the right bonsai tree for your living space involves consideration of various factors such as species, care requirements, and available space. In this comprehensive guide, we will explore the world of bonsai trees and delve into which types are best suited for home environments. Whether you are a seasoned bonsai enthusiast or a beginner looking to embark on a new botanical journey, this article will provide you with valuable insights to help you select the perfect bonsai tree for your home.

I. Introduction to Bonsai Trees

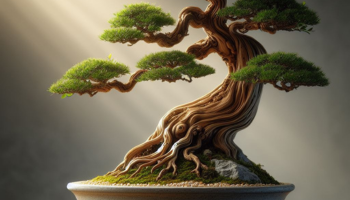
Welcome to the wonderful world of bonsai trees! These miniature trees have captured the hearts of plant enthusiasts around the globe. Derived from the Japanese words “bon” (tray) and “sai” (planting), bonsai refers to the art of growing and shaping small trees in pots. These tiny living sculptures can bring nature’s beauty right into your home.

II. Benefits of Having a Bonsai Tree at Home

1. Aesthetic Appeal and Natural Decor

Imagine having a living piece of art sitting on your windowsill or adorning your coffee table. Bonsai trees add a touch of elegance and natural beauty to any living space. Their intricate forms and delicate foliage create a serene and calming atmosphere that is hard to replicate with any other indoor plant.

2. Stress Relief and Mental Well-being

In today’s fast-paced world, finding moments of tranquility can be a challenge. Bonsai trees offer a therapeutic escape from the chaos. Taking care of these mini trees requires patience and mindful attention, which can help reduce stress and promote mental well-being. It’s like having your own little Zen garden right at home.

3. Learning Patience and Mindfulness

Growing a bonsai tree is no easy feat. It requires dedication, patience, and a gentle touch. As you care for your bonsai, you’ll learn to appreciate the beauty of slow growth and the art of shaping and pruning. It’s a wonderful practice in patience and mindfulness, allowing you to connect with nature on a deeper level.

III. Factors to Consider When Choosing a Bonsai Tree for Home

1. Indoor or Outdoor Bonsai

Before diving into the world of bonsai, you need to decide if you want an indoor or outdoor bonsai tree. Indoor bonsai trees thrive in moderate light conditions and are more suitable for those living in apartments or houses with limited outdoor space. Outdoor bonsai trees, on the other hand, require specific climate conditions and should be placed outside for most of the year.

2. Size and Space Requirements

Consider the size of your living space and the amount of time and effort you’re willing to invest in maintaining your bonsai. Some trees can grow quite large, while others remain small and compact. Make sure you choose a bonsai tree that fits well with your available space and lifestyle.

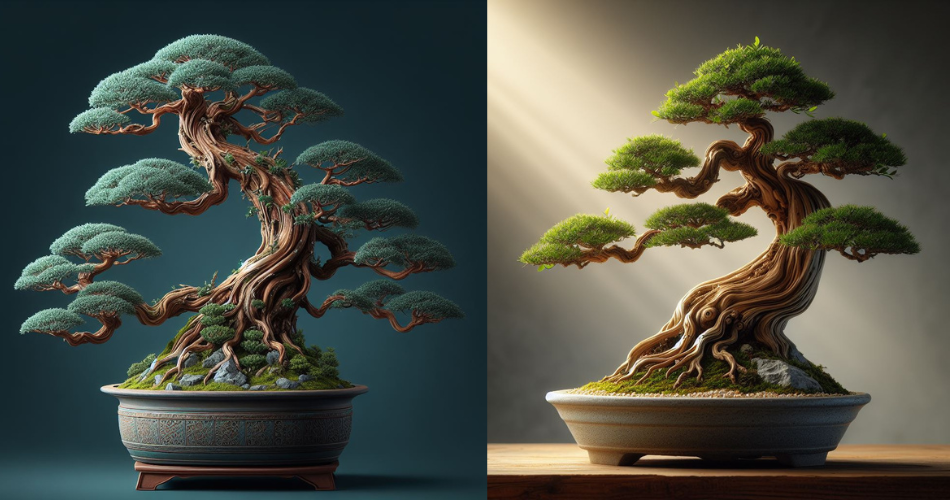
3. Species and Characteristics

Each bonsai tree species has its own unique characteristics and care requirements. Some trees prefer bright sunlight, while others thrive in shadier conditions. Research the specific needs of the bonsai tree species you’re interested in to ensure it will thrive in your home environment.

4. Level of Care and Maintenance

Consider your level of experience and commitment to caring for a bonsai tree. Some species are more forgiving and tolerant of beginner mistakes, while others demand more attention and expertise. Be honest with yourself about your green thumb skills and choose a bonsai tree that matches your capabilities.

IV. Top Recommended Bonsai Trees for Home

1. Juniper Bonsai

If you’re a bonsai beginner, the Juniper bonsai is a fantastic choice. Known for its hardy nature and impressive resilience, this tree can handle a wide range of growing conditions. Its distinctive needles and rugged appearance make it a timeless classic in the bonsai world.

2. Ficus Bonsai

For those seeking an indoor bonsai tree, the Ficus bonsai is an excellent option. With its glossy leaves and flexible trunk, the Ficus is a visually captivating addition to any room. It is also a forgiving tree that tolerates lower light conditions, making it ideal for beginners.

3. Chinese Elm Bonsai

The Chinese Elm bonsai is a popular choice for bonsai enthusiasts due to its small leaves and graceful branches. This tree thrives both indoors and outdoors, making it a versatile option. Its ability to withstand a variety of conditions and adaptability to different bonsai styles make it a fantastic choice for beginners and experienced growers alike.

4. Jade Bonsai

If you’re looking for a unique and exotic bonsai tree, the Jade bonsai is worth considering. This succulent tree has thick, fleshy leaves and a distinctive trunk that gives it a striking appearance. Jade bonsai trees are relatively easy to care for, making them suitable for beginners or anyone with a busy lifestyle.

Now that you know the ins and outs of choosing a bonsai tree for your home, it’s time to let your creativity flourish and bring a little slice of nature indoors. Happy bonsai tree hunting!

V. Care and Maintenance Tips for Home Bonsai Trees

1. Watering and Humidity Control

When it comes to watering your home bonsai tree, strike a balance between drowning it and leaving it thirsty for days. You don’t want your bonsai to turn into a desert cactus or a flooded swimming pool. Take the time to understand the specific watering needs of your bonsai tree species. And remember, just because you’re on vacation doesn’t mean your bonsai is. Find a reliable bonsai babysitter who knows how to keep the hydration levels just right.

2. Pruning and Shaping Techniques

Pruning and shaping your bonsai tree is like giving it a stylish haircut. But be careful not to go too Edward Scissorhands on it. Take it slow and steady, and resist the urge to turn your bonsai into a bonsai dinosaur or a bonsai hedgehog. Consult a bonsai expert or YouTube tutorial to learn the art of gentle pruning and shaping. You’ll create a gorgeous masterpiece without scaring your bonsai into an existential crisis.

3. Soil and Fertilizer Requirements

Your bonsai tree has a delicate relationship with soil and fertilizer, much like you and your morning coffee. Use a well-draining soil mix that provides enough nutrients without turning your bonsai into a fertilizer junkie. Think of it as a balanced diet for your tree. And remember, moderation is key. Don’t overfeed your bonsai or let it become malnourished. Keep a watchful eye on its growth and adjust the feeding schedule accordingly.

4. Sunlight and Temperature Considerations

Sunlight and temperature preferences vary among bonsai tree species, just like your preferences for beach or ski vacations. Some bonsai trees thrive in bright, indirect light, while others prefer a cozy spot away from direct sunlight. Make sure to read up on the specific needs of your bonsai when it comes to lighting and temperature. And don’t forget, your bonsai isn’t a houseplant; it can’t handle extreme temperature fluctuations like a champ. Keep it away from drafty windows and air-conditioning vents, and you’ll have a happy, sun-kissed bonsai.

VI. Common Mistakes to Avoid with Home Bonsai Trees

1. Overwatering or Underwatering

Water, water everywhere, but not a drop for your bonsai. Or maybe a little too much water, drowning the poor thing. Finding the right balance is crucial. Avoid overwatering or underwatering, as both can lead to disastrous consequences for your bonsai. Think of it as finding the sweet spot between a waterlogged rainforest and a parched desert.

2. Improper Pruning and Wiring

Pruning and wiring your bonsai tree is an art form. But be careful not to turn it into a botched painting by going overboard. Improper pruning can weaken the tree and make it vulnerable to pests and diseases. And as for wiring, don’t turn your bonsai into a bonsai contortionist. Be gentle and avoid tight wiring that can dig into the branches like a pair of overly tight pants. Your bonsai will thank you for being a kind and fashionable gardener.

3. Neglecting Soil Quality

You wouldn’t build a house on quicksand, so don’t expect your bonsai tree to thrive on subpar soil. Make sure you use a quality soil mix that provides proper drainage and nutrients. Cheap and poorly draining soil is like serving your bonsai a meal of fast food and soda – it might survive for a while, but it won’t be healthy. Invest in good soil for a happy and vibrant bonsai.

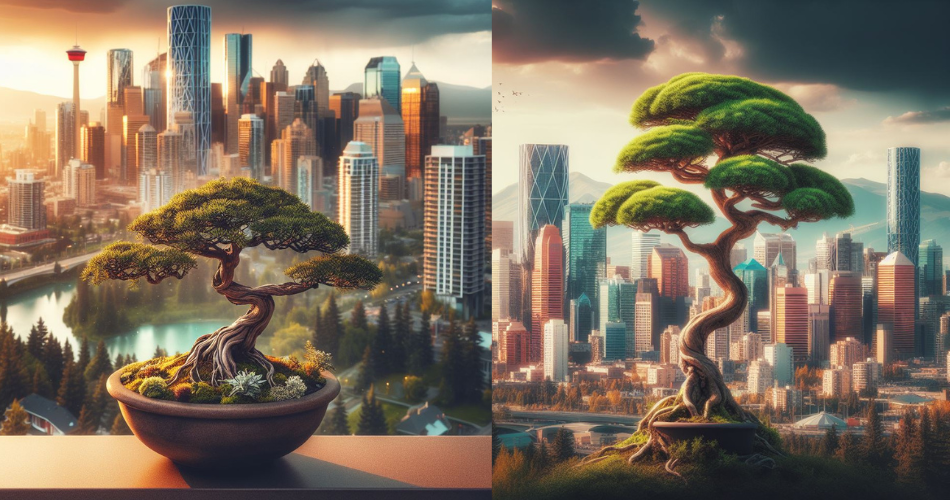
VII. Creating a Bonsai Tree Display in Your Home

Creating a bonsai tree display in your home is like decorating a mini art gallery. Choose a beautiful bonsai pot that complements your tree’s style and personality. Consider the overall aesthetic and find a spot that allows your bonsai to shine without being overshadowed by other decor. And don’t forget to admire your masterpiece from different angles, just like you’d appreciate a work of art. After all, your bonsai is a living masterpiece that deserves to be displayed with pride.

VIII. Conclusion and Final Thoughts on Choosing a Bonsai Tree for Home

Choosing a bonsai tree for your home is an exciting journey filled with challenges, rewards, and a touch of artistic expression. Remember to consider factors like space, care requirements, and your personal taste when selecting a bonsai. And most importantly, have fun with it! Bonsai tree care is an ongoing adventure that requires patience, dedication, and a sense of humor. So go forth, embrace the bonsai spirit, and let your home flourish with the beauty of these miniaturized marvels.

VIII. Conclusion and Final Thoughts on Choosing a Bonsai Tree for Home

In conclusion, incorporating a bonsai tree into your home can bring a touch of nature and serenity to your living space. By considering factors such as indoor or outdoor suitability, size, species, and care requirements, you can choose a bonsai tree that aligns with your preferences and lifestyle. Remember to provide the necessary care and attention to ensure the health and longevity of your bonsai tree. With proper maintenance and a little patience, your bonsai tree will flourish and become a cherished part of your home. So go ahead and embark on this delightful journey of bonsai cultivation, and enjoy the rewards of having a unique and captivating living work of art right in your own home.

FAQ

1. Can I keep a bonsai tree indoors?

Yes, certain bonsai tree species are well-suited for indoor environments. It is important to choose indoor-friendly species that can thrive with lower light levels and controlled temperature and humidity conditions.

2. How often should I water my bonsai tree?

The watering frequency for bonsai trees varies depending on factors such as the species, pot size, and environmental conditions. Generally, it is recommended to water the bonsai tree when the top inch of soil feels slightly dry. Overwatering or underwatering can be detrimental to the health of the tree, so it is essential to find the right balance.

3. Do bonsai trees require special care compared to regular potted plants?

Yes, bonsai trees require specialized care due to their unique nature and miniature size. They need regular pruning and shaping to maintain their desired form, as well as specific soil mixes and fertilizers to provide the necessary nutrients. Additionally, they may require occasional wiring to guide the growth. Understanding the specific needs of your bonsai tree is crucial for its overall health and longevity.

4. Can I create a bonsai tree display in a small living space?

Absolutely! Bonsai trees are ideal for small living spaces as they can be grown in various sizes and shapes. You can choose compact species or utilize techniques such as pruning and wiring to maintain a miniature form. Additionally, bonsai trees can be displayed on windowsills, shelves, or even as a centerpiece on a coffee table, making them versatile and adaptable for any home.

The Art of Bonsai: Navigating 10 Bonsai Mistakes with Ease

Bonsai cultivation is a challenging and rewarding art that requires patience, dedication, and knowledge. As a bonsai enthusiast, I have learned that mistakes are an inevitable part of the learning process. In fact, making mistakes is essential to improving your skills, as it allows you to identify weaknesses and areas for improvement.

In this article, I will share my insights and experience on some of the most common bonsai mistakes and provide guidance on how to navigate them successfully. From selecting the right tree species to pruning, wiring, soil composition and watering frequency, there are a variety of practices that can lead to mistakes. By understanding these mistakes and how to avoid them, you can take your bonsai cultivation to the next level.

Key Takeaways

  • Mistakes are an essential part of the bonsai learning process
  • 10 common bonsai mistakes include over-pruning, incorrect branch selection, improper soil composition, under and over-watering, and watering frequency
  • Understanding bonsai basics like species selection and pruning techniques is crucial to success
  • Proper bonsai soil and watering are vital for a healthy, growing tree
  • Patience, practice and a willingness to learn will help you navigate bonsai mistakes like a pro

Understanding Bonsai Basics

As I continue this journey in bonsai cultivation, let’s get to the root of what makes a bonsai thrive. Understanding Bonsai Basics is key if you want to create and maintain a healthy and beautiful plant.

Selecting the right tree species

Not all trees are ideal for bonsai. Choose species that are hardy, small-leaved, and easy to maintain for a beginner. Consider the needs of the tree and its adaptability to the environment.

The importance of soil and watering

Bonsai soil must be a well-draining mix that doesn’t hold too much water. Be mindful of when the plant needs watering, and avoid watering during extreme weather conditions. A thorough watering every one to two weeks should suffice.

The role of pruning and wiring in shaping a bonsai tree

Regular pruning encourages the plant’s growth, shape and structure. Wiring can be used to bend branches and shape the tree as it grows. These techniques should be used with care and caution, as over-pruning can lead to a weakened and unhealthy tree.

“Bonsai is not a race, it’s a journey. Enjoy the process and learn from your mistakes.” – Kathy Shaner

Avoiding Common Pruning Pitfalls

Correct pruning is critical to shaping a bonsai tree and maintaining its health. However, novice bonsai enthusiasts often make mistakes when it comes to pruning. Some of the most common pruning mistakes include:

  • Over-pruning, which can weaken the tree and damage its structure
  • Choosing the wrong branches to prune, which can result in an imbalanced appearance
  • Pruning at the wrong time of year, which can cause stress to the tree and lead to slower growth

To avoid these pruning pitfalls, it is essential to have a clear understanding of the specific needs of your bonsai species. Regular observation and assessment of the tree’s growth patterns can help you determine the appropriate pruning timing and techniques. Remember to only prune as much as necessary, selecting branches that will enhance the tree’s overall appearance and avoiding excessive cutting that can harm the tree.

Pro tip: Be patient in your pruning efforts, as it can take time to see the full effects of your work. Always err on the side of caution, and stop pruning before you do permanent damage to the tree.

“When pruning, always keep in mind the balance of the overall tree structure. Don’t be afraid to visualize the final shape and carefully plan your cuts.”

Troubleshooting Soil and Watering Mistakes

When it comes to growing a healthy and beautiful bonsai tree, the right soil composition and proper watering techniques are essential. Unfortunately, novices often struggle with these aspects, leading to soil and watering mistakes that can harm the tree’s health and growth. In this section, I’ll explore the most common soil and watering mistakes in bonsai cultivation and provide practical solutions to overcome them.

Soil Composition Mistakes

One of the most significant mistakes novice bonsai enthusiasts make is using the wrong soil composition. Many people think that any type of soil will work for a bonsai tree, but this is not the case. The roots of a bonsai tree need proper nutrition, aeration, and drainage to grow and thrive, which means the soil composition must be carefully selected. Common mistakes include using regular potting soil or garden soil that is too heavy and dense, or using soil that lacks essential nutrients.

To avoid soil composition mistakes, it’s crucial to select the appropriate bonsai soil mix. A good bonsai soil mix typically consists of components like akadama, pumice, and lava rock, which provide the ideal balance of aeration, drainage, and moisture retention. Beginner bonsai enthusiasts can use pre-mixed bonsai soil, which is readily available at nurseries and garden centers, to avoid making soil composition mistakes.

Under-Watering and Over-Watering

Another common issue with novice bonsai enthusiasts is under-watering or over-watering the tree. Both of these mistakes can be detrimental to the tree’s health, leading to root rot or dehydration.

Under-watering is more common in the summer months and occurs when the soil becomes too dry. Signs of under-watering include wilted leaves, dry soil, and yellowing of the foliage. To avoid under-watering, ensure that the soil remains moist and regularly check the tree’s water requirements, particularly during hot weather.

Over-watering, on the other hand, is more common in the winter months when the tree’s water requirements are lower. Over-watering happens when the soil becomes too saturated and the tree’s roots don’t receive enough oxygen. Signs of over-watering include yellowing or browning of the leaves, mold or fungus growth, and a foul smell. To avoid over-watering, it’s important to water the tree only when the soil has completely dried, and ensure proper drainage to prevent the soil from becoming too compact.

Frequency of Watering

Finally, another common mistake is watering the tree too frequently or infrequently. The frequency of watering depends on factors like the tree species, soil composition, and weather conditions, and can vary significantly.

As a general rule, it’s essential to water the tree when the soil is dry to the touch, but not bone dry. However, each tree’s water requirements can differ, and it’s essential to learn to read your tree and adjust the watering frequency accordingly.

Bonsai Mistakes Conclusion: Navigating Bonsai Mistakes Summary

Throughout this article, I have discussed the art of bonsai and how mistakes can be a natural part of the learning process. It’s important to remain patient and stay committed to learning from our mistakes as we navigate the world of bonsai cultivation.

We covered 10 common bonsai mistakes that novice enthusiasts often make, including problems related to watering, soil composition, pruning, and wiring. By understanding these common pitfalls, we can avoid making the same mistakes and begin to grow healthy, vibrant bonsai trees.

Remember, bonsai cultivation takes time and practice. While it can be frustrating to encounter setbacks, it’s important to view these moments as opportunities to learn and improve. By embracing a growth mindset and remaining committed to the process, we can develop a deep appreciation for the beauty and artistry of bonsai cultivation.

Thank you for taking the time to learn more about bonsai and how to navigate common mistakes. I hope this article has been helpful and informative, and that it inspires you to continue exploring this ancient artform for years to come.

FAQ

What is bonsai?

Bonsai is a traditional Japanese art form involving the cultivation and shaping of miniature trees in pots. It is a meticulous practice that requires careful attention to detail and artistic vision.

Are mistakes common in bonsai cultivation?

Yes, mistakes are an inevitable part of learning and growing as a bonsai enthusiast. They can occur at any stage of the bonsai cultivation process, but with the right knowledge and guidance, they can be navigated successfully.

What are some common bonsai mistakes?

Some common bonsai mistakes include over-watering, incorrect pruning techniques, improper soil composition, and selecting the wrong tree species for a specific climate.

How can I navigate bonsai mistakes?

Navigating bonsai mistakes requires patience, practice, and a willingness to learn from your errors. It is essential to educate yourself about the basic principles of bonsai, seek guidance from experienced bonsai growers, and embrace the process of experimentation and refinement.

What are the fundamentals of bonsai?

The fundamentals of bonsai include selecting the right tree species, understanding the importance of soil and watering, and mastering pruning and wiring techniques to shape and maintain a bonsai tree’s aesthetics.

What are some common pruning mistakes in bonsai cultivation?

Some common pruning mistakes in bonsai cultivation include over-pruning, selecting improper branches to remove, and pruning at the wrong time of year. These mistakes can impact the overall health and shape of the bonsai tree.

How can I avoid pruning pitfalls in bonsai cultivation?

To avoid pruning pitfalls, it is crucial to study proper pruning techniques, understand the appropriate timing for pruning different tree species, and gradually refine your skills through practice and observation.

What are the challenges related to bonsai soil and watering?

Bonsai soil and watering present challenges such as improper soil composition, under-watering, over-watering, and determining the right frequency of watering. These factors significantly impact the health and growth of a bonsai tree.

How can I troubleshoot soil and watering mistakes in bonsai cultivation?

Troubleshooting soil and watering mistakes involves understanding the specific needs of the tree species you are cultivating, using well-draining bonsai soil, monitoring soil moisture levels, and adjusting watering practices accordingly.

How to Grow Your Own Avocado Bonsai Tree at Home

If you’re a plant enthusiast and looking for a unique addition to your indoor garden, growing your own avocado bonsai tree might be just what you need. Not only does it add life and beauty to your space, but it’s also a fun and rewarding experience.

Cultivating an avocado bonsai tree at home requires some patience and dedication but is relatively easy once you know the steps. In this article, I will guide you through the process of growing and caring for your own avocado bonsai tree.

Key Takeaways:

  • Growing an avocado bonsai tree is a fun and rewarding experience.
  • It requires patience and dedication but is relatively easy once you know the steps.
  • Cultivating an avocado bonsai tree at home allows you to enjoy the beauty of this miniature tree in your own space.
  • Choosing the right avocado variety is crucial for successful bonsai cultivation.
  • Proper care, including watering and pruning, is necessary for the healthy growth of the plant.

Choosing the Right Avocado Variety for Bonsai

Avocados are a popular fruit, but not all of them are well-suited for bonsai cultivation. It’s important to choose the right variety that can thrive in a miniature environment.

When selecting an avocado bonsai tree, consider the size of the tree’s leaves. Generally, smaller leaves lend themselves better to bonsai pruning and shaping. Some recommended varieties for avocado bonsai include:

  • Hass: A popular variety with small, dark green leaves and a compact growth habit. It also produces delicious fruit.
  • Fuerte: Another popular variety with medium-sized, oval leaves. It’s a hardy tree that can adapt well to different growing conditions.
  • Bacon: This variety has a unique growth habit that lends itself well to bonsai cultivation. Its leaves are slightly larger than other varieties but can still be pruned and shaped effectively.

It’s also important to consider the climate in which the avocado variety will be grown. Some varieties may not do well in colder temperatures or high humidity.

By selecting the right avocado variety, you’ll increase your chances of successfully growing a healthy and beautiful bonsai tree.

Planting and Caring for Your Avocado Bonsai Tree

Now that you have selected the right avocado variety, it’s time to plant and care for your bonsai tree. Follow these step-by-step instructions to ensure healthy growth:

Planting

Choose a pot that’s at least 8 inches in diameter and filled with well-draining soil. Plant your tree in the soil, making sure the root ball is level with the soil surface. Water the soil thoroughly.

Pruning

Trim back the top of your tree to just above a leaf bud. This will encourage bushier, fuller growth. Trim back any branches that grow too long or cross over other branches.

Watering

Water your avocado bonsai tree regularly, but avoid overwatering. Check the moisture level of the soil using a moisture meter and water when the top inch feels dry.

Maintenance Tips

Avocado bonsai trees thrive in bright, indirect sunlight. Place your tree near a sunny window and rotate it every few days to ensure even growth. Fertilize your tree with a balanced houseplant fertilizer every two to three months.

With these tips, you can maintain a healthy and thriving avocado bonsai tree. Keep monitoring your tree’s growth and adjust your care as necessary.

Troubleshooting Common Issues with Avocado Bonsai Trees

Despite your best efforts, your avocado bonsai tree may run into some common issues. Pests, diseases, and nutrient deficiencies can all affect the health and growth of your plant. It’s important to identify these problems early and take appropriate measures to address them.

Common Problems

Here are some of the most common issues you may encounter with your avocado bonsai:

  • Yellowing leaves: This can be a sign of nutrient deficiency or overwatering.
  • Brown spots: This could be due to fungal diseases or pests.
  • Pest infestation: Spider mites and thrips are common pests that can affect avocado bonsai trees.

Troubleshooting Tips

If you notice any of these issues, here are some troubleshooting tips to help you get your avocado bonsai tree back on the right track:

  1. Check soil moisture: Make sure you’re not overwatering your tree and that the soil isn’t too dry.
  2. Nutrient deficiency: Use a fertilizer specifically designed for avocado trees or try adding an organic compost to the soil.
  3. Pest control: Use an insecticidal soap or neem oil to control pests.
  4. Disease control: Remove affected leaves or branches and use a fungicide to control fungal diseases.

By following these tips, you’ll be able to troubleshoot and resolve common issues with your avocado bonsai tree.

Conclusion

In conclusion, growing an avocado bonsai tree can be a delightful and engaging activity for any plant enthusiast. By following the steps and techniques outlined in this article, you can successfully cultivate your own homegrown avocado bonsai tree. Remember to carefully choose the right avocado variety for bonsai, provide the necessary care and maintenance, and troubleshoot any potential issues that may arise.

With patience and dedication, you can watch your avocado bonsai tree grow and transform into a stunning miniature tree that adds life and vibrancy to any space in your home. So why wait? Start your avocado bonsai journey today and enjoy the beauty of this fascinating plant!

FAQ

How long does it take for an avocado bonsai tree to grow?

The growth rate of an avocado bonsai tree can vary depending on various factors such as the variety, growing conditions, and care provided. On average, it takes about 3-5 years for an avocado bonsai tree to grow and develop into a mature tree.

What are the best avocado varieties for bonsai?

Some recommended avocado varieties for bonsai cultivation include ‘Hass,’ ‘Bacon,’ ‘Fuerte,’ and ‘Reed.’ These varieties are known for their compact growth habit and adaptability to bonsai techniques.

How often should I water my avocado bonsai tree?

The watering frequency for an avocado bonsai tree depends on environmental conditions, such as temperature and humidity. Generally, it’s best to water the tree when the top inch of soil feels dry. Avoid overwatering, as it can lead to root rot. Regularly monitor the moisture levels and adjust the watering schedule accordingly.

What should I do if my avocado bonsai tree is infested with pests?

If you notice pests on your avocado bonsai tree, such as aphids or spider mites, it’s essential to take immediate action. Begin by manually removing the pests using a soft brush or cloth. If the infestation persists, you can use organic pest control methods or consult a professional for guidance.

What are some common issues that avocado bonsai trees may face?

Avocado bonsai trees may encounter several common issues, including leaf browning, wilting, and yellowing leaves. These problems can be caused by factors such as overwatering, inadequate sunlight, nutrient deficiencies, or pests. Proper care, regular monitoring, and timely intervention can help address and prevent these issues.

Why My Philodendron Leaves Drooping? – Causes and Solutions

Philodendrons are beloved houseplants known for their lush foliage and ability to thrive in various indoor conditions. However, if you notice your philodendron leaves starting to droop, it can be a cause for concern. Understanding the reasons behind this issue is crucial in order to provide the necessary care and revive your plant’s health. In this article, we will explore the common causes of philodendron leaves drooping and provide practical solutions to help you maintain vibrant and healthy foliage. By implementing these strategies, you can ensure that your philodendron thrives and continues to beautify your indoor space.

1. Introduction to Philodendron Leaves Drooping

Ah, the majestic philodendron plant. With its lush green leaves and tropical vibes, it’s a popular choice for plant enthusiasts everywhere. But what do you do when those beautiful leaves start to droop? Fear not, dear reader, for I am here to shed some light on the causes and solutions for philodendron leaves drooping. Let’s dive in!

2. Common Causes of Philodendron Leaves Drooping

2.1 Insufficient Watering as a Cause of Philodendron Leaves Drooping

Just like us, plants need water to thrive. If you notice your philodendron leaves drooping, it could be a sign of dehydration. Perhaps you’ve been a little neglectful with your watering routine, and your poor plant is crying out for a drink. Time to show some love with a refreshing splash of water!

2.2 Overwatering as a Cause of Philodendron Leaves Drooping

Ah, the classic case of too much of a good thing. While plants need water, they also need a chance to dry out a bit. Overwatering can cause root rot, leading to droopy leaves. So, my fellow plant parent, resist the temptation to shower your philodendron with love and H2O all the time. Let it breathe, let it dry, and let those leaves stand tall once again.

2.3 Environmental Factors Contributing to Philodendron Leaves Drooping

Sometimes, it’s not you, it’s the environment. Philodendrons are sensitive creatures, and extremes in temperature or humidity can cause them to wilt. Is your plant sitting near a drafty window or in a sauna-like bathroom? It might be time to relocate it to a more comfortable spot. Remember, plants enjoy a cozy environment, just like you do.

2.4 Pests and Diseases Associated with Philodendron Leaves Drooping

Oh, the horror of unwanted visitors. Pests and diseases can wreak havoc on our beloved plants, and philodendrons are no exception. If you suspect that those drooping leaves are the result of an insect invasion or a fungal infection, it’s time to play detective and eliminate those pesky culprits. Your philodendron will thank you with perky leaves and a sigh of relief.

3. Proper Care and Solutions for Philodendron Leaves Drooping

3.1 Assessing the Watering Needs of Philodendron Plants

To water or not to water, that is the question. Finding the right balance is key to keeping your philodendron happy and its leaves standing tall. Take a moment to assess the moisture levels in the soil before reaching for that watering can. Stick your finger an inch or two into the soil – if it’s dry, it’s time for a drink. If it’s still moist, hold off a bit longer. Remember, moderation is key, my friend.

3.2 Adjusting the Environmental Conditions for Healthy Philodendron Leaves

Being the considerate plant parent that you are, it’s time to create the perfect ambiance for your philodendron. Ensure it’s not exposed to extreme temperatures or drafts. Find a cozy spot with indirect sunlight and reasonable humidity levels. If your home resembles the arctic tundra or the Sahara desert, it might be wise to invest in a humidifier or a little green oasis for your plant to thrive in.

3.3 Preventing Pests and Diseases in Philodendron Plants

Nobody likes uninvited guests, especially when they’re munching on your gorgeous philodendron leaves. Keep a watchful eye for any signs of pests or diseases and take immediate action. Regularly inspect your plant, clean its leaves, and, if necessary, use organic pest control methods to keep those unwanted visitors at bay. Remember, a healthy plant is a happy plant!

3.4 Additional Tips for Reviving Drooping Philodendron Leaves

Reviving drooping philodendron leaves is like giving your plant a motivational pep talk. Trim away any yellow or brown leaves to encourage new growth. Consider repotting if the roots are becoming overcrowded. And don’t forget to give your philodendron some love and encouragement – a little positive reinforcement goes a long way!

4. Conclusion and Final Thoughts on Philodendron Leaves Drooping

So there you have it, dear plant enthusiasts! Drooping philodendron leaves may be a cause for concern, but with the right care and attention, your plant can bounce back to its former glory. Remember to assess watering needs, adjust environmental conditions, keep pests and diseases at bay, and be a supportive plant parent. With a little love and a green thumb, your philodendron will be back on its feet – or rather, its leaves – in no time.

4. Conclusion and Final Thoughts on Philodendron Leaves Drooping

In conclusion, philodendron leaves drooping can be a sign of various underlying issues, including improper watering, environmental factors, and pest infestations. By accurately identifying the cause, you can implement the appropriate solutions to restore your plant’s health and vitality. Remember to assess your watering habits, adjust environmental conditions, and take preventive measures against pests and diseases. With proper care and attention, your philodendron will regain its upright and vibrant leaves, bringing joy and beauty to your indoor space once again. Happy gardening!

FAQ for Philodendron Leaves Drooping

1. Why are my philodendron leaves drooping?

Philodendron leaves can droop due to various reasons, including inadequate watering, overwatering, environmental factors such as temperature or humidity fluctuations, and pest infestations. It’s important to assess these factors to determine the exact cause and apply the appropriate solutions.

2. How can I prevent philodendron leaves from drooping?

To prevent philodendron leaves from drooping, ensure that you are providing the right amount of water, allowing the soil to dry slightly between watering sessions. Maintain a consistent and suitable temperature and humidity level, avoiding extreme fluctuations. Regularly inspect your plant for pests and diseases, implementing preventative measures promptly.

3. Should I cut off drooping philodendron leaves?

It is generally advised not to cut off drooping philodendron leaves immediately. Instead, focus on identifying and addressing the underlying cause of the drooping. In some cases, the leaves may be salvageable with proper care. However, if a leaf is severely damaged or shows signs of disease, it may be necessary to remove it to prevent further spread.

4. How long does it take for philodendron leaves to recover?

The recovery time for philodendron leaves can vary depending on the cause of the drooping and the extent of damage. With proper care and the implementation of appropriate solutions, you may start to see improvements within a few weeks. However, it’s important to be patient as the recovery process can take several months for the plant to fully regain its health and for new leaves to grow.

Should You Repot Your New Plant Immediately? Weighing the Pros and Cons

Bringing home a vibrant new plant is exciting! But then the question arises: should you repot it right away? This seemingly simple decision can trigger anxiety in even the most seasoned plant parent.

The Case for Waiting:

  • Acclimatization: Imagine moving to a new country – it takes time to adjust! Similarly, your plant needs to acclimate to your home’s light, humidity, and temperature. Repotting adds another stressor, potentially leading to leaf drop or stunted growth.
  • Root Disruption: Nursery pots are often small, but that doesn’t necessarily mean they’re bad. The roots have likely adapted to the confined space, and repotting can damage them, hindering water and nutrient uptake.
  • Post-Purchase Blues: Plants often experience “transplant shock” after purchase due to changes in environment and handling. Repotting on top of that can double the shock, delaying recovery.

Signs Your Plant Needs a New Pot:

So you’ve recently brought home a new plant and you’re wondering if it needs a new pot? Well, there are some signs to look out for. Firstly, check the roots of your plant. If they have started to grow through the drainage holes at the bottom or are tightly circling around the inside of the pot, it’s time for an upgrade. Another indication is when your plant is showing signs of stunted growth or wilting despite regular watering. This could mean that the current pot is too small, restricting root development and causing waterlogged soil. Additionally, if you notice that water is not properly draining from the pot after watering or there is a strong odor coming from it, it’s a clear sign that your plant needs a new home. Remember, choosing a pot with proper drainage and sufficient size will allow room for healthy root growth and support your plant’s overall well-being!

  • Roots Overflowing:
    If roots are peeking out of drainage holes or circling the top of the soil, it’s time for a bigger pot.
  • Stunted Growth:
    Despite proper care, if your plant isn’t growing for months, it might be rootbound, restricting its ability to expand.
  • Frequent Watering:
    Does the soil dry out super quickly, requiring constant watering? This could indicate insufficient soil volume for the root system.
  • Top-Heavy Wobble:
    If your plant seems unstable and prone to tipping over, it might need a larger pot for better balance and root support.

Making the Decision:

Ultimately, the repotting decision depends on your specific plant and situation. Here’s a quick guide:

  • Wait 2-4 weeks: Generally, it’s best to let your plant settle in for a few weeks before repotting. This gives it time to adjust and reduces transplant shock.
  • Exceptions exist: If the plant shows signs of rootboundness, overwatering, or unsuitable soil (like peat moss for moisture-loving plants), immediate repotting might be necessary.
  • Choose the right pot: Opt for a pot only 1-2 inches larger than the current one. Avoid oversized pots, as they can lead to waterlogging.
  • Gentle repotting: Carefully loosen the roots, remove old soil (if needed), and place the plant in fresh, well-draining potting mix.

Remember: Repotting is a stressful event for any plant. Be patient, provide proper care, and your new leafy friend will soon thrive in its new home. Happy planting!

Bonus Tips:

  • Research your specific plant’s needs for repotting frequency and pot size.
  • Use high-quality, well-draining potting mix suitable for your plant type.
  • Water the plant thoroughly after repotting to settle the soil and encourage root growth.
  • Avoid fertilizing for a few weeks after repotting to allow the plant to recover.

With a little knowledge and care, you can ensure a smooth transition for your new plant, setting it up for success in its leafy journey. And remember, even if you make a mistake, plants are resilient! Just learn from the experience and keep nurturing your green companions.

10 Essential Tips for Keeping Houseplants Healthy

Houseplants not only add beauty and warmth to our homes but also provide numerous benefits for our well-being. They improve indoor air quality, boost mood and productivity, and create a soothing ambiance. To fully enjoy these advantages, it is crucial to keep our houseplants healthy and thriving. This comprehensive guide will provide you with ten essential tips to ensure the well-being of your houseplants. From choosing the right plants for your home to understanding their basic needs, optimizing lighting and temperature conditions, implementing proper watering techniques, and preventing common pests and diseases, we will cover all aspects of houseplant care. So, let’s dive in and discover how to maintain flourishing and vibrant houseplants that will enhance your living space.

1. The Importance of Keeping Houseplants Healthy

Houseplants are like the unsung heroes of our homes. They add a touch of greenery, improve air quality, and can even boost our mood. But let’s face it, keeping them alive and thriving can sometimes feel like an uphill battle. Fear not, dear plant lovers! In this article, we’ll delve into the essential tips for keeping your houseplants happy and healthy. So grab your watering can and let’s dive in!

2. Choosing the Right Houseplants for Your Home

When it comes to selecting houseplants, it’s crucial to find the right match for your home. Here are a few considerations to keep in mind:

2.1 Consider Light Requirements

Just like us, plants need their daily dose of sunshine. Some plants thrive in bright, indirect light, while others can tolerate lower light conditions. Assess the lighting conditions in your home and choose plants that will flourish in those conditions.

2.2 Assess Space and Size

Space might be a limited resource in your home, but that doesn’t mean you can’t have houseplants. Determine the available space and consider the size of the plants you’re eyeing. You don’t want your vibrant green friend turning into an overgrown jungle in your living room.

2.3 Evaluate Maintenance Levels

Let’s be honest, not all of us are green thumbs. Before bringing a plant home, consider your commitment level to their care. Some plants require more attention and care, while others are low-maintenance and forgiving. Choose plants that align with your lifestyle and level of dedication.

3. Understanding the Basic Needs of Houseplants

To keep your houseplants thriving, it’s crucial to understand their basic needs. Let’s take a closer look:

3.1 Importance of Proper Watering

Watering your plants is like finding the balance between hydration and drowning. Overwatering can lead to root rot, while underwatering can cause your plants to wither away. Strike the right balance by checking the soil moisture regularly and adjusting your watering routine accordingly.

3.2 Significance of Light and Temperature

Light and temperature are the dynamic duo that can make or break your plants’ happiness. Different plants have specific light requirements, so find the optimal spot for each one. As for temperature, avoid placing your plants too close to drafty windows or heaters that might disrupt their cozy environment.

3.3 Role of Humidity

Humidity, oh sweet humidity! While some plants enjoy a humid environment, others can tolerate drier conditions. Consider grouping plants with similar humidity needs together or using a pebble tray or humidifier to create the right level of moisture for your leafy friends.

4. Providing Proper Lighting and Temperature for Houseplants

Now that we understand the importance of light and temperature, let’s explore how to provide the best environment for your plant pals:

4.1 Determining the Right Amount of Light

Finding the perfect lighting conditions can sometimes feel like a quest for a pot of gold at the end of a rainbow. Pay attention to the intensity and duration of sunlight in different areas of your home. If needed, you can also supplement natural light with artificial grow lights to keep your plants happy throughout the year.

4.2 Managing Temperature Variations

While we enjoy snuggling up with a warm blanket during chilly months, not all houseplants appreciate extreme temperature variations. Avoid placing your plants near drafty windows or air conditioning units. Keep an eye on temperature fluctuations and adjust accordingly to create a stable and comfortable environment for your leafy companions.

With these essential tips, you’ll be well on your way to becoming a houseplant whisperer. Remember, each plant has its own preferences and quirks, so don’t be afraid to experiment and learn along the way. Happy gardening, my fellow plant enthusiasts!

5. Watering Techniques and Moisture Control for Houseplants

5.1 Understanding Watering Frequency

Watering your houseplants can sometimes feel like a guessing game. Do they need water every day? Every week? Well, it depends on the plant. Some plants prefer to be kept on the drier side, while others thrive in moist soil. Understanding the specific watering needs of your houseplants is the key to keeping them happy and healthy.

5.2 Techniques for Proper Watering

Just like Goldilocks and her porridge, you want to get the watering just right. Overwatering can lead to root rot and other issues, while underwatering can leave your plants parched. So, here are a few tips for proper watering:

– Check the soil: Before watering, stick your finger about an inch into the soil. If it feels dry, it’s time to water. If it’s still moist, hold off for a bit.

– Water thoroughly: When you do water, make sure to give your plants a good drink until you see water draining out of the bottom. This ensures that the roots are properly hydrated.

– Avoid wet foliage: Try to avoid getting water on the leaves of your plants, as this can create a humid environment that encourages the growth of mold and mildew.

5.3 Managing Humidity and Moisture Levels

Houseplants come from a variety of environments, and some thrive in higher humidity levels than others. To keep your plants happy, you can try a few tricks to increase humidity:

– Grouping plants together: By clustering your plants, they can create a microclimate with higher humidity levels.

– Using a humidifier: If you have a particularly dry home, investing in a humidifier can provide the extra moisture your plants need.

– Mist them gently: For plants that love humidity, a light misting of water can help simulate their natural environment.

Remember, every plant is different, so it’s essential to research the specific needs of your houseplants to ensure they receive the right amount of water and humidity.

6. Fertilizing and Nutrient Management for Houseplants

6.1 Importance of Nutrient-Rich Soil

Just like humans need a balanced diet to stay healthy, houseplants need nutrient-rich soil to thrive. The soil provides essential minerals and elements that plants need for growth and overall health. Opt for high-quality potting soil or mix in organic matter like compost to ensure your plants get the nutrients they crave.

6.2 Choosing the Right Fertilizer

Fertilizing your houseplants is like giving them a little boost of nutrients to keep them going strong. There are many types of fertilizers available, from slow-release granules to liquid options. Choose a fertilizer specifically formulated for houseplants and follow the instructions for application.

6.3 Application and Frequency of Fertilizing

When it comes to fertilizing, it’s all about balance. Too much fertilizer can lead to burnt roots, while too little can leave your plants malnourished. Here are some tips for proper fertilization:

– Follow the instructions: Always read and follow the instructions on your chosen fertilizer to ensure you’re using the correct amount.

– Don’t overdo it: It’s better to under-fertilize than over-fertilize. Start with a smaller amount and gradually increase if needed.

– Watch for signs: Keep an eye out for signs of nutrient deficiencies, such as yellowing leaves or stunted growth. This may indicate that your plants need a little extra feeding.

Remember, fertilizing should be done during the active growing season, typically spring and summer. During the dormant winter months, it’s best to hold off on fertilizing.

7. Preventing and Treating Common Houseplant Pests and Diseases

7.1 Identifying Common Pests

Nobody likes uninvited guests, especially when they come in the form of pests invading your beloved houseplants. Common pests you may encounter include aphids, spider mites, mealybugs, and fungus gnats. The sooner you identify these intruders, the quicker you can take action.

7.2 Natural and Chemical Pest Control Methods

When it comes to pest control, you have options. If you prefer a natural approach, you can try methods like manually removing pests, introducing beneficial insects, or using homemade insecticidal soap. For more severe infestations, chemical pesticides may be necessary. Just be sure to choose products labeled safe for houseplants and follow the instructions carefully.

7.3 Recognizing and Addressing Plant Diseases

Plant diseases can be a real downer for both you and your houseplants. Common diseases include powdery mildew, root rot, and leaf spot. If you notice any signs of disease, such as discolored or wilting leaves, act quickly to prevent the spread. Remove affected leaves, ensure proper airflow, and, if needed, treat with a suitable fungicide.

8. Pruning, Repotting, and Proper Maintenance of Houseplants

8.1 Benefits of Pruning

Just like a good haircut can make someone look and feel better, pruning can work wonders for your houseplants. Regular pruning helps remove dead or diseased foliage, encourages new growth, and improves the overall shape and appearance of your plants.

8.2 When and How to Repot Houseplants

As your houseplants grow, they may outgrow their current pots. This is where repotting comes in. Signs that it’s time to repot include roots growing out of drainage holes or the plant becoming top-heavy. When repotting, choose a slightly larger pot with good drainage, and gently loosen the roots before placing the plant in its new home.

8.3 General Maintenance Tips for Healthy Houseplants

Taking care of houseplants doesn’t stop at watering, fertilizing, and pest control. Here are a few extra tips to keep your green friends thriving:

Dust off those leaves: Dust can accumulate on your plant’s leaves, blocking sunlight and inhibiting photosynthesis. Give them a gentle wipe with a damp cloth or take them for a shower (yes, some plants enjoy a light shower!).

Rotate for even growth: To ensure your plants grow evenly, rotate them every few weeks to expose all sides to the light source.

– Keep an eye out for warning signs: Monitor your plants regularly for any changes in appearance, such as wilting, discoloration, or drooping. These can be early indicators of problems that need attention.

By following these tips and showing a little love and attention to your houseplants, you’ll have a thriving indoor garden that will bring joy and beauty to your home. Happy gardening!Incorporating these ten essential tips into your houseplant care routine will set you on the path to maintaining healthy and thriving indoor greenery. With proper knowledge and consistent attention, your houseplants will continue to bring beauty and joy to your home for years to come. Remember, each plant is unique, so observe and adapt to their individual needs as you nurture them. By prioritizing their well-being, you can enjoy the benefits of lush and vibrant houseplants that create a refreshing and inviting atmosphere in your living space.

FAQ

1. How often should I water my houseplants?

Finding the right watering frequency depends on various factors such as the type of plant, the size of the pot, and the environmental conditions. As a general rule of thumb, it’s best to allow the top inch of soil to dry out before watering again. However, it’s crucial to assess each plant’s specific moisture requirements and adjust accordingly.

2. What are some common signs of plant pests and diseases?

Common signs of plant pests include visible insects, sticky residue on leaves, yellowing or wilting foliage, and distorted growth. Plant diseases can manifest as spots, discoloration, stunted growth, or fungal growth on leaves or stems. Regularly inspecting your houseplants will help you identify and address any issues promptly.

3. Can I use any type of fertilizer for my houseplants?

Different houseplants have varying nutritional needs, so it’s essential to choose a fertilizer specifically formulated for indoor plants. Look for a balanced fertilizer with equal parts nitrogen, phosphorus, and potassium (NPK), or consider using organic alternatives. Follow the instructions on the fertilizer packaging for proper application and frequency.

4. When should I consider repotting my houseplants?

Repotting is typically necessary when a plant becomes root-bound, meaning its roots have outgrown the current pot. Signs of a root-bound plant include roots growing out of drainage holes, slow growth, or water draining too quickly. It’s best to repot in the spring when plants are entering their active growth phase. Choose a pot that is slightly larger than the current one and use fresh, well-draining potting soil.

Best 9 Low Light Indoor Plants Details with Benefits

Are you prepared to transform your indoor space into a lush, green paradise, even if the sun’s rays are scarce? In this comprehensive guide, we’ll delve into an exquisite array of tall and large indoor plants 🌱 that thrive effortlessly in low-light conditions, ensuring your home stays vibrant year-round.

These resilient indoor plants are not just green companions; they’re statements of elegance that demand minimal sunlight.

Snake Plant (Dracaena trifasciata)

Indoor Size: 6 inches to 8 ft. tall
Care Level: Low
Light: Shade, partial sun
Temperature: 70 – 90°F
Humidity: 30 – 50%

The Snake Plant, recognized for its architectural elegance, not only thrives in low-light conditions but also stands out as an exceptional air purifier. Its ability to convert carbon dioxide into oxygen, even during the night, makes it an ideal choice for enhancing indoor air quality and promoting a healthier living environment.

The Snake Plant, with its sword-shaped leaves, is an excellent choice for low-light conditions. Known for its adaptability and drought resistance, it’s a perfect match for beginners. However, pet owners should exercise caution as it’s toxic to both dogs and cats.

Monstera (Monstera Deliciosa)

Indoor Size: 3 – 8 ft. tall, 1 – 3 ft. wide
Care Level: Low
Light: Partial sun
Temperature: 60 – 85°F
Humidity: 50% and above

Monstera, with its iconic Swiss cheese-like leaves, brings a touch of tropical sophistication to your space. Beyond its aesthetic appeal, this plant is known for its resilience and adaptability, making it an excellent choice for both novice and experienced plant enthusiasts. Its lush foliage adds a vibrant and lively atmosphere to any room.

The Monstera, with its iconic Swiss cheese-like leaves, is not just a plant; it’s a work of art. Easy to care for and adaptable, it can be pruned to control its growth. However, it’s toxic to pets, so be cautious with placement.

Corn Plant (Dracaena Fragrans)

Indoor Size: Up to 6 ft. tall
Care Level: Low
Light: Partial sun
Temperature: 60 – 75°F
Humidity: 40 – 50%

The Corn Plant, a slow-growing African evergreen, not only thrives in low light but also contributes to the aesthetic appeal of your indoor space. Its distinctive upright growth and glossy leaves make it a visually appealing addition, requiring minimal care while infusing a touch of natural charm into your home.

The slow-growing Corn Plant, an African evergreen tree, thrives in low-light conditions. With minimal care requirements, it’s a low-maintenance beauty. Consider a humidifier if your home’s humidity falls below 40%, and avoid direct sunlight.

Rubber Plant (Ficus Elastica)

Indoor Size: 4 – 10 ft. tall
Care Level: Medium
Light: Partial shade
Temperature: 60 – 75°F
Humidity: 45 – 50%

The Rubber Plant, characterized by its large, waxy leaves, serves as more than just a decorative element. This low-maintenance beauty is an excellent air purifier, helping to remove common indoor pollutants and improve overall air quality. Its adaptability to various lighting conditions adds versatility to your indoor garden.

The Rubber Plant, adorned with large waxy leaves, prefers indirect light and can reach up to ten feet in height indoors. Pruning can help control its size, but it’s not suitable for extremely dark rooms.

Dragon Tree (Dracaena Marginata)

Indoor Size: 4 to 10 feet
Care Level: Low
Light: Bright, indirect light
Temperature: 60 – 80°F
Humidity: 40% and above

The Dragon Tree, appreciated for its teardrop leaves, not only enhances the visual appeal of your space but also contributes to a serene atmosphere. This low-maintenance plant thrives in filtered light, making it an easy and elegant choice for indoor greenery that complements your decor while requiring minimal attention.

Appreciated for its teardrop leaves and simplicity in care, the Dragon Tree thrives in filtered light indoors. However, it’s toxic to both pets and humans, so be cautious with its placement.

Parlor Palm (Chamaedorea Elegans)

Indoor Size: Up to 6 ft. tall, up to 4 ft. wide
Care Level: Low
Light: Partial sun, shade
Temperature: 60 – 80°F
Humidity: 50% and above

The Parlor Palm, an elegant and graceful plant, offers more than just aesthetic charm. Tolerant of lower-lighting conditions, it requires minimal pruning and repotting, making it an excellent choice for those seeking a low-maintenance yet sophisticated indoor companion that adds a touch of timeless elegance to your home.

The elegant Parlor Palm requires minimal pruning and biennial repotting, making it an excellent low-light choice. Avoid direct sunlight for optimal growth.

ZZ Plant (Zamioculcas Zamiifolia)

Indoor Size: 2 – 4 ft. (height and width)
Care Level: Low
Light: Partial sun
Temperature: 60 – 75°F
Humidity: 40 – 50%

The ZZ Plant, characterized by its glossy, dark green leaves, is a true survivor in various lighting conditions. Beyond its adaptability, this slow-growing beauty is recognized for its air-purifying qualities. It effortlessly removes pollutants from the air, promoting a healthier indoor environment while adding a touch of modern simplicity to your decor.

The ZZ Plant, a slow grower, adapts to most lighting conditions, making it an excellent choice for those seeking an easy-to-care-for indoor plant.

Kentia Palm (Howea Forsteriana)

Indoor Size: 2 to 12 feet in height
Care Level: Low
Light: Bright, indirect light
Temperature: 65 – 75°F
Humidity: 40 – 50%

The Kentia Palm, known for its graceful fronds, brings the allure of the tropics into your home. Beyond its aesthetic appeal, this low-maintenance plant thrives in bright, indirect light and contributes to a tranquil atmosphere. Its presence adds a classic touch, transforming your space into a sophisticated oasis.

Known for its graceful fronds, the Kentia Palm adds a touch of the tropics to your home. It thrives in bright, indirect light and is relatively low-maintenance.

Money Tree (Pachira Aquatica)

Indoor Size: 3 to 8 feet in height
Care Level: Low to moderate
Light: Bright, indirect light
Temperature: 65 – 75°F
Humidity: Moderate

The Money Tree, with its distinctive braided trunk, is more than a symbol of good luck. This versatile plant thrives in bright, indirect light and creates an ambiance of prosperity. Its low-maintenance nature, coupled with its symbolic significance, makes it a unique addition to your indoor garden, adding both visual and metaphorical richness to your space.

With its enchanting braided trunk, the Money Tree is a symbol of good fortune. Flourishing in the gentle glow of bright, indirect light, this plant embraces a rhythm of drying out between waterings, creating an atmosphere of luck and vitality in your space.

This diverse selection of indoor plants not only promises greenery but also serves as living art, enhancing your indoor space with elegance and tranquility.

FAQ:

  1. What makes indoor plants suitable for low-light conditions?
    • Indoor plants for low-light conditions are typically species that have adapted to thrive in environments with minimal sunlight. They often have features such as larger leaves to capture more light and the ability to tolerate lower light levels.
  2. How do I know if my home has low-light conditions?
    • Low-light conditions are common in spaces with limited access to natural sunlight, such as rooms with small windows, north-facing windows, or areas shaded by buildings or trees. If you notice that direct sunlight is scarce, it’s likely a low-light environment.
  3. Can these plants survive in completely dark rooms?
    • While these plants are resilient in low-light conditions, they still need some degree of light to carry out photosynthesis. Completely dark rooms are not suitable for most plants, and they typically require at least some indirect or filtered sunlight.
  4. Are these plants suitable for beginners?
    • Yes, many of the mentioned plants, such as the Snake Plant and ZZ Plant, are known for their resilience and adaptability, making them ideal for beginners. They require minimal care and can withstand occasional neglect.
  5. Do these plants need frequent watering?
    • The watering frequency varies among different plants. Generally, plants like the Snake Plant and ZZ Plant are drought-tolerant and prefer slightly drier conditions. It’s crucial to let the soil dry out between waterings to prevent overwatering.
  6. Are any of these plants pet-friendly?
    • Some plants on the list, such as the Snake Plant, Monstera, and Corn Plant, can be toxic to pets if ingested. It’s essential to place toxic plants out of reach of pets or choose pet-friendly alternatives if you have animals at home.
  7. Can I keep these plants in bathrooms with lower light levels?
    • Yes, many of these plants, such as the Boston Fern and Parlor Palm, can thrive in bathrooms with lower light levels. However, the humidity levels in bathrooms can vary, so it’s essential to monitor the specific needs of each plant.
  8. How do I prevent overgrowth of tall plants indoors?
    • Pruning is an effective way to control the growth of tall indoor plants. Regularly trimming back excess growth helps maintain the desired size and shape. Additionally, repotting and dividing certain plants can prevent them from becoming too large for their containers.
  9. Do these plants improve indoor air quality?
    • Yes, many of the mentioned plants, including the Snake Plant and Rubber Plant, are known for their air-purifying qualities. They can help remove toxins from the air and contribute to a healthier indoor environment.
  10. What is the ideal humidity level for these plants?
    • The humidity preferences vary among plants, but many of them, such as the Boston Fern and Calathea, prefer higher humidity levels. Regular misting, placing a tray of water nearby, or using a humidifier can help create a more favorable environment for these plants.

Remember to check the specific care requirements for each plant, as individual needs may vary.

The Art and Science Behind Evaluating the Value of Bonsai Trees

Bonsai, a captivating art form originating from Japan, has gained worldwide admiration for its ability to capture the essence of nature in miniature form. The intricate process of cultivating and shaping these small trees requires skill, patience, and an understanding of their aesthetic value. The value of a bonsai extends beyond its monetary worth, encompassing factors such as artistry, history, rarity, and cultural significance. In this article, we delve into the various aspects that contribute to the value of a bonsai, exploring the principles of design, evaluation techniques, and the broader appreciation of bonsai as a treasured art form. Whether you are an enthusiast seeking to understand the worth of your own bonsai collection or simply intrigued by this ancient horticultural tradition, we invite you to join us on this journey of discovery.

1. Introduction to Bonsai and its Value

1.1 What is Bonsai?

Bonsai is not just a small tree in a pot, it’s an art form that has been practiced for centuries. Bonsai literally means “tray planting” in Japanese, and it involves the cultivation and shaping of miniature trees to create a sense of natural beauty and harmony.

1.2 The Significance of Bonsai

Bonsai holds a special place in many cultures around the world. It represents the beauty of nature in a confined space, and the patience and dedication required to cultivate and care for these living sculptures. Bonsai trees are often considered symbols of peace, balance, and the connection between humans and nature.

2. Factors to Consider when Valuing a Bonsai

2.1 Size and Proportions

The size and proportions of a bonsai tree are essential factors when determining its value. A well-proportioned bonsai should have a balanced relationship between the trunk, branches, and foliage. The size should be harmonious and suitable for the type of tree being cultivated.

2.2 Trunk Thickness and Nebari

The trunk thickness of a bonsai tree indicates its age and maturity. A thick and well-tapered trunk is highly desirable and adds to the aesthetic value of the tree. The nebari, or the visible surface roots, also play a significant role in determining the value of a bonsai tree, as they show the tree’s stability and overall health.

2.3 Branch Structure and Ramification

The branch structure and ramification refer to the arrangement and development of the branches in a bonsai tree. A well-developed branch structure with fine branching and ramification creates a sense of maturity and adds to the overall value of the tree. It demonstrates the skill and artistry of the bonsai artist in shaping and training the tree.

2.4 Foliage Density and Health

The foliage of a bonsai tree should be dense and healthy. A balanced distribution of leaves and the absence of pests or diseases are important indicators of the tree’s vitality. The color, texture, and overall health of the foliage significantly contribute to the aesthetic appeal and value of the bonsai.

2.5 Overall Visual Harmony

The overall visual harmony of a bonsai tree considers how all the elements come together to create a pleasing and balanced composition. The combination of the tree’s size, proportions, trunk thickness, branch structure, foliage density, and overall health should create a harmonious and visually appealing bonsai that captivates the viewer.

3. The Artistry and Aesthetics of Bonsai

3.1 Principles of Bonsai Design

Bonsai design follows certain principles that guide the creation of visually pleasing trees. These principles include balance, asymmetry, proportion, simplicity, and naturalness. The careful application of these principles by the bonsai artist enhances the artistic value and appeal of the tree.

3.2 Styling Techniques and Forms

Bonsai trees can be styled using various techniques and forms, such as formal upright, informal upright, slanting, cascade, and windswept. Each style has its own unique characteristics and conveys a particular aesthetic. The skillful execution of these techniques adds to the artistic value and individuality of the bonsai tree.

3.3 Creating a Sense of Naturalness

Bonsai trees strive to capture the essence of nature in a miniature form. The bonsai artist aims to create a sense of naturalness by mimicking the growth patterns and characteristics of full-sized trees in nature. This attention to detail and the ability to evoke a feeling of authenticity contributes to the overall value and beauty of the bonsai.

4. Understanding the Age and History of a Bonsai

4.1 Evaluating the Age of a Bonsai

Determining the age of a bonsai tree can be challenging as it often requires knowledge of the tree species, growth rate, and the history of the tree. However, certain indicators like the trunk thickness, bark texture, and the presence of deadwood can provide valuable clues about the age of the tree. Older bonsai trees are generally more valuable due to their rarity and the time taken to develop them.

4.2 Historical Significance and Heritage Value

Some bonsai trees have historical significance and a rich heritage associated with them. These trees may have been passed down through generations or have been created by renowned bonsai artists. The historical importance and heritage value of a bonsai tree can greatly enhance its value and desirability among collectors and enthusiasts.

In conclusion, valuing a bonsai involves considering various factors like size, proportions, trunk thickness, branch structure, foliage density, and overall visual harmony. The artistry, aesthetics, and the sense of naturalness also play a significant role in determining the value of a bonsai tree. Additionally, the age and historical significance of a bonsai contribute to its overall worth. So, the next time you admire a bonsai, remember that its value goes beyond its size and shape – it’s a testament to the patience, skill, and artistry of bonsai enthusiasts around the world..2 Factors Influencing Bonsai Investment Value

8.3 Tips for Buying and Selling Bonsai

5. Rare and Exotic Bonsai Species and their Value

When it comes to valuing a bonsai, one important factor to consider is the rarity and exoticness of the species. Unique species and cultivars can significantly increase the value of a bonsai. Just like the thrill of finding a rare gem, bonsai enthusiasts are always on the lookout for something special to add to their collection. Whether it’s a rare variety of pine, a vibrant flowering species, or a distinct cultivar with unusual foliage, these special bonsai trees can command a higher price tag due to their scarcity and desirability.

5.1 Unique Species and Cultivars

Certain bonsai species and cultivars are rarer than others, making them highly sought after by collectors. For example, the Japanese White Pine, known for its graceful appearance and delicate needles, is considered a prized species in the bonsai world. Similarly, unique cultivars like the Red Maple with its stunning autumn colors or the miniature Hinoki Cypress can fetch a higher price due to their distinctive characteristics.

5.2 Rarity and Availability

Rarity plays a significant role in determining the value of a bonsai. If a particular species is challenging to find or is only available in limited quantities, its value can skyrocket. Bonsai trees that are native to specific regions or are endemic to certain countries can be particularly rare and therefore highly valued. The scarcity factor adds an element of exclusivity and allure, making these bonsai trees even more valuable.

5.3 Cultural and Symbolic Importance

The cultural and symbolic importance of certain bonsai species can also affect their value. In Japanese culture, for example, the Pine, Juniper, and Maple trees hold deep cultural significance and are often associated with strength, longevity, and beauty. Bonsai trees representing these species can carry extra meaning and sentimental value, making them more desirable and valuable to collectors.

6. Evaluating the Health and Condition of a Bonsai

Apart from the species and rarity, the health and condition of a bonsai are crucial factors in determining its value. After all, nobody wants to invest in a sickly or poorly maintained tree that will require extensive rehabilitation. Assessing the overall well-being of a bonsai involves examining various aspects, from the roots to the foliage and long-term sustainability.

6.1 Assessing Root Health and Nebari

The roots are the foundation of a bonsai tree, and their health is vital for its survival and aesthetic appeal. Inspecting the root system for any signs of rot, damage, or poor development is essential. Additionally, the nebari, which refers to the visible surface roots, should be well-distributed and visually pleasing. A bonsai with a strong and well-developed nebari is often considered more valuable due to its enhanced stability and overall attractiveness.

6.2 Examining Foliage and Pests/Diseases

Healthy foliage is an indicator of a thriving bonsai. When evaluating a bonsai, it’s important to check for vibrant and lush foliage, free from discoloration, wilting, or pest infestations. Pests and diseases can significantly impact a bonsai’s health and reduce its value. Prudent buyers and collectors pay close attention to these factors to ensure they are investing in a bonsai that will flourish under their care.

6.3 Long-term Sustainability and Maintenance

Considering the long-term sustainability and maintenance requirements of a bonsai is crucial for both buyer and seller. A bonsai that has been well-maintained and carefully shaped over the years will have higher value compared to a neglected or poorly cared for tree. Additionally, the overall design and aesthetic appeal of the bonsai, as well as its future potential for growth and refinement, can contribute to its value.

7. Appreciating the Cultural Significance of Bonsai

Bonsai is not just a form of gardening; it is a living art that reflects the culture and traditions of various societies. Understanding the cultural significance of bonsai can deepen one’s appreciation for these miniature trees and, in turn, impact their perceived value.

7.1 Bonsai as a Reflection of Japanese Culture

Bonsai has its roots in Japanese culture and is deeply intertwined with Zen Buddhism and the principles of harmony, balance, and the pursuit of perfection. The intricate techniques used in bonsai cultivation, such as pruning, wiring, and shaping, parallel the discipline and patience required in traditional Japanese arts. Bonsai trees that exemplify these cultural principles, as well as those closely tied to Japanese heritage, can hold a higher value due to their cultural significance.

7.2 Bonsai in Other Cultures and Traditions

While bonsai may have originated in Japan, its influence has spread worldwide, with each culture adding its own unique touch to the art form. Chinese bonsai, for instance, emphasizes naturalistic styles and symbolism, while Western bonsai may incorporate more experimental and artistic approaches. Bonsai trees that embody these diverse cultural influences can attract collectors who appreciate the global heritage and story behind each tree, potentially increasing their value.

8. The Market Value and Investment Potential of Bonsai

While bonsai is primarily an art form and a hobby for most enthusiasts, it’s worth noting that certain bonsai trees can hold significant market value and even serve as potential investments. Understanding the market trends and factors that influence the value of bonsai can be valuable for those interested in buying or selling these miniature treasures.

8.1 Understanding Bonsai Market Trends

Like any other market, the value of bonsai can fluctuate based on supply and demand. Certain bonsai species or styles may gain popularity, driving up their prices. Additionally, the reputation and recognition of specific bonsai artists or nurseries can also affect the market value of their creations. Staying informed about the latest trends and developments in the bonsai market can help buyers and sellers make informed decisions.

8.2 Factors Influencing Bonsai Investment Value

For those considering bonsai as an investment, several factors can impact the investment potential. The rarity, desirability, and artistic quality of a bonsai are crucial considerations. Additionally, the reputation and track record of the bonsai artist or nursery can play a role in determining its investment value. Investing in well-maintained and healthy bonsai trees with potential for further development and refinement can provide a higher chance of increasing in value over time.

8.3 Tips for Buying and Selling Bonsai

Whether you’re a seasoned collector or a newcomer to the bonsai world, it’s important to approach buying and selling bonsai trees with care. Researching the market value of specific species and styles, consulting with experts or experienced collectors, and thoroughly examining the health and condition of a bonsai are essential steps. When selling a bonsai,In conclusion, valuing a bonsai encompasses more than just its price tag. It involves a deep appreciation for the artistry, aesthetics, cultural significance, and the unique qualities of each individual tree. By understanding the factors that contribute to the value of a bonsai, we can develop a greater appreciation for this timeless art form. Whether you view bonsai as a personal hobby, an investment opportunity, or a representation of nature’s beauty, the value of a bonsai extends far beyond its physical form. So, take a moment to admire the intricate beauty of a bonsai and let its value enrich your understanding of the natural world.

FAQ

1. How can I determine the value of my bonsai tree?

Determining the value of a bonsai tree involves considering various factors such as its size, age, aesthetics, species rarity, and overall health. Consulting with experienced bonsai enthusiasts or professionals in the field can provide valuable insights and help assess the monetary and intrinsic worth of your bonsai.

2. Can any tree be turned into a bonsai?

While many tree species can be trained and styled as bonsai, not all trees are suitable for this purpose. Ideal bonsai candidates typically possess characteristics such as small leaves, flexible branches, and a proportionate trunk base. However, with proper techniques and patience, a wide range of tree species can be transformed into beautiful bonsai specimens.

3. Are bonsai trees a good investment?

The investment potential of bonsai trees can vary depending on factors such as species rarity, age, aesthetics, and market demand. While some highly sought-after or historically significant bonsai trees can appreciate in value over time, it is important to note that bonsai should primarily be enjoyed for their artistic and horticultural qualities rather than solely as financial investments.

4. How do I care for and maintain the value of my bonsai?

To maintain the value of your bonsai, it is crucial to provide proper care and maintenance. This includes regular watering, ensuring adequate sunlight, monitoring for pests and diseases, appropriate pruning, and repotting when necessary. Additionally, ongoing education and understanding of bonsai techniques and best practices will help you nurture your bonsai and preserve its value over time.

The Ultimate Beginners Guide to Bald Cypress Bonsai Care

Bonsai, the ancient art of cultivating miniature trees, has captivated enthusiasts for centuries. Among the plethora of tree species suitable for bonsai, the majestic Bald Cypress (Taxodium distichum) stands out as a unique and visually striking choice. Native to the southern United States, Bald Cypress Bonsai offers a captivating blend of elegance and ruggedness that makes it a popular choice among bonsai enthusiasts. In this article, we will delve into the world of Bald Cypress Bonsai, exploring its distinct characteristics, growth patterns, and essential care requirements. Whether you are a beginner or an experienced bonsai enthusiast, this guide will provide valuable insights and tips to help you create and maintain a stunning Bald Cypress Bonsai specimen.

1. Introduction to Bald Cypress Bonsai

1.1 What is Bald Cypress Bonsai?

Bald Cypress Bonsai is the art of growing and shaping the majestic Bald Cypress tree (Taxodium distichum) into miniature, aesthetically pleasing versions. This ancient art form originated in East Asia and has gained popularity across the globe for its unique and captivating appeal.

1.2 The Appeal of Bald Cypress Bonsai

What makes Bald Cypress Bonsai so appealing? Well, imagine having a tiny tree that exudes the same grandeur and tranquility as its full-sized counterpart. The Bald Cypress, known for its beautiful foliage, distinctive bark, and ability to grow in or near water, offers a sense of natural beauty and serenity that can be enjoyed from the comfort of your own home. Plus, the small size of the bonsai allows for easy placement and a touch of greenery even in limited spaces.

2. Understanding the Characteristics and Growth Patterns of Bald Cypress Bonsai

2.1 Overview of Bald Cypress Tree

The Bald Cypress tree is a deciduous conifer that can reach impressive heights in nature. Its unique feature is its “knees” – curious, knobby growths that emerge from the roots, adding character to the tree. When transformed into a bonsai, these distinctive characteristics are carefully preserved, resulting in a miniature version that captures the essence of nature’s artistry.

2.2 How Bald Cypress Trees Adapt to Bonsai Form

Bald Cypress trees have remarkable adaptability, which makes them suitable for bonsai cultivation. They possess a fine-textured foliage that can be easily shaped and pruned, allowing enthusiasts to create intricate designs. These trees also readily develop dense root systems, which is essential for maintaining the bonsai’s health and stability. With proper care and training, Bald Cypress trees gracefully adapt to the bonsai form, becoming living works of art.

3. Essential Care and Maintenance for Bald Cypress Bonsai

3.1 Sunlight and Temperature Requirements

Like any other plant, Bald Cypress Bonsai requires an appropriate amount of sunlight to thrive. These trees prefer full sun exposure, so make sure to place them in a sunny spot, preferably outdoors. As for temperature, they are hardy trees that tolerate both hot and cold climates, but protection may be required during extreme conditions.

3.2 Watering Techniques and Frequency

Proper watering is crucial for the health of your Bald Cypress Bonsai. These trees prefer consistently moist soil, so regular watering is essential. However, be mindful not to overwater, as excessive moisture can lead to root rot. An excellent way to determine when to water is by checking the moisture level of the soil using your finger or a moisture meter.

3.3 Fertilizing and Nutritional Needs

To ensure the optimal growth and vitality of your Bald Cypress Bonsai, regular fertilization is necessary. During the growing season, apply a balanced, slow-release fertilizer every four to six weeks. Additionally, supplementing with a liquid fertilizer during the growing months can provide the necessary nutrients for vigorous growth. Always follow the instructions on the fertilizer packaging for best results.

4. Styling Techniques and Pruning Tips for Bald Cypress Bonsai

4.1 Basic Styling Principles for Bald Cypress Bonsai

Styling your Bald Cypress Bonsai is where the fun and creativity come into play. The basic principles of bonsai styling apply here – strive for a harmonious balance between the tree’s branches, foliage, and overall shape. Experiment with different styling techniques, such as formal upright, slanting, or cascading, to create a unique and captivating bonsai masterpiece.

4.2 Pruning Methods for Shape and Structure

Pruning is essential to maintain the desired shape and structure of your Bald Cypress Bonsai. Remove any unwanted growth, including weak or crossing branches, to ensure a clean and well-defined silhouette. Regularly thin out the foliage to enhance the tree’s aesthetic appeal and promote airflow, which contributes to overall health.

4.3 Wiring and Positioning Branches

Wiring is a common technique used to position branches in Bald Cypress Bonsai. Be gentle when wiring, as the branches of these trees are relatively pliable and can be easily shaped. However, be cautious not to damage or constrict the branches. Monitor the growth regularly and make adjustments as needed to maintain the desired form.

Now that you have a better understanding of Bald Cypress Bonsai, it’s time to embark on your own bonsai journey. Remember to enjoy the process, embrace the uniqueness of your tree, and let your creativity flourish!

5. Repotting and Root Pruning Guidelines for Bald Cypress Bonsai

5.1 Understanding When to Repot Bald Cypress Bonsai

Repotting your bald cypress bonsai is like giving it a spa day – it’s rejuvenating and necessary for its overall health and growth. But how do you know when it’s time to repot? Well, the general rule of thumb is to repot every two to three years, or when you notice the roots starting to circle around the edges of the pot. So keep an eye out for those sneaky little roots!

5.2 Step-by-Step Guide to Repotting

Now that you’ve caught those roots trying to make a break for it, it’s time to repot your bald cypress bonsai. Here’s a step-by-step guide to make sure you nail it:

1. Choose the right pot: Go for a pot that’s slightly larger than the current one, but not too big that it overwhelms your bonsai. We don’t want it to feel like it’s living in a mansion!

2. Gather your supplies: You’ll need some bonsai soil (make sure it’s well-draining), a plastic drainage screen, and some wire to secure your bonsai in the pot.

3. Carefully remove your bonsai from its current pot: Gently loosen the soil around the edges and carefully lift your bonsai out. Be gentle, just like you’re handling a delicate little plant baby!

4. Prune those roots: Trim away any circling or tangled roots, making sure to keep the root mass balanced and neat. Think of it as giving your bonsai a fancy haircut!

5. Place the drainage screen: Cut a piece of plastic drainage screen to fit the bottom of the new pot. This will prevent the soil from escaping through the drainage holes. We don’t want a messy plant party!

6. Position your bonsai in the pot: Carefully place your bald cypress bonsai in the new pot, making sure it sits at the desired angle. Get creative and find its best side!

7. Fill the pot with soil: Slowly add the bonsai soil around the roots, gently patting it down to ensure there are no air pockets. No air bubbles allowed in this soil party!

8. Secure your bonsai: Use wire to anchor your bonsai to the pot, creating stability. We want it to feel secure, like a bonsai superhero!

9. Water and celebrate: Give your bonsai a good watering and celebrate your successful repotting session! Cheers to happy, healthy roots!

5.3 Root Pruning Techniques for Healthy Growth

Root pruning is like giving your bonsai’s roots a nice little trim to promote healthy growth and prevent them from going wild. Here are a few techniques to help you master the art of root pruning:

1. Rake and comb: Use a root rake or comb to gently untangle and separate the roots. Think of it as giving your bonsai a relaxing spa treatment!

2. Snip away the stragglers: Trim any excessively long or wayward roots with sharp, clean pruning shears. Just a little trim, nothing too drastic!

3. Reduce the root mass: If your bonsai’s roots are overcrowded, carefully remove some of the excess soil and prune away a portion of the root mass. It’s like decluttering your bonsai’s root space!

Remember, root pruning should be done in conjunction with repotting, so make sure to follow the guidelines mentioned earlier for a successful session. Your bonsai will thank you for the pampering session!

6. Common Pests and Diseases of Bald Cypress Bonsai and How to Manage Them

6.1 Identifying Common Pests Affecting Bald Cypress Bonsai

Nobody likes uninvited guests, especially when they come in the form of pests on your beloved bald cypress bonsai. Here are a few common pests you may encounter and how to spot them:

– Aphids: These tiny sap-suckers will leave a trail of sticky honeydew on your bonsai’s leaves. Look out for clusters of small insects on the foliage.

– Spider mites: These pesky critters love to build fine webs and suck the life out of your bonsai. Keep an eye out for yellowing leaves and tiny specks moving around.

– Scale insects: These sneaky fellows attach themselves to the stems and leaves, forming a protective shell. Look for small, round bumps on your bonsai.

6.2 Effective Pest Management Strategies

Now that you’ve identified the unwanted guests on your bald cypress bonsai, it’s time to kick them out! Here are a few strategies to manage these pesky pests:

– Manual removal: For small infestations, gently wipe or pick off the pests with a cotton swab or your nimble fingers. Show them who’s boss!

– Insecticidal soap: Use an insecticidal soap spray to control aphids and spider mites. Make sure to follow the instructions and cover all affected areas.

– Neem oil: Neem oil is a natural insecticide that can help control a variety of pests. Mix it with water according to the instructions and spray your bonsai, paying attention to the undersides of leaves.

Remember, prevention is key! Keep a close eye on your bald cypress bonsai, regularly inspecting the foliage and taking immediate action at the first sign of trouble. Your bonsai will thank you for being a vigilant pest detective!

6.3 Recognizing and Treating Common Diseases

Just like us, plants can catch a cold too. Here are a few common diseases that can affect your bald cypress bonsai and how to tackle them:

– Root rot: Excessive moisture and poor drainage can cause root rot, resulting in wilting and discolored foliage. If caught early, repotting in well-draining soil can save the day.

– Needle blight: This fungal disease causes the needles to turn brown and eventually fall off. Prune affected branches and treat with a fungicide according to the instructions.

– Rust: Rust is a fungal disease that creates orange-brown spots on the foliage. Prune affected areas and apply a fungicide to prevent further spread.

Remember, prevention is better than cure! Maintain good bonsai hygiene, provide proper watering, and ensure adequate air circulation to minimize the risk of diseases. Your bald cypress bonsai will appreciate the healthy environment!

7. Showcasing Bald Cypress Bonsai: Displaying Techniques and Presentation Ideas

7.1 Choosing the Right Bonsai Pot and Stand

Just like having the perfect outfit and accessories can elevate your style, choosing the right pot and stand can enhance the beauty of your bald cypress bonsai. Here’s how to make the perfect match:

– Pot selection: Go for a pot that complements the size and style of your bonsai. Consider materials like ceramic or clay for an earthy feel, or opt for a sleek and modern design with a bonsai pot madeIn conclusion, cultivating and caring for a Bald Cypress Bonsai is a rewarding endeavor that allows you to bring the beauty and grace of nature into your home or garden. By understanding its unique characteristics, employing proper care techniques, and honing your styling skills, you can create a captivating masterpiece that will continue to evolve and thrive over time. Embrace the art and history of Bald Cypress Bonsai, and let your creativity flourish as you embark on this journey of tranquility and natural beauty. Start your own Bald Cypress Bonsai today and witness the transformation of a humble tree into a living work of art.

FAQ

1. Can I keep a Bald Cypress Bonsai indoors?

While Bald Cypress Bonsai can tolerate brief periods indoors, they are primarily an outdoor tree species. They require ample sunlight and fresh air to thrive. It is recommended to keep your Bald Cypress Bonsai outdoors, especially during the growing season, and only bring them indoors for short periods for display purposes.

2. How often should I water my Bald Cypress Bonsai?

The watering frequency for Bald Cypress Bonsai depends on various factors such as climate, season, and pot size. As a general rule, it is best to water thoroughly when the top inch of soil feels slightly dry. Avoid overwatering as this can lead to root rot, and ensure that the pot has proper drainage. Regularly monitor the moisture level in the soil and adjust your watering routine accordingly.

3. Do Bald Cypress Bonsai require special soil mixtures?

Yes, Bald Cypress Bonsai benefit from a well-draining soil mixture to promote healthy root growth. A common mixture consists of components such as Akadama, pumice, and lava rock. This combination provides good drainage while retaining sufficient moisture for the roots. It is advisable to repot your Bald Cypress Bonsai every 2-3 years to refresh the soil and encourage optimal growth.

4. How long does it take for a Bald Cypress Bonsai to develop its signature aerial roots?

Bald Cypress Bonsai are known for their characteristic aerial roots that enhance their unique beauty. The development of these roots largely depends on the age and health of the tree. It can take several years for the aerial roots to fully develop and become prominent features of your bonsai. Patience and proper care are key to encouraging the growth of these captivating aerial roots.

What is Tanuki Bonsai?: A Unique Art Form of Deadwood bonsai techniques

Tanuki Bonsai, also known as Phoenix Bonsai or Bonsai Forest or Deadwood bonsai techniques, is a captivating and distinctive form of bonsai that combines living trees with deadwood to create a harmonious and artistic composition. Originating from Japan, this art form holds deep cultural significance and has become increasingly popular among bonsai enthusiasts worldwide. In this article, we will delve into the world of Tanuki Bonsai, exploring its history, symbolic meanings, and step-by-step techniques to create your own stunning Tanuki Bonsai masterpiece. Whether you are a seasoned bonsai artist or a beginner looking to embark on a unique bonsai journey, this guide will equip you with the knowledge and skills to bring a Tanuki Bonsai tree to life.

1. Introduction to Tanuki Bonsai: A Unique Art Form

1.1 The History and Origins of Tanuki Bonsai

Picture this: a bonsai tree that seems to have a story to tell, with branches that twist and turn like a wise old wizard’s beard. That, my curious friends, is the magic of tanuki bonsai. But where did this delightful art form come from?

Tanuki bonsai originated in Japan (no surprise there!) and it’s said to have been inspired by the Japanese folklore creature called tanuki. Tanuki are mythical creatures that resemble raccoon dogs and are known for their mischievous nature. Imagine a raccoon with the ability to shape-shift and you’ve got the picture.

1.2 Understanding the Symbolism and Cultural Significance

Now, why would anyone want to create a bonsai that looks like a tanuki? Well, beyond their mischievous reputations, tanuki have symbolic meanings in Japanese culture. They are often associated with good fortune, prosperity, and protection against evil spirits. So, having a tanuki bonsai in your home is like having a little lucky charm that also adds a touch of whimsy to your space. Plus, who wouldn’t want a raccoon dog-shaped tree, am I right?

2. Understanding the Cultural Significance of Tanuki Bonsai

2.1 Tanuki Bonsai in Japanese Folklore and Mythology

In Japanese folklore and mythology, tanuki are often portrayed as playful tricksters. They are believed to have shape-shifting abilities and are known to use their powers for both mischief and good deeds. These mischievous creatures have captured the imagination of the Japanese people for centuries, and their influence can even be seen in traditional art forms like ukiyo-e prints.

2.2 The Symbolic Meanings Behind Tanuki Bonsai

Beyond the folklore, tanuki bonsai also carries symbolic meanings. The twisted and gnarled branches of a tanuki bonsai represent resilience and adaptability, reminding us to embrace life’s twists and turns with grace. It’s a reminder that even in the face of challenges, we can find beauty and strength. Plus, let’s be honest, it’s just really cool to have a tree that looks like a quirky character straight out of a fairy tale.

3. Step-by-Step Guide on Creating a Tanuki Bonsai Tree

3.1 Gathering the Necessary Materials and Tools

Before you embark on your tanuki bonsai journey, you’ll need some essentials. Don’t worry, it’s not as complicated as it sounds! You’ll need a young tree, preferably with a straight trunk and plenty of branches. You’ll also need deadwood, wire, bonsai soil, and some tools like concave cutters and jin pliers.

3.2 Preparing the Tree for Tanuki Bonsai Styling

Now that you have your materials, it’s time to get down to business. Start by carefully removing the young tree from its pot and gently combing out the roots. This will help promote growth and allow the tree to thrive in its new tanuki form.

3.3 Techniques for Attaching the Deadwood and Branches

The real magic happens when you start attaching the deadwood and branches to your tree. This is where you can let your creativity shine! Use wire to carefully secure the deadwood and branches to the tree, making sure to create a natural and balanced composition. Think of it as giving your tree its own personality and character. And voila! You have your very own tanuki bonsai.

4. Selecting the Perfect Tree for Your Tanuki Bonsai

4.1 Choosing the Ideal Tree Species for Tanuki Bonsai

Not all trees are created equal when it comes to tanuki bonsai. Some tree species lend themselves better to this unique art form. Junipers, pines, and maples are often popular choices due to their flexible branches that can be easily shaped and styled. However, feel free to experiment and choose a tree species that speaks to you. After all, art is all about personal expression!

4.2 Evaluating the Tree’s Trunk and Branch Structure

When selecting a tree for tanuki bonsai, pay close attention to the trunk and branch structure. Look for a tree with a strong, straight trunk that will serve as the backbone of your tanuki creation. The branches should be well-distributed and allow for interesting twists and turns. Remember, the more character the tree has, the more personality your tanuki bonsai will exude.

So, whether you’re a bonsai enthusiast, a lover of Japanese folklore, or just someone who appreciates the whimsical, tanuki bonsai is a unique art form that will surely bring a touch of magic into your life. Happy sculpting, my friends!2> Displaying Your Tanuki Bonsai with Style and Flair

5. Techniques for Styling and Wiring a Tanuki Bonsai

Creating a majestic tanuki bonsai is like sculpting a work of art from nature’s very own materials. With the right techniques, you can transform an ordinary bonsai into a whimsical masterpiece. In this section, we’ll explore the principles of bonsai styling and the wiring techniques that will help you create natural-looking branches.

5.1 Understanding Principles of Bonsai Styling

Styling a tanuki bonsai is all about channeling your inner artist and finding harmony in the branches and foliage. Start by observing the tree’s natural growth pattern and use it as a guide. Aim to create a balanced composition with an asymmetrical twist, as this will give your bonsai a more dynamic and captivating appearance.

Remember, bonsai is not about forcing a tree into a specific shape; it’s about enhancing its natural beauty. So, be patient and let the tree speak to you as you shape it.

5.2 Wiring Techniques for Creating Natural-Looking Branches

Wiring is the secret weapon of bonsai enthusiasts. It allows you to shape and position branches in a way that looks both natural and visually pleasing. When wiring your tanuki bonsai, start by selecting a suitable thickness of wire. Generally, the wire should be about one-third the diameter of the branch you’re working with.

Gently wrap the wire around the branch, making sure not to apply too much pressure. You want to hold the branch in place without causing any damage. Once the wire is in place, carefully bend the branch to achieve the desired shape. Remember to take breaks and allow your bonsai’s branches to rest, as excessive bending can cause stress.

6. Mastering the Art of Moss and Rock Placement for Tanuki Bonsai

In the enchanting world of tanuki bonsai, moss and rocks play a vital role in creating a captivating landscape. In this section, we’ll explore how you can enhance the aesthetic appeal of your bonsai using moss and incorporate rocks to achieve a naturalistic landscape composition.

6.1 Enhancing the Aesthetic Appeal with Moss

Moss adds a touch of tranquility and visual interest to your tanuki bonsai. Applying moss to the soil surface not only creates an attractive ground cover but also helps retain moisture and protects the root system. To grow moss, keep the soil moist and provide a shady environment. You can even sprinkle some moss spores onto the soil for a faster and more abundant growth.

Remember, moss has a mind of its own, so allow it to grow freely and embrace its whimsical nature. Just make sure to keep it in check so that it doesn’t smother your bonsai.

6.2 Incorporating Rocks for Naturalistic Landscape Composition

Strategically placing rocks around your tanuki bonsai can bring a sense of harmony and balance to the overall composition. Rocks can represent mountains, cliffs, or even the shoreline of a tranquil lake. Experiment with different sizes, shapes, and colors to create a captivating and visually appealing landscape.

When positioning rocks, make sure they appear as though they’ve naturally settled into the scenery. Avoid placing rocks directly on the soil surface, as this can disrupt root growth. Instead, embed them partially into the soil or use a layer of moss to create a seamless transition.

7. Pruning and Maintenance Tips for a Healthy Tanuki Bonsai

To keep your tanuki bonsai thriving and looking its best, it’s essential to master the art of pruning and provide proper care. In this section, we’ll explore pruning techniques specific to tanuki bonsai and share tips for watering, fertilizing, and protecting your bonsai.

7.1 Proper Pruning Techniques for Tanuki Bonsai

Pruning is a crucial aspect of bonsai care that helps shape your tanuki bonsai and maintain its health. Regularly inspect your bonsai for any dead, damaged, or overgrown branches and remove them with sharp pruning shears. Remember to sanitize your tools before pruning to prevent the spread of diseases.

When pruning, make clean cuts just above the node or bud to encourage new growth. Aim for a balanced appearance, ensuring that no single branch dominates the overall design. Pruning not only helps maintain the desired shape but also improves airflow and sunlight penetration for a healthier bonsai.

7.2 Watering, Fertilizing, and Protecting Your Tanuki Bonsai

Proper watering is essential to keep your tanuki bonsai happy and healthy. Watering requirements may vary depending on factors like climate, soil composition, and tree species. As a rule of thumb, check the moisture level of the soil by pressing your finger lightly into the soil surface. If it feels dry, water thoroughly, ensuring that the water reaches the roots.

Fertilization is also crucial for the nourishment of your bonsai. Use a balanced bonsai fertilizer according to the instructions provided, typically during the growing season. Avoid overfertilization, as this can cause root burn and other complications. Additionally, protect your tanuki bonsai from extreme weather conditions, pests, and diseases by providing the necessary care and maintaining a clean environment.

8. Showcasing Your Tanuki Bonsai: Display and Care Tips

Your tanuki bonsai deserves to be displayed with style and flair to highlight its beauty and create a captivating focal point. In this section, we’ll explore tips for choosing the right bonsai pot and showcase your tanuki bonsai in all its splendor.

8.1 Choosing the Right Bonsai Pot for Your Tanuki Bonsai

When it comes to pots for your tanuki bonsai, it’s essential to strike a balance between functionality and aesthetics. Choose a pot that complements the style and size of your bonsai. Consider factors such as material, color, and shape to enhance the overall visual impact.

Ensure that the pot provides adequate drainage and room for the root system to grow. A mesh or screen at the bottom of the pot will prevent soil from escaping while allowing excess water to drain freely. Remember, the pot is not just a container—it’s an essential element that contributes to the overall artistic expression of your tanuki bonsai.

8.2 Displaying Your Tanuki Bonsai with Style and Flair

Once you’ve chosen the perfect pot, it’s time to give your tanuki bonsai the spotlight it deserves. Find a display area that offers optimal lighting conditions, considering the specific needs of your bonsai species. A well-lit space near a window or a shaded outdoor area can work wonders for your bonsai’s growth and aesthetics.

Consider using a bonsai stand or a suiseki (a naturally formed stone) to elevate your tanuki bonsai and create a captivating display. Experiment with different angles and positions to find the most visually appealing arrangement. And don’t be afraid to show off your bonsai to friends and fellow enthusiasts—sharing the beauty of your tanIn conclusion, delving into the art of Tanuki Bonsai offers a truly unique and rewarding experience for bonsai enthusiasts. By understanding its cultural significance, mastering the techniques of styling and wiring, and embracing the beauty of moss and rock placement, you can create stunning Tanuki Bonsai trees that showcase your artistic flair. With proper pruning and maintenance, your Tanuki Bonsai will thrive and continue to captivate viewers for years to come. So, embrace the artistry, patience, and precision required, and let the enchanting world of Tanuki Bonsai inspire your bonsai journey.

FAQ

1. Is Tanuki Bonsai suitable for beginners?

Tanuki Bonsai can be quite challenging for beginners due to the techniques involved in attaching deadwood and creating a natural look. However, with patience, practice, and guidance, beginners can certainly learn and enjoy the art of Tanuki Bonsai.

2. Can any tree be used for Tanuki Bonsai?

While almost any tree species can be used for Tanuki Bonsai, it is essential to select a tree with an interesting trunk and branch structure. Trees with flexible branches that can be manipulated and wired easily tend to work best for this art form.

3. How do I care for a Tanuki Bonsai tree?

Caring for a Tanuki Bonsai tree involves regular pruning, watering, and fertilizing, just like any other bonsai tree. Additionally, you should provide protection from extreme weather conditions and ensure appropriate lighting conditions based on the tree species. Regular monitoring and adjustment of these factors will help keep your Tanuki Bonsai healthy and vibrant.

4. Can I display my Tanuki Bonsai indoors?

While it’s possible to display your Tanuki Bonsai indoors temporarily, it is generally recommended to keep it outside, as most bonsai trees thrive in natural light and fresh air. However, you can bring your Tanuki Bonsai indoors for short periods, ensuring it receives sufficient sunlight and proper care during that time.