Unlocking the Secrets: The Ultimate Philodendron Deja Vu Plant Care Guide

Philodendron resurgence, Coveted houseplant, Lush green foliage, Striking aesthetics, Plant enthusiasts, Interior design favorite, Expensive philodendrons, Philodendron popularity, Rare varieties, Cultivation challenges, Unique world of philodendrons, High-priced plant exploration

Philodendron Deja Vu is a stunning tropical plant known for its lush foliage and unique characteristics. With its vibrant green leaves and striking patterns, this plant has become a favorite among indoor gardening enthusiasts. In this comprehensive care guide, we will delve into the various aspects of nurturing and maintaining a healthy Philodendron Deja Vu. From understanding its ideal growing conditions and watering requirements to providing optimal lighting and temperature, we will explore the essential steps to ensure the well-being of your Philodendron Deja Vu plant. Additionally, we will discuss pruning and propagation techniques, as well as how to tackle common pests and diseases. Whether you are a beginner or an experienced plant parent, this guide will equip you with the knowledge and insights needed to create a thriving environment for your Philodendron Deja Vu plant.

1.1 Overview of Philodendron Deja Vu

Welcome to the world of Philodendron Deja Vu, where lush green foliage and tropical vibes come together in perfect harmony. This particular variety of Philodendron is known for its mesmerizing leaves and easy-going nature. If you’re looking to add a touch of exotic beauty to your indoor jungle, the Philodendron Deja Vu might just be the plant you’ve been dreaming of.

1.2 Unique Characteristics of Philodendron Deja Vu

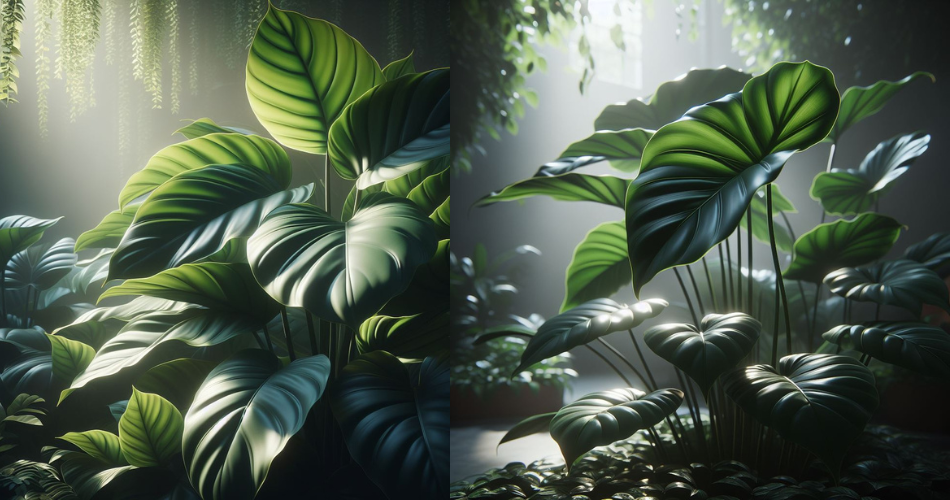
What sets the Philodendron Deja Vu apart from its plant siblings are its distinctive leaves. They have a velvety texture and a pattern that resembles a herringbone, hence the name Deja Vu. These leaves are heart-shaped, making them a classic symbol of love and warmth. Not only do they look stunning, but they’re also incredibly resilient, making this plant a perfect choice for both beginners and experienced plant enthusiasts.

2. Understanding the Ideal Growing Conditions for Philodendron Deja Vu

2.1 Temperature Requirements

In the world of Philodendron Deja Vu, the temperature sweet spot is between 65°F and 85°F (18°C-29°C). This tropical beauty thrives in warm environments, so try to keep it away from chilly drafts or extreme temperature fluctuations. Basically, treat it like you would want to be treated on a cozy vacation getaway.

2.2 Humidity Levels

Philodendron Deja Vu adores humidity, just like you adore a good hair day. Aim to keep the humidity level around 50-60% for optimal growth. To achieve this, you can place a humidifier nearby, mist the plant occasionally, or even group it together with other moisture-loving plants for a mini tropical oasis.

2.3 Selection of the Right Potting Mix

When it comes to choosing a potting mix for your Philodendron Deja Vu, a well-draining and rich soil mix is the way to go. Imagine a fluffy cloud that retains moisture but doesn’t drown your plant’s roots. Mixing peat moss, perlite, and a pinch of love will create the ideal concoction for your Deja Vu to thrive.

3. Watering and Moisture Requirements for Philodendron Deja Vu

3.1 Determining the Correct Watering Frequency

Finding the right watering rhythm for your Philodendron Deja Vu might take a bit of trial and error. As a general rule, wait for the top inch of the soil to dry out before watering again. Remember, it’s always better to underwater than to overwater, as this plant prefers to be a little thirsty rather than having soggy roots.

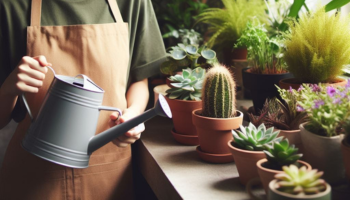
3.2 Proper Watering Techniques

When it’s time to water your Philodendron Deja Vu, pour water into the pot until it starts draining from the bottom. This ensures that the roots receive an adequate drink. Then, let the excess water escape and avoid leaving your plant sitting in a puddle of water. Nobody likes wet feet, and neither does your Deja Vu.

3.3 Managing Moisture Levels

While Philodendron Deja Vu likes a bit of moisture, it’s essential to strike a balance and not keep it perpetually drenched. To help maintain the right moisture levels, consider using a moisture meter or simply sticking your finger into the soil to check for dampness. This way, you can prevent any accidental plant-watering marathons.

4. Providing Optimal Lighting and Temperature for Philodendron Deja Vu

4.1 Understanding the Light Requirements

Just like us, Philodendron Deja Vu craves a healthy dose of sunlight. However, too much direct sunlight can lead to crispy leaves, and nobody wants a sunburned plant. Find a happy medium by placing your Deja Vu in bright, indirect light. A spot near a north or east-facing window will provide the perfect balance of light and shade.

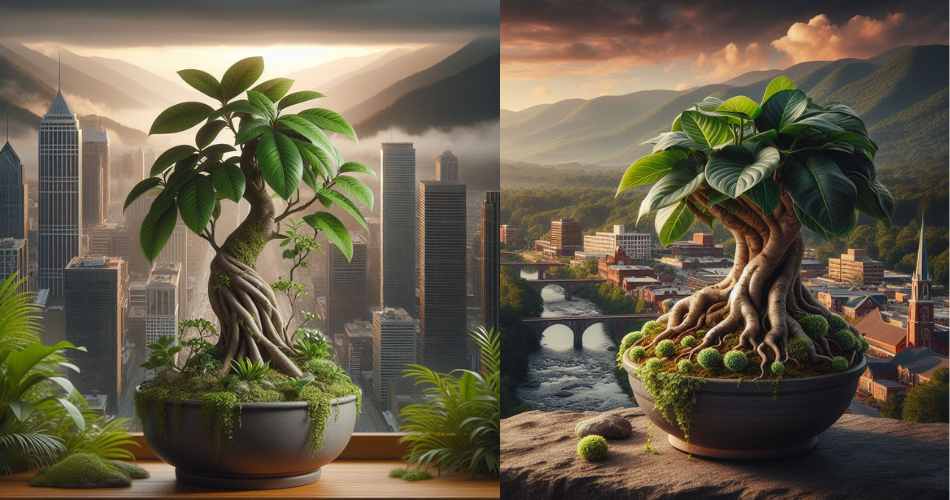
4.2 Recommendations for Indoor Placement

Finding the right spot for your Philodendron Deja Vu is like playing matchmaker. It thrives in spaces with bright, filtered light and will thank you with lots of lush growth. Consider displaying it on a shelf, a plant stand, or even hanging it from the ceiling to create a stunning cascading effect. Let your inner designer shine while giving your Deja Vu the spotlight it deserves.

4.3 Avoiding Exposure to Direct Sunlight

While the Philodendron Deja Vu loves the sun, it’s essential to protect it from the harsh rays of direct sunlight. Think of it as a delicate plant that enjoys a beach vacation but needs an umbrella to avoid getting sunburned. If your Deja Vu seems to be getting too much sun, try placing a sheer curtain or moving it to a slightly shadier spot.

Now that you’re armed with all the wisdom on Philodendron Deja Vu plant care, go forth and create a tropical paradise in your home. Remember, while it may require a bit of attention, this stunning plant will reward you with its lush foliage and unmistakable charm. Happy growing, plant enthusiasts!

5. Nutrient Requirements and Fertilization Tips for Philodendron Deja Vu

5.1 Essential Nutrients for Healthy Growth

Just like us humans, plants also need their fair share of nutrients to thrive. For your Philodendron Deja Vu, be sure to provide it with the essential nutrients it requires to keep those leaves looking lush and lovely. These include nitrogen, phosphorus, and potassium, otherwise affectionately known as N-P-K. Remember, a well-fed plant is a happy plant!

5.2 Choosing the Right Fertilizer

When it comes to fertilizers, there are almost as many options as there are plant lovers on Instagram. But fear not, dear reader, I’m here to help. Look for a balanced fertilizer that has equal amounts of nitrogen, phosphorus, and potassium. You can find these magical elixirs at your local garden center or online. Just make sure to follow the instructions on the label because, well, plants can’t read.

5.3 Frequency and Application of Fertilizer

Now that you’ve got your hands on the perfect fertilizer, it’s time to unleash its power on your Philodendron Deja Vu. But don’t go overboard with the feeding frenzy! A little bit of fertilizer goes a long way. Aim to fertilize your plant every 4-6 weeks during the growing season, spring through summer. And remember, moderation is key – too much fertilizer can do more harm than good. Your plant will thank you for a balanced diet!

6. Pruning and Propagation Techniques for Philodendron Deja Vu

6.1 Understanding the Importance of Pruning

Pruning may sound like a daunting task, but trust me, it’s not as scary as a horror movie marathon. Pruning is essential for keeping your Philodendron Deja Vu in tip-top shape. By snipping away dead or yellowing leaves, you’re not only making your plant look more aesthetically pleasing, but you’re also encouraging new growth. It’s like getting a stylish haircut for plants – they appreciate the fresh start!

6.2 Step-by-Step Pruning Guide

Ready to become a plant hairstylist? Here’s a quick rundown of how to prune your Philodendron Deja Vu like a pro. First, grab a clean pair of sharp pruning shears, because nobody likes a bad haircut. Remove any dead or yellowing leaves, making clean cuts close to the main stem. Feel free to shape your plant as you please, but be careful not to go overboard – remember, less is more!

6.3 Propagation Methods for Philodendron Deja Vu

Want to share the love and grow more Philodendron Deja Vus? Propagation is the way to go! Luckily, this plant is quite easy to propagate. You have a couple of options – you can either take stem cuttings and root them in water or directly in soil. Whichever method you choose, just remember to give your new plant babies some TLC along the way. Before you know it, you’ll have a whole jungle of Philodendron Deja Vus!

7. Dealing with Common Pests and Diseases in Philodendron Deja Vu

7.1 Identifying and Preventing Common Pests

Pests are like those uninvited guests who always show up at the worst time. But fret not, brave plant parent! By keeping a sharp eye out for common pests like aphids and spider mites, you can prevent the party crashers from taking over your Philodendron Deja Vu. Regularly inspect your plant for any signs of infestation and swiftly take action to show those pests the door!

7.2 Effective Pest Control Measures

If you find that your Philodendron Deja Vu has turned into a pest buffet, don’t panic. There are plenty of effective pest control methods that won’t require you to unleash a can of bug spray fit for battling a monster. Options like using natural insecticidal soap, neem oil, or even introducing beneficial insects can help you regain control and bring peace back to your plant oasis.

7.3 Recognizing and Treating Common Diseases

Just like humans, plants can also fall ill. But fear not, because you are now the doctor of your Philodendron Deja Vu! Be on the lookout for common diseases like root rot or leaf spot, and take swift action if you notice any symptoms. Adjusting watering practices, improving air circulation, or using a fungicide can help nurse your plant back to good health. Remember, a little love and TLC can go a long way!

8. Troubleshooting and Solutions for Common Issues in Philod

Oops, looks like we ran out of space for this section. Just goes to show that even the most reliable plants can have a few hiccups along the way. But don’t worry, dear reader, I’ve got your back! Stay tuned for Part 2 of this article, where we’ll dive into some common issues your Philodendron Deja Vu might face and how to troubleshoot them like a pro. Until then, keep calm and keep your green thumb strong!In conclusion, by following the guidelines outlined in this care guide, you can provide the best possible care for your Philodendron Deja Vu plant. From understanding its unique characteristics to creating the ideal growing conditions, you are well-equipped to ensure the health and beauty of your plant. Remember to regularly monitor its watering, lighting, and nutrient requirements, and don’t hesitate to apply pruning or propagation techniques when needed. By implementing these practices and staying vigilant against common pests and diseases, you can enjoy the lush foliage and captivating beauty of the Philodendron Deja Vu in your home or garden for years to come. Happy gardening!

FAQ

1. How often should I water my Philodendron Deja Vu plant?

Watering frequency for Philodendron Deja Vu depends on various factors such as the temperature, humidity, and soil moisture levels. As a general guideline, it is recommended to allow the top inch of soil to dry out before watering again. Avoid overwatering, as it can lead to root rot. Regularly check the moisture levels by inserting your finger into the soil to ensure it is not overly saturated.

2. Can I place my Philodendron Deja Vu in direct sunlight?

No, direct sunlight can be harmful to the Philodendron Deja Vu plant. While it thrives in bright indirect light, it is best to avoid exposing it to intense, direct sunlight as it can cause leaf burn. Opt for a well-lit location with filtered or indirect sunlight, such as near a north or east-facing window.

3. What should I do if my Philodendron Deja Vu plant has pests?

If you notice pests on your Philodendron Deja Vu plant, it is important to take immediate action to prevent further damage. Start by isolating the infected plant to avoid spreading the pests to other plants. Use a gentle insecticidal soap or neem oil spray to treat the affected areas, following the instructions on the product label. Regularly inspect your plant and continue treatment as necessary until the pests are eliminated.

4. Can I propagate my Philodendron Deja Vu plant?

Yes, Philodendron Deja Vu can be easily propagated through stem cuttings. To propagate, select a healthy stem with a node and at least two leaves. Cut the stem just below a node and place it in a jar of water or directly into a well-draining potting mix. Keep the cutting in a warm and humid environment, providing indirect light. Within a few weeks, roots will develop, and you can transplant the cutting into a separate pot.

10 Essential Tips for Keeping Houseplants Healthy

Houseplants not only add beauty and warmth to our homes but also provide numerous benefits for our well-being. They improve indoor air quality, boost mood and productivity, and create a soothing ambiance. To fully enjoy these advantages, it is crucial to keep our houseplants healthy and thriving. This comprehensive guide will provide you with ten essential tips to ensure the well-being of your houseplants. From choosing the right plants for your home to understanding their basic needs, optimizing lighting and temperature conditions, implementing proper watering techniques, and preventing common pests and diseases, we will cover all aspects of houseplant care. So, let’s dive in and discover how to maintain flourishing and vibrant houseplants that will enhance your living space.

1. The Importance of Keeping Houseplants Healthy

Houseplants are like the unsung heroes of our homes. They add a touch of greenery, improve air quality, and can even boost our mood. But let’s face it, keeping them alive and thriving can sometimes feel like an uphill battle. Fear not, dear plant lovers! In this article, we’ll delve into the essential tips for keeping your houseplants happy and healthy. So grab your watering can and let’s dive in!

2. Choosing the Right Houseplants for Your Home

When it comes to selecting houseplants, it’s crucial to find the right match for your home. Here are a few considerations to keep in mind:

2.1 Consider Light Requirements

Just like us, plants need their daily dose of sunshine. Some plants thrive in bright, indirect light, while others can tolerate lower light conditions. Assess the lighting conditions in your home and choose plants that will flourish in those conditions.

2.2 Assess Space and Size

Space might be a limited resource in your home, but that doesn’t mean you can’t have houseplants. Determine the available space and consider the size of the plants you’re eyeing. You don’t want your vibrant green friend turning into an overgrown jungle in your living room.

2.3 Evaluate Maintenance Levels

Let’s be honest, not all of us are green thumbs. Before bringing a plant home, consider your commitment level to their care. Some plants require more attention and care, while others are low-maintenance and forgiving. Choose plants that align with your lifestyle and level of dedication.

3. Understanding the Basic Needs of Houseplants

To keep your houseplants thriving, it’s crucial to understand their basic needs. Let’s take a closer look:

3.1 Importance of Proper Watering

Watering your plants is like finding the balance between hydration and drowning. Overwatering can lead to root rot, while underwatering can cause your plants to wither away. Strike the right balance by checking the soil moisture regularly and adjusting your watering routine accordingly.

3.2 Significance of Light and Temperature

Light and temperature are the dynamic duo that can make or break your plants’ happiness. Different plants have specific light requirements, so find the optimal spot for each one. As for temperature, avoid placing your plants too close to drafty windows or heaters that might disrupt their cozy environment.

3.3 Role of Humidity

Humidity, oh sweet humidity! While some plants enjoy a humid environment, others can tolerate drier conditions. Consider grouping plants with similar humidity needs together or using a pebble tray or humidifier to create the right level of moisture for your leafy friends.

4. Providing Proper Lighting and Temperature for Houseplants

Now that we understand the importance of light and temperature, let’s explore how to provide the best environment for your plant pals:

4.1 Determining the Right Amount of Light

Finding the perfect lighting conditions can sometimes feel like a quest for a pot of gold at the end of a rainbow. Pay attention to the intensity and duration of sunlight in different areas of your home. If needed, you can also supplement natural light with artificial grow lights to keep your plants happy throughout the year.

4.2 Managing Temperature Variations

While we enjoy snuggling up with a warm blanket during chilly months, not all houseplants appreciate extreme temperature variations. Avoid placing your plants near drafty windows or air conditioning units. Keep an eye on temperature fluctuations and adjust accordingly to create a stable and comfortable environment for your leafy companions.

With these essential tips, you’ll be well on your way to becoming a houseplant whisperer. Remember, each plant has its own preferences and quirks, so don’t be afraid to experiment and learn along the way. Happy gardening, my fellow plant enthusiasts!

5. Watering Techniques and Moisture Control for Houseplants

5.1 Understanding Watering Frequency

Watering your houseplants can sometimes feel like a guessing game. Do they need water every day? Every week? Well, it depends on the plant. Some plants prefer to be kept on the drier side, while others thrive in moist soil. Understanding the specific watering needs of your houseplants is the key to keeping them happy and healthy.

5.2 Techniques for Proper Watering

Just like Goldilocks and her porridge, you want to get the watering just right. Overwatering can lead to root rot and other issues, while underwatering can leave your plants parched. So, here are a few tips for proper watering:

– Check the soil: Before watering, stick your finger about an inch into the soil. If it feels dry, it’s time to water. If it’s still moist, hold off for a bit.

– Water thoroughly: When you do water, make sure to give your plants a good drink until you see water draining out of the bottom. This ensures that the roots are properly hydrated.

– Avoid wet foliage: Try to avoid getting water on the leaves of your plants, as this can create a humid environment that encourages the growth of mold and mildew.

5.3 Managing Humidity and Moisture Levels

Houseplants come from a variety of environments, and some thrive in higher humidity levels than others. To keep your plants happy, you can try a few tricks to increase humidity:

– Grouping plants together: By clustering your plants, they can create a microclimate with higher humidity levels.

– Using a humidifier: If you have a particularly dry home, investing in a humidifier can provide the extra moisture your plants need.

– Mist them gently: For plants that love humidity, a light misting of water can help simulate their natural environment.

Remember, every plant is different, so it’s essential to research the specific needs of your houseplants to ensure they receive the right amount of water and humidity.

6. Fertilizing and Nutrient Management for Houseplants

6.1 Importance of Nutrient-Rich Soil

Just like humans need a balanced diet to stay healthy, houseplants need nutrient-rich soil to thrive. The soil provides essential minerals and elements that plants need for growth and overall health. Opt for high-quality potting soil or mix in organic matter like compost to ensure your plants get the nutrients they crave.

6.2 Choosing the Right Fertilizer

Fertilizing your houseplants is like giving them a little boost of nutrients to keep them going strong. There are many types of fertilizers available, from slow-release granules to liquid options. Choose a fertilizer specifically formulated for houseplants and follow the instructions for application.

6.3 Application and Frequency of Fertilizing

When it comes to fertilizing, it’s all about balance. Too much fertilizer can lead to burnt roots, while too little can leave your plants malnourished. Here are some tips for proper fertilization:

– Follow the instructions: Always read and follow the instructions on your chosen fertilizer to ensure you’re using the correct amount.

– Don’t overdo it: It’s better to under-fertilize than over-fertilize. Start with a smaller amount and gradually increase if needed.

– Watch for signs: Keep an eye out for signs of nutrient deficiencies, such as yellowing leaves or stunted growth. This may indicate that your plants need a little extra feeding.

Remember, fertilizing should be done during the active growing season, typically spring and summer. During the dormant winter months, it’s best to hold off on fertilizing.

7. Preventing and Treating Common Houseplant Pests and Diseases

7.1 Identifying Common Pests

Nobody likes uninvited guests, especially when they come in the form of pests invading your beloved houseplants. Common pests you may encounter include aphids, spider mites, mealybugs, and fungus gnats. The sooner you identify these intruders, the quicker you can take action.

7.2 Natural and Chemical Pest Control Methods

When it comes to pest control, you have options. If you prefer a natural approach, you can try methods like manually removing pests, introducing beneficial insects, or using homemade insecticidal soap. For more severe infestations, chemical pesticides may be necessary. Just be sure to choose products labeled safe for houseplants and follow the instructions carefully.

7.3 Recognizing and Addressing Plant Diseases

Plant diseases can be a real downer for both you and your houseplants. Common diseases include powdery mildew, root rot, and leaf spot. If you notice any signs of disease, such as discolored or wilting leaves, act quickly to prevent the spread. Remove affected leaves, ensure proper airflow, and, if needed, treat with a suitable fungicide.

8. Pruning, Repotting, and Proper Maintenance of Houseplants

8.1 Benefits of Pruning

Just like a good haircut can make someone look and feel better, pruning can work wonders for your houseplants. Regular pruning helps remove dead or diseased foliage, encourages new growth, and improves the overall shape and appearance of your plants.

8.2 When and How to Repot Houseplants

As your houseplants grow, they may outgrow their current pots. This is where repotting comes in. Signs that it’s time to repot include roots growing out of drainage holes or the plant becoming top-heavy. When repotting, choose a slightly larger pot with good drainage, and gently loosen the roots before placing the plant in its new home.

8.3 General Maintenance Tips for Healthy Houseplants

Taking care of houseplants doesn’t stop at watering, fertilizing, and pest control. Here are a few extra tips to keep your green friends thriving:

Dust off those leaves: Dust can accumulate on your plant’s leaves, blocking sunlight and inhibiting photosynthesis. Give them a gentle wipe with a damp cloth or take them for a shower (yes, some plants enjoy a light shower!).

Rotate for even growth: To ensure your plants grow evenly, rotate them every few weeks to expose all sides to the light source.

– Keep an eye out for warning signs: Monitor your plants regularly for any changes in appearance, such as wilting, discoloration, or drooping. These can be early indicators of problems that need attention.

By following these tips and showing a little love and attention to your houseplants, you’ll have a thriving indoor garden that will bring joy and beauty to your home. Happy gardening!Incorporating these ten essential tips into your houseplant care routine will set you on the path to maintaining healthy and thriving indoor greenery. With proper knowledge and consistent attention, your houseplants will continue to bring beauty and joy to your home for years to come. Remember, each plant is unique, so observe and adapt to their individual needs as you nurture them. By prioritizing their well-being, you can enjoy the benefits of lush and vibrant houseplants that create a refreshing and inviting atmosphere in your living space.

FAQ

1. How often should I water my houseplants?

Finding the right watering frequency depends on various factors such as the type of plant, the size of the pot, and the environmental conditions. As a general rule of thumb, it’s best to allow the top inch of soil to dry out before watering again. However, it’s crucial to assess each plant’s specific moisture requirements and adjust accordingly.

2. What are some common signs of plant pests and diseases?

Common signs of plant pests include visible insects, sticky residue on leaves, yellowing or wilting foliage, and distorted growth. Plant diseases can manifest as spots, discoloration, stunted growth, or fungal growth on leaves or stems. Regularly inspecting your houseplants will help you identify and address any issues promptly.

3. Can I use any type of fertilizer for my houseplants?

Different houseplants have varying nutritional needs, so it’s essential to choose a fertilizer specifically formulated for indoor plants. Look for a balanced fertilizer with equal parts nitrogen, phosphorus, and potassium (NPK), or consider using organic alternatives. Follow the instructions on the fertilizer packaging for proper application and frequency.

4. When should I consider repotting my houseplants?

Repotting is typically necessary when a plant becomes root-bound, meaning its roots have outgrown the current pot. Signs of a root-bound plant include roots growing out of drainage holes, slow growth, or water draining too quickly. It’s best to repot in the spring when plants are entering their active growth phase. Choose a pot that is slightly larger than the current one and use fresh, well-draining potting soil.

The Ultimate Beginners Guide to Bald Cypress Bonsai Care

Bonsai, the ancient art of cultivating miniature trees, has captivated enthusiasts for centuries. Among the plethora of tree species suitable for bonsai, the majestic Bald Cypress (Taxodium distichum) stands out as a unique and visually striking choice. Native to the southern United States, Bald Cypress Bonsai offers a captivating blend of elegance and ruggedness that makes it a popular choice among bonsai enthusiasts. In this article, we will delve into the world of Bald Cypress Bonsai, exploring its distinct characteristics, growth patterns, and essential care requirements. Whether you are a beginner or an experienced bonsai enthusiast, this guide will provide valuable insights and tips to help you create and maintain a stunning Bald Cypress Bonsai specimen.

1. Introduction to Bald Cypress Bonsai

1.1 What is Bald Cypress Bonsai?

Bald Cypress Bonsai is the art of growing and shaping the majestic Bald Cypress tree (Taxodium distichum) into miniature, aesthetically pleasing versions. This ancient art form originated in East Asia and has gained popularity across the globe for its unique and captivating appeal.

1.2 The Appeal of Bald Cypress Bonsai

What makes Bald Cypress Bonsai so appealing? Well, imagine having a tiny tree that exudes the same grandeur and tranquility as its full-sized counterpart. The Bald Cypress, known for its beautiful foliage, distinctive bark, and ability to grow in or near water, offers a sense of natural beauty and serenity that can be enjoyed from the comfort of your own home. Plus, the small size of the bonsai allows for easy placement and a touch of greenery even in limited spaces.

2. Understanding the Characteristics and Growth Patterns of Bald Cypress Bonsai

2.1 Overview of Bald Cypress Tree

The Bald Cypress tree is a deciduous conifer that can reach impressive heights in nature. Its unique feature is its “knees” – curious, knobby growths that emerge from the roots, adding character to the tree. When transformed into a bonsai, these distinctive characteristics are carefully preserved, resulting in a miniature version that captures the essence of nature’s artistry.

2.2 How Bald Cypress Trees Adapt to Bonsai Form

Bald Cypress trees have remarkable adaptability, which makes them suitable for bonsai cultivation. They possess a fine-textured foliage that can be easily shaped and pruned, allowing enthusiasts to create intricate designs. These trees also readily develop dense root systems, which is essential for maintaining the bonsai’s health and stability. With proper care and training, Bald Cypress trees gracefully adapt to the bonsai form, becoming living works of art.

3. Essential Care and Maintenance for Bald Cypress Bonsai

3.1 Sunlight and Temperature Requirements

Like any other plant, Bald Cypress Bonsai requires an appropriate amount of sunlight to thrive. These trees prefer full sun exposure, so make sure to place them in a sunny spot, preferably outdoors. As for temperature, they are hardy trees that tolerate both hot and cold climates, but protection may be required during extreme conditions.

3.2 Watering Techniques and Frequency

Proper watering is crucial for the health of your Bald Cypress Bonsai. These trees prefer consistently moist soil, so regular watering is essential. However, be mindful not to overwater, as excessive moisture can lead to root rot. An excellent way to determine when to water is by checking the moisture level of the soil using your finger or a moisture meter.

3.3 Fertilizing and Nutritional Needs

To ensure the optimal growth and vitality of your Bald Cypress Bonsai, regular fertilization is necessary. During the growing season, apply a balanced, slow-release fertilizer every four to six weeks. Additionally, supplementing with a liquid fertilizer during the growing months can provide the necessary nutrients for vigorous growth. Always follow the instructions on the fertilizer packaging for best results.

4. Styling Techniques and Pruning Tips for Bald Cypress Bonsai

4.1 Basic Styling Principles for Bald Cypress Bonsai

Styling your Bald Cypress Bonsai is where the fun and creativity come into play. The basic principles of bonsai styling apply here – strive for a harmonious balance between the tree’s branches, foliage, and overall shape. Experiment with different styling techniques, such as formal upright, slanting, or cascading, to create a unique and captivating bonsai masterpiece.

4.2 Pruning Methods for Shape and Structure

Pruning is essential to maintain the desired shape and structure of your Bald Cypress Bonsai. Remove any unwanted growth, including weak or crossing branches, to ensure a clean and well-defined silhouette. Regularly thin out the foliage to enhance the tree’s aesthetic appeal and promote airflow, which contributes to overall health.

4.3 Wiring and Positioning Branches

Wiring is a common technique used to position branches in Bald Cypress Bonsai. Be gentle when wiring, as the branches of these trees are relatively pliable and can be easily shaped. However, be cautious not to damage or constrict the branches. Monitor the growth regularly and make adjustments as needed to maintain the desired form.

Now that you have a better understanding of Bald Cypress Bonsai, it’s time to embark on your own bonsai journey. Remember to enjoy the process, embrace the uniqueness of your tree, and let your creativity flourish!

5. Repotting and Root Pruning Guidelines for Bald Cypress Bonsai

5.1 Understanding When to Repot Bald Cypress Bonsai

Repotting your bald cypress bonsai is like giving it a spa day – it’s rejuvenating and necessary for its overall health and growth. But how do you know when it’s time to repot? Well, the general rule of thumb is to repot every two to three years, or when you notice the roots starting to circle around the edges of the pot. So keep an eye out for those sneaky little roots!

5.2 Step-by-Step Guide to Repotting

Now that you’ve caught those roots trying to make a break for it, it’s time to repot your bald cypress bonsai. Here’s a step-by-step guide to make sure you nail it:

1. Choose the right pot: Go for a pot that’s slightly larger than the current one, but not too big that it overwhelms your bonsai. We don’t want it to feel like it’s living in a mansion!

2. Gather your supplies: You’ll need some bonsai soil (make sure it’s well-draining), a plastic drainage screen, and some wire to secure your bonsai in the pot.

3. Carefully remove your bonsai from its current pot: Gently loosen the soil around the edges and carefully lift your bonsai out. Be gentle, just like you’re handling a delicate little plant baby!

4. Prune those roots: Trim away any circling or tangled roots, making sure to keep the root mass balanced and neat. Think of it as giving your bonsai a fancy haircut!

5. Place the drainage screen: Cut a piece of plastic drainage screen to fit the bottom of the new pot. This will prevent the soil from escaping through the drainage holes. We don’t want a messy plant party!

6. Position your bonsai in the pot: Carefully place your bald cypress bonsai in the new pot, making sure it sits at the desired angle. Get creative and find its best side!

7. Fill the pot with soil: Slowly add the bonsai soil around the roots, gently patting it down to ensure there are no air pockets. No air bubbles allowed in this soil party!

8. Secure your bonsai: Use wire to anchor your bonsai to the pot, creating stability. We want it to feel secure, like a bonsai superhero!

9. Water and celebrate: Give your bonsai a good watering and celebrate your successful repotting session! Cheers to happy, healthy roots!

5.3 Root Pruning Techniques for Healthy Growth

Root pruning is like giving your bonsai’s roots a nice little trim to promote healthy growth and prevent them from going wild. Here are a few techniques to help you master the art of root pruning:

1. Rake and comb: Use a root rake or comb to gently untangle and separate the roots. Think of it as giving your bonsai a relaxing spa treatment!

2. Snip away the stragglers: Trim any excessively long or wayward roots with sharp, clean pruning shears. Just a little trim, nothing too drastic!

3. Reduce the root mass: If your bonsai’s roots are overcrowded, carefully remove some of the excess soil and prune away a portion of the root mass. It’s like decluttering your bonsai’s root space!

Remember, root pruning should be done in conjunction with repotting, so make sure to follow the guidelines mentioned earlier for a successful session. Your bonsai will thank you for the pampering session!

6. Common Pests and Diseases of Bald Cypress Bonsai and How to Manage Them

6.1 Identifying Common Pests Affecting Bald Cypress Bonsai

Nobody likes uninvited guests, especially when they come in the form of pests on your beloved bald cypress bonsai. Here are a few common pests you may encounter and how to spot them:

– Aphids: These tiny sap-suckers will leave a trail of sticky honeydew on your bonsai’s leaves. Look out for clusters of small insects on the foliage.

– Spider mites: These pesky critters love to build fine webs and suck the life out of your bonsai. Keep an eye out for yellowing leaves and tiny specks moving around.

– Scale insects: These sneaky fellows attach themselves to the stems and leaves, forming a protective shell. Look for small, round bumps on your bonsai.

6.2 Effective Pest Management Strategies

Now that you’ve identified the unwanted guests on your bald cypress bonsai, it’s time to kick them out! Here are a few strategies to manage these pesky pests:

– Manual removal: For small infestations, gently wipe or pick off the pests with a cotton swab or your nimble fingers. Show them who’s boss!

– Insecticidal soap: Use an insecticidal soap spray to control aphids and spider mites. Make sure to follow the instructions and cover all affected areas.

– Neem oil: Neem oil is a natural insecticide that can help control a variety of pests. Mix it with water according to the instructions and spray your bonsai, paying attention to the undersides of leaves.

Remember, prevention is key! Keep a close eye on your bald cypress bonsai, regularly inspecting the foliage and taking immediate action at the first sign of trouble. Your bonsai will thank you for being a vigilant pest detective!

6.3 Recognizing and Treating Common Diseases

Just like us, plants can catch a cold too. Here are a few common diseases that can affect your bald cypress bonsai and how to tackle them:

– Root rot: Excessive moisture and poor drainage can cause root rot, resulting in wilting and discolored foliage. If caught early, repotting in well-draining soil can save the day.

– Needle blight: This fungal disease causes the needles to turn brown and eventually fall off. Prune affected branches and treat with a fungicide according to the instructions.

– Rust: Rust is a fungal disease that creates orange-brown spots on the foliage. Prune affected areas and apply a fungicide to prevent further spread.

Remember, prevention is better than cure! Maintain good bonsai hygiene, provide proper watering, and ensure adequate air circulation to minimize the risk of diseases. Your bald cypress bonsai will appreciate the healthy environment!

7. Showcasing Bald Cypress Bonsai: Displaying Techniques and Presentation Ideas

7.1 Choosing the Right Bonsai Pot and Stand

Just like having the perfect outfit and accessories can elevate your style, choosing the right pot and stand can enhance the beauty of your bald cypress bonsai. Here’s how to make the perfect match:

– Pot selection: Go for a pot that complements the size and style of your bonsai. Consider materials like ceramic or clay for an earthy feel, or opt for a sleek and modern design with a bonsai pot madeIn conclusion, cultivating and caring for a Bald Cypress Bonsai is a rewarding endeavor that allows you to bring the beauty and grace of nature into your home or garden. By understanding its unique characteristics, employing proper care techniques, and honing your styling skills, you can create a captivating masterpiece that will continue to evolve and thrive over time. Embrace the art and history of Bald Cypress Bonsai, and let your creativity flourish as you embark on this journey of tranquility and natural beauty. Start your own Bald Cypress Bonsai today and witness the transformation of a humble tree into a living work of art.

FAQ

1. Can I keep a Bald Cypress Bonsai indoors?

While Bald Cypress Bonsai can tolerate brief periods indoors, they are primarily an outdoor tree species. They require ample sunlight and fresh air to thrive. It is recommended to keep your Bald Cypress Bonsai outdoors, especially during the growing season, and only bring them indoors for short periods for display purposes.

2. How often should I water my Bald Cypress Bonsai?

The watering frequency for Bald Cypress Bonsai depends on various factors such as climate, season, and pot size. As a general rule, it is best to water thoroughly when the top inch of soil feels slightly dry. Avoid overwatering as this can lead to root rot, and ensure that the pot has proper drainage. Regularly monitor the moisture level in the soil and adjust your watering routine accordingly.

3. Do Bald Cypress Bonsai require special soil mixtures?

Yes, Bald Cypress Bonsai benefit from a well-draining soil mixture to promote healthy root growth. A common mixture consists of components such as Akadama, pumice, and lava rock. This combination provides good drainage while retaining sufficient moisture for the roots. It is advisable to repot your Bald Cypress Bonsai every 2-3 years to refresh the soil and encourage optimal growth.

4. How long does it take for a Bald Cypress Bonsai to develop its signature aerial roots?

Bald Cypress Bonsai are known for their characteristic aerial roots that enhance their unique beauty. The development of these roots largely depends on the age and health of the tree. It can take several years for the aerial roots to fully develop and become prominent features of your bonsai. Patience and proper care are key to encouraging the growth of these captivating aerial roots.

How To Care For Your Brazilian Rain Tree Bonsai Tree

Welcome to our comprehensive guide on how to care for your Brazilian Rain Tree Bonsai. These miniature versions of the majestic and iconic Brazilian Rain Tree (scientifically known as Pithecellobium tortum) are captivating and rewarding to cultivate. Native to the rainforests of South America, Brazilian Rain Tree Bonsai showcase delicate foliage, intricate branching patterns, and impressive aerial roots. In this article, we will delve into the essential aspects of caring for these unique bonsai trees, providing you with valuable insights and practical tips to ensure they thrive in your care. Whether you are a beginner or an experienced enthusiast, this guide will equip you with the knowledge to nurture and maintain the health and beauty of your Brazilian Rain Tree Bonsai.

1. Introduction to Brazilian Rain Tree Bonsai Trees

1.1 Understanding the Brazilian Rain Tree Species

When it comes to bonsai trees, the Brazilian Rain Tree is like the Beyoncé of the bonsai world – captivating, exotic, and a showstopper. Native to the rainforests of Brazil, this tree is known for its delicate foliage, intricate branch structure, and the ability to make any room feel like a tropical paradise.

1.2 Why Choose Brazilian Rain Tree Bonsai?

So, why should you choose a Brazilian Rain Tree as your bonsai companion? Well, besides its undeniable beauty, this tree is a joy to care for. With the right love and attention, it will reward you with stunning growth and a sense of satisfaction that only a bonsai enthusiast can understand. Plus, it’s a great conversation starter. Who wouldn’t want to talk about their Brazilian Rain Tree bonsai at parties?

2. Choosing the Right Environment for Your Bonsai Tree

2.1 Light Requirements for Brazilian Rain Tree Bonsai

Let’s shed some light on the light requirements of your Brazilian Rain Tree bonsai. These trees love basking in the sunlight, but not too much. Think of it like a beach vacation – a healthy dose of sun, but with some shade to cool off. Place your bonsai near a bright window where it can soak up the rays, but make sure it doesn’t get roasted by scorching midday sun.

2.2 Temperature and Humidity Considerations

Like any diva, the Brazilian Rain Tree prefers a comfortable climate. Keep it away from extreme temperatures, both hot and cold. Also, remember that humidity is its best friend. So, if you live in a dry climate, consider channeling your inner rainmaker by misting the leaves or using a humidity tray. Your bonsai will thank you with lush foliage and a contented sigh of relief.

2.3 Indoor vs. Outdoor Cultivation

To be indoors or outdoors, that is the question. While Brazilian Rain Trees can tolerate both settings, they truly thrive outdoors. If you have the luxury of a garden, give your bonsai the gift of fresh air, rain showers, and an occasional serenade by chirping birds. However, if outdoor life isn’t an option, don’t worry. With the right care and attention, your Brazilian Rain Tree can still rock the indoor bonsai scene.

3. Watering and Humidity: Essential Care Tips

3.1 Watering Frequency and Techniques

Watering your Brazilian Rain Tree bonsai is like finding the perfect balance in life – not too little, not too much. Stick your finger into the soil to feel if it’s dry before watering, and then give it a good soak. Remember, these trees enjoy a thorough watering but hate sitting in waterlogged soil. So, pour with caution, my friend.

3.2 Ensuring Proper Drainage

Drainage is key for happy roots. Make sure your bonsai pot has enough drainage holes to prevent waterlogging. Nobody wants their Brazilian Rain Tree to feel like it’s stuck in a soggy marshland. If necessary, you can also add a layer of gravel or a well-draining soil mix at the bottom of the pot to enhance drainage.

3.3 Understanding Humidity Needs

Humidity is like a spa day for your bonsai. Brazilian Rain Trees adore a moist environment, so don’t be afraid to increase the humidity in its surroundings. Misting the leaves, using a humidity tray, or even setting up a mini-humidifier will make your tree feel like it’s in the Amazon rainforest. Just remember, no rainfall dances required.

4. Pruning and Shaping Techniques for Brazilian Rain Tree Bonsai

4.1 Pruning for Structural Development

Pruning your Brazilian Rain Tree bonsai is like giving it a fabulous makeover. Start by removing any dead or unwanted branches to promote healthy growth. Then, carefully shape the remaining branches to create a visually appealing structure that will make your bonsai the envy of all other plants.

4.2 Wiring and Training Methods

If you want your bonsai to strike a pose, you’ll need a bit of wiring and training. Gently wrap some wire around the branches to guide them into the desired position. It’s like bonsai hairstyling, but without the hairspray. Just remember to remove the wire before it starts digging into the wood. Nobody wants their bonsai to develop a grudge against metal.

4.3 Pruning to Maintain Size and Shape

Size matters, especially when it comes to bonsai trees. Regular pruning will help you maintain the ideal size and shape of your Brazilian Rain Tree. Just imagine it as bonsai body sculpting. Trim back the excessive growth, shape the branches, and voila! Your bonsai will maintain its dashing looks without taking up too much space.

Remember, caring for a Brazilian Rain Tree bonsai is like having a glamorous diva as a pet. Give it love, light, and the occasional spa treatment, and it will reward you with a stunning masterpiece that will bring joy to your life. Happy bonsai-ing!

5. Fertilizing and Nutrient Management for Optimal Growth

5.1 Choosing the Right Fertilizer for Brazilian Rain Tree Bonsai

When it comes to fertilizing your Brazilian Rain Tree Bonsai, it’s important to choose the right fertilizer. You don’t want to be the bonsai equivalent of a picky eater who only likes mac and cheese. Look for a balanced, slow-release fertilizer specifically formulated for bonsai trees. This will provide a steady supply of nutrients without overwhelming your little leafy friend.

5.2 Frequency and Timing of Fertilization

Now that you have the right fertilizer, let’s talk about when and how often to feed your Brazilian Rain Tree Bonsai. Much like how we humans need our daily caffeine fix in the morning, your bonsai tree will appreciate regular doses of nutrients during its growing season. Aim to fertilize every two to four weeks, from spring through summer. Be sure to follow the instructions on the fertilizer package because, let’s face it, your bonsai doesn’t want to be overdressed like a salad with too much dressing.

5.3 Supplementary Nutrient Management

Just like we occasionally need a little something extra to boost our immune system, so too does your Brazilian Rain Tree Bonsai. If you notice any signs of nutrient deficiencies, such as yellowing leaves or stunted growth, consider supplementing with a specialized bonsai fertilizer high in the deficient nutrient. Think of it as giving your bonsai a multivitamin for its specific needs. But remember, moderation is key. Don’t go overboard with the supplements, or your little tree might start feeling like a bodybuilder on protein powder.

6. Preventing and Managing Common Pests and Diseases

6.1 Identifying Common Pests for Brazilian Rain Tree Bonsai

Just like how some people attract mosquitoes while others never get bitten, your Brazilian Rain Tree Bonsai might have its own entourage of pests. Look out for common offenders like aphids, spider mites, and scale insects. These pesky critters can put a damper on your bonsai’s thriving social life, so it’s important to keep an eye out for any unwelcome guests.

6.2 Effective Pest Prevention and Control Measures

To keep your bonsai party pest-free, prevention is key. Regularly inspect your bonsai for any signs of pests, and if you see any, take immediate action. You can try a variety of methods including spraying with insecticidal soap, using predatory insects, or even resorting to guerilla warfare with toothpick and tweezers. Just kidding about the last one, but you get the idea.

6.3 Recognizing and Treating Common Diseases

Nobody likes to be under the weather, and the same goes for your beloved Brazilian Rain Tree Bonsai. Keep an eye out for common diseases like fungal infections and root rot. If you notice any unusual discoloration, wilting, or other signs of illness, it’s time to play plant doctor. Diagnosis can be tricky, but with a bit of research and the right treatment methods, you can nurse your bonsai back to health. Remember to be gentle with your bedside manner, and don’t forget to wash your hands before and after handling your bonsai patients.

7. Winter Care and Protection for Brazilian Rain Tree Bonsai

7.1 Preparing Bonsai Trees for Winter

Winter can be a challenging time for your Brazilian Rain Tree Bonsai, just like getting out of bed on a cold, dark morning. To help your bonsai survive the winter blues, it’s important to prepare it properly. Start by reducing fertilizer and gradually decreasing watering frequency as the temperature drops. This will help your bonsai ease into its winter hibernation mode.

7.2 Providing Adequate Cold Protection

Nobody likes to be left out in the cold, especially not your Brazilian Rain Tree Bonsai. Depending on your climate, you might need to provide some extra protection from freezing temperatures. Consider moving your bonsai to a sheltered area, using frost blankets, or even creating a bonsai-sized igloo (just kidding, but it does sound adorable).

7.3 Winter Watering and Care Considerations

When it comes to winter watering, less is more. Your Brazilian Rain Tree Bonsai will require significantly less water during the dormant season. It’s important to strike the delicate balance between keeping the roots from drying out and avoiding overwatering, which can lead to root rot. Think of it as finding the perfect amount of moisturizer for your bonsai’s skin—just enough to keep it hydrated without clogging its pores.

8. Troubleshooting Guide: Frequently Asked Questions and Solutions

8.1 Yellowing Leaves and Leaf Drop

Oh no, your Brazilian Rain Tree Bonsai is shedding leaves like it’s auditioning for a balding beauty pageant. Yellowing leaves and leaf drop can be a sign of stress or a problem with your bonsai’s care routine. Check for common causes such as over or under-watering, inadequate light, or nutrient deficiencies. Once you determine the issue, make the necessary adjustments and give your leafy friend some TLC. Remember, nobody likes to be left feeling naked, especially not your bonsai.

By following the care guidelines outlined in this article, you can create a nurturing environment for your Brazilian Rain Tree Bonsai and watch it flourish over time. Remember, patience and consistency are key when it comes to bonsai cultivation. As you gain experience and develop a deeper understanding of your tree’s needs, you can refine your techniques and continue to refine the artistry of your bonsai. Enjoy the journey of tending to your Brazilian Rain Tree Bonsai, and may it bring you endless joy and beauty for years to come.

FAQs

1. Can I keep my Brazilian Rain Tree Bonsai indoors?

Yes, Brazilian Rain Tree Bonsai can be kept indoors, but they require ample sunlight and humidity to thrive. Ensure that your indoor environment provides sufficient light and humidity levels, or consider supplementing with artificial lighting and humidity trays.

2. How often should I water my Brazilian Rain Tree Bonsai?

The watering frequency for your Brazilian Rain Tree Bonsai will vary depending on factors such as temperature, humidity, and soil conditions. As a general rule, monitor the moisture levels in the soil and water your bonsai when the top inch of the soil feels slightly dry. Avoid overwatering, as it can lead to root rot.

3. Do I need to prune my Brazilian Rain Tree Bonsai?

Pruning is an important aspect of bonsai care, as it helps maintain the desired shape and size of your Brazilian Rain Tree Bonsai. Regular pruning is recommended to remove any dead or unhealthy branches, as well as to encourage new growth and maintain the overall aesthetic appeal of your bonsai.

4. How do I protect my Brazilian Rain Tree Bonsai during the winter?

During winter, it is crucial to protect your Brazilian Rain Tree Bonsai from extreme cold temperatures. Consider moving it to a sheltered location, such as a greenhouse or a protected area indoors. Additionally, wrapping the pot with insulating material and providing adequate water and humidity will help safeguard your bonsai from the harsh winter conditions.

Philodendron Pedatum Bonsai Care Guide

Welcome to the comprehensive guide on caring for Philodendron Pedatum bonsai trees. Philodendron Pedatum, also known as the Horsehead Philodendron, is a popular choice among bonsai enthusiasts due to its unique foliage and manageable size. In this article, we will delve into the essential aspects of Philodendron Pedatum bonsai care, including choosing the right environment, providing proper care techniques, pruning and shaping methods, watering and fertilizing guidelines, pest and disease prevention, as well as repotting and root pruning tips. Whether you are a beginner or an experienced bonsai gardener, this guide will equip you with the knowledge and skills needed to ensure the health and beauty of your Philodendron Pedatum bonsai.

1.1 What is Philodendron Pedatum?

When it comes to unique and captivating bonsai trees, the Philodendron Pedatum is a true gem. This particular species is known for its beautiful heart-shaped leaves with distinct lobes, resembling a bird’s foot. Don’t worry, we won’t quiz you on the scientific name, just remember “Philodendron Pedatum” for your next trivia night!

1.2 Why Choose Philodendron Pedatum as a Bonsai Tree?

So, why should you consider Philodendron Pedatum as your bonsai companion? Well, apart from its eye-catching foliage, this plant is relatively low-maintenance, making it perfect for beginners or those without a green thumb. It has a natural ability to adapt to various environments and can thrive indoors or outdoors, depending on your preference. Plus, who doesn’t love a bonsai tree that brings a touch of whimsy to their living space?

2. Choosing the Right Environment for Your Philodendron Pedatum Bonsai

2.1 Indoor vs. Outdoor Cultivation

Deciding where to grow your Philodendron Pedatum bonsai tree is an important consideration. It can be cultivated both indoors and outdoors, depending on the climate you live in. Indoors, it loves bright, indirect light and can be placed near a window with filtered sunlight. Outdoors, it thrives in partial shade, avoiding direct sunlight during the hottest parts of the day.

2.2 Light Requirements for Philodendron Pedatum Bonsai

Philodendron Pedatum enjoys a good balance of light. While it appreciates bright conditions, direct sunlight can scorch its delicate leaves. Think of it as a plant that enjoys a cozy spot under a tree canopy rather than basking in the harsh rays of the sun. If you’re growing it indoors, placing it near a window with filtered sunlight or using grow lights can help provide the necessary light intensity.

2.3 Temperature and Humidity Considerations

When it comes to temperature, Philodendron Pedatum prefers a warm and humid environment. It thrives in temperatures between 65°F to 75°F (18°C to 24°C), so make sure to keep it away from cold drafts or extreme temperature fluctuations. As for humidity, this tropical plant appreciates higher levels, so misting the leaves or using a humidifier can help create a comfortable environment for your leafy friend.

3. Essential Care Techniques for Philodendron Pedatum Bonsai Trees

3.1 Watering Guidelines and Frequency

As with any plant, proper watering is crucial for the health of your Philodendron Pedatum bonsai. Keep the soil evenly moist, but not waterlogged. Remember, this isn’t a sponge-bob, and it doesn’t appreciate soggy feet. To avoid overwatering, check the soil’s moisture level before watering and adjust accordingly. It’s better to underwater than to drown this bonsai beauty!

3.2 Soil Selection and Repotting Schedule

When it comes to soil, Philodendron Pedatum prefers well-draining soil that retains some moisture. A mixture of bonsai soil, peat moss, and perlite or sand can provide the ideal growing medium. As for repotting, aim to do so every two years during the spring season. This allows the roots to have enough space to grow and ensures your bonsai remains happy and healthy.

3.3 Feeding and Fertilization Recommendations

To give your Philodendron Pedatum bonsai a boost, feeding it with a balanced liquid fertilizer every two weeks during the growing season is beneficial. Be sure to follow the manufacturer’s instructions for dilution and avoid overdoing it, as too much fertilizer can harm this tropical beauty. Remember, a little bit of fertilizer can go a long way in promoting healthy growth.

4. Pruning and Shaping Your Philodendron Pedatum Bonsai

4.1 Understanding Pruning Techniques for Bonsai

Pruning is a vital part of bonsai care, and Philodendron Pedatum is no exception. It’s important to understand the different pruning techniques to keep your bonsai in shape. These techniques include pinching back new growth, trimming long stems, and removing any dead or diseased foliage. Pruning not only helps maintain the desired shape but also encourages bushier growth.

4.2 Pruning for Shape and Size Control

If you want to unleash your inner bonsai artist, shaping your Philodendron Pedatum bonsai is a fun process. You can prune and trim the branches to create the desired shape and size. Just remember to take it slow and steady, as bonsai shaping is an ongoing process that requires patience and finesse. Take breaks if you need to, and remember that a perfectly shaped bonsai is like a fine wine – it takes time to mature.

4.3 Wiring and Branch Manipulation

Wiring is another technique used in bonsai to guide the growth of branches and achieve the desired shape. For your Philodendron Pedatum bonsai, it’s important to use gentle wiring techniques to avoid damaging the delicate stems and leaves. Be mindful of the wire tension and regularly check for any signs of wire cutting into the branches. Remember, the goal is to create a harmonious shape, not give your bonsai a bad hair day.

With these care techniques under your belt, you’re well on your way to becoming a proud Philodendron Pedatum bonsai parent. Remember, bonsai care is an art form that requires dedication and love, but the rewards of a beautifully thriving miniature tree are well worth it. Happy bonsai-ing!

5. Watering and Fertilizing Guidelines for Philodendron Pedatum Bonsai

5.1 Proper Watering Techniques

Watering your Philodendron Pedatum bonsai can be a bit tricky, but fear not, we’ve got you covered. This little guy likes to stay slightly moist but not drenched. Think of it as having a good balance between quenching its thirst and not drowning it in the process. A good rule of thumb is to water it when the top inch of the soil feels dry. Make sure to water evenly and avoid leaving stagnant water in the pot, because no one likes sitting in a puddle!

5.2 Choosing the Right Fertilizer and Application

Just like we need our daily dose of nutrients, so does our Philodendron Pedatum bonsai. When it comes to fertilizer, opt for a well-balanced, water-soluble fertilizer designed specifically for houseplants. Look for one with a balanced N-P-K ratio (nitrogen, phosphorus, potassium) to ensure your bonsai gets a well-rounded meal. Follow the instructions on the package for the correct dosage, and remember, less is always more when it comes to fertilizer.

5.3 Frequency and Timing of Fertilization

Timing is everything, even when it comes to fertilizing your bonsai. During the growing season, which is typically spring and summer, you can feed your Philodendron Pedatum bonsai every two to four weeks. As the weather cools down and growth slows down in fall and winter, you can reduce the frequency to every six to eight weeks. Always pay attention to your bonsai’s needs and adjust accordingly. It’s like having a personal chef, but for plants.

6. Common Pests and Diseases: Prevention and Treatment for Philodendron Pedatum Bonsai

6.1 Identifying Common Pests Affecting Philodendron Pedatum

No bonsai is safe from the occasional unwanted visitors. Philodendron Pedatum bonsai can be prone to pests such as aphids, spider mites, and mealybugs. Keep an eye out for any tiny, crawling critters or signs of damage like yellowing leaves or sticky residue. If you spot any of these troublemakers, it’s time to take action.

6.2 Preventive Measures for Pest Infestations

Preventing pests from invading your beloved bonsai is like building a fortress for your plant. Start by regularly inspecting your bonsai for any signs of pests. Keep your bonsai clean and tidy by removing dead leaves and debris, which can serve as hiding spots or breeding grounds for pests. You can also give your bonsai a gentle shower or wipe down its leaves with a damp cloth to keep those buggers at bay.

6.3 Effective Methods for Treating Pests and Diseases

So, your bonsai has fallen victim to a pesky infestation? Don’t fret, there are ways to fight back. One effective method is using an insecticidal soap or neem oil spray, which can help rid your plant of pests. Just make sure to follow the instructions carefully and test it on a small area before applying it to the entire bonsai. If the infestation persists or you’re unsure about how to handle it, don’t hesitate to seek advice from a local horticulturist or bonsai expert. Remember, we can’t let those pests win!

7. Repotting and Root Pruning Tips for Philodendron Pedatum Bonsai

7.1 Signs that Your Philodendron Pedatum Bonsai Needs Repotting

Nobody likes feeling cramped, including our bonsai friends. If you notice that your Philodendron Pedatum bonsai has roots poking out of the drainage holes or the soil seems compacted, it might be time for a new home. Another sign is if the water doesn’t absorb as quickly as before, indicating that the roots have taken up most of the space. Repotting allows for fresh soil, better drainage, and more growing room for your bonsai. It’s like giving them a little vacation to a bigger and better pot!

8. Conclusion and Additional Resources for Philodendron Pedatum Bonsai Care

Congratulations! You are now equipped with the knowledge and understanding required to provide excellent care for your Philodendron Pedatum bonsai tree. By creating the ideal environment, implementing proper care techniques, and staying vigilant against pests and diseases, your bonsai will thrive and bring joy for years to come. Remember, bonsai care is a continuous learning process, so feel free to explore additional resources and connect with fellow bonsai enthusiasts for further guidance and inspiration. Now, go forth and enjoy the artistry and tranquility of your Philodendron Pedatum bonsai!

FAQ

1. How often should I water my Philodendron Pedatum bonsai?

Watering frequency for your Philodendron Pedatum bonsai depends on various factors such as the climate, pot size, and soil composition. As a general rule, it is recommended to water your bonsai when the top layer of soil feels slightly dry to the touch. Avoid overwatering as it can lead to root rot, but also ensure the soil does not completely dry out. Regularly monitor the moisture levels and adjust the watering schedule accordingly.

2. Can I keep my Philodendron Pedatum bonsai indoors?

While Philodendron Pedatum bonsai can be grown indoors, they thrive best when placed in a location with ample sunlight. If you choose to keep your bonsai indoors, ensure it receives sufficient indirect light or consider using artificial grow lights to supplement. Additionally, be mindful of the temperature and humidity levels in the indoor environment, as Philodendron Pedatum bonsai trees prefer warm and humid conditions.

3. How do I prune and shape my Philodendron Pedatum bonsai?

Pruning and shaping are essential for maintaining the desired form and aesthetics of your Philodendron Pedatum bonsai. Begin by removing any dead, damaged, or excessive growth using clean bonsai pruning shears. To shape the bonsai, carefully trim the branches and foliage to create the desired silhouette. Wiring can also be used to guide the branches in the desired direction. Remember to step back and assess the overall shape regularly to ensure balanced growth.

4. What are some common pests and diseases that affect Philodendron Pedatum bonsai?

Philodendron Pedatum bonsai trees are susceptible to pests such as aphids, spider mites, and scale insects. Regularly inspect your bonsai for any signs of infestation, such as sticky residue, webbing, or yellowing leaves. To prevent pests, maintain good hygiene, provide proper ventilation, and avoid overwatering. In terms of diseases, root rot and fungal infections can occur if the bonsai is kept in excessively wet conditions. Proper watering techniques and well-draining soil can help prevent these issues.